Atlassian Jira
Jira is a widely used project management and issue tracking software developed by Atlassian. You can set up Wallarm to create issues in Jira when vulnerabilities are detected, all or only for the selected risk level(s) - high, medium or low.
Supported versions
This integration is supported both for JIRA Cloud and on-premise solutions.
Setting up integration
In Jira UI:
-
Generate API token:
- For Jira Cloud, as described here. The provided token is used with
Basicauthentication. - For Jira on-premise, in your Jira instance, navigate to your profile settings, and create a personal access token (PAT). The provided token is used with
Bearerauthentication.
- For Jira Cloud, as described here. The provided token is used with
-
Copy the generated API token.
In Wallarm UI:
-
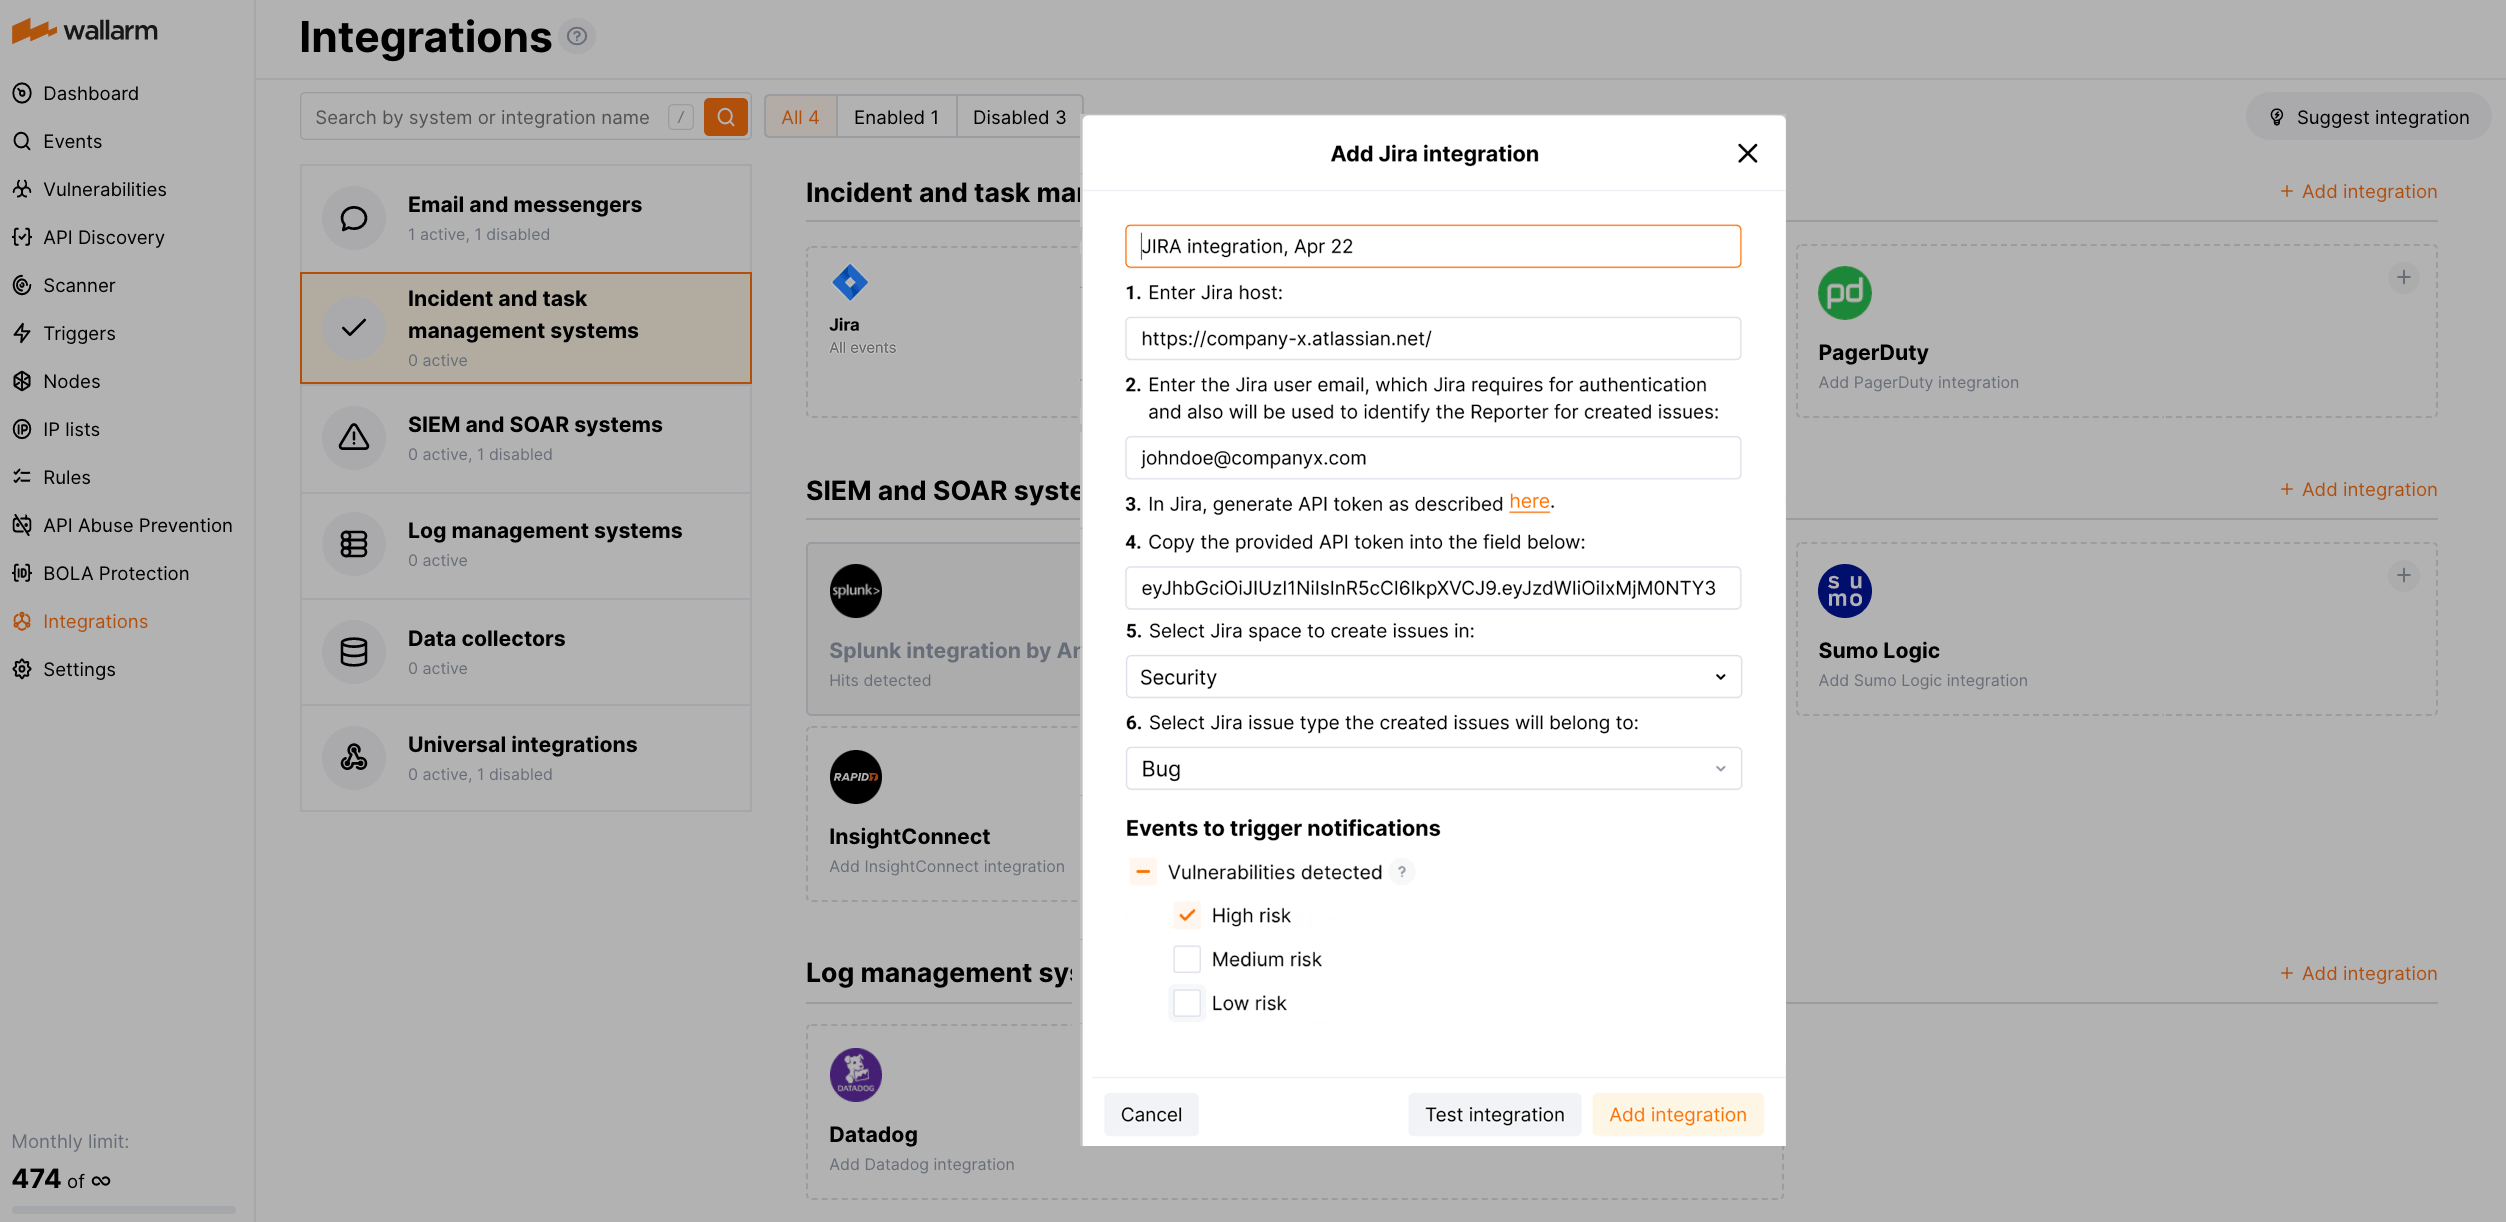
Open Wallarm Console → Integrations → Jira.
-
Enter an integration name.
-
Enter the Jira host (e.g.,
https://company-x.atlassian.net/). -
Enter the Jira user email, which Jira requires for authentication and will also be used to identify the Reporter for created issues.
-
Select token type:
Basicfor Jira Cloud andBearerfor Jira on-premise. -
Paste the generated API token.
If necessary, you can disable Jira server SSL verification.
The email and token will be checked to authenticate Wallarm at the specified Jira host. On success, spaces available to this Jira user will be listed.
-
Select the Jira space to create issues in. When selected, the issue types supported in this space will be listed.
-
Select the Jira issue type the created issues will belong to.
-
Select event types to trigger notifications. All security issues (vulnerabilities) or only of the specific risk level(s) may be selected.
-
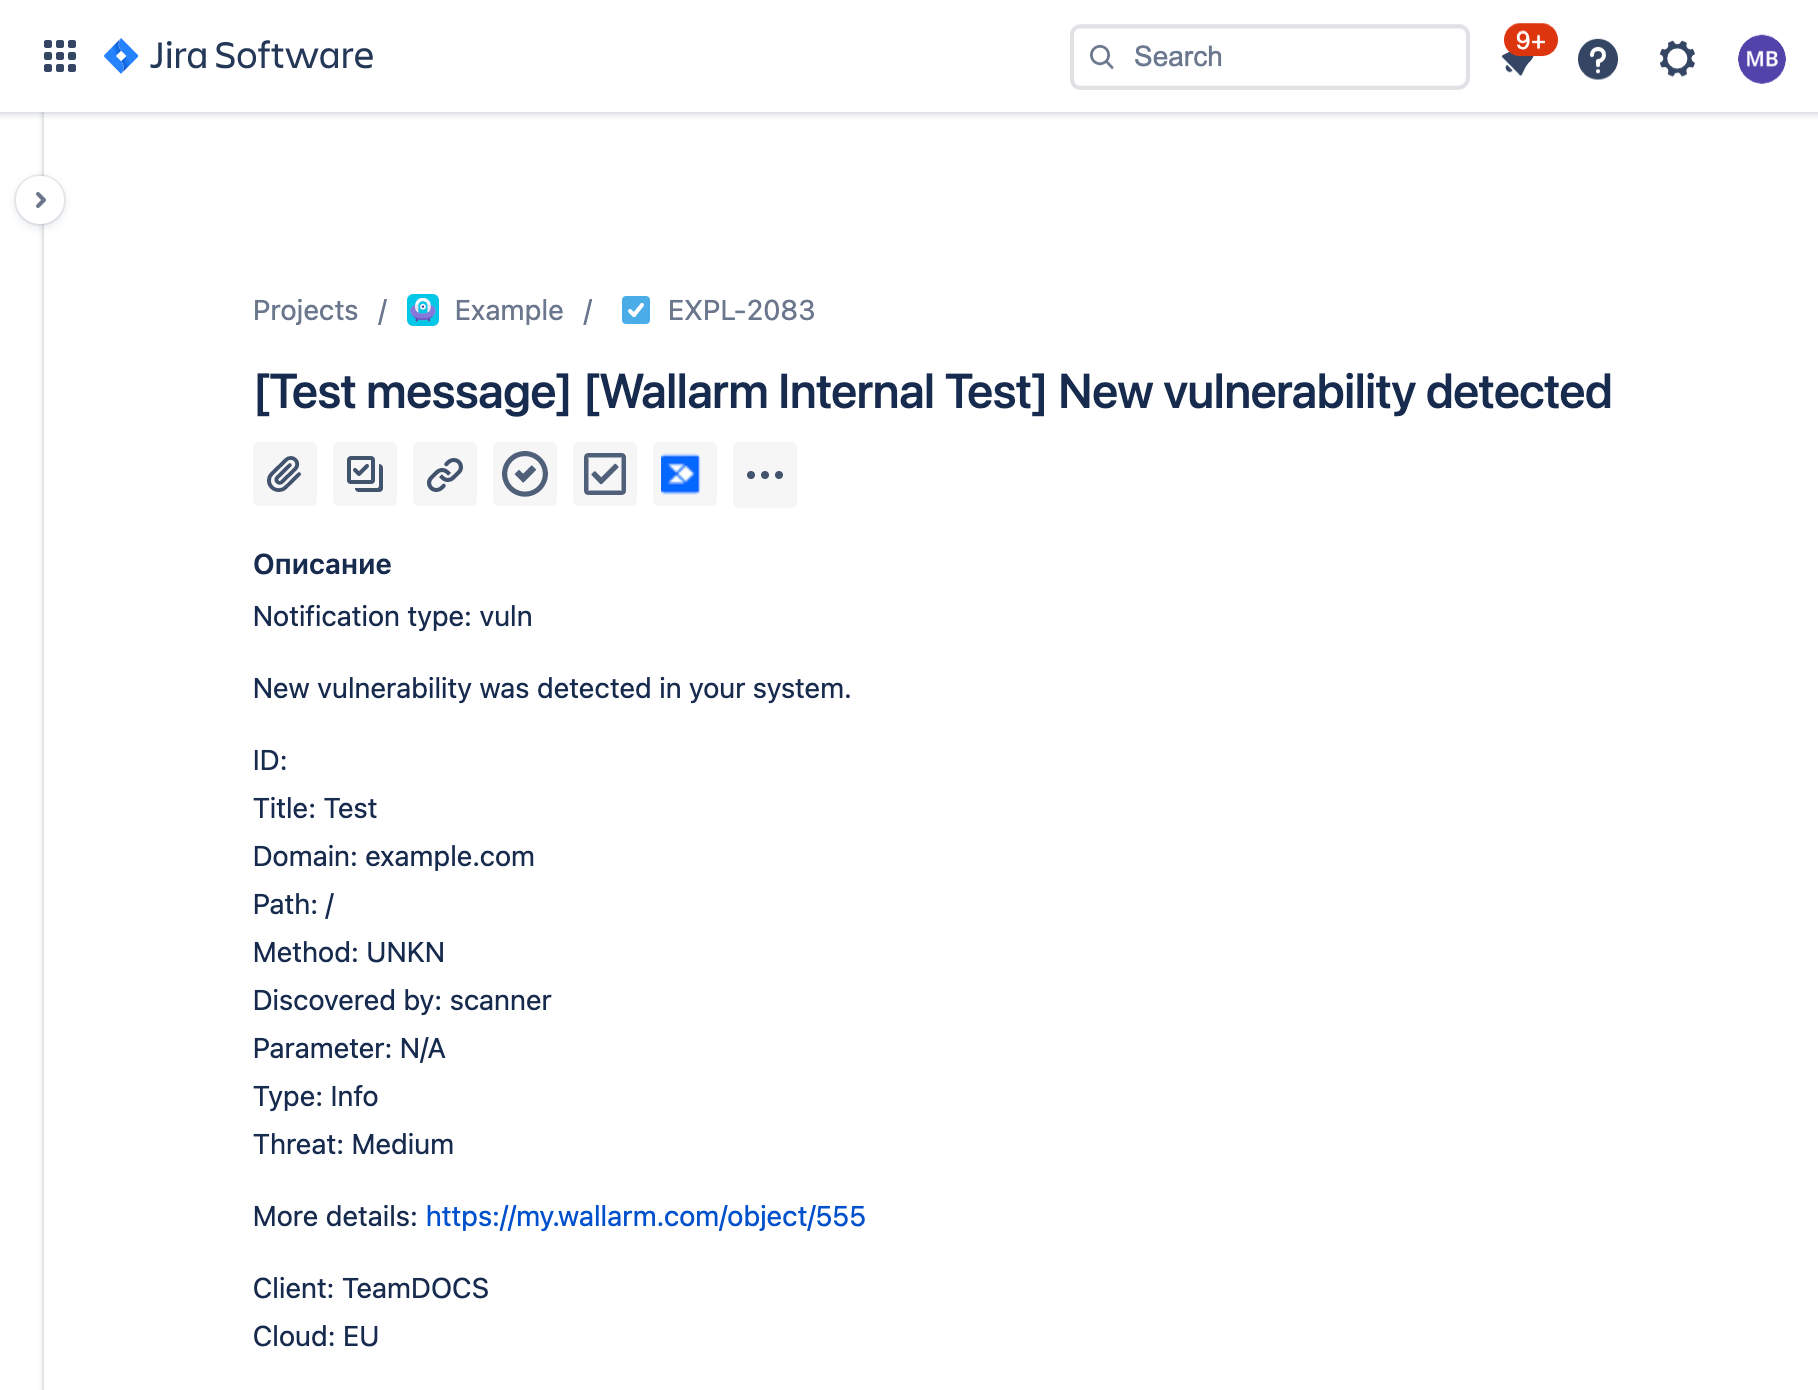
Click Test integration to check configuration correctness, availability of the target system, and the notification format.
Test Jira issue creation:
-
Click Add integration.
Wallarm Cloud IP addresses
To provide Wallarm Cloud access to your system, you may need a list of its public IP addresses:
Disabling and deleting an integration
You can delete or temporarily disable the integration. While deleting stops sending notifications and completely deletes all configuration, disabling just stops sending notifications, which you can re-enable at any moment with the same settings.
If the System related events are selected to trigger notifications for the integration, Wallarm will notify you about both of these actions.
System unavailability and incorrect integration parameters
Notifications to the system are sent via requests. If the system is unavailable or integration parameters are configured incorrectly, the error code is returned in the response to the request.
If the system responds to the Wallarm request with any code other than 2xx, Wallarm resends the request at intervals until the 2xx code is received:
-
The first cycle intervals: 1, 3, 5, 10, 10 seconds
-
The second cycle intervals: 0, 1, 3, 5, 30 seconds
-
The third cycle intervals: 1, 1, 3, 5, 10, 30 minutes
If the percentage of unsuccessful requests reaches 60% in 12 hours, the integration is automatically disabled. If you receive system notifications, you will get a message about the automatically disabled integration.