Threat Replay Testing Setup  
This article describes how to enable and configure Wallarm's Threat Replay Testing.
Enable
Threat Replay Testing is disabled by default. To enable and run:
-
Make sure you have the Advanced API Security subscription plan.
-
Proceed to Wallarm Console → Threat Replay Testing by following the link for the US Cloud or EU Cloud, and toggle on the Enable Threat Replay Testing switch.
If Threat Replay Testing is not presented, contact Wallarm's technical support.
-
Add IP addresses of Threat Replay Testing to the whitelists.
-
Go to the Test policies tab and create at least one policy.
Preventing from being blocked
If besides Wallarm, you use additional facilities (software or hardware) to automatically filter and block traffic, it is recommended that you configure an allowlist that includes the IP addresses for Threat Replay Testing.
This will allow Wallarm components, including Threat Replay Testing, to seamlessly scan your resources for vulnerabilities.
Configure test policies
When the attack on some endpoint is detected by the filtering node, it triggers enabled Threat Replay Testing to run tests to check whether this endpoint is vulnerable to this attack type.
Will these tests be run and how exactly, is defined by test policies, each defining:
-
For which host the tests should be run.
-
On which environment the tests should be run.
-
For which attack type the tests should be run (see limitations).
-
How often the re-test should be run for this endpoint and attack type.
-
Optionally, how the test request should be modified before executing on the test environment.
How several test policies interact
Consider the following:
-
No policies → no tests.
-
No policies for this host / attack type → no tests.
-
Several policies affecting the host → several separate tests.
About the time: if test was already performed for this endpoint and attack type and new attacks of this type on this endpoint occur, test will not be re-run before the Period is expired.
Host and replay host
Use Host affected by attack and Replay attack on host fields to define for which host the tests should be run and on which environment theses tests should be run.
You can use regular expressions, including capturing groups and backreferences in both fields. Find below the demonstration of the most common scenarios.
Scenario #1: recheck attacks on arbitrary subdomains on a specific host
Host affected by the attack: .+\.wallarm\.com
Replay attack on host: test.wallarm.com
Result:
-
Any attack on
www.wallarm.comwill be tested ontest.wallarm.com. -
Any attack on
dev.wallarm.comwill be tested ontest.wallarm.com.
Scenario #2: substitution in the middle of the hostname
Host affected by the attack: (.+)\.wallarm\.com
Replay attack on host: \1.test-wallarm.com
Result:
-
Attack on
www.wallarm.comwill be tested onwww.test-wallarm.com. -
Attack on
dev.wallarm.comwill be tested ondev.test-wallarm.com.
Scenario #3: recheck any request on the same host
Host affected by the attack: (.+)
Replay attack on host: \1
Result:
-
Attack on
www.wallarm.comwill be tested onwww.wallarm.com -
Attack on
dev.wallarm.comwill be tested ondev.wallarm.com
Scenario #4: recheck attack on specific host on a specific host
Host affected by the attack: www\.wallarm\.com
Replay attack on host: test.wallarm.com
Result:
-
Attack on
www.wallarm.comwill be tested ontest.wallarm.com -
Attack on
dev.wallarm.comwill not be tested
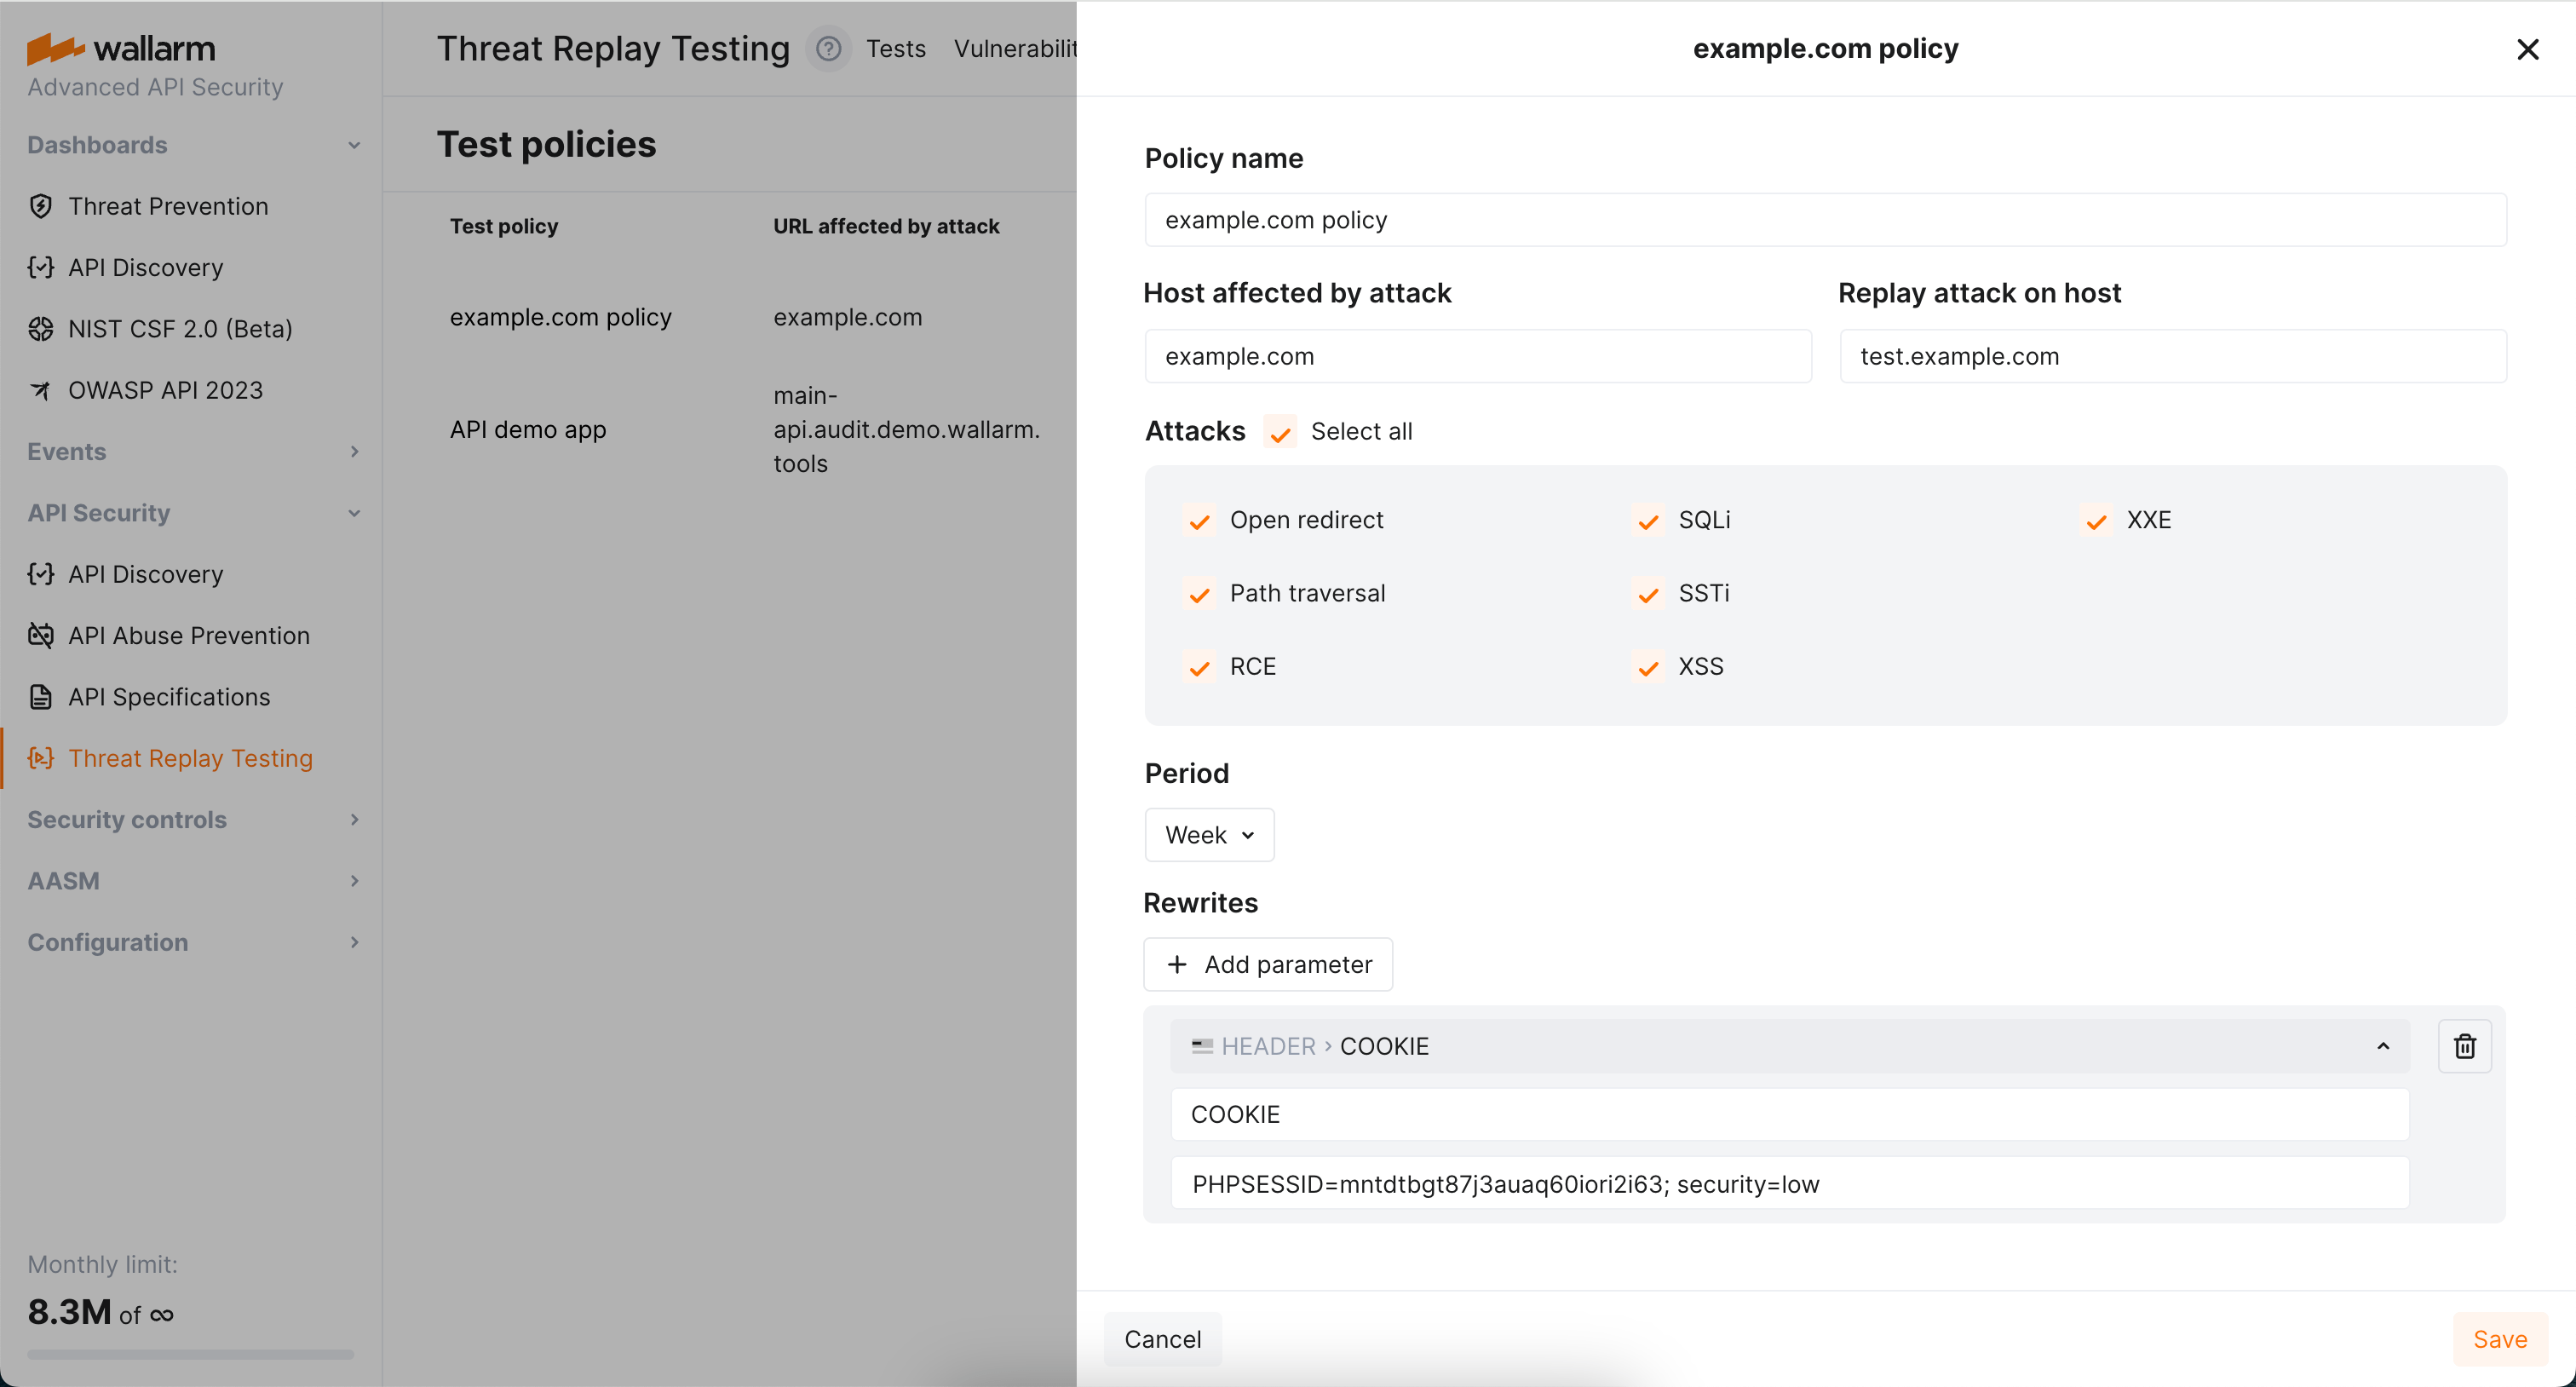
Rewrites
By default, Threat Replay Testing retains the original request data, except for stripping specific authentication parameters. You can use the Rewrites section of test policies to modify the original request elements before generating test attack set based on them. This can be particularly useful when replacing original authentication data with test data or conducting attack replays on alternative addresses.
Modification of any original request element
You can modify only headers (header) and paths (uri) of the original requests. Other request elements cannot be modified or added.
Rewrite example
The following is the rewrite to ensure attacks replayed on example.com carry the value PHPSESSID=mntdtbgt87j3auaq60iori2i63; security=low in the COOKIE header.