Managing Users
Invite your team members to your Wallarm account and assign each one a specific role to safeguard sensitive information and limit account actions. Manage users under Settings → Users.
Only Administrator and Global Administrator roles have user management privileges.
User roles
Users of Wallarm clients can have the following roles:
-
Administrator with access to all Wallarm settings.
-
Analyst with access to view main Wallarm settings, and manage information about attacks, incidents and vulnerabilities.
-
Read Only with access to view main Wallarm settings.
-
API Developer with access to view and download the API inventory discovered by the API Discovery module. This role allows distinguishing users whose tasks only require using Wallarm to get actual data on company APIs. These users do not have access to any Wallarm Console sections except for API Discovery, its dashboard, and Settings → Profile.
-
Deploy with access to create Wallarm filtering nodes using the
addnodescript and with no access to Wallarm Console.Using the Deploy role to install the Wallarm node 4.0
The Deploy user role is recommended to be used to install only nodes 3.6 and lower since the
addnodescript is deprecated in the release of version 4.0.
The multitenancy feature also enables you to use the global roles Global Administrator, Global Analyst, Global Read Only. Global roles provide users with access to the technical tenant account and linked tenant accounts, regular roles provide users with access only to the technical tenant account.
More detailed information about access of different user roles to the Wallarm entities is provided in the table below. Entity management covers creating, editing, and deleting entities.
| Entity | Administrator / Global Administrator | Analyst / Global Analyst | Read Only / Global Read Only | API Developer |
|---|---|---|---|---|
| Filtering nodes | View and manage | View | View | - |
| Dashboard | View | View | View | - |
| Attacks | View and manage | View and manage | View | - |
| Incidents | View and manage | View and manage | View | - |
| API Sessions | View and manage | View | View | - |
| Vulnerabilities | View and manage | View and manage | View | - |
| API inventory by API Discovery | View and manage | View and manage | - | View and download |
| API Specifications | View and manage | View | View | View |
| Infrastructure Discovery | View and manage | View and manage | View | - |
| Triggers | View and manage | - | - | - |
| IP lists | View, manage, and export | View, manage, and export | View and export | - |
| Rules WAF | View and manage | View and manage | View | - |
| Mitigation Controls | View and manage | View | View | - |
| Credential Stuffing Detection | View and manage | View and manage | View | - |
| Security Edge | View and manage | View | - | - |
| Integrations | View and manage | - | - | - |
| Filtration mode | View and manage | View | View | - |
| Applications | View and manage | View | View | - |
| Users | View and manage | - | View | - |
| API tokens | Manage personal and shared tokens | Manage personal tokens | - | - |
| Activity log | View | - | View | - |
Custom permissions
While standard role-based access control (RBAC) provides a helpful, high-level structure, in Wallarm, for the selected user, you can define a custom, individual permission set where every position and action is manually and individually configured. This moves control from broad buckets to precise, fine-grained settings.
To define custom permissions:
-
Select Edit user settings from the user's menu.
-
In the role field, select Custom permissions, set and save.
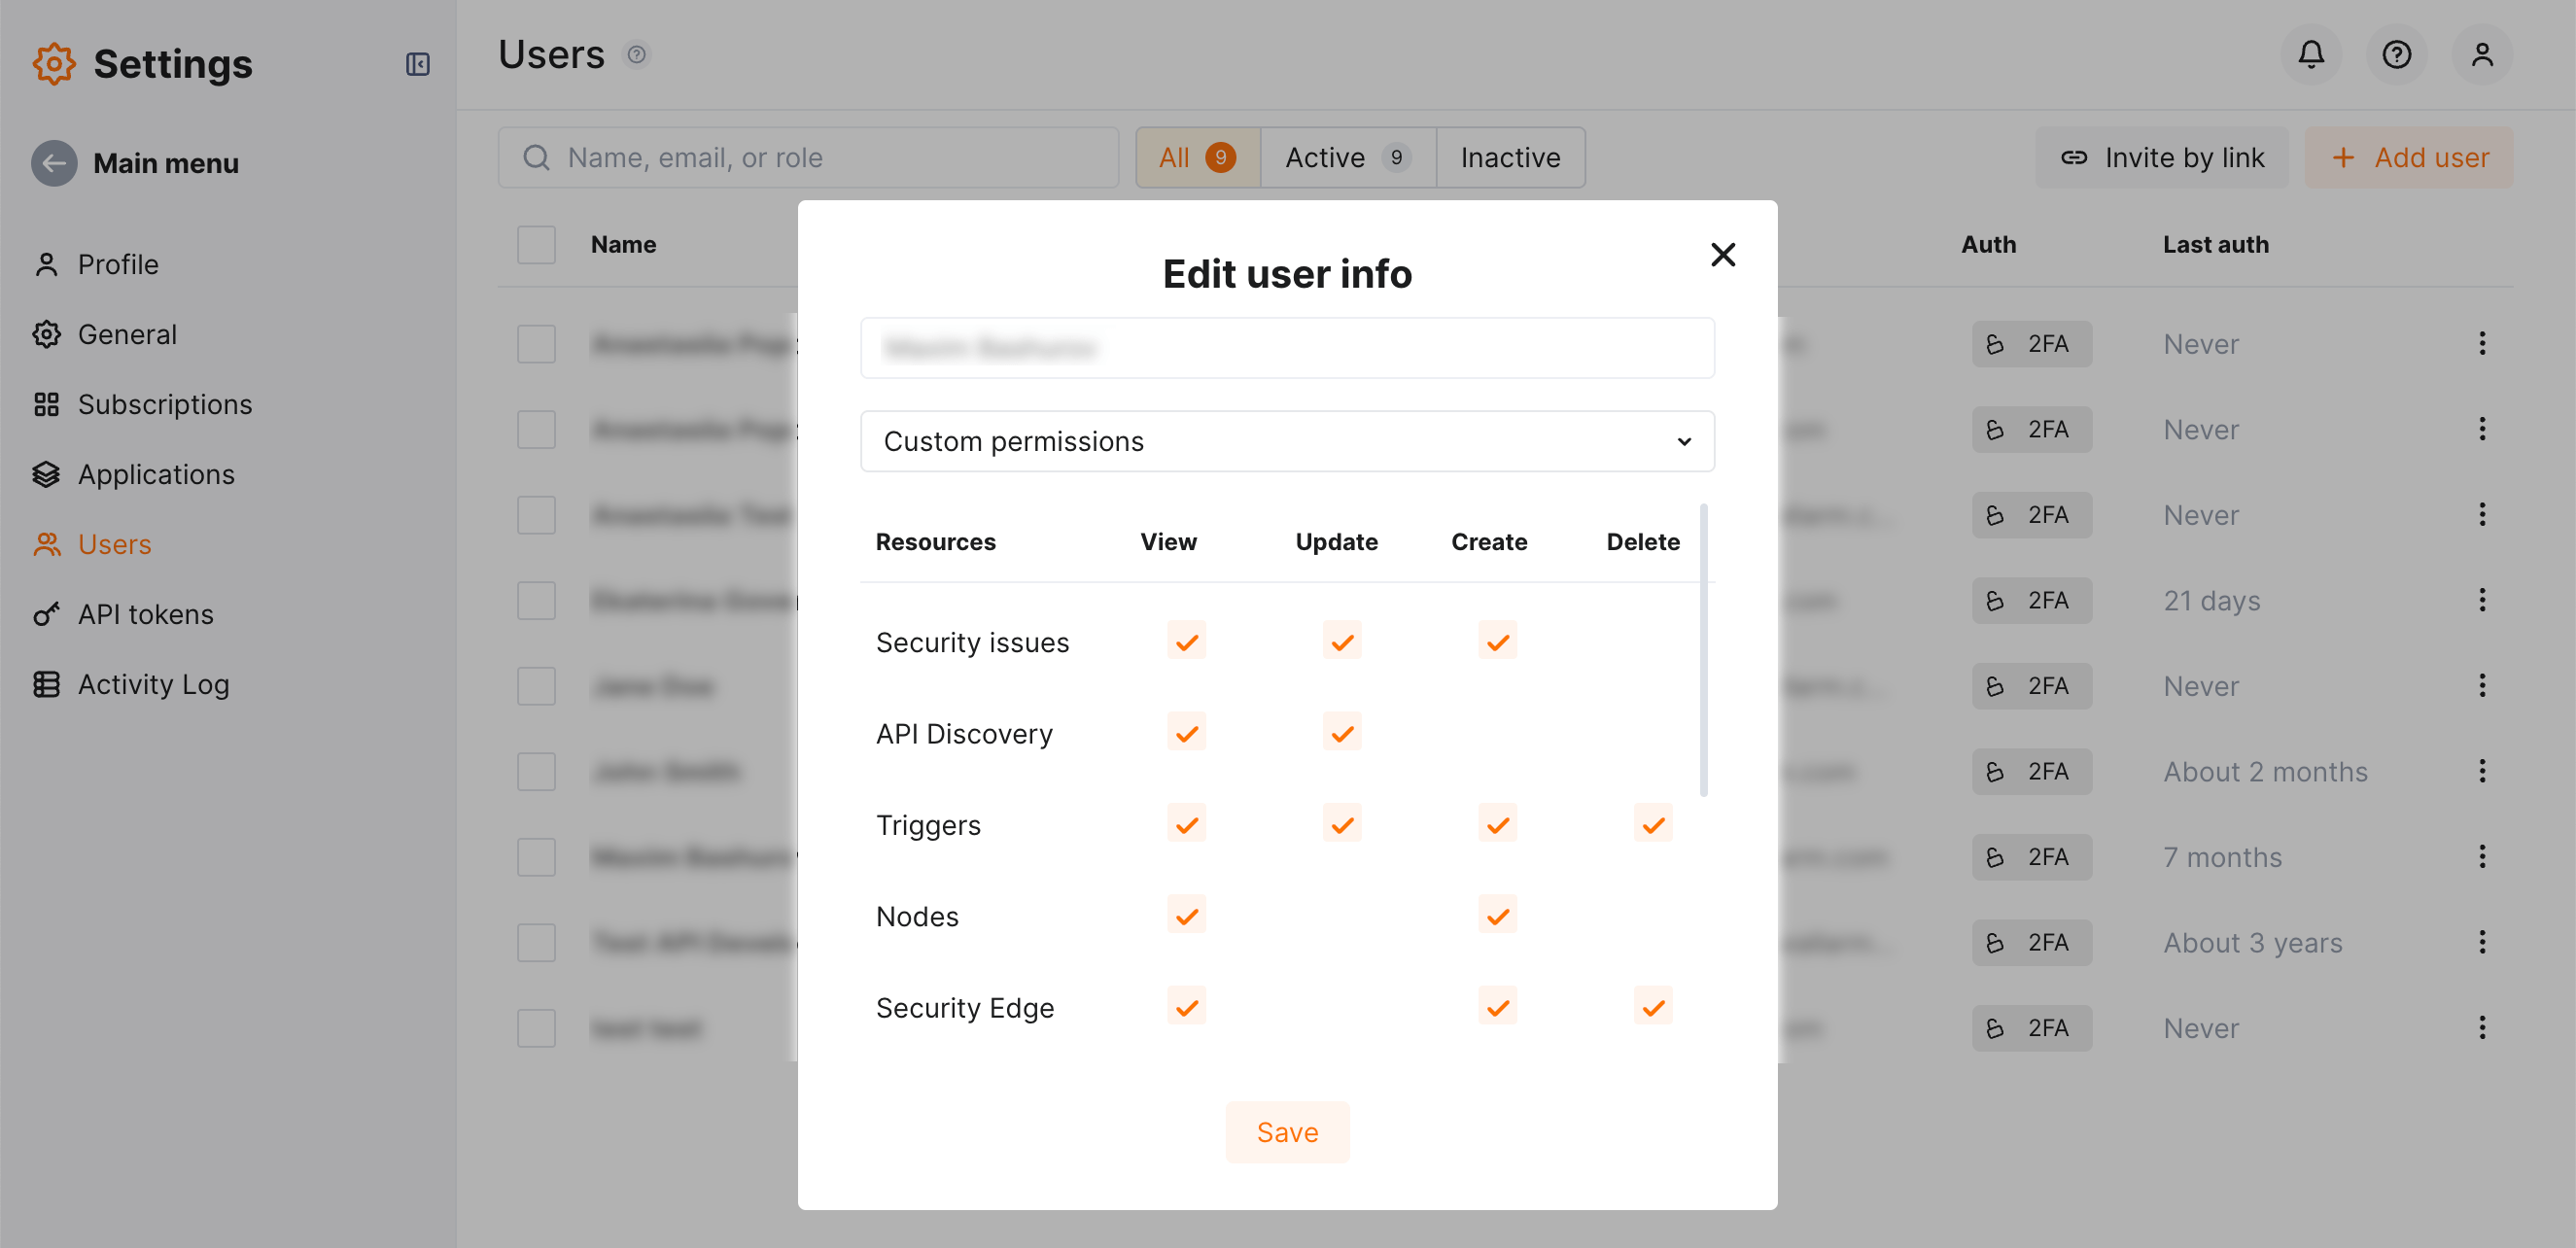
Note that:
-
When a new user is created and Custom permissions are selected, they are all denied by default, and you need to specify explicitly what to allow.
-
If new features appear in the list (new releases), they will initially all be denied, and you need to allow them manually.
-
If View permission is not selected, the user will not see the corresponding interface element and will not be able to use other permissions even if they are allowed.
Inviting users
You can add a user to your account in two ways, both involving the creation and sharing of an invitation link. You can either have Wallarm automatically send the invitation link to the user's specified email or share the link directly with the user.
Automatic email invitation
For this method, set up the user's role, email, and names in advance, and Wallarm will automatically send an invitation email with a link to log in and set a password to the specified user's email. The user should then follow the link to complete the signup process.
To send an invitation link automatically, click the Add user button and complete the form:
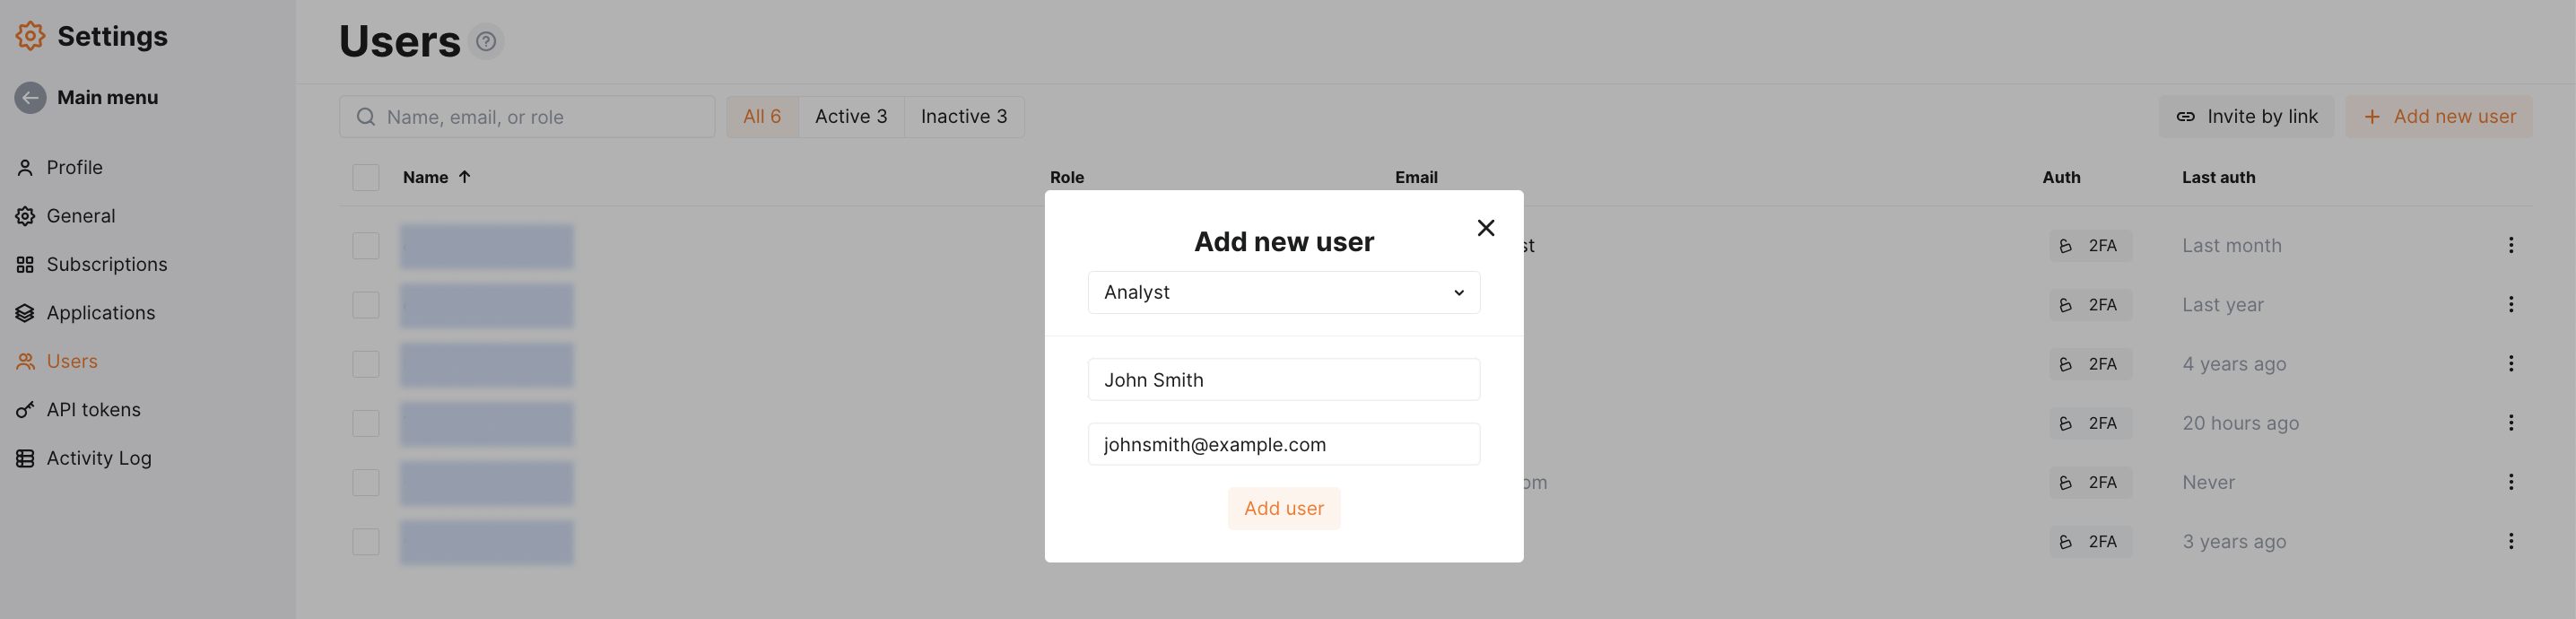
After submitting the form, the user will be added to your list of users and receive an email with the invitation link.
Manual invitation link sharing
Generate an invitation link by selecting your team member's email, their role, and the link's duration using the Invite by link option. Then, share this link with the intended user.
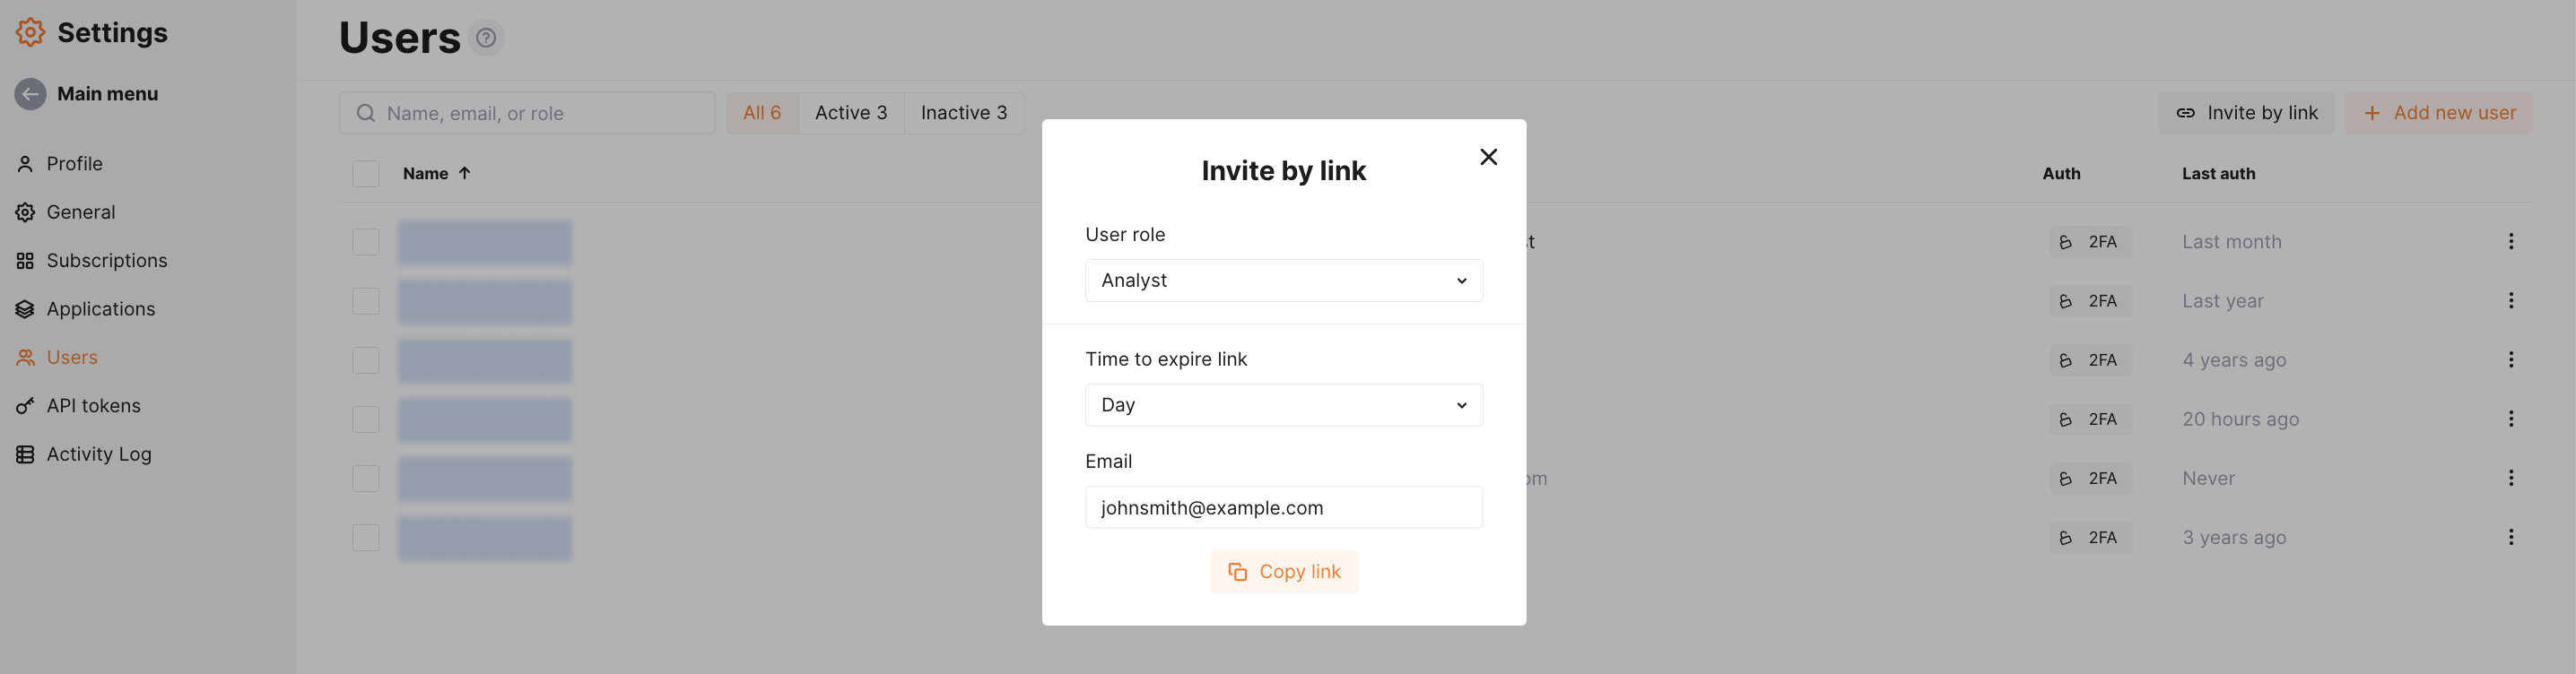
This link leads them to the Wallarm signup page to create their account by choosing a password and entering their name.
After signup, they will be added to your user list and will receive a confirmation email.
Password policy
By default, Wallarm's user password must contain:
-
8 characters
-
1 number (0-9)
-
1 lowercase letter (a-z)
-
1 uppercase letter (A-Z)
-
No rotation required
You can contact the Wallarm support team to modify this policy:
-
Make it stricter
-
Add rotation (like, request password change every
xdays) -
Etc.
Automatic creation with SSO
You can manage Wallarm Console users and their permissions directly from your SAML SSO solution. In this case, in your SAML SSO solution, you have groups mapped to Wallarm roles - when you create new users inside these groups, they are automatically created in Wallarm and get:
-
Corresponding Wallarm role.
-
Immediate access to Wallarm Console under SSO credentials.
-
Permissions specified by the role.
For this to work, you need to configure integration between Wallarm and your SAML SSO solution with provisioning option enabled as described here.
Changing user settings
Once a user appears in the user list, you can edit their settings using the Edit user settings option from the corresponding user menu. This allows you to change their assigned user role or custom permissions, first name, and last name.
Managing 2FA
Enforcing for all users
You can enforce all company users to use two-factor authentication (2FA). To do so:
-
Open Wallarm Console → Settings → General.
-
In the Sign-in management section, select the Enforce two-factor authentication for all company users option and confirm.
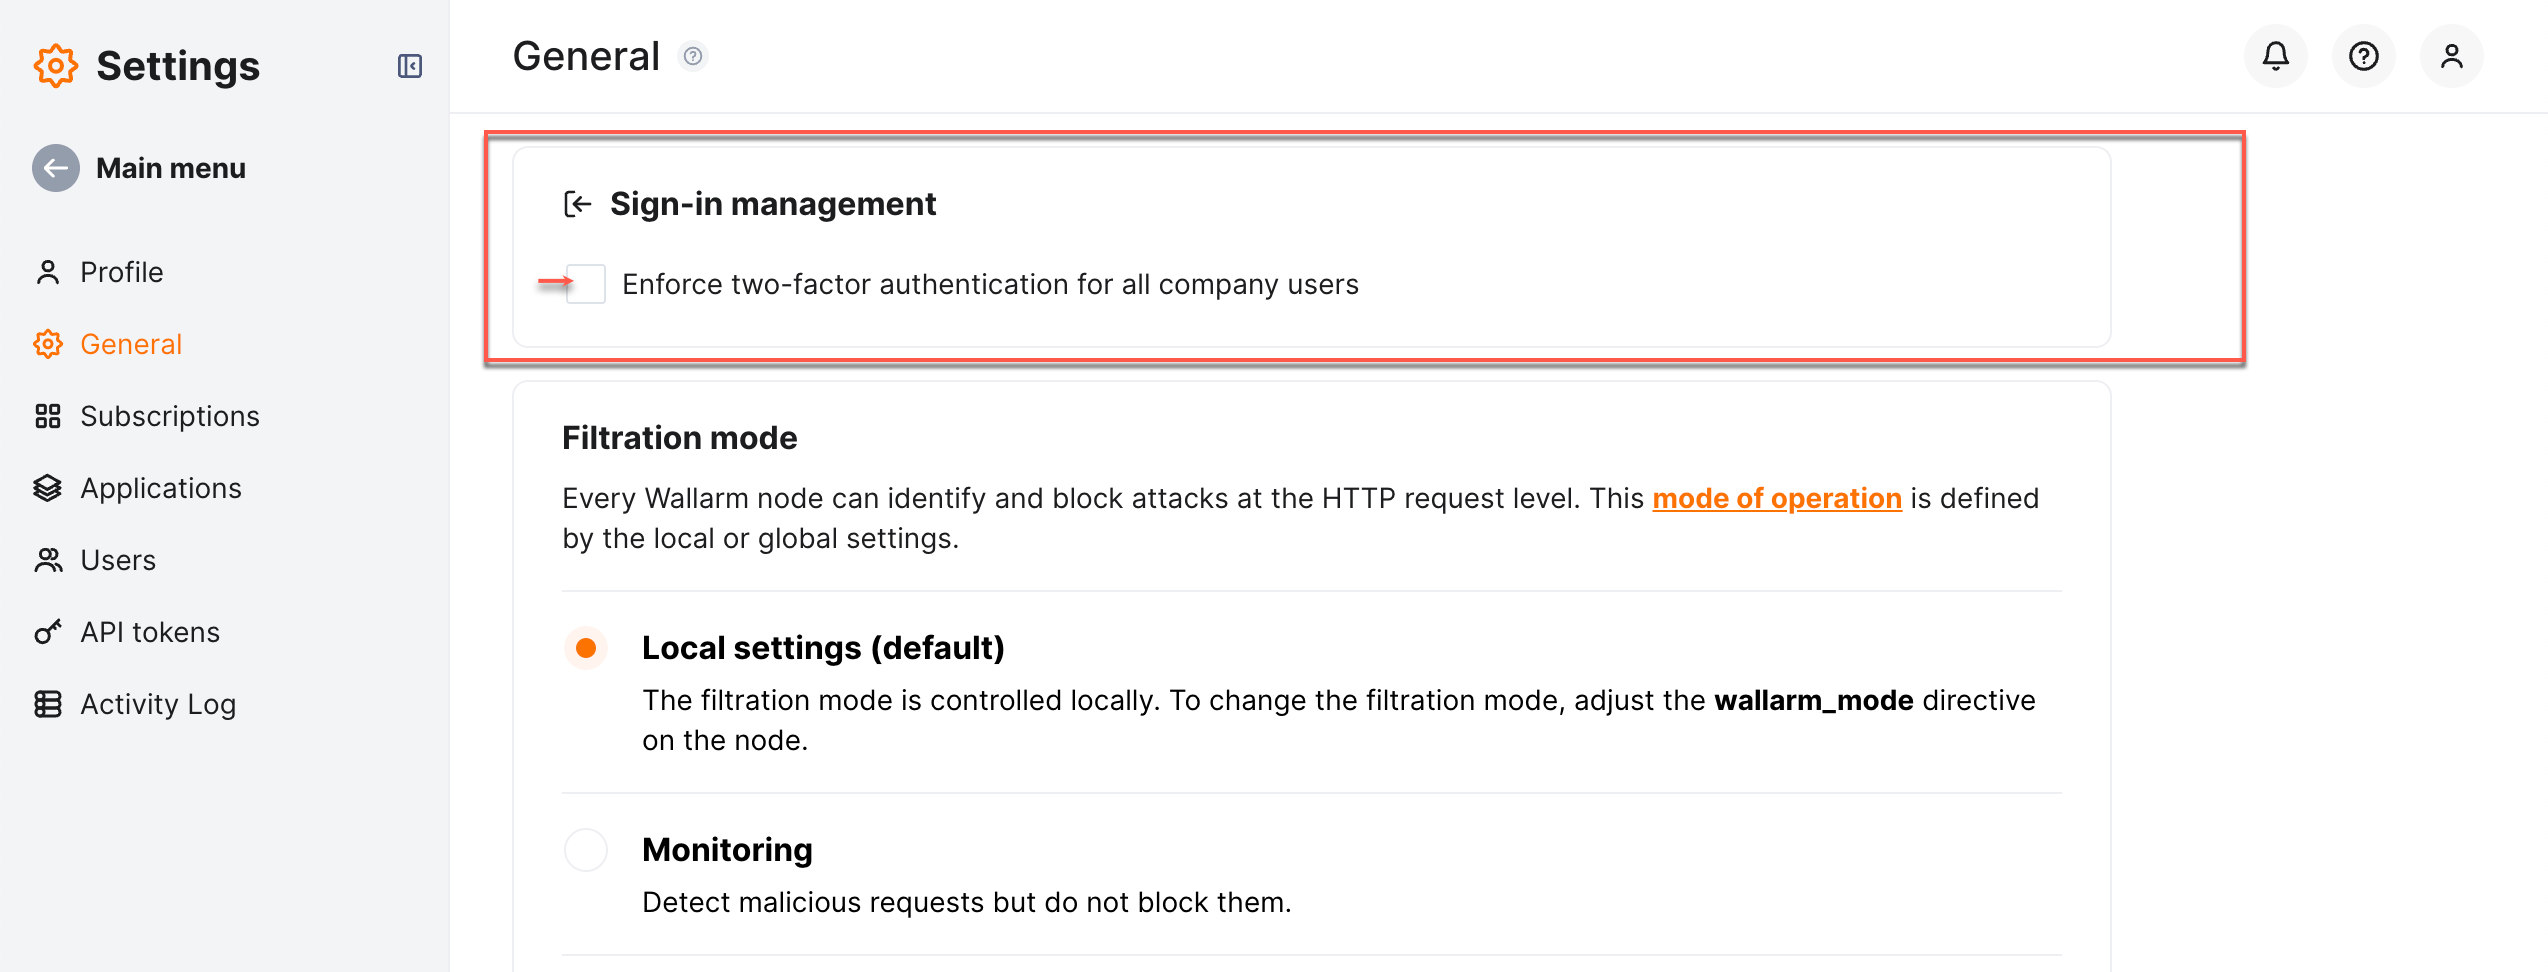
Once enabled, all users of your company account will have to set up 2FA before they can log in without an option of bypassing: on the next login they will be informed about 2FA set to be obligatory and will be provided with the 2FA configuration options. However, enabling the option does not affect the current user sessions.
You can disable the enforcement mode at any moment later. After disabling, users are not notified and continue to use 2FA until they or you (administrator) disable it manually for this particular user.
Disabling for selected users
If a user has two-factor authentication (2FA) enabled and you need to reset it, select the Disable 2FA option from the user menu. Confirm the action by entering your Wallarm administrator account password. You cannot disable 2FA for individual users when the 2FA enforcement mode is active.
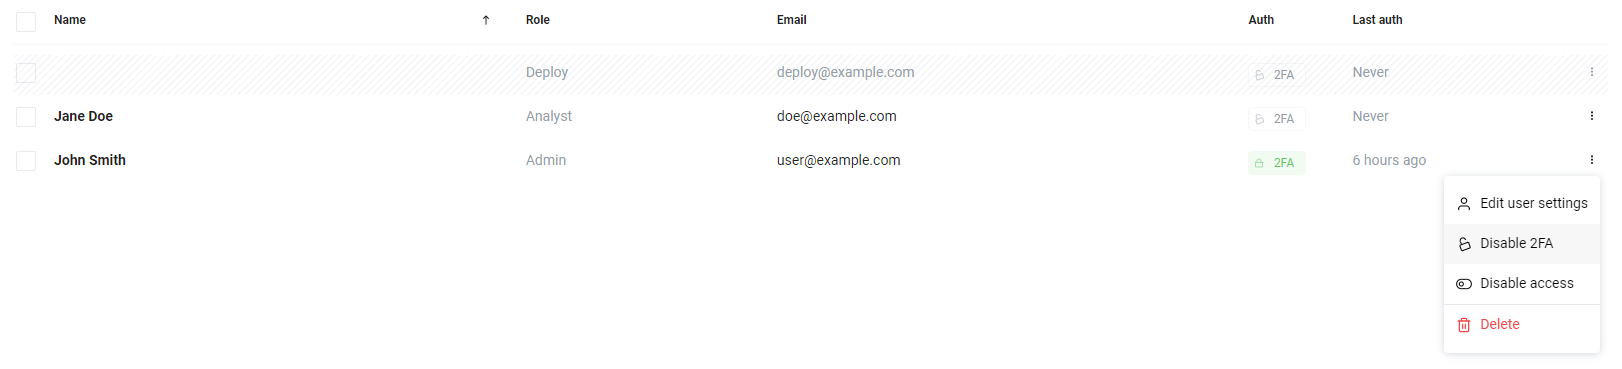
This will disable 2FA for the selected user. The user can re-enable 2FA through their profile settings.
Disabling and deleting users
-
To temporarily suspend a user's Wallarm account login capability without deleting their account information, use the Disable access option next to their name. This action marks them in gray in the main user list and lists them under the Disabled tab. Reactivate their account by choosing Enable access, allowing them to log in and access Wallarm again.
-
For permanent removal and to revoke login access forever, select Delete user from the user menu. This action permanently removes them from the user list and cannot be undone.
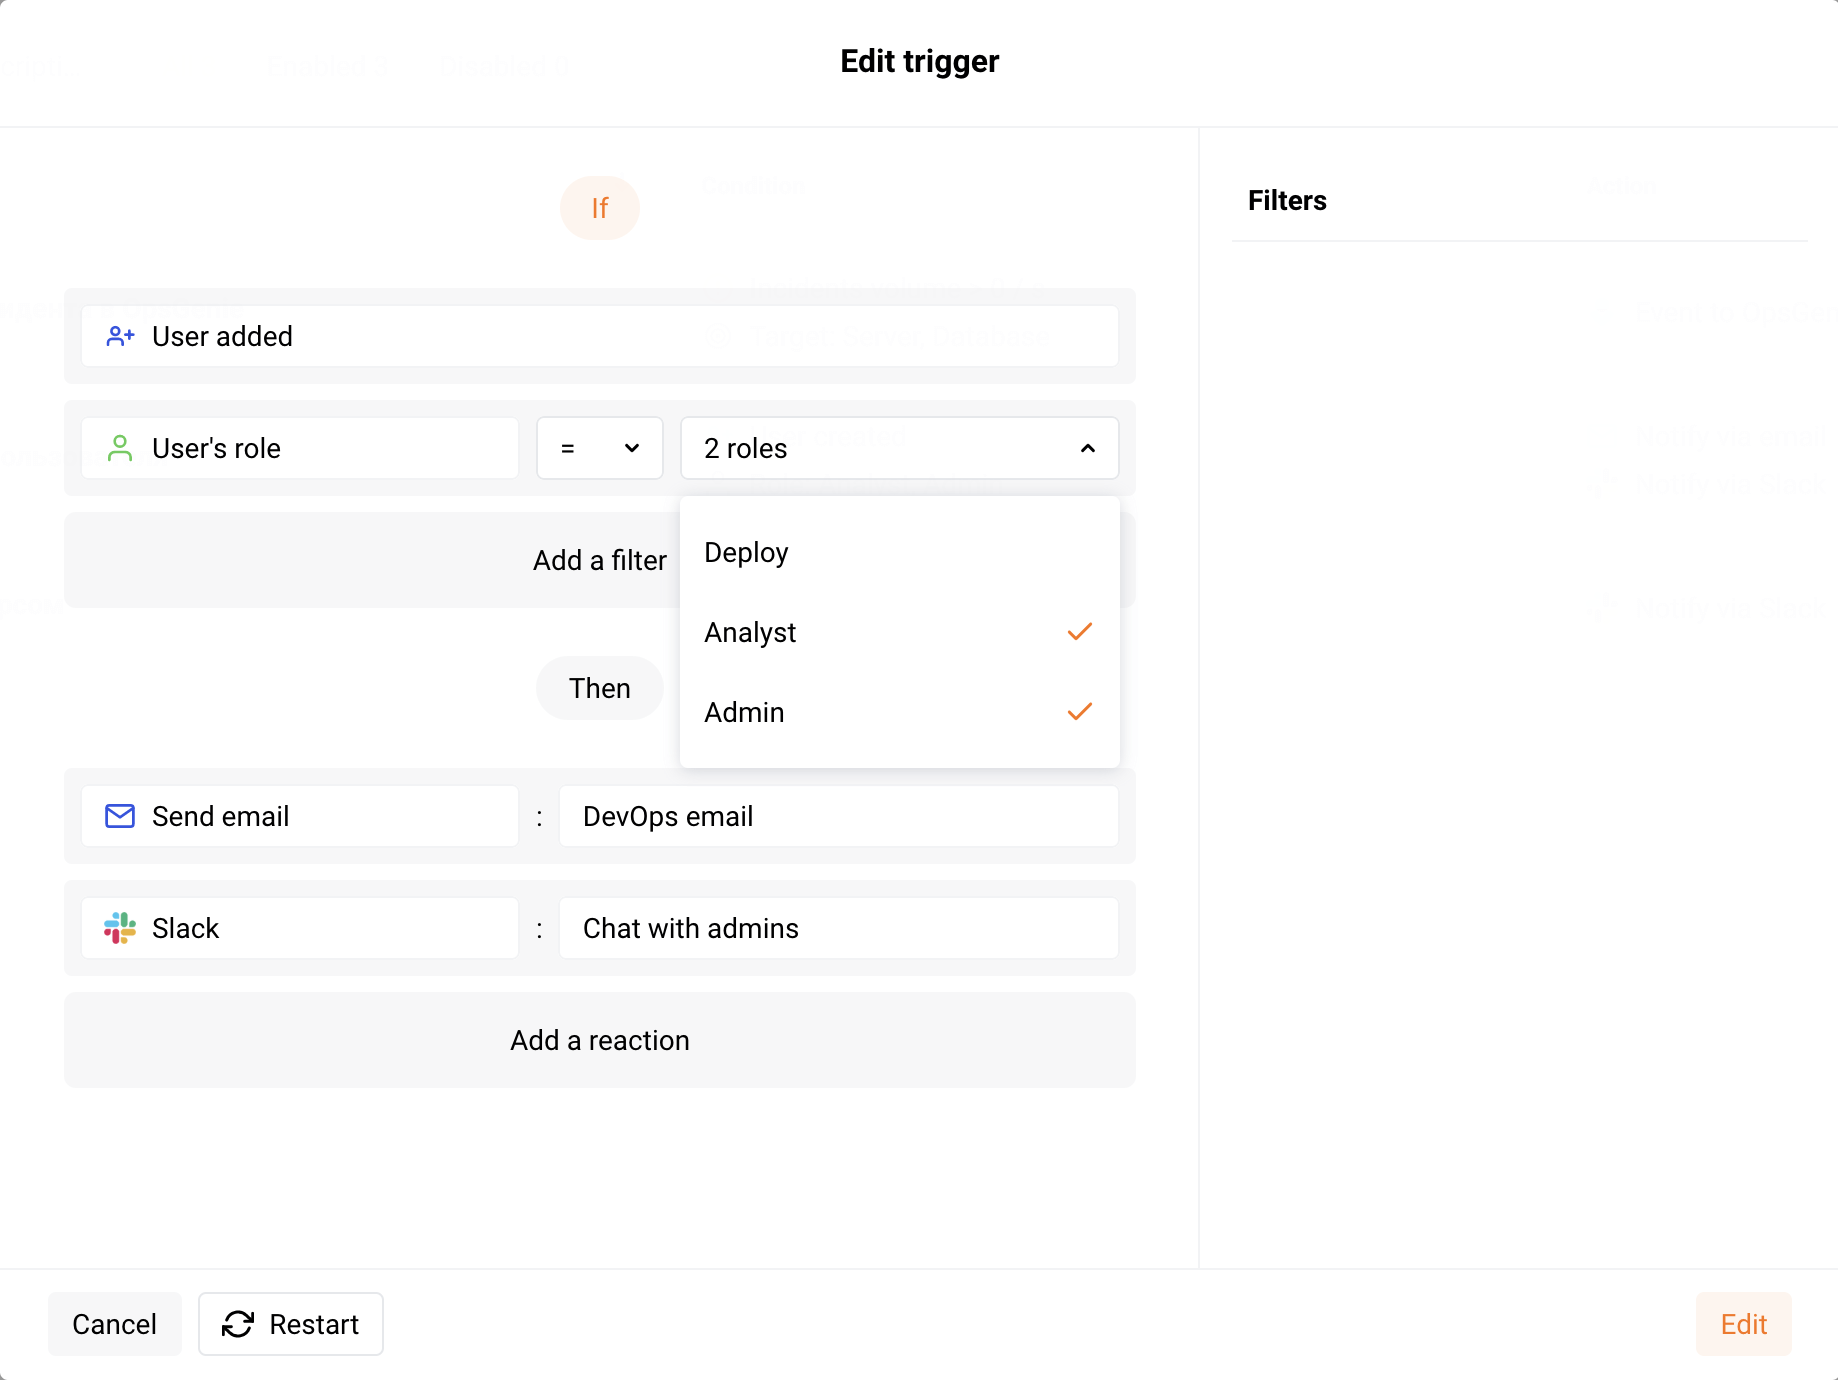
New user alerts
Receive instant alerts when new users are added to your Wallarm account by setting up a trigger with the User added condition. Choose to be notified about specific roles or any new user addition.
Team members interested in these notifications must set up their own triggers.
Trigger example: new user alerts to Slack
If a new user with the Administrator or Analyst role is added to the company account in Wallarm Console, a notification about this event will be sent to the email address specified in the integration and to the Slack channel.
To test the trigger:
-
Open the Wallarm Console → Settings → Users and add a new user.
-
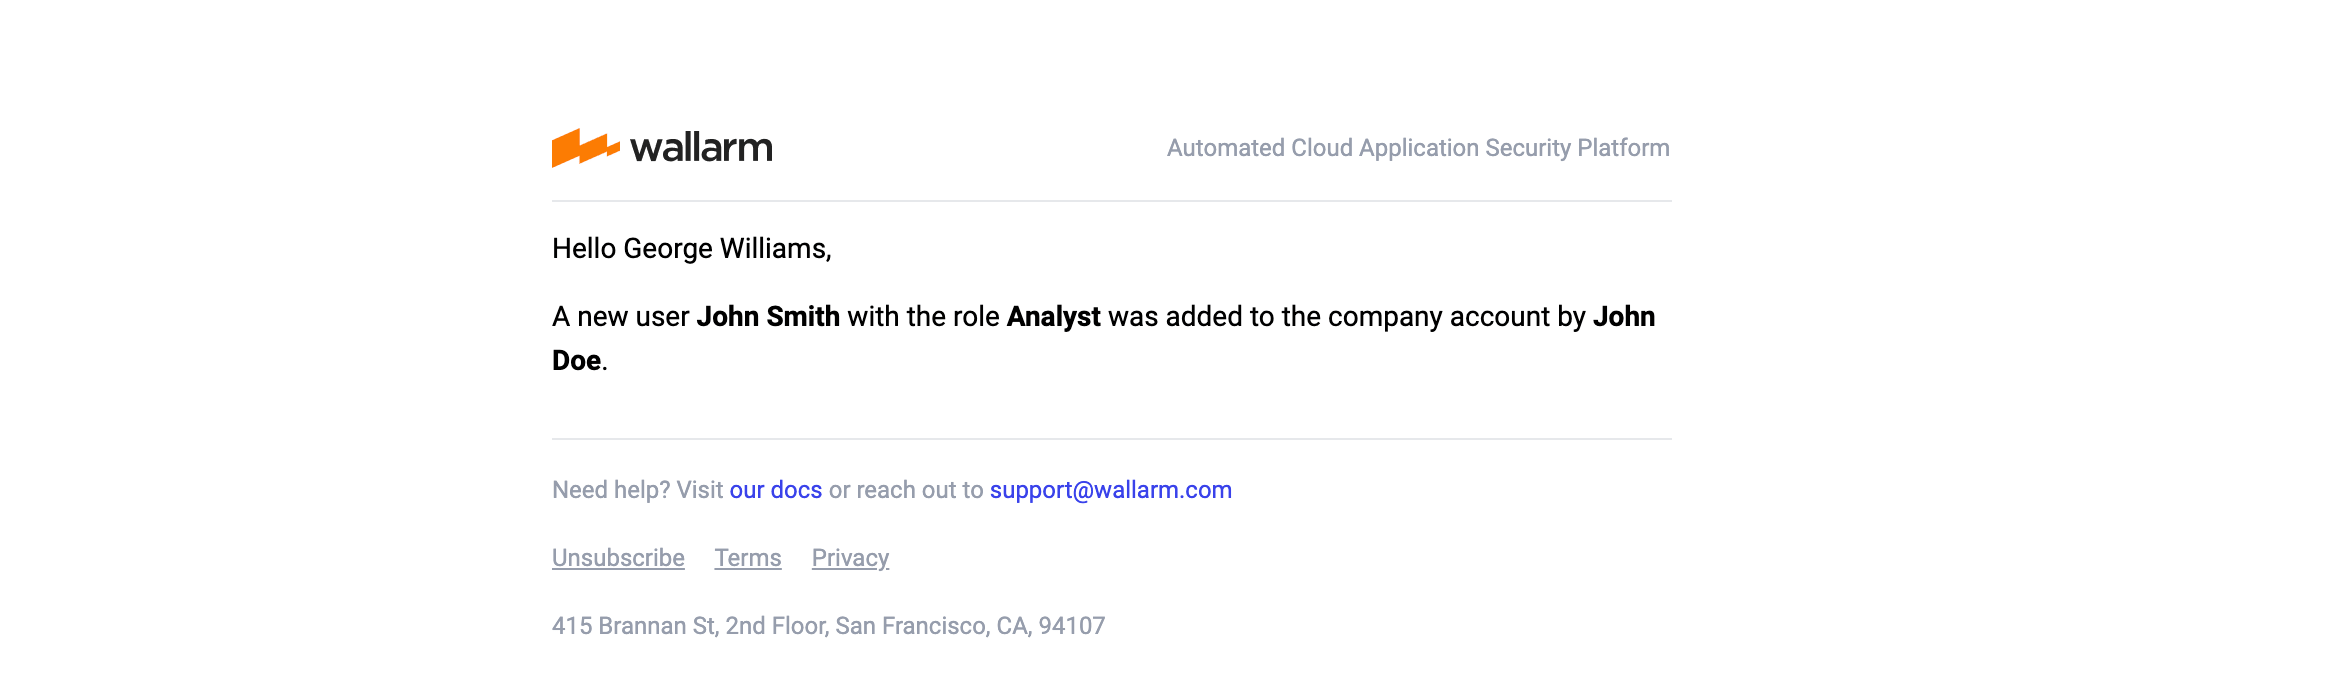
Open your email Inbox and check that the following message is received:
-
Open the Slack channel and check that the following notification from the user wallarm is received:
[Wallarm] Trigger: New user was added to the company account

Notification type: create_user

A new user John Smith <johnsmith@example.com> with the role Analyst was added to the company account by John Doe <johndoe@example.com>.
This notification was triggered by the "Added user" trigger.

Client: TestCompany
Cloud: EU
John Smithandjohnsmith@example.comis information about the added userAnalystis the role of the added userJohn Doeandjohndoe@example.comis information about the user who added a new userAdded useris the trigger nameTestCompanyis the name of your company account in Wallarm ConsoleEUis the Wallarm Cloud where your company account is registered
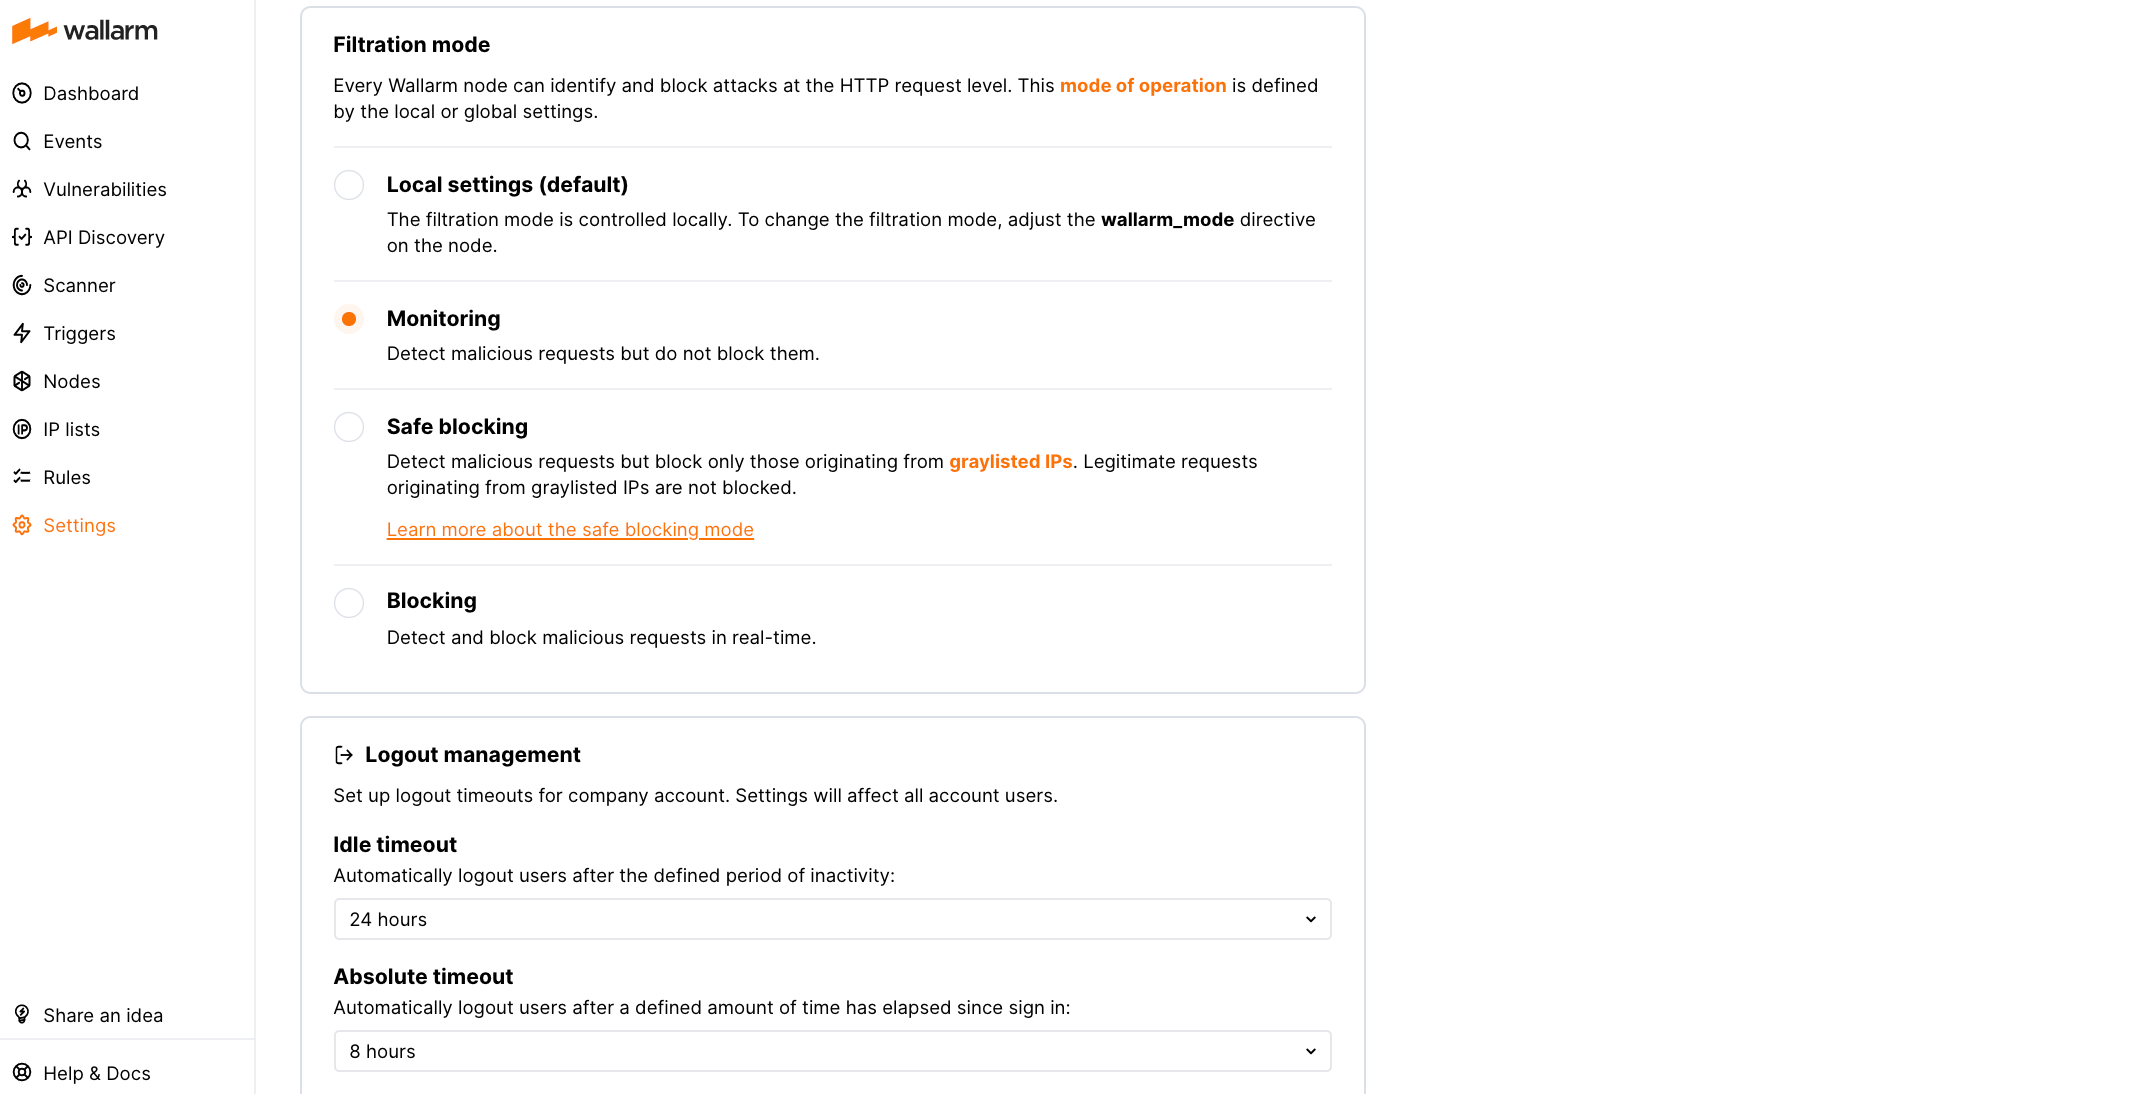
Logout management
Administrator and Global Administrator roles can set up logout timeouts for the company account in Settings → General. Settings will affect all account users. Idle and absolute timeouts can be set.