Microsoft Teams
Microsoft Teams is a collaboration and communication platform designed to facilitate teamwork and enable organizations to communicate, collaborate, and manage projects effectively, whether they are working in the office, remotely, or a combination of both. You can set up Wallarm to send notifications to your Microsoft Teams channel(s). If you want to send notifications to several different channels, create several Microsoft Teams integrations.
Setting up integration
-
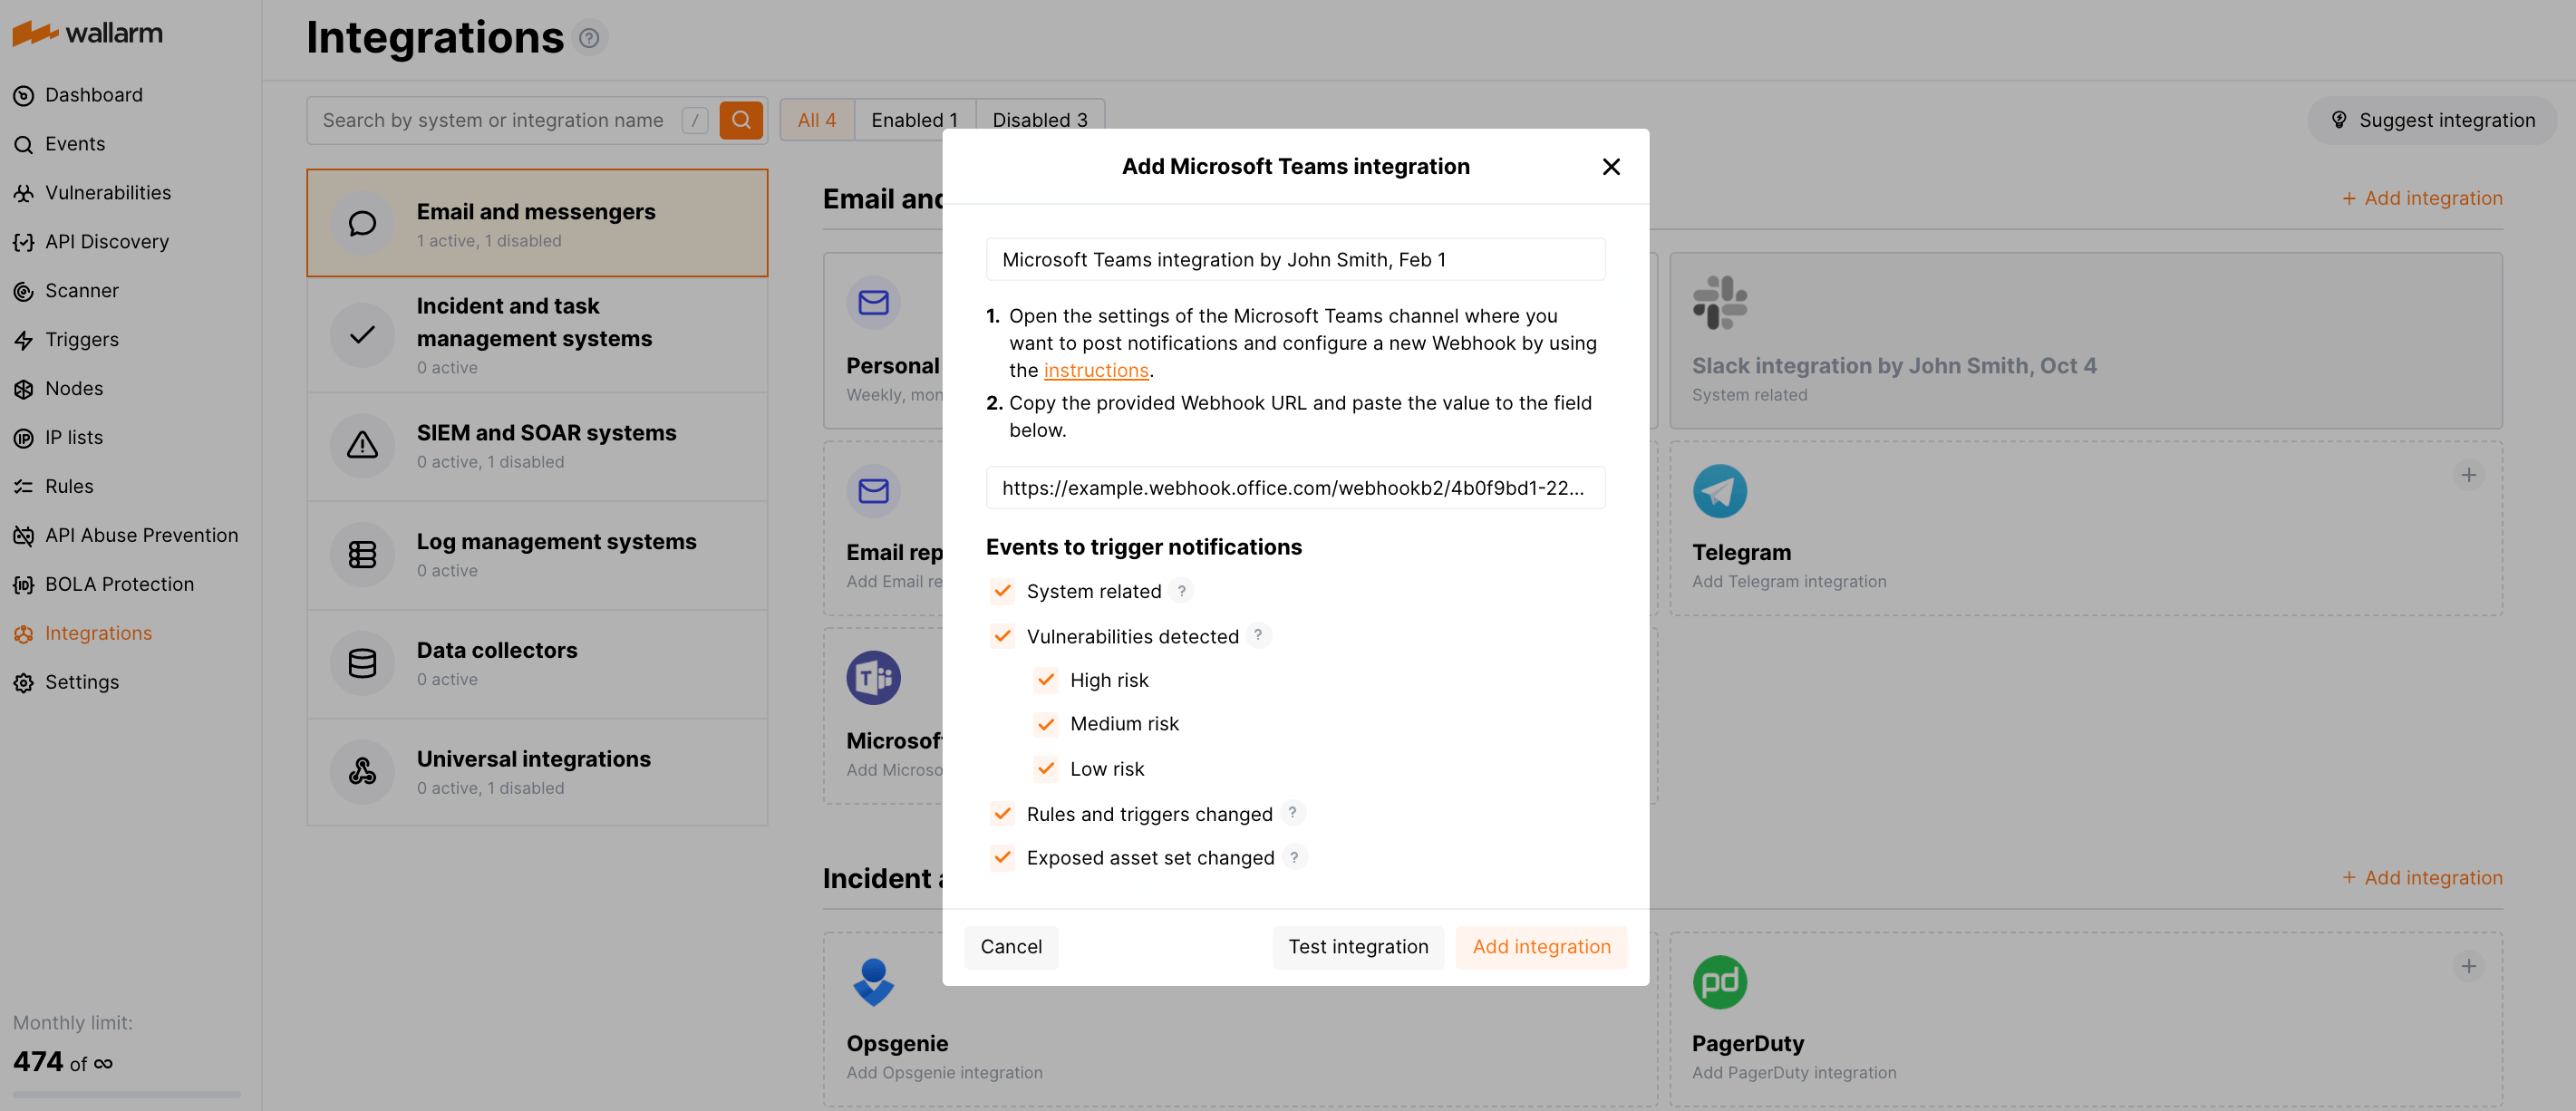
Open the Integrations section.
-
Click the Microsoft Teams block or click the Add integration button and choose Microsoft Teams.
-
Enter an integration name.
-
Open the settings of the Microsoft Teams channel where you want to post notifications and configure a new Webhook by using the instructions.
-
Copy the provided Webhook URL and paste the value to the Webhook URL field in Wallarm Console.
-
Choose event types to trigger notifications.
Details on available events:
- System related:
- User changes (newly created, deleted, role change)
- Integration changes (disabled, deleted)
- Application changes (newly created, deleted, name change)
- Errors during regular update of specifications used for rogue API detection or API specification enforcement
- Vulnerabilities detected, all by default or only for the selected risk level(s):
- High risk
- Medium risk
- Low risk
- Rules and triggers changed (creating, updating, or deleting the rule or trigger)
- (Requires AASM Enterprise) Security issues detected, all or only for the selected risk level(s):
- Critical risk
- High risk
- Medium risk
- Low risk
- Info risk
- System related:
-
Click Test integration to check configuration correctness, availability of the Wallarm Cloud, and the notification format.
This will send the test notifications with the prefix
[Test message]: -
Click Add integration.
Setting up additional alerts
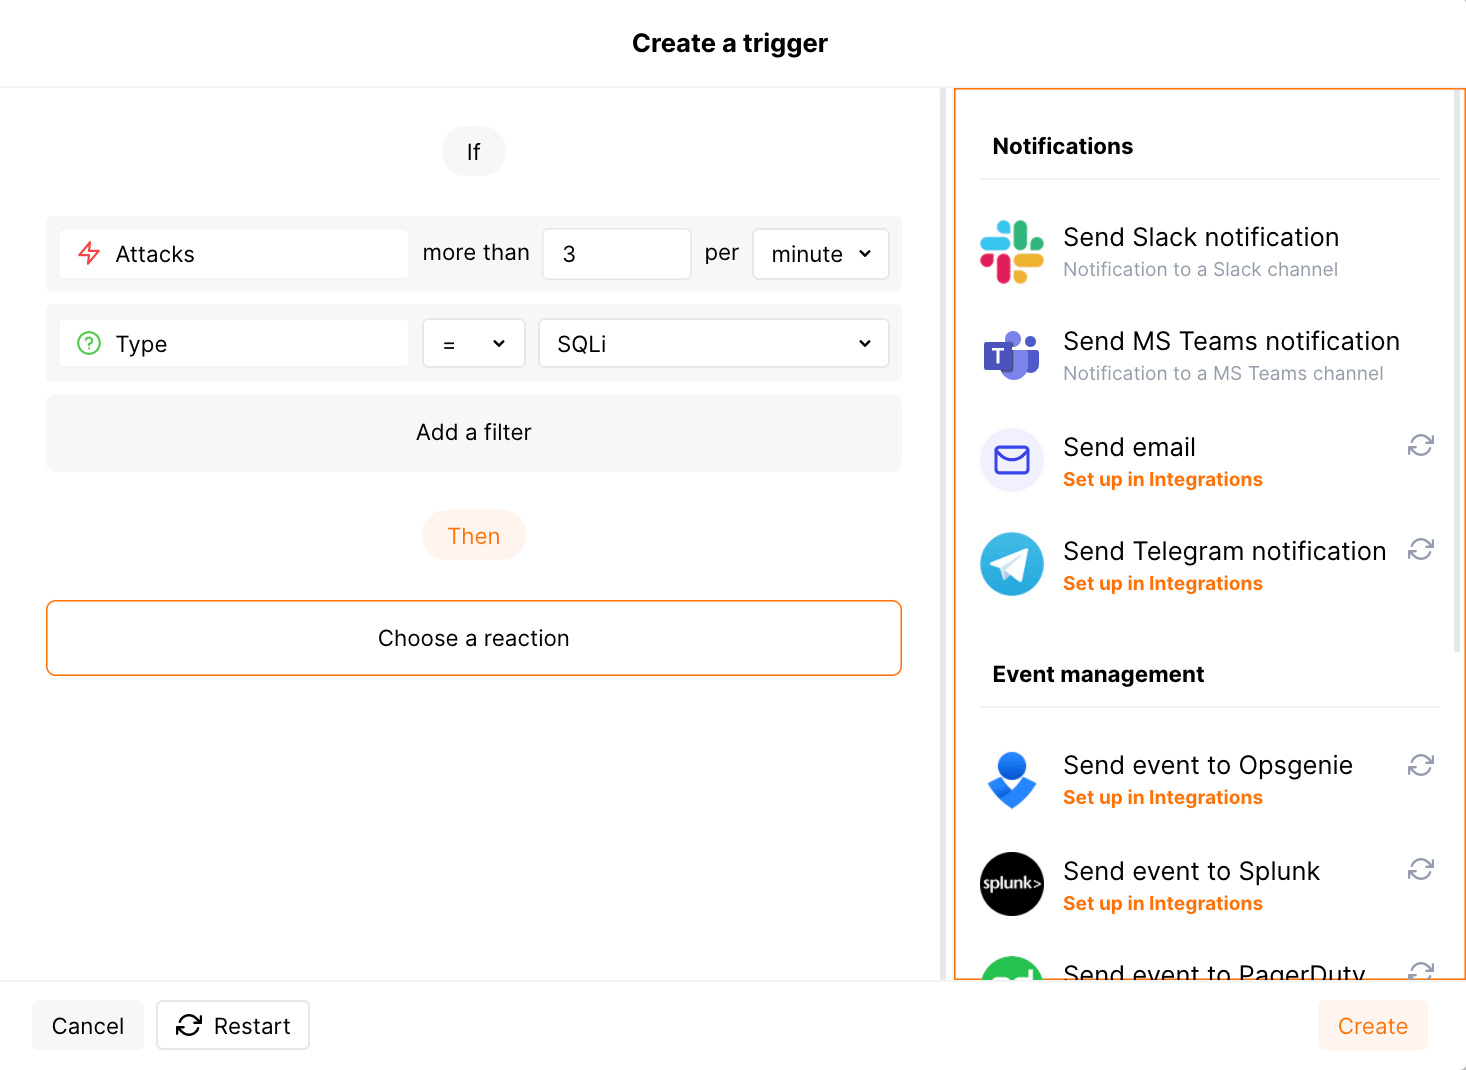
Besides the notifications you have already set up through the integration card, Wallarm triggers allow you to select additional events for notifications:
-
Number of attacks, hits or incidents per time interval (day, hour, etc.) exceeds the set number
What is not counted
- For attacks:
- The experimental attacks based on the custom regular expressions.
- For hits:
- The experimental hits based on the custom regular expressions.
- Hits not saved in the sample.
- For attacks:
-
Changes in API took place
-
New rogue API (shadow, orphan, zombie) was detected
-
New user was added to the company account
For condition detailing, you can add one or more filters. As soon, as condition and filters are set, select the integration through which the selected alert should be sent. You can select several integrations simultaneously.
Disabling and deleting an integration
You can delete or temporarily disable the integration. While deleting stops sending notificatioins and completely deletes all configuration, disabling just stops sending notifications which you can at any moment re-enable with the same settings.
If for the integration the System related events are selected to trigger notifications, Wallarm will notify about both of these actions.
System unavailability and incorrect integration parameters
Notifications to the system are sent via requests. If the system is unavailable or integration parameters are configured incorrectly, the error code is returned in the response to the request.
If the system responds to Wallarm request with any code other than 2xx, Wallarm resends the request with the interval until the 2xx code is received:
-
The first cycle intervals: 1, 3, 5, 10, 10 seconds
-
The second cycle intervals: 0, 1, 3, 5, 30 seconds
-
The third cycle intervals: 1, 1, 3, 5, 10, 30 minutes
If the percentage of unsuccessful requests reaches 60% in 12 hours, the integration is automatically disabled. If you receive system notifications, you will get a message about automatically disabled integration.

