Setting Up Applications
If your company has several applications, you may find it convenient not only to view the statistics of the entire company's traffic but also to view the statistics separately for each application. To separate traffic by the applications, you can use the "application" entity in the Wallarm system.
Using applications enables you to:
-
View events and statistics separately for each application
-
Configure triggers, rules and other Wallarm features for certain applications
-
Handle environments (production, testing, etc.) as separate applications
Isolated environments
Environments managed as applications are accessible to all users of the current Wallarm account. If you need to isolate their data so that only specific users have access to it, instead of applications, use the multitenancy feature.
For Wallarm to identify your applications, it is required to assign them unique identifiers via the appropriate directive in the node configuration. Identifiers can be set for both the application domains and the domain paths.
By default, Wallarm considers each application to be the default application with the identifier (ID) -1.
Adding applications
-
(Optional) Add an application in Wallarm Console → Settings → Applications.

Administrator access
Only users with the Administrator role can access the section Settings → Applications.
-
Assign an application the unique ID in the node configuration via:
- The directive
wallarm_applicationif Wallarm is installed as NGINX module, cloud marketplace image, NGINX-based Docker container with a mounted configuration file, sidecar container. - The environment variable
WALLARM_APPLICATIONif Wallarm is installed as NGINX-based Docker container. - The Ingress annotation
wallarm-applicationif Wallarm is installed as the Ingress controller. - For Native Node all-in-one installer, Docker image and AWS AMI, use the
route_config.wallarm_applicationparameter. - For Native Node Helm chart, use the
config.connector.route_config.wallarm_applicationparameter. - The application configuration in the Edge inline or connector setup window.
The value can be a positive integer except for
0.If an application with a specified ID is not added in Wallarm Console → Settings → Applications, it will be added to the list automatically. The application name will be generated automatically based on the specified identifier (e.g.
Application #1for the application with the ID-1). The name can be changed via Wallarm Console later. - The directive
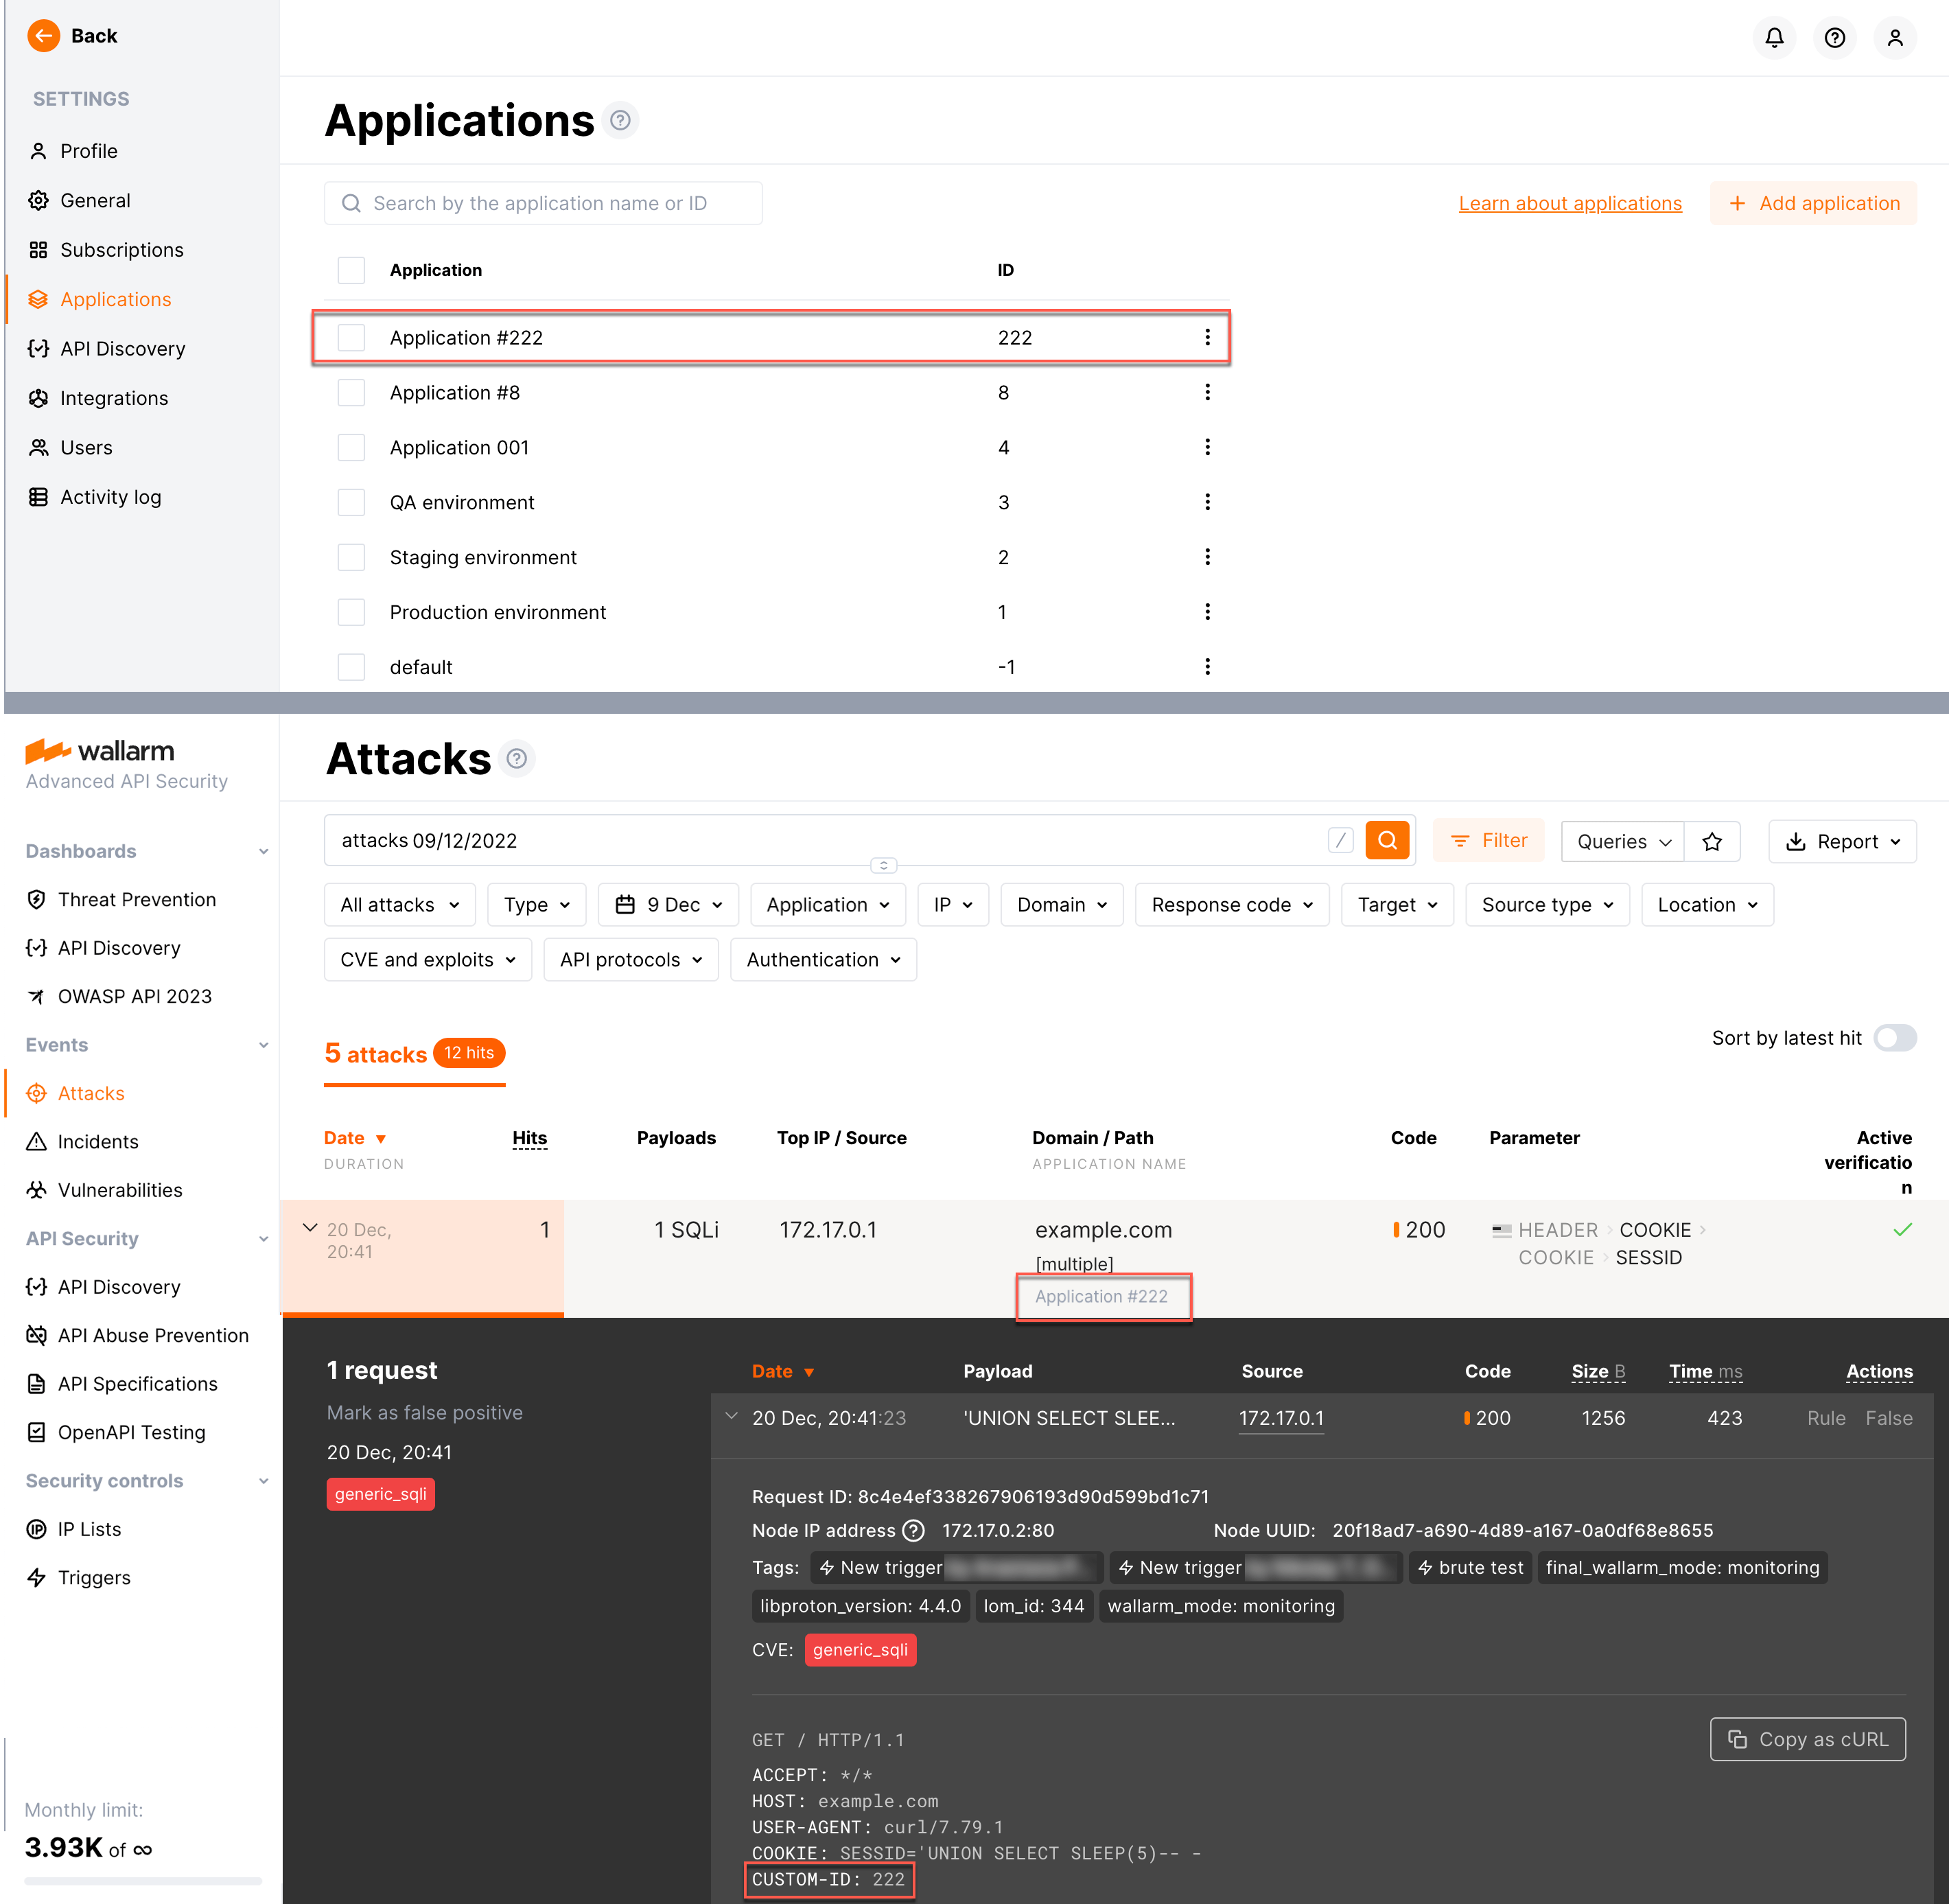
If the application is properly configured, its name will be displayed in the details of attacks aimed at this application. To test the application configuration, you can send the test attack to the application address.
Automatic application identification
You can configure automatic application identification based on:
-
Specific request headers
-
Specific request header or part of URLs using
mapNGINX directive
NGINX only
Listed approaches are applicable only for NGINX-based self-hosted node deployments.
Application identification on base of specific request headers
This approach includes two steps:
-
Configure your network so that the header with application ID is added to each request.
-
Use the value of this header as the value for the
wallarm_applicationdirective. See example below.
Example of the NGINX configuration file:
server {
    listen       80;
    server_name  example.com;
    wallarm_mode block;
    wallarm_application $http_custom_id;

    location / {
        proxy_pass      http://upstream1:8080;
    }
}
Attack request example:
This request will:
-
Be considered an attack and added to the Attacks section.
-
Be associated with application with ID
222. -
If the corresponding application does not exist, it will be added to the Settings → Applications and automatically named
Application #222.
Application identification on base of specific request header or part of URLs using map NGINX directive
You can add applications based on a specific request header or part of the endpoint URLs, using the map NGINX directive. See detailed description of the directive in the NGINX documentation.
Viewing events and statistics by application
Once you have your applications set up, you can view separately:
-
Attacks and incidents only for the application of your interest
-
API sessions related only to the application of your interest
-
Statistics on dashboards related only to the application of your interest
Configuring Wallarm features by application
Once you have your applications set up, you can configure Wallarm protection features separately for each application, including:
Assigning Wallarm's features to applications is the easiest way to specify conditions in which those features should be applied and to differentiate configurations for the different parts of your infrastructure.
Deleting applications
To delete the application from the Wallarm system, delete an appropriate directive from the node configuration file. If the application is only deleted from the Settings → Applications section, it will be restored in the list.