Wallarm Nodes
The Nodes section of the Wallarm Console allows you to manage self-hosted nodes (Security Edge nodes are managed separately).
Wallarm self-hosted nodes should be deployed to the customer's environment for Wallarm to mitigate the malicious traffic. Wallarm node operates as a proxy by mitigating malicious requests and forwarding legitimate requests to the protected resource.
Wallarm node UI management options:
-
Add, rename or delete node groups
-
Regenerate node group tokens
-
View properties and metrics of installed nodes
Administrator access
Adding and deleting Wallarm node groups and regenerating their tokens is only available to users with the Administrator or Global Administrator role. Viewing the details of installed nodes is available to all users.
Removed regular and cloud types of nodes
Starting from the release 4.6, only the Wallarm node type is available.
Wallarm node utilizes a unified approach to registering and configuring in any supported environment.
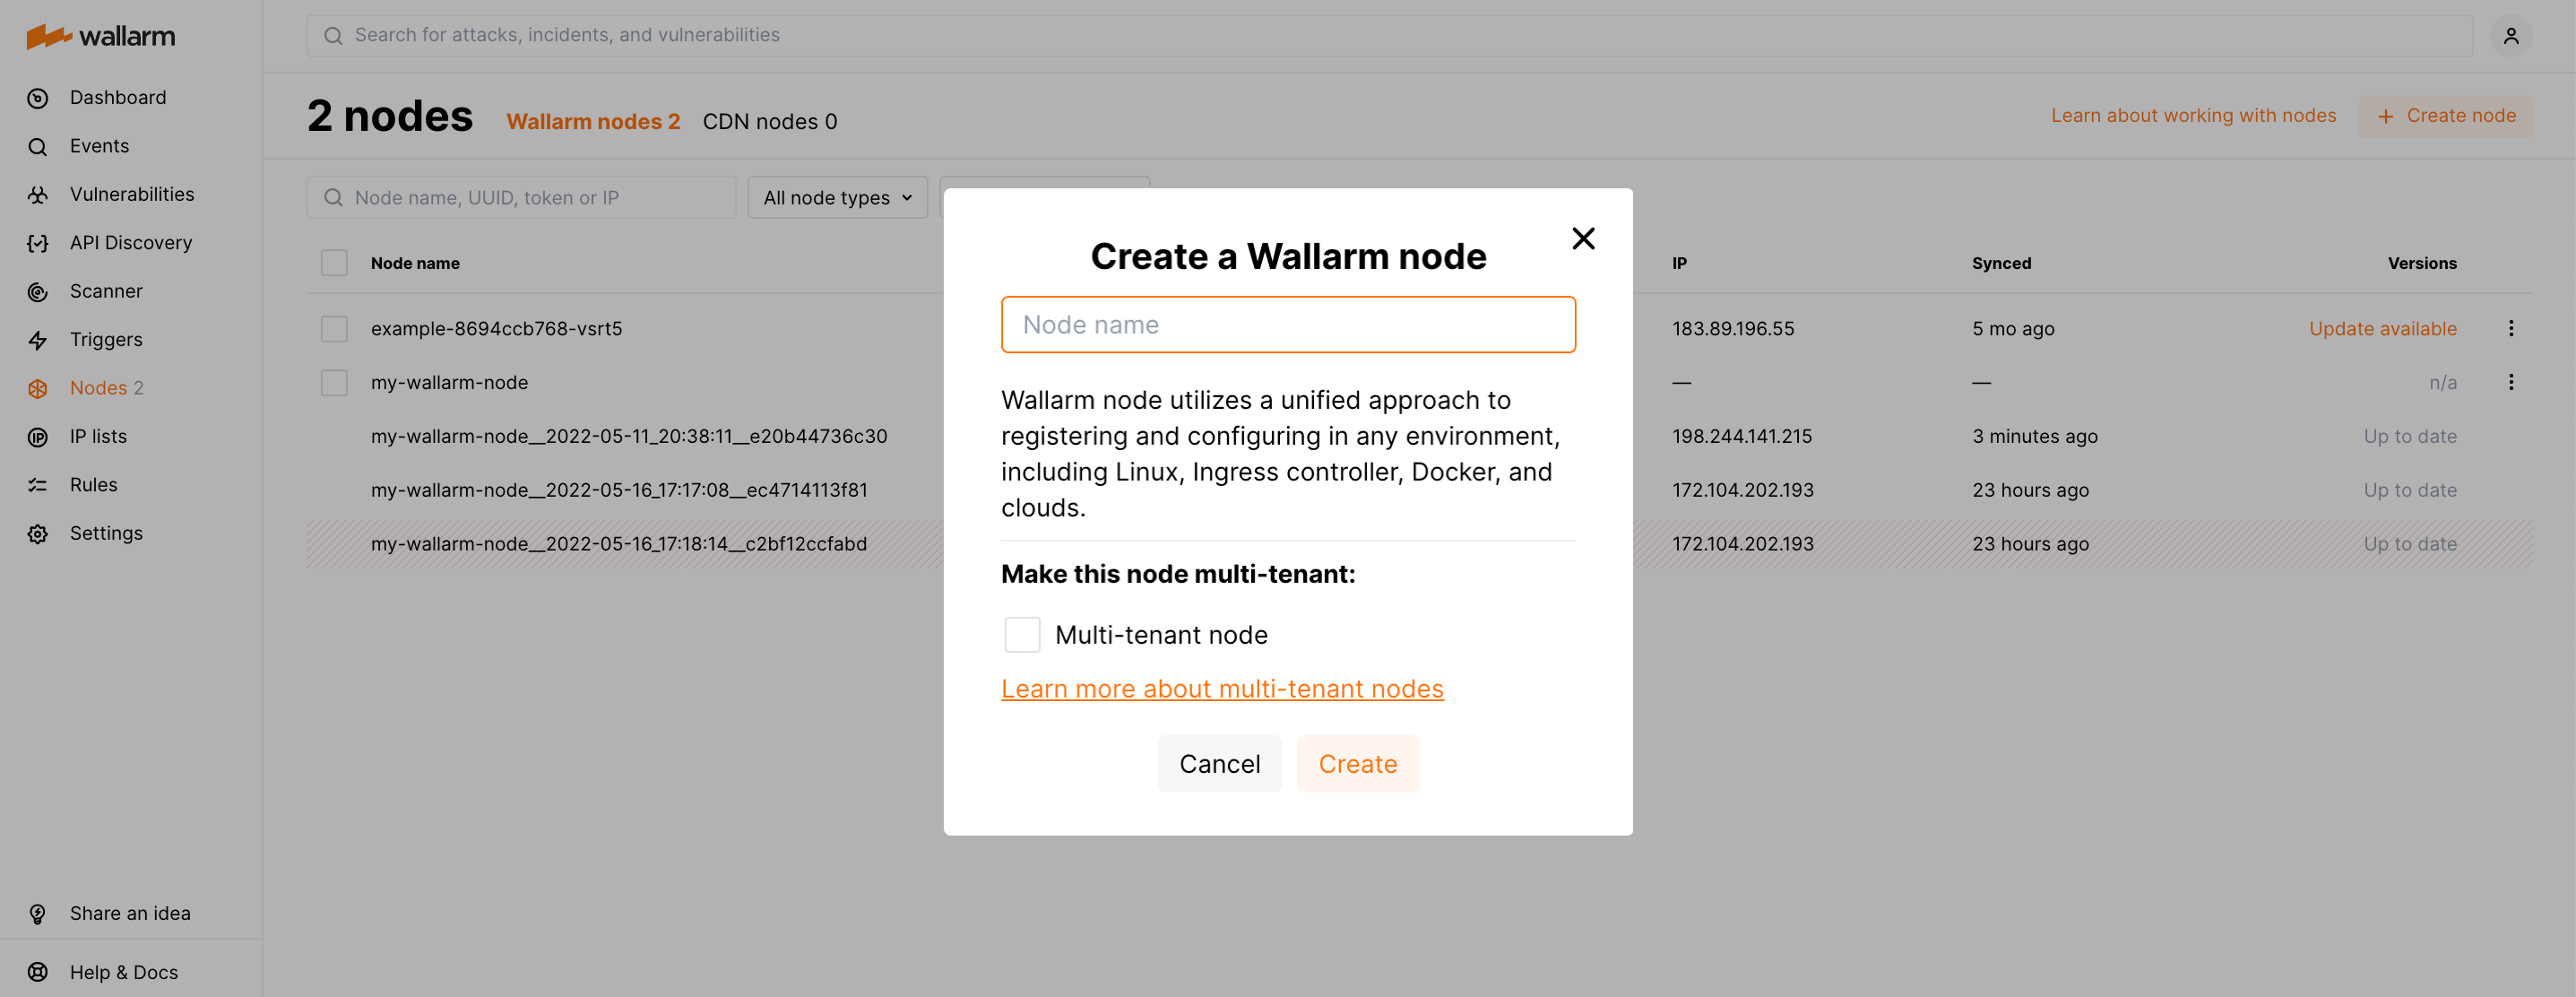
Creating node
To create a Wallarm node using the appropriate token:
- Open Wallarm Console → Settings → API tokens in the US Cloud or EU Cloud.
- Find or create an API token with the
Node deployment/Deploymentusage type. - Copy this token.
- Deploy a new node to the convenient environment using your API token. After the node registers, it will automatically appear in the Nodes section of Wallarm Console.
-
Open Wallarm Console → Nodes in the US Cloud or EU Cloud and create a node of the Wallarm node type.
-
Copy the generated token.
- Deploy a new node to the convenient environment using your node token.
The multi-tenant option
The multi-tenant option allows using Wallarm to protect several independent company infrastructures or isolated environments simultaneously. Read more
You can switch a node to the multi-tenant mode after installation from the existing node's menu.
You can switch a node to the multi-tenant mode either during its creation or from the existing node's menu.
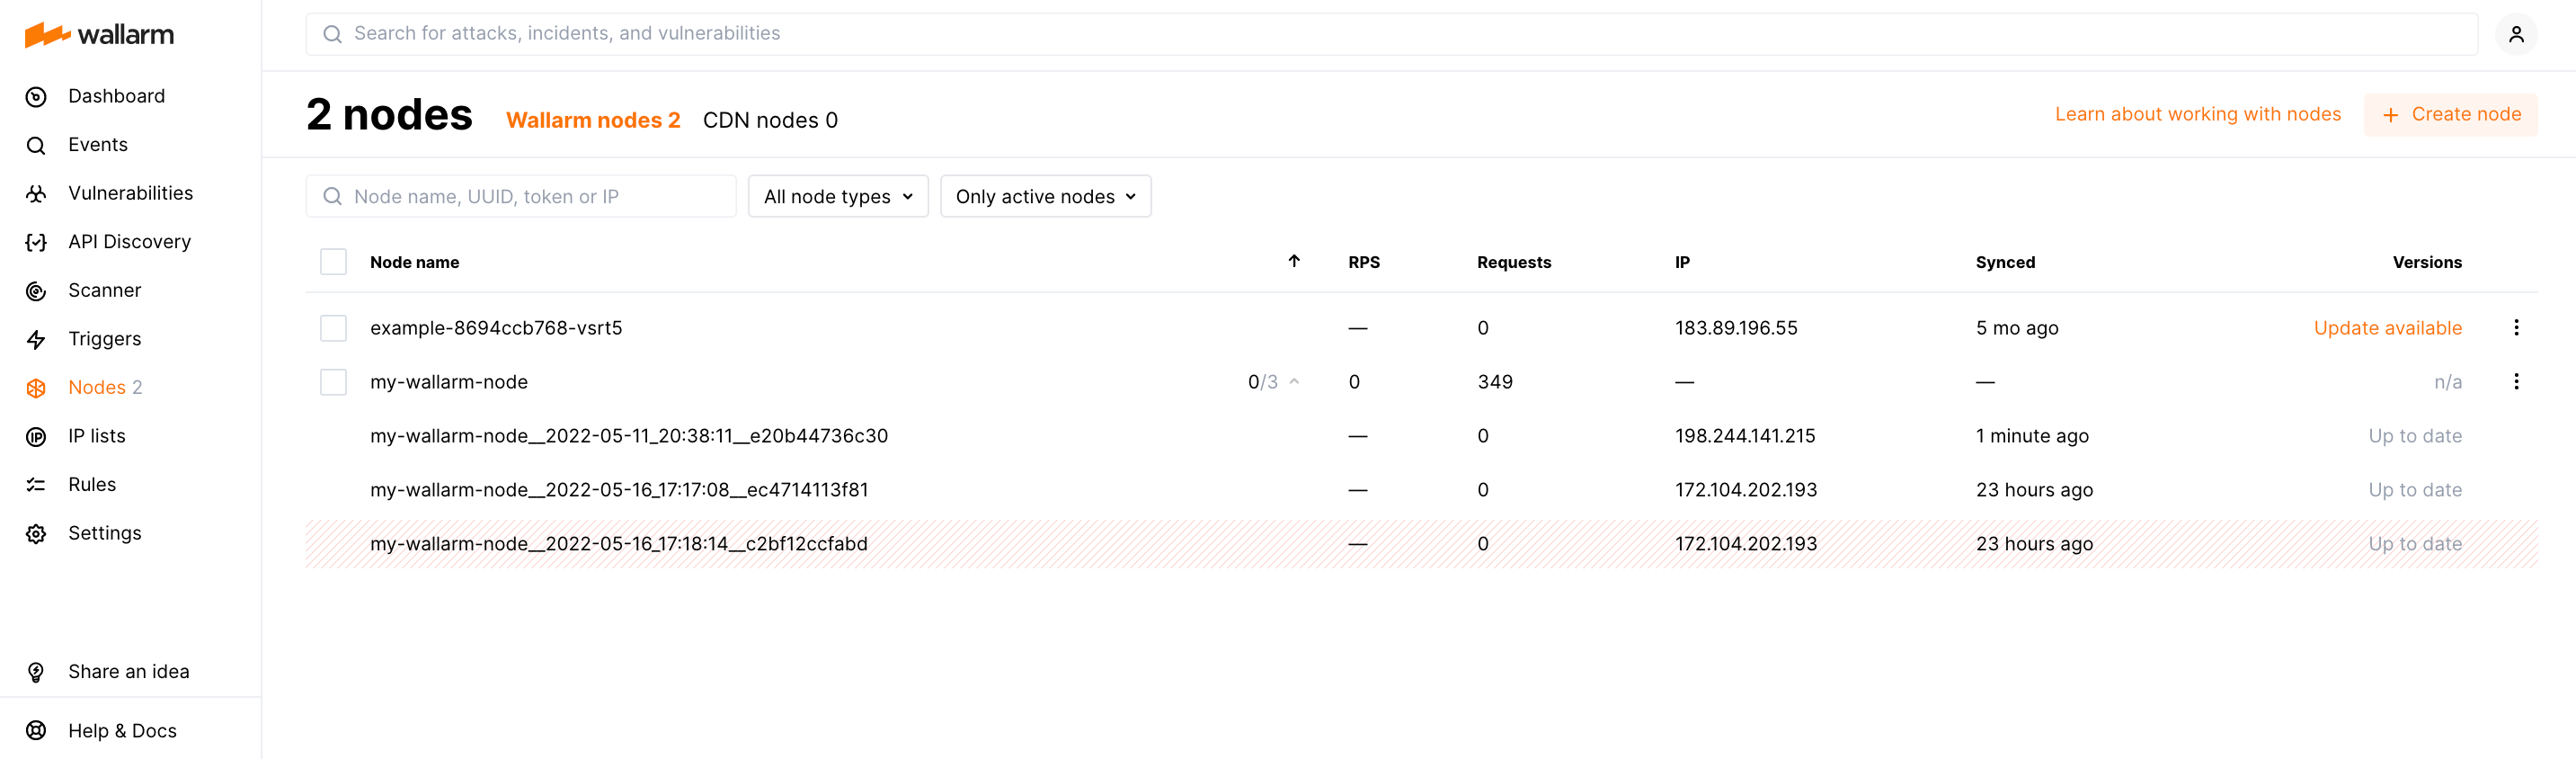
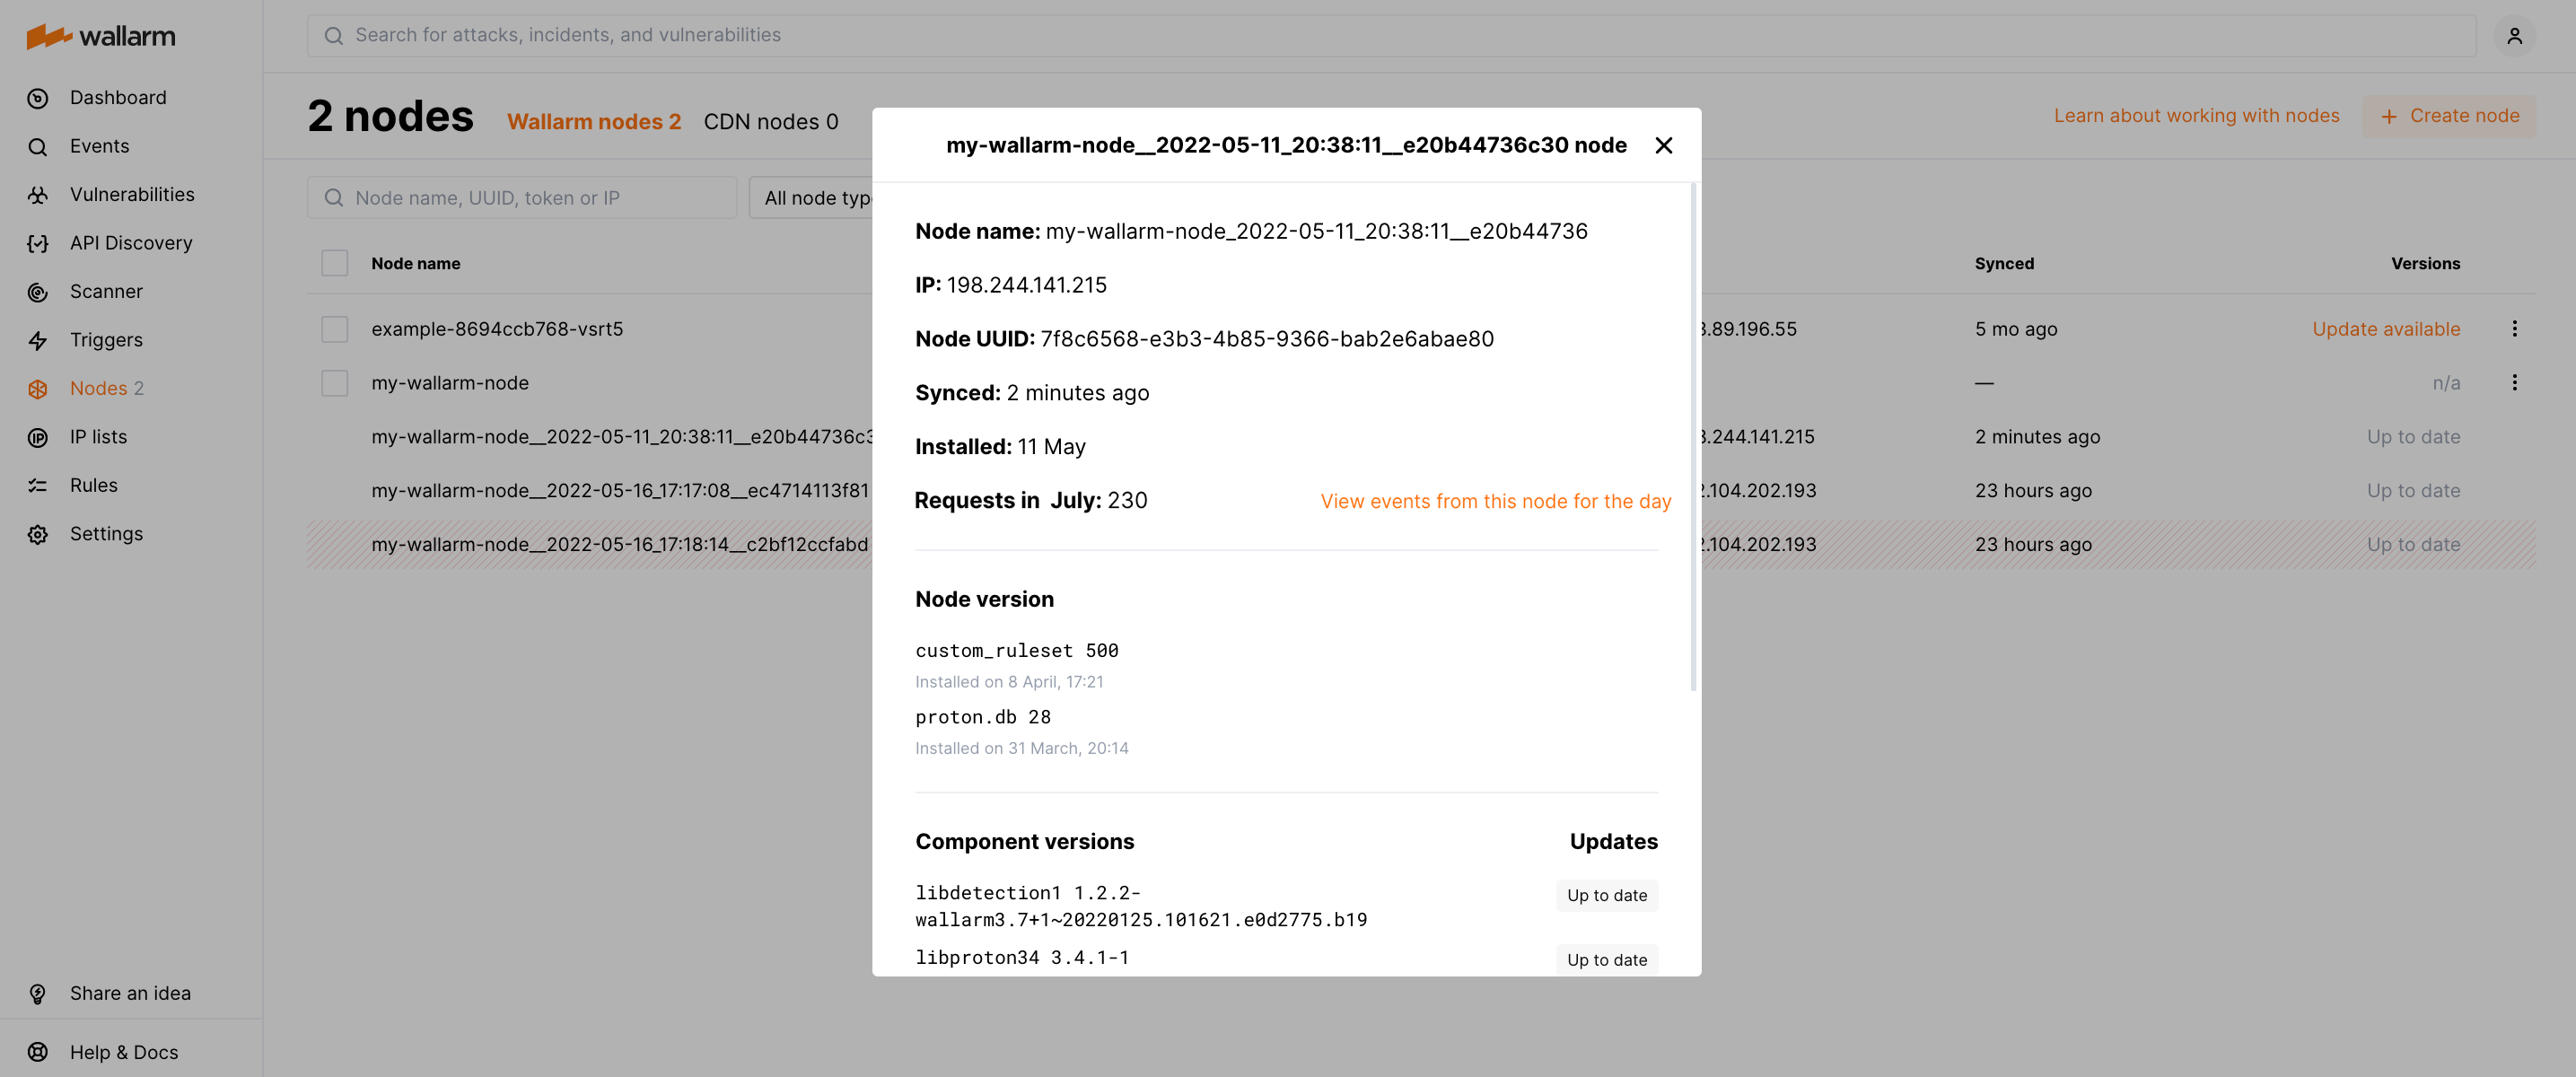
Viewing node details
Details of the installed filtering node are displayed in the table and card of each filtering node. To open the card, click the appropriate table record.
The following node properties and metrics are available:
-
Node name that was given to the node upon creation
-
The average number of requests per second (RPS)
-
Node IP address
-
Unique node identifier (UUID)
-
Token of the Wallarm node (visible only for users with the Administrator or Global Administrator role)
-
Time of the last synchronization of the filtering node and Wallarm Cloud
-
Date of the filtering node creation
-
Number of requests processed by the node in the current month, you can also View events from this node for the day (switches to the Attacks section)
-
Versions of used LOM and proton.db
-
Versions of installed Wallarm packages and NGINX (if any)
If one Wallarm node is installed for multiple instances (e.g. for the initial traffic processing and request postanalytics performed by different server instances), then the corresponding number of filtering nodes is grouped into one record in the table. Properties and metrics will be available for each instance.
In Wallarm, node instances are named as hostname_NodeUUID, where:
-
hostnameis the name of the working machine on which the node instance is launched -
NodeUUIDis the unique node identifier (UUID)
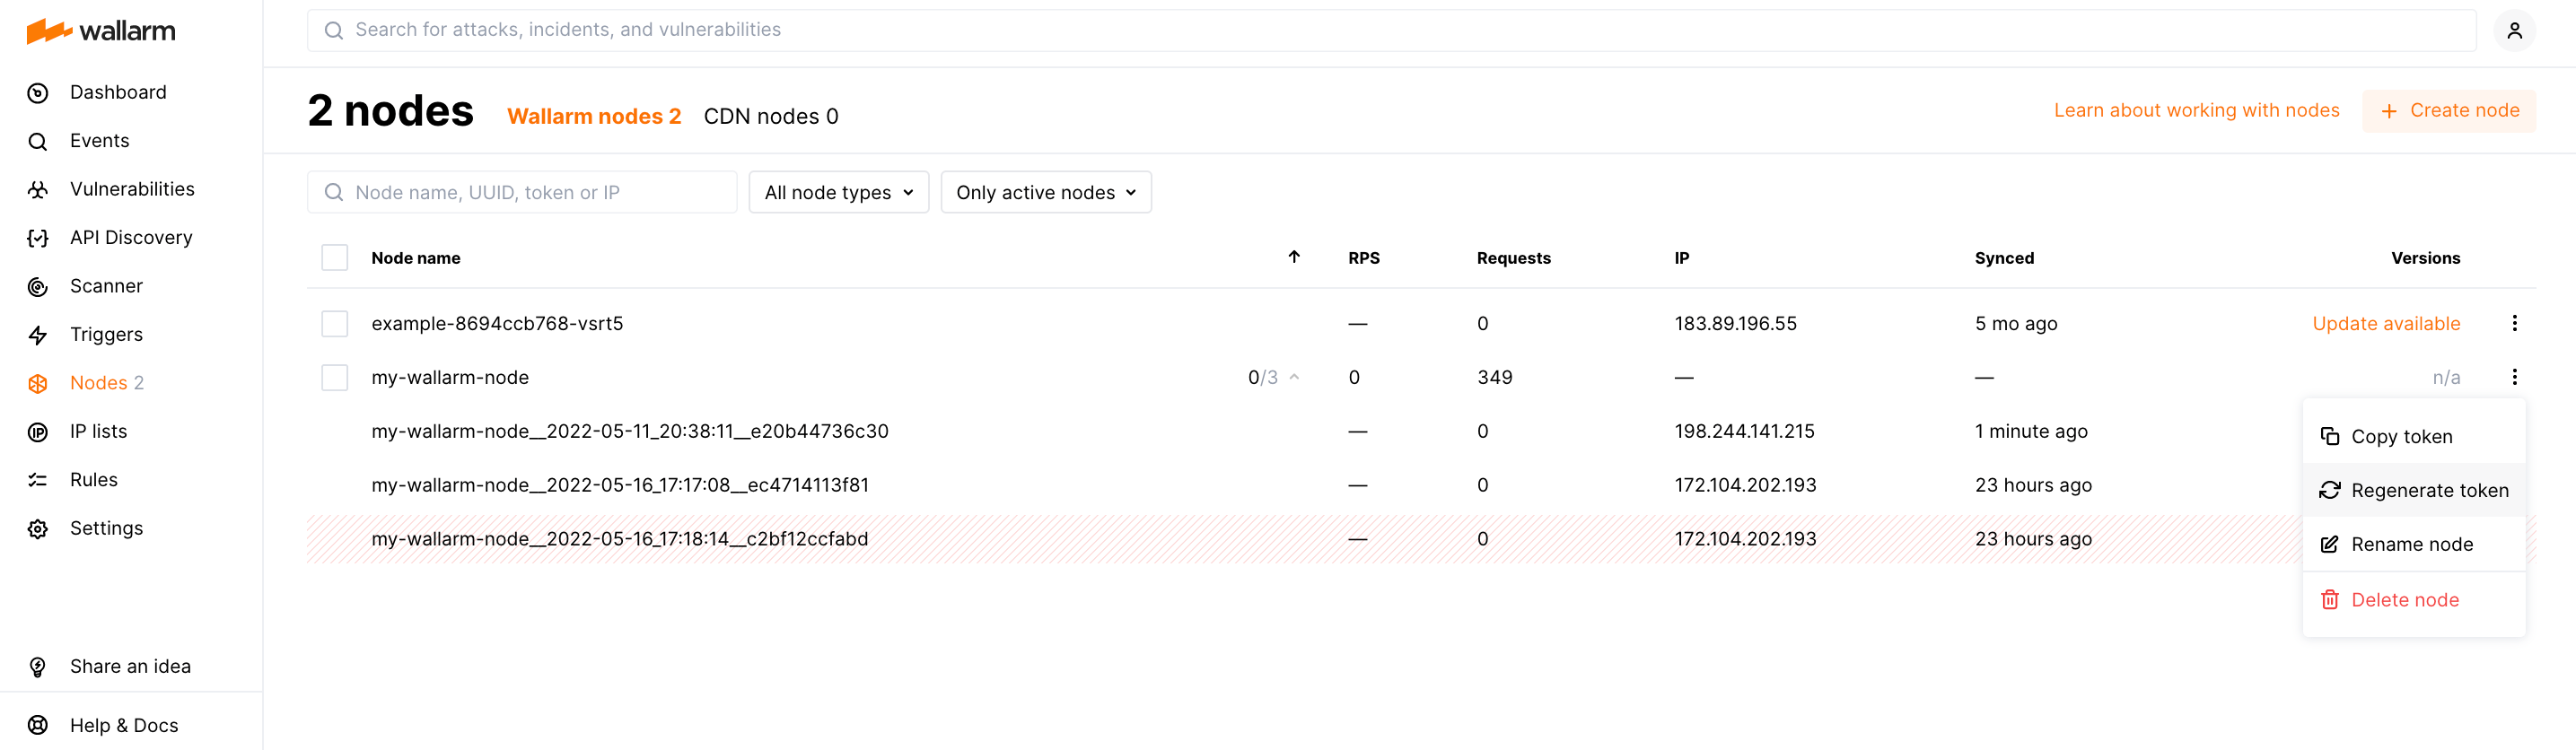
Regenerating node tokens
Token regeneration creates a new token for the node group.
-
Open Wallarm Console → Nodes.
-
Click Regenerate token in the node group menu or card.
-
If the node group contains node(s) already installed in your infrastructure, copy the new token value and specify it within the installed node settings.
Active and inactive nodes
Synchronization between node and Cloud can be interrupted for several reasons:
-
Node is down
-
No network connection between node and Cloud
-
Node's group is deleted from Cloud
-
Node's API token is disabled or deleted
-
Node's node token is regenerated and new one is not copied to the node
Nodes are considered active or inactive depending on their synchronization status:
-
If the node does not sync with the Cloud for around 2 minutes, it is marked as inactive (red shaded background).
-
If the node remains inactive for 24 consecutive hours, Wallarm automatically removes it from the list. This applies to nodes 4.10 and newer.
-
If later the node starts and syncs again, it re-appears in the list. It will not happen if the node was installed with node token (of the group) and the group was deleted.
-
If the node becomes inactive and a new node is deployed using the same IP address, there would not be any problem with synchronization as Nodes synchronize with the Wallarm Cloud using UUID and secret and not the IP address. Multiple nodes with the same IP can be active at the same time.
Deleting node groups and nodes
When the node group is deleted, registration of all nodes of the group in Wallarm Cloud is cancelled and the nodes cannot synchronize with the Cloud anymore. However, the nodes themselves continue to work in their environment and protect resources with the configuration obtained from the Cloud during last sync.
To delete the node group:
-
Open Wallarm Console → Nodes.
-
From the node group menu, select Delete.
-
Confirm deletion.
Node group re-appearance
For nodes installed with API token, if later the node re-starts and syncs again, the group re-appears.
To delete the node itself, go to its environment, stop the node and delete all its files. In Wallarm Console, it will be marked inactive and automatically removed from the list in 24 hours.
API and node tokens for node creation
The Wallarm filtering node interacts with the Wallarm Cloud. To provide the node with access to Wallarm Cloud API, you need to generate a token on the Cloud side and use it on the machine with the node. Use API tokens (recommended) or node tokens for this purpose:
-
API tokens with the
Node deployment/Deploymentusage type when:- The number of node groups used to logically organize nodes in UI is not known in advance (node groups will be constantly added/removed - with API tokens you will be able to easily manage these groups with the
WALLARM_LABELSvariable setting thegrouplabel value). -
You need to control the lifecycle of the token (you can specify the expiration date or disable API tokens which makes them more secure).
API tokens are not supported by some deployment options
API tokens currently cannot be used for AWS deployments based on Terraform module. Use node tokens instead.
- The number of node groups used to logically organize nodes in UI is not known in advance (node groups will be constantly added/removed - with API tokens you will be able to easily manage these groups with the
-
Node tokens when you know in advance what node groups will be present. Use Nodes → Create node to create and name the node group. During node deployment, use the group's token for every node you want to include in the group.
Autoscaling support
Both token types support the node autoscaling feature available in some clouds/installation variants.