Postanalytics modülünün yükseltilmesi
Bu talimatlar, ayrı bir sunucuya kurulu postanalytics modülünün en son 6.x sürümüne yükseltilmesi adımlarını açıklar. Wallarm NGINX modüllerini yükseltmeden önce postanalytics modülü yükseltilmelidir.
All-in-one yükleyici ile yükseltme
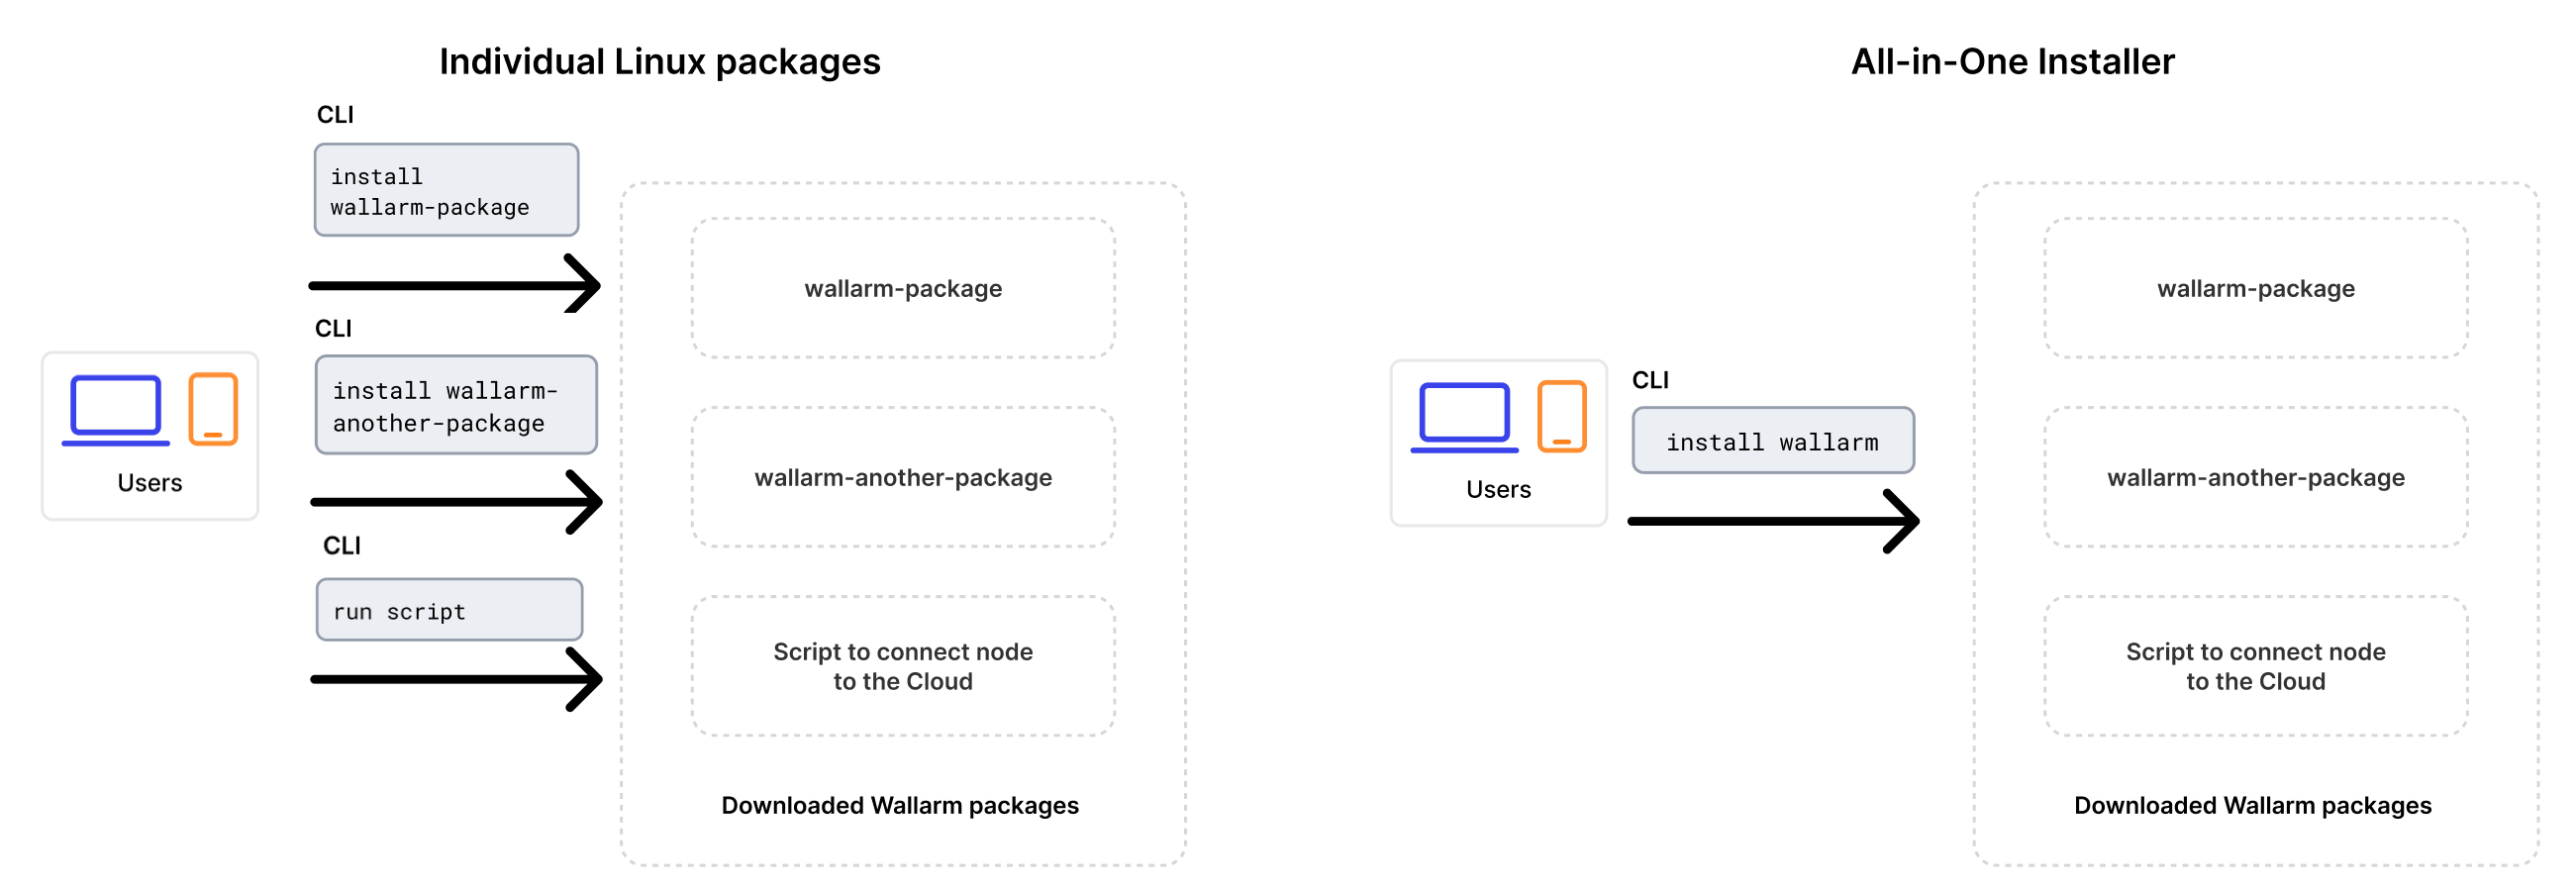
4.10 sürümünden itibaren, tekil Linux paketleri kullanımdan kaldırıldığından yükseltme işlemi Wallarm'ın all-in-one yükleyicisi kullanılarak gerçekleştirilir. Bu yöntem, önceki yaklaşıma kıyasla yükseltme sürecini ve sürekli kurulum bakımını basitleştirir.
Yükleyici aşağıdaki işlemleri otomatik olarak gerçekleştirir:
- İşletim sisteminizi ve NGINX sürümünü kontrol eder.
- Algılanan OS ve NGINX sürümü için Wallarm depolarını ekler.
- Bu depolardan Wallarm paketlerini kurar.
- Kurulan Wallarm modülünü NGINX'inize bağlar.
- Sağlanan token kullanılarak filtreleme düğümünü Wallarm Cloud'a bağlar.
Kullanım ömrü sona ermiş modülü (3.6 veya daha düşük) yükseltmek için lütfen farklı talimatları kullanın.
Gereksinimler
-
Access to the account with the Administrator role in Wallarm Console for the US Cloud or EU Cloud.
-
Access to
https://meganode.wallarm.comto download all-in-one Wallarm installer. Ensure the access is not blocked by a firewall. -
Access to
https://us1.api.wallarm.comfor working with US Wallarm Cloud or tohttps://api.wallarm.comfor working with EU Wallarm Cloud. If access can be configured only via the proxy server, then use the instructions. -
Executing all commands as a superuser (e.g.
root). -
Access to the IP addresses and their corresponding hostnames (if any) listed below. This is needed for downloading updates to attack detection rules and API specifications, as well as retrieving precise IPs for your allowlisted, denylisted, or graylisted countries, regions, or data centers.
Adım 1: Temiz makine hazırlayın
When upgrading modules with all-in-one installer, you cannot upgrade an old package installation - instead you need to use a clean machine. Thus, as step 1, prepare a machine with one of the supported OS:
-
Debian 10, 11, 12.x, 13.x
-
Ubuntu LTS 18.04, 20.04, 22.04, 24.04
-
Ubuntu non-LTS 24.10, 25.04, 25.10
-
CentOS 7, 8 Stream, 9 Stream, 10 Stream
-
Alma/Rocky Linux 9
-
AlmaLinux 10
-
RHEL 8.x
-
RHEL 9.x
-
RHEL 10.x
-
Oracle Linux 8.x
-
Oracle Linux 9.x
-
Oracle Linux 10.x
-
Redox
-
SuSe Linux
-
Others (the list is constantly widening, contact Wallarm support team to check if your OS is in the list)
Using new clean machine will lead to that at some moment you will have both old and new node, which is good: you can test the new one working properly without stopping the old one.
Adım 2: Wallarm token'ını hazırlayın
To install node, you will need a Wallarm token of the appropriate type. To prepare a token:
Adım 3: Wallarm all-in-one yükleyicisini indirin
Wallarm suggests all-in-one installations for the following processors:
-
x86_64
-
ARM64
To download all-in-one Wallarm installation script, execute the command:
Adım 4: Postanalytics'i kurmak için Wallarm all-in-one yükleyicisini çalıştırın
To install postanalytics separately with all-in-one installer, use:
# If using the x86_64 version:
sudo env WALLARM_LABELS='group=<GROUP>' sh wallarm-6.10.1.x86_64-glibc.sh postanalytics

# If using the ARM64 version:
sudo env WALLARM_LABELS='group=<GROUP>' sh wallarm-6.10.1.aarch64-glibc.sh postanalytics
The WALLARM_LABELS variable sets group into which the node will be added (used for logical grouping of nodes in the Wallarm Console UI).
Adım 5: Ayrı bir sunucudaki NGINX‑Wallarm modülünü yükseltin
Postanalytics modülü ayrı sunucuya kurulduktan sonra, farklı bir sunucuda çalışan ilgili NGINX‑Wallarm modülünü yükseltin.
Adım 6: NGINX‑Wallarm modülünü postanalytics modülüne yeniden bağlayın
On the machine with the NGINX-Wallarm module, in the NGINX configuration file (typically located at /etc/nginx/nginx.conf), specify the postanalytics module server address:
http {
    # omitted
    upstream wallarm_wstore {
        server <ip1>:3313 max_fails=0 fail_timeout=0 max_conns=1;
        server <ip2>:3313 max_fails=0 fail_timeout=0 max_conns=1;

        keepalive 2;
    }

    wallarm_wstore_upstream wallarm_wstore;

    # omitted
}
-
max_connsvalue must be specified for each of the upstream wstore servers to prevent the creation of excessive connections. -
keepalivevalue must not be lower than the number of the wstore servers. -
The
# wallarm_wstore_upstream wallarm_wstore;string is commented by default - please delete#.
Once the configuration file changed, restart NGINX/NGINX Plus on the NGINX-Wallarm module server:
Adım 7: NGINX‑Wallarm ve ayrı postanalytics modüllerinin etkileşimini kontrol edin
To check the NGINX‑Wallarm and separate postanalytics modules interaction, you can send the request with test attack to the address of the protected application:
If the NGINX‑Wallarm and separate postanalytics modules are configured properly, the attack will be uploaded to the Wallarm Cloud and displayed in the Attacks section of Wallarm Console:
If the attack was not uploaded to the Cloud, please check that there are no errors in the services operation:
-
Analyze the postanalytics module logs
If there is the record like
SystemError binary: failed to bind: Cannot assign requested address, make sure that the server accepts connection on specified address and port. -
On the server with the NGINX‑Wallarm module, analyze the NGINX logs:
If there is the record like
[error] wallarm: <address> connect() failed, make sure that the address of separate postanalytics module is specified correctly in the NGINX‑Wallarm module configuration files and separate postanalytics server accepts connection on specified address and port. -
On the server with the NGINX‑Wallarm module, get the statistics on processed requests using the command below and make sure that the value of
tnt_errorsis 0Description of all parameters returned by the statistics service →
Adım 8: Eski postanalytics modülünü kaldırın
-
Delete old postanalytics module in Wallarm Console → Nodes by selecting your postanalytics module node and clicking Delete.
-
Confirm the action.
When the postanalytics module node is deleted from Cloud, it will stop participation in filtration of requests to your applications. Deleting cannot be undone. The postanalytics module node will be deleted from the list of nodes permanently.
-
Delete machine with the old postanalytics module or just clean it from Wallarm postanalytics module components:

