AWS AMI ile NGINX Düğümünün Dağıtımı
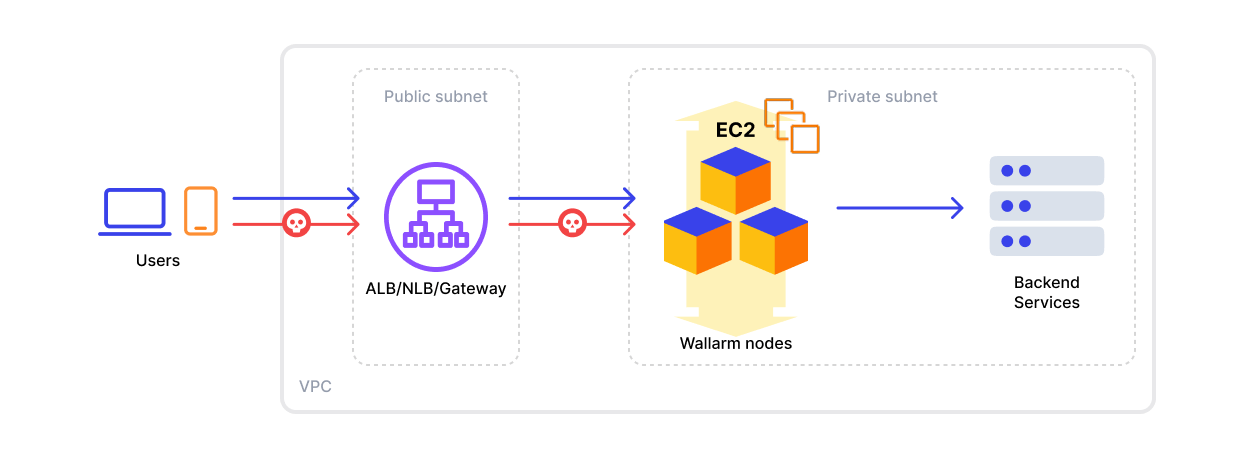
Bu makale, Wallarm NGINX düğümünün AWS üzerinde inline olarak resmi Amazon Machine Image (AMI) kullanılarak dağıtılması için talimatlar sağlar.
İmaj, Debian ve Debian'ın sağladığı NGINX sürümü temel alınarak hazırlanmıştır. Şu anda en güncel imaj Debian 12 kullanır ve NGINX'in kararlı 1.22.1 sürümünü içerir.
AWS üzerinde AMI'den Wallarm düğümünün dağıtılması genellikle yaklaşık 10 dakika sürer.
Güvenlik notu
Bu çözüm, AWS güvenlik en iyi uygulamalarını takip edecek şekilde tasarlanmıştır. Dağıtım için AWS root hesabını kullanmaktan kaçınmanızı öneririz. Bunun yerine, yalnızca gerekli izinlere sahip IAM kullanıcılarını veya rolleri kullanın.
Dağıtım süreci, Wallarm bileşenlerini sağlamak ve işletmek için gereken asgari erişimi veren asgari ayrıcalık ilkesini esas alır.
Bu dağıtım için AWS altyapı maliyetlerini tahmin etmeye yönelik rehberlik için AWS'de Wallarm'ın Dağıtımı için Maliyet Rehberi sayfasına bakın.
Kullanım senaryoları
Among all supported Wallarm deployment options, AMI is recommended for Wallarm deployment in these use cases:
-
Your existing infrastructure resides on AWS.
-
You aim to deploy a security solution as a separate cloud instance, rather than installing it directly on frontend systems like NGINX.
Requirements
-
An AWS account
-
Understanding of AWS EC2, Security Groups
-
Any AWS region of your choice, there are no specific restrictions on the region for the Wallarm node deployment
Wallarm supports both single availability zone (AZ) and multi availability zone deployments. In multi-AZ setups, Wallarm Nodes can be launched in separate availability zones and placed behind a Load Balancer for high availability.
-
Access to the account with the Administrator role in Wallarm Console for the US Cloud or EU Cloud
-
Executing all commands on a Wallarm instance as a superuser (e.g.
root) -
No system user named
wallarmexists
Installation
1. Launch a Wallarm Node instance
Launch an EC2 instance using the Wallarm NGINX Node AMI.
Recommended configuration:
-
Latest available AMI version
-
Any preferred AWS region
-
EC2 instance type:
t3.medium(for testing) orm4.xlarge(for production), see cost guidance for details -
SSH key pair for accessing the instance
-
Appropriate VPC and subnet based on your infrastructure
-
Security Group inbound access to ports 22, 80, and 443
-
Security Group outbound access to:
https://meganode.wallarm.comto download the Wallarm installerhttps://us1.api.wallarm.comfor working with US Wallarm Cloud or tohttps://api.wallarm.comfor working with EU Wallarm Cloud. If access can be configured only via the proxy server, then use the instructions-
IP addresses below for downloading updates to attack detection rules and API specifications, as well as retrieving precise IPs for your allowlisted, denylisted, or graylisted countries, regions, or data centers
2. Connect to the Wallarm Node instance via SSH
Use the selected SSH key to connect to your running EC2 instance:
You need to use the admin username to connect to the instance.
3. Generate a token to connect an instance to the Wallarm Cloud
The Wallarm node needs to connect to the Wallarm Cloud using a Wallarm token of the appropriate type. An API token allows you to create a node group in the Wallarm Console UI, helping you organize your node instances more effectively.
Generate a token as follows:
4. Instance'ı Wallarm Cloud'a bağlayın
Instance'ın düğümü, cloud-init.py betiği aracılığıyla Wallarm Cloud'a bağlanır. Bu betik, sağlanan bir token kullanarak düğümü Wallarm Cloud'a kaydeder, genel olarak Monitoring [mode]'a ayarlar ve --proxy-pass bayrağına göre düğümün meşru trafiği iletmesini yapılandırır.
Bulut imajından oluşturulan instance üzerinde cloud-init.py betiğini şu şekilde çalıştırın:
-
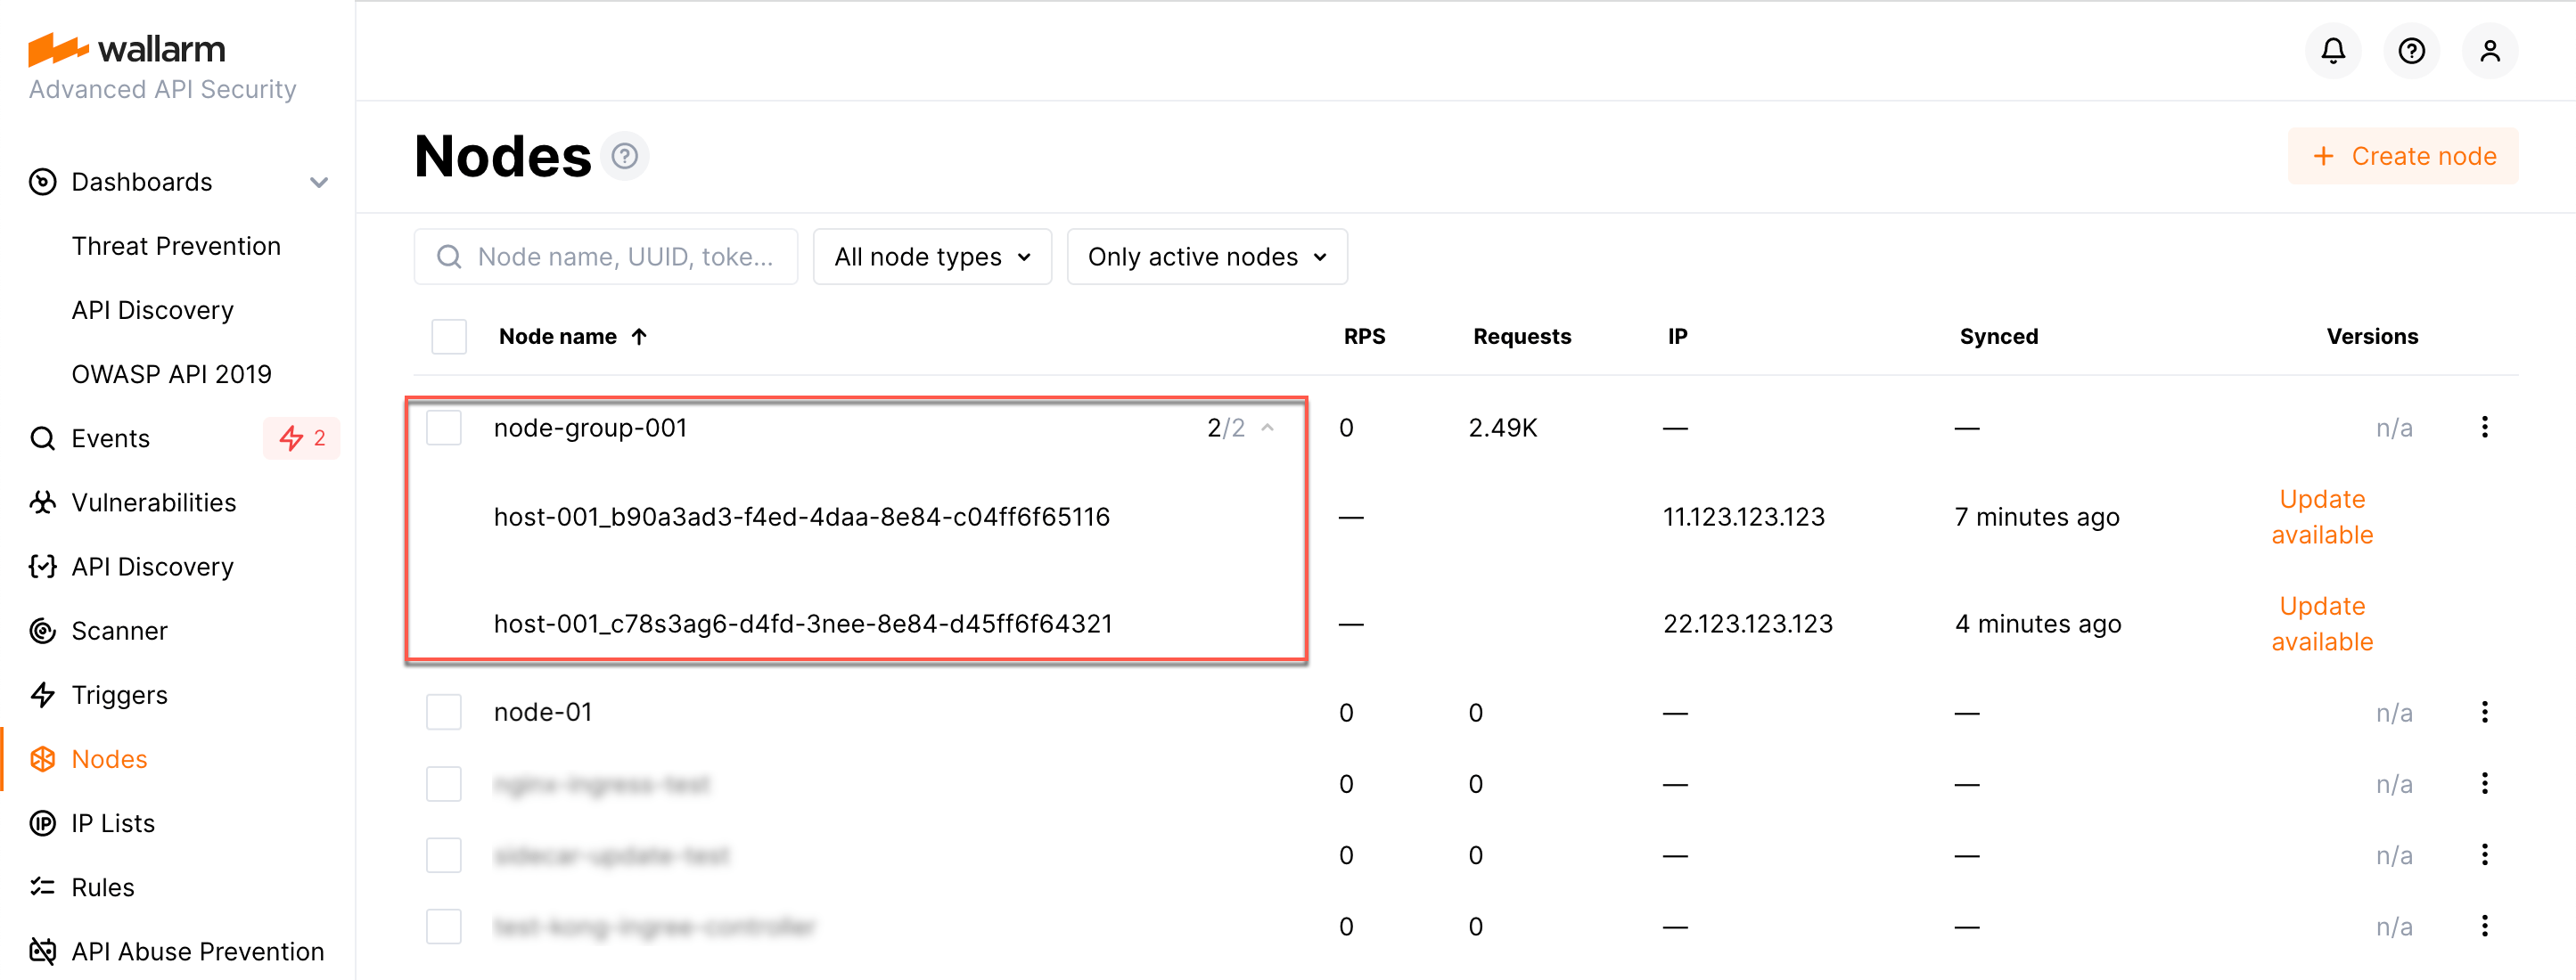
WALLARM_LABELS='group=<GROUP>'bir düğüm grup adını ayarlar (mevcutsa kullanılır, mevcut değilse oluşturulur). Yalnızca bir API token'ı kullanıyorsanız uygulanır. -
<TOKEN>kopyalanan token değeridir. -
<PROXY_ADDRESS>, Wallarm düğümünün meşru trafiği proxy'lediği adrestir. Mimarinize bağlı olarak bir uygulama instance'ının IP'si, bir yük dengeleyici veya bir DNS adı olabilir; belirtilmişhttpveyahttpsprotokolü ile, örn.http://example.comveyahttps://192.0.2.1. Proxy adres biçimi hakkında daha fazla bilgi edinin.
5. Trafiğin Wallarm instance'ına gönderilmesini yapılandırın
Update targets of your load balancer to send traffic to the Wallarm instance. For details, please refer to the documentation on your load balancer.
6. Wallarm'ın çalışmasını test edin
-
The request with test Path Traversal attack to an address of either the load balancer or the machine with the Wallarm node:
-
Open Wallarm Console → Attacks section in the US Cloud or EU Cloud and make sure the attack is displayed in the list.

Since Wallarm operates in the monitoring mode, the Wallarm node does not block the attack but registers it.
-
Optionally, test other aspects of the node functioning.
Düğüm çalışmasını günlükler ve metriklerle doğrulama
Düğümün trafiği algıladığını doğrulamak için metrikleri ve günlükleri aşağıdaki gibi kontrol edebilirsiniz:
-
Düğümün sunduğu Prometheus metriklerini kontrol edin:
-
Gelen istekleri ve hataları incelemek için NGINX günlüklerini gözden geçirin:
- Erişim günlükleri:
/var/log/nginx/access.log - Hata günlükleri:
/var/log/nginx/error.log
- Erişim günlükleri:
-
Wallarm Cloud'a gönderilen veriler, tespit edilen saldırılar ve daha fazlası gibi ayrıntıları içeren Wallarm'a özgü günlükleri gözden geçirin. Bu günlükler
/opt/wallarm/var/log/wallarmdizininde bulunur.
Dağıtılan çözüme ince ayar yapın
The deployment is now complete. The filtering node may require some additional configuration after deployment.
Wallarm settings are defined using the NGINX directives or the Wallarm Console UI. Directives should be set in the following files on the Wallarm instance:
-
/etc/nginx/sites-enabled/defaultdefines the configuration of NGINX -
/etc/nginx/conf.d/wallarm.confdefines the global configuration of Wallarm filtering node -
/etc/nginx/conf.d/wallarm-status.confdefines the filtering node monitoring service configuration -
/opt/wallarm/wstore/wstore.yamlwith the postanalytics service (wstore) settings
You can modify the listed files or create your own configuration files to define the operation of NGINX and Wallarm. It is recommended to create a separate configuration file with the server block for each group of the domains that should be processed in the same way (e.g. example.com.conf). To see detailed information about working with NGINX configuration files, proceed to the official NGINX documentation.
Creating a configuration file
When creating a custom configuration file, make sure that NGINX listens to the incoming connections on the free port.
Below there are a few of the typical settings that you can apply if needed:
To apply the settings, restart NGINX on the Wallarm instance:
Each configuration file change requires NGINX to be restarted to apply it.


