Wallarm Docker İmajının GCP'ye Dağıtımı
Bu hızlı kılavuz, NGINX tabanlı Wallarm node'unun Docker imajını Google Compute Engine (GCE) bileşenini kullanarak Google Cloud Platform'a dağıtma adımlarını sunar.
Talimatların sınırlamaları
Bu talimatlar, yük dengeleme ve node otomatik ölçeklendirme yapılandırmasını kapsamaz. Bu bileşenleri kendiniz kuracaksanız, ilgili GCP dokümantasyonunu okumanızı öneririz.
Kullanım senaryoları
Among all supported Wallarm deployment options, Wallarm deployment on Google Compute Engine (GCE) using the Docker image is recommended in these use cases:
-
If your applications leverage a microservices architecture, and are already containerized and operational on GCE.
-
If you require fine-grained control over each container, the Docker image excels. It affords a greater level of resource isolation than typically possible with traditional VM-based deployments.
Gereksinimler
-
Aktif GCP hesabı
-
Compute Engine API etkin
-
US Cloud veya EU Cloud için Wallarm Console'da Administrator rolüne sahip hesaba erişim
-
Saldırı tespit kurallarına ve API spesifikasyonlarına güncellemeleri indirmek, ayrıca ülkeleriniz, bölgeleriniz veya veri merkezleriniz için izinli listeye (allowlist), yasaklı listeye (denylist) veya gri listeye (graylist) alınmış IP'lerin tam listesini almak amacıyla aşağıdaki IP adreslerine erişim
Wallarm node Docker konteyneri yapılandırma seçenekleri
The filtering node configuration parameters should be passed to the deployed Docker container in one of the following ways:
-
In the environment variables. This option allows for the configuration of only basic filtering node parameters. Most directives cannot be configured through environment variables.
-
In the mounted configuration file. This option allows full filtering node configuration via any directives. With this configuration method, environment variables with the filtering node and Wallarm Cloud connection settings are also passed to the container.
Ortam değişkenleri aracılığıyla yapılandırılmış Wallarm node Docker konteynerinin dağıtımı
Yalnızca ortam değişkenleriyle yapılandırılmış konteynerleştirilmiş Wallarm filtreleme node'unu dağıtmak için GCP Console veya gcloud CLI kullanılabilir. Bu talimatta gcloud CLI kullanılmıştır.
-
Get Wallarm token of the appropriate type:
-
Örneği Wallarm Cloud'a bağlamak için kullanılacak Wallarm node token'ını yerel ortam değişkeni olarak ayarlayın:
-
Çalışan Docker konteyneriyle örneği
gcloud compute instances create-with-containerkomutuyla oluşturun:gcloud compute instances create-with-container <INSTANCE_NAME> \ --zone <DEPLOYMENT_ZONE> \ --tags http-server \ --container-env WALLARM_API_TOKEN=${WALLARM_API_TOKEN} \ --container-env NGINX_BACKEND=<HOST_TO_PROTECT_WITH_WALLARM> \ --container-env WALLARM_API_HOST=us1.api.wallarm.com \ --container-image registry-1.docker.io/wallarm/node:6.5.1<INSTANCE_NAME>: örnek adı, örneğin:wallarm-node.--zone: örneğe ev sahipliği yapacak bölge.--tags: örnek etiketleri. Etiketler, örneğin diğer kaynaklara erişilebilirliğini yapılandırmak için kullanılır. Bu durumda, 80 numaralı portu açanhttp-serveretiketi örneğe atanır.--container-image: filtreleme node'unun Docker imajına bağlantı.-
--container-env: filtreleme node'u yapılandırması için ortam değişkenleri (kullanılabilir değişkenler aşağıdaki tabloda listelenmiştir).WALLARM_API_TOKENdeğerinin açıkça geçirilmesi tavsiye edilmez.Environment variable Description Required WALLARM_API_TOKENWallarm node or API token. Yes WALLARM_LABELSAvailable starting from node 4.6. Works only if
WALLARM_API_TOKENis set to API token with theDeployrole. Sets thegrouplabel for node instance grouping, for example:WALLARM_LABELS="group=<GROUP>"...will place node instance into the
<GROUP>instance group (existing, or, if does not exist, it will be created).Yes (for API tokens) NGINX_BACKENDDomain or IP address of the resource to protect with the Wallarm solution. Yes WALLARM_API_HOSTWallarm API server: us1.api.wallarm.comfor the US Cloudapi.wallarm.comfor the EU Cloud
api.wallarm.com.No WALLARM_MODENode mode: blockto block malicious requestssafe_blockingto block only those malicious requests originated from graylisted IP addressesmonitoringto analyze but not block requestsoffto disable traffic analyzing and processing
monitoring.
Detailed description of filtration modes →No WALLARM_APPLICATIONUnique identifier of the protected application to be used in the Wallarm Cloud. The value can be a positive integer except for 0.
Default value (if the variable is not passed to the container) is-1which indicates the default application displayed in Wallarm Console → Settings → Application.
More details on setting up applications →No SLAB_ALLOC_ARENA(TARANTOOL_MEMORY_GBNGINX Node 5.x and earlier)Amount of memory allocated to wstore. The value can be a float (a dot .is a decimal separator). By default: 1.0 (1 gygabyte).
Note that when passing this variable in Dockerruncommand with the-e, the variable is not recorded in any configuration file within the container, but it is still used whenwstorestarts.No NGINX_PORTSets a port that NGINX will use inside the Docker container.
Starting from the Docker image4.0.2-1, thewallarm-statusservice automatically runs on the same port as NGINX.
Default value (if the variable is not passed to the container) is80.
Syntax isNGINX_PORT='443'.No WALLARM_STATUS_ALLOWCustom CIDRs that are allowed to access the /wallarm-statusendpoint from outside the Docker container. Example value:10.0.0.0/8. If you need to pass several values, use a comma,as a separator. To access the service externally, use the Docker container's IP, specifying the/wallarm-statusendpoint path.No DISABLE_IPV6The variable with any value except for an empty one deletes the listen [::]:80 default_server ipv6only=on;line from the NGINX configuration file which will stop NGINX from IPv6 connection processing.
If the variable is not specified explicitly or has an empty value"", NGINX processes both IPv6 and IPv4 connections.No WALLARM_APIFW_ENABLEThis setting toggles API Specification Enforcement on or off, available from release 4.10 onwards. Please note that activating this feature does not substitute for the required subscription and configuration through the Wallarm Console UI.
Its default value istrue, enabling the functionality.No WALLARM_APID_ONLY(5.3.7 and higher)In this mode, attacks detected in your traffic are blocked locally by the node (if enabled) but not exported to Wallarm Cloud. Meanwhile, API Discovery and some other features remain fully functional, detecting your API inventory and uploading it to the Cloud for visualization. This mode is for those who want to review their API inventory and identify sensitive data first, and plan controlled attack data export accordingly. However, disabling attack export is rare, as Wallarm securely processes attack data and provides sensitive attack data masking if needed. More details
By default:false.No APIFW_METRICS_ENABLED(6.4.1 and higher)Enables Prometheus metrics for the API Specification Enforcement module.
By default:false(disabled).No APIFW_METRICS_HOST(6.4.1 and higher)Defines the host and port on which the API Specification Enforcement exposes metrics.
By default::9010.No APIFW_METRICS_ENDPOINT_NAME(6.4.1 and higher)Defines the HTTP path of the API Specification Enforcement metrics endpoint
By default:metrics.No WALLARM_WSTORE__METRICS__LISTEN_ADDRESSDefines the host and port on which [Postanalytics and general system metrics][wstore-metrics] are exposed.
By default:http://localhost:9001/metrics.No WALLARM_WSTORE__SERVICE__PROTOCOL(6.6.0 and higher)Specifies the protocol family that wstore uses for incoming connections. Possible values: "tcp"- dual-stack mode (listens on both IPv4 and IPv6)"tcp4"- IPv4 only"tcp6"- IPv6 only
"tcp4".No WALLARM_WCLI__METRICS__LISTEN_ADDRESSDefines the host and port on which the [wcli Controller metrics][wcli-metrics] are exposed.
By default:http://localhost:9003/metrics.No WALLARM_WCLI__METRICS__ENDPOINTDefines the HTTP path for the [wcli Controller metrics][wcli-metrics] endpoint.
By default:metrics.No -
gcloud compute instances create-with-containerkomutunun tüm parametreleri GCP dokümantasyonunda açıklanmıştır.
-
GCP Console → Compute Engine → VM instances sayfasını açın ve örneğin listede görüntülendiğini doğrulayın.
Bağlanan dosya üzerinden yapılandırılmış Wallarm node Docker konteynerinin dağıtımı
Ortam değişkenleri ve bağlanan dosya üzerinden yapılandırılmış konteynerleştirilmiş Wallarm filtreleme node'unu dağıtmak için bir örnek oluşturmalı, filtreleme node'u yapılandırma dosyasını bu örneğin dosya sistemine yerleştirmeli ve Docker konteynerini bu örnekte çalıştırmalısınız. Bu adımlar GCP Console veya gcloud CLI aracılığıyla gerçekleştirilebilir. Bu talimatta gcloud CLI kullanılmıştır.
-
Get Wallarm token of the appropriate type:
-
gcloud compute instances createkomutunu kullanarak Compute Engine kayıt defterindeki herhangi bir işletim sistemi imajına dayalı örneği oluşturun:gcloud compute instances create <INSTANCE_NAME> \ --image <PUBLIC_IMAGE_NAME> \ --zone <DEPLOYMENT_ZONE> \ --tags http-server<INSTANCE_NAME>: örnek adı.--image: Compute Engine kayıt defterindeki işletim sistemi imajının adı. Oluşturulan örnek bu imaja dayanacaktır ve daha sonra Docker konteynerini çalıştırmak için kullanılacaktır. Bu parametre atlanırsa, örnek Debian 10 imajına dayanır.--zone: örneğe ev sahipliği yapacak bölge.--tags: örnek etiketleri. Etiketler, örneğin diğer kaynaklara erişilebilirliğini yapılandırmak için kullanılır. Bu durumda, 80 numaralı portu açanhttp-serveretiketi örneğe atanır.gcloud compute instances createkomutunun tüm parametreleri GCP dokümantasyonunda açıklanmıştır.
-
GCP Console → Compute Engine → VM instances sayfasını açın ve örneğin listede görüntülendiğini ve RUNNING durumunda olduğunu doğrulayın.
-
GCP talimatlarını izleyerek örneğe SSH üzerinden bağlanın.
-
Uygun işletim sistemi için talimatları izleyerek örneğe Docker paketlerini yükleyin.
-
Örneği Wallarm Cloud'a bağlamak için kullanılacak Wallarm node token'ını yerel ortam değişkeni olarak ayarlayın:
-
Örnekte, filtreleme node'u yapılandırmasını içeren
defaultdosyasıyla birlikte bir dizin oluşturun (örneğin dizin adıconfigsolabilir). Minimum ayarlarla dosya örneği:server { listen 80 default_server; listen [::]:80 default_server ipv6only=on; #listen 443 ssl; server_name localhost; #ssl_certificate cert.pem; #ssl_certificate_key cert.key; root /usr/share/nginx/html; index index.html index.htm; wallarm_mode monitoring; # wallarm_application 1; location / { proxy_pass http://example.com; include proxy_params; } }Yapılandırma dosyasında belirtilebilecek filtreleme node'u yönergeleri seti →
-
Ortam değişkenleri geçirilmiş ve yapılandırma dosyası bağlanmış şekilde
docker runkomutunu kullanarak Wallarm node Docker konteynerini çalıştırın:<INSTANCE_PATH_TO_CONFIG>: önceki adımda oluşturulan yapılandırma dosyasının yolu. Örneğin,configs.-
<DIRECTORY_FOR_MOUNTING>: yapılandırma dosyasının bağlanacağı konteyner dizini. Yapılandırma dosyaları NGINX tarafından kullanılan aşağıdaki konteyner dizinlerine bağlanabilir:/etc/nginx/conf.d— genel ayarlar/etc/nginx/http.d— sanal host ayarları/var/www/html— statik dosyalar
Filtreleme node'u yönergeleri
/etc/nginx/http.d/default.confdosyasında tanımlanmalıdır. -
-p: filtreleme node'unun dinlediği port. Değer, örnek portuyla aynı olmalıdır. -
-e: filtreleme node'u yapılandırması için ortam değişkenleri (kullanılabilir değişkenler aşağıdaki tabloda listelenmiştir).WALLARM_API_TOKENdeğerinin açıkça geçirilmesi tavsiye edilmez.Environment variable Description Required WALLARM_API_TOKENWallarm node or API token. Yes WALLARM_API_HOSTWallarm API server: us1.api.wallarm.comfor the US Cloudapi.wallarm.comfor the EU Cloud
api.wallarm.com.No WALLARM_LABELSAvailable starting from node 4.6. Works only if
WALLARM_API_TOKENis set to API token with theDeployrole. Sets thegrouplabel for node instance grouping, for example:WALLARM_LABELS="group=<GROUP>"...will place node instance into the
<GROUP>instance group (existing, or, if does not exist, it will be created).Yes (for API tokens) SLAB_ALLOC_ARENA(TARANTOOL_MEMORY_GBNGINX Node 5.x and earlier)Amount of memory allocated to wstore. The value can be a float (a dot .is a decimal separator). By default: 1.0 (1 gygabyte).No WALLARM_APID_ONLY(5.3.7 and higher)In this mode, attacks detected in your traffic are blocked locally by the node (if enabled) but not exported to Wallarm Cloud. Meanwhile, API Discovery and some other features remain fully functional, detecting your API inventory and uploading it to the Cloud for visualization. This mode is for those who want to review their API inventory and identify sensitive data first, and plan controlled attack data export accordingly. However, disabling attack export is rare, as Wallarm securely processes attack data and provides sensitive attack data masking if needed. More details
By default:false.No APIFW_METRICS_ENABLED(6.4.1 and higher)Enables Prometheus metrics for the API Specification Enforcement module.
By default:false(disabled).No APIFW_METRICS_HOST(6.4.1 and higher)Defines the host and port on which the API Specification Enforcement exposes metrics.
By default::9010.No APIFW_METRICS_ENDPOINT_NAME(6.4.1 and higher)Defines the HTTP path of the API Specification Enforcement metrics endpoint
By default:metrics.No WALLARM_WSTORE__METRICS__LISTEN_ADDRESSDefines the host and port on which [Postanalytics and general system metrics][wstore-metrics-mount] are exposed.
By default:http://localhost:9001/metrics.No WALLARM_WSTORE__SERVICE__PROTOCOL(6.6.0 and higher)Specifies the protocol family that wstore uses for incoming connections. Possible values: "tcp"- dual-stack mode (listens on both IPv4 and IPv6)"tcp4"- IPv4 only"tcp6"- IPv6 only
"tcp4".No WALLARM_WCLI__METRICS__LISTEN_ADDRESSDefines the host and port on which the [wcli Controller metrics][wcli-metrics] are exposed.
By default:http://localhost:9003/metrics.No WALLARM_WCLI__METRICS__ENDPOINTDefines the HTTP path for the [wcli Controller metrics][wcli-metrics] endpoint.
By default:metrics.No
Filtreleme node'unun çalışmasını test etme
-
GCP Console → Compute Engine → VM instances sayfasını açın ve External IP sütunundan örneğin IP adresini kopyalayın.
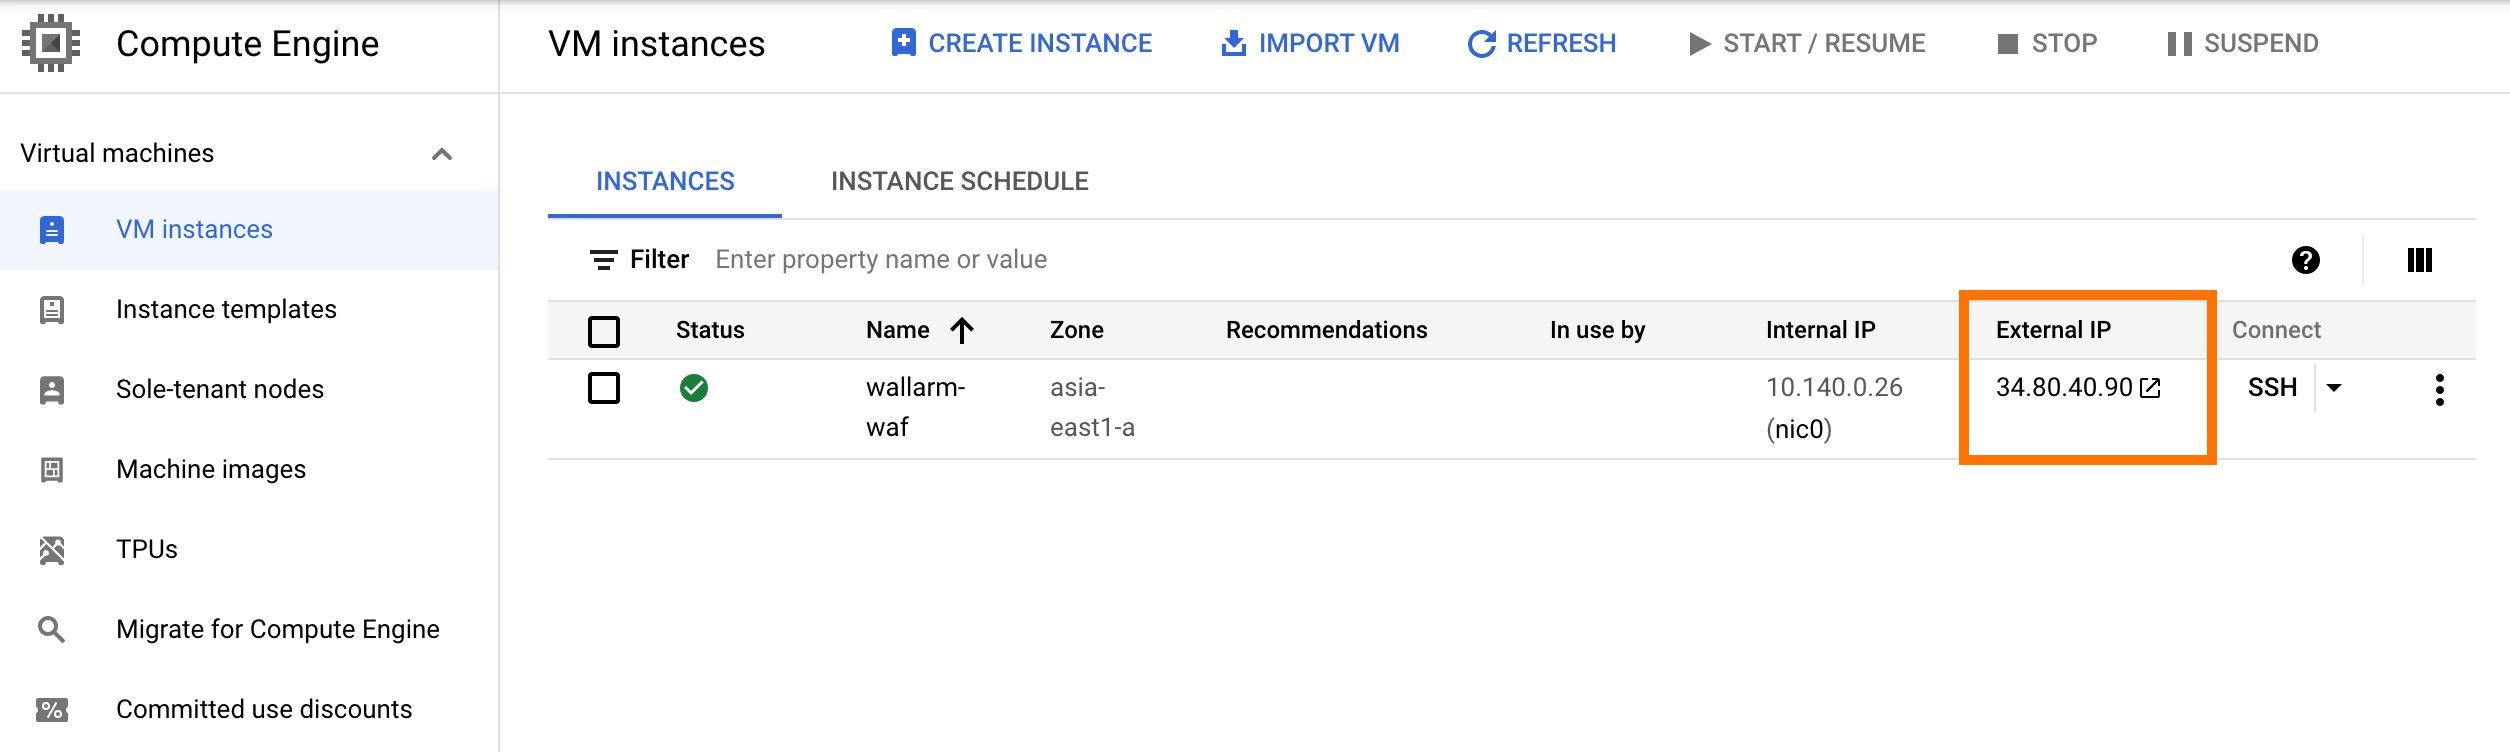
IP adresi boşsa, lütfen örneğin RUNNING durumunda olduğundan emin olun.
-
Kopyaladığınız adrese test Path Traversal saldırısıyla istek gönderin:
-
Wallarm Console → Attacks bölümünü US Cloud veya EU Cloud üzerinde açın ve saldırının listede göründüğünden emin olun.

-
İsteğe bağlı olarak, node'un çalışmasının diğer yönlerini [test edin][link-docs-check-operation].
Konteyner dağıtımı sırasında oluşan hatalara ilişkin ayrıntılar, örneğin menüsündeki View logs bölümünde görüntülenir. Örnek erişilemezse, lütfen gerekli filtreleme node'u parametrelerinin doğru değerlerle konteynere geçirildiğinden emin olun.