Fluentd/Logstash経由のDatadog連携
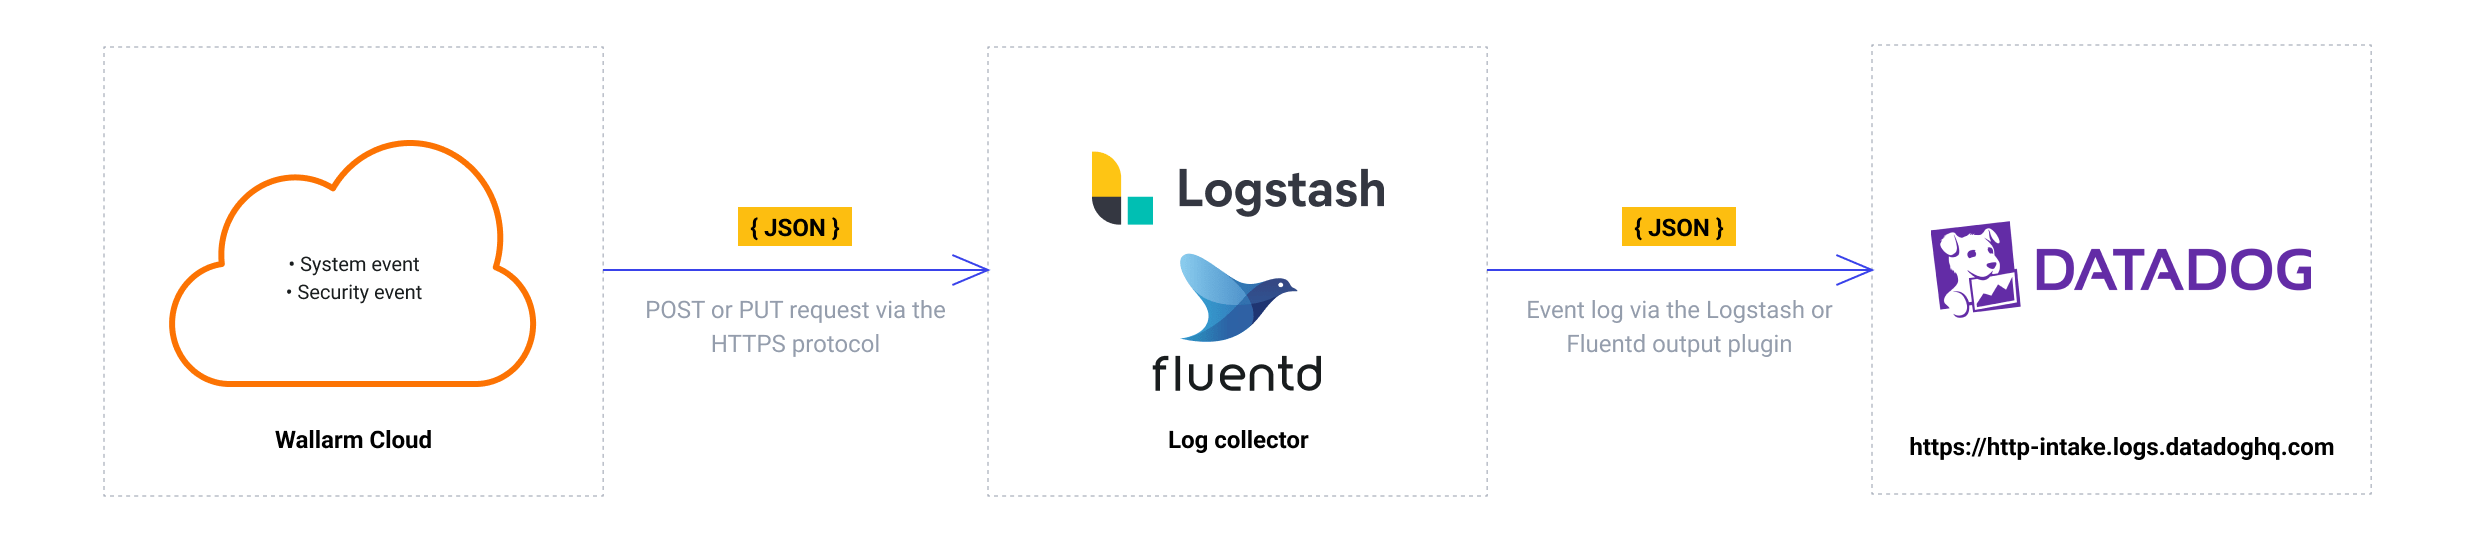
FluentdまたはLogstashの中間データコレクターを介して、検出されたイベントの通知をDatadogへ送信するようにWallarmを設定できます。
The most common logging scheme in complex systems consists of the following components:
-
Data collector: accepts logs from several sources and forwards logs to the SIEM system
-
SIEM system or log management systems: used to analyze logs and monitor the system status
Datadogとのネイティブ連携
WallarmはDatadog APIを介したDatadogのネイティブ連携にも対応しています。ネイティブ連携では中間データコレクターを使用する必要はありません。
使用するリソース
-
公開URLで到達可能なFluentdまたはLogstashサービスが必要です
-
公開URLで到達可能なDatadogサービスが必要です
-
Wallarm Console(EU cloud)への管理者アクセス権(Fluentd/Logstash連携を構成するために必要)が必要です
Wallarm Cloud IP addresses
To provide Wallarm Cloud access to your system, you may need a list of its public IP addresses:
要件
WallarmはWebhook経由で中間データコレクターにログを送信します。そのため、FluentdまたはLogstashの設定は次の要件を満たす必要があります。
-
POSTまたはPUTリクエストを受け付ける必要があります
-
HTTPSリクエストを受け付ける必要があります
-
公開URLを持っている必要があります
-
datadog_logsLogstashプラグインまたはfluent-plugin-datadogFluentdプラグインを介してDatadogへログを転送する必要があります
- Datadogへログを転送するために、
datadog_logsプラグインをインストールします。 - Logstashが受信リクエストを読み取り、Datadogへログを転送するように構成します。
設定ファイルlogstash-sample.confの例:
- Datadogへログを転送するために、
fluent-plugin-datadogプラグインをインストールします。 - Fluentdが受信リクエストを読み取り、Datadogへログを転送するように構成します。
設定ファイルtd-agent.confの例:
FluentdまたはLogstashとの連携の設定
-
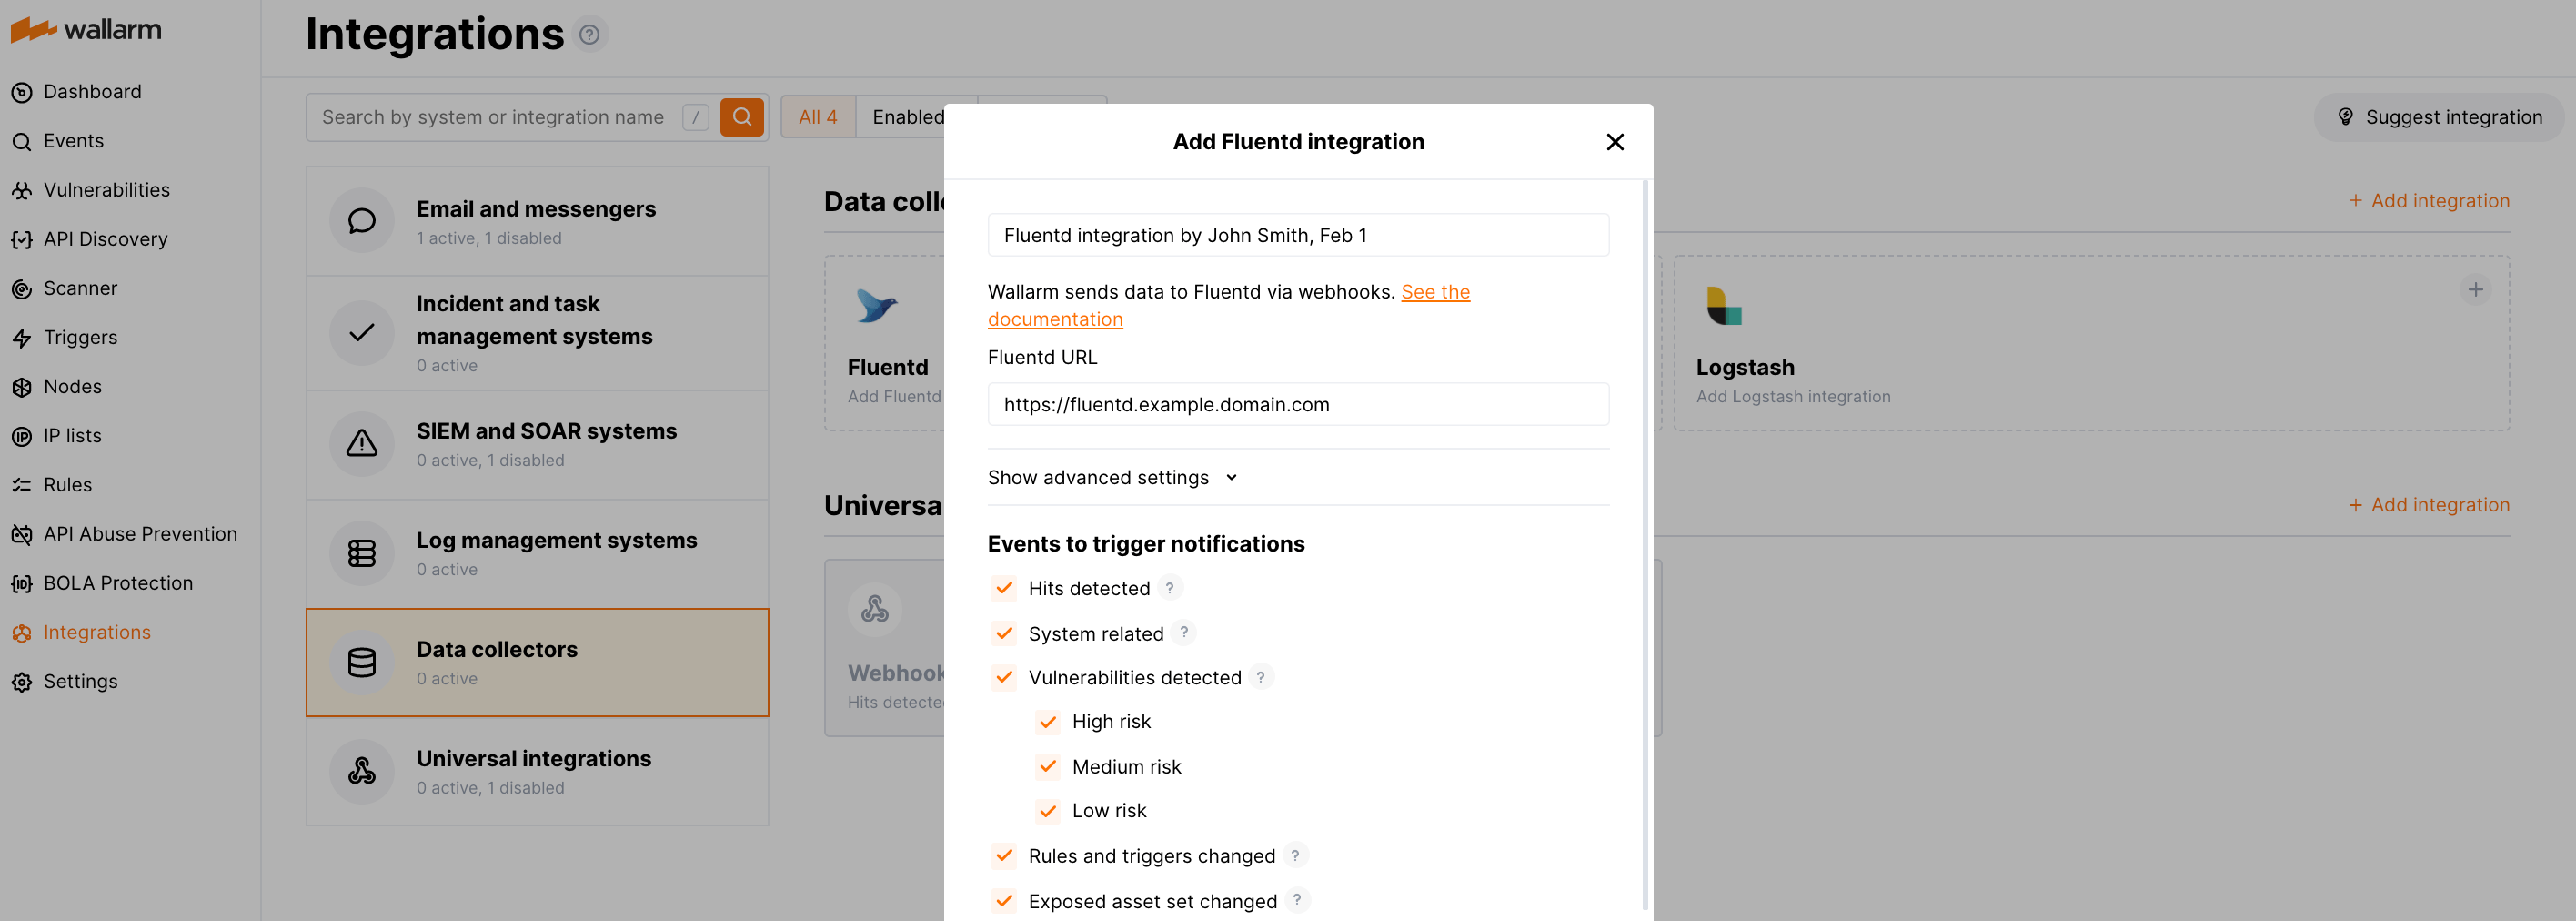
Wallarm Console → Integrations → Fluentd/LogstashでDatadog連携の設定に進みます。
-
連携名を入力します。
-
対象のFluentdまたはLogstashのURL(Webhook URL)を指定します。
-
必要に応じて、高度な設定を構成します:
- Request method:
POSTorPUT. By default, POST requests are sent. - Request header and its value if the server requires a non-standard header to execute the request. The number of headers is not limited.
- CA certificate: certificate of CA that signed a server certificate. If CA is publicly trusted, this field is optional. If a server certificate is self-signed, this field is required and must contain a certificate of your own CA that signed a server certificate.
- Verify TLS certificate: this setting allows to disable verification of the specified server certificate. By default, Wallarm verifies whether a server certificate is signed by a publicly trusted CA. We do not recommend disabling the verification of production server certificates. If your server uses a self-signed TLS certificate, you can add a self-signed CA certificate to allow sending requests to this server.
- Request timeout, in seconds: if the server does not respond to the request within the specified time, the request fails. By default: 15 seconds.
- Connection timeout, in seconds: if the connection to the server cannot be established during the specified time, the request fails. By default: 20 seconds.
- Wallarm data format: either a JSON Array (default) or a New Line Delimited JSON (NDJSON).
- Request method:
-
指定したURLへの通知送信をトリガーするイベントタイプを選択します。イベントを選択しない場合、通知は送信されません。
-
連携をテストして、設定が正しいことを確認します。
-
Add integrationをクリックします。
Fluentd連携の例:
連携のテスト
Integration testing allows checking configuration correctness, availability of the Wallarm Cloud, and the notification format. To test the integration, you can use the button Test integration when creating or editing the integration.
The integration is tested as follows:
-
Test notifications with the prefix
[Test message]are sent to the selected system. -
Test notifications cover the following events (each in a single record):
- New user in the company account
- Newly detected hit
- Newly discovered IP in the company scope
- New trigger in the company account
- Newly discovered security vulnerability
-
Test notifications include test data.
FluentdまたはLogstashの中間データコレクターにおけるテストログ:
[
    {
        summary:"[Test message] [Test partner(US)] New vulnerability detected",
        description:"Notification type: vuln

                    New vulnerability was detected in your system.

                    ID:
                    Title: Test
                    Domain: example.com
                    Path:
                    Method:
                    Discovered by:
                    Parameter:
                    Type: Info
                    Threat: Medium

                    More details: https://us1.my.wallarm.com/object/555


                    Client: TestCompany
                    Cloud: US
                    ",
        details:{
            client_name:"TestCompany",
            cloud:"US",
            notification_type:"vuln",
            vuln_link:"https://us1.my.wallarm.com/object/555",
            vuln:{
                domain:"example.com",
                id:null,
                method:null,
                parameter:null,
                path:null,
                title:"Test",
                discovered_by:null,
                threat:"Medium",
                type:"Info"
            }
        }
    }
]
Datadogのテストログ:
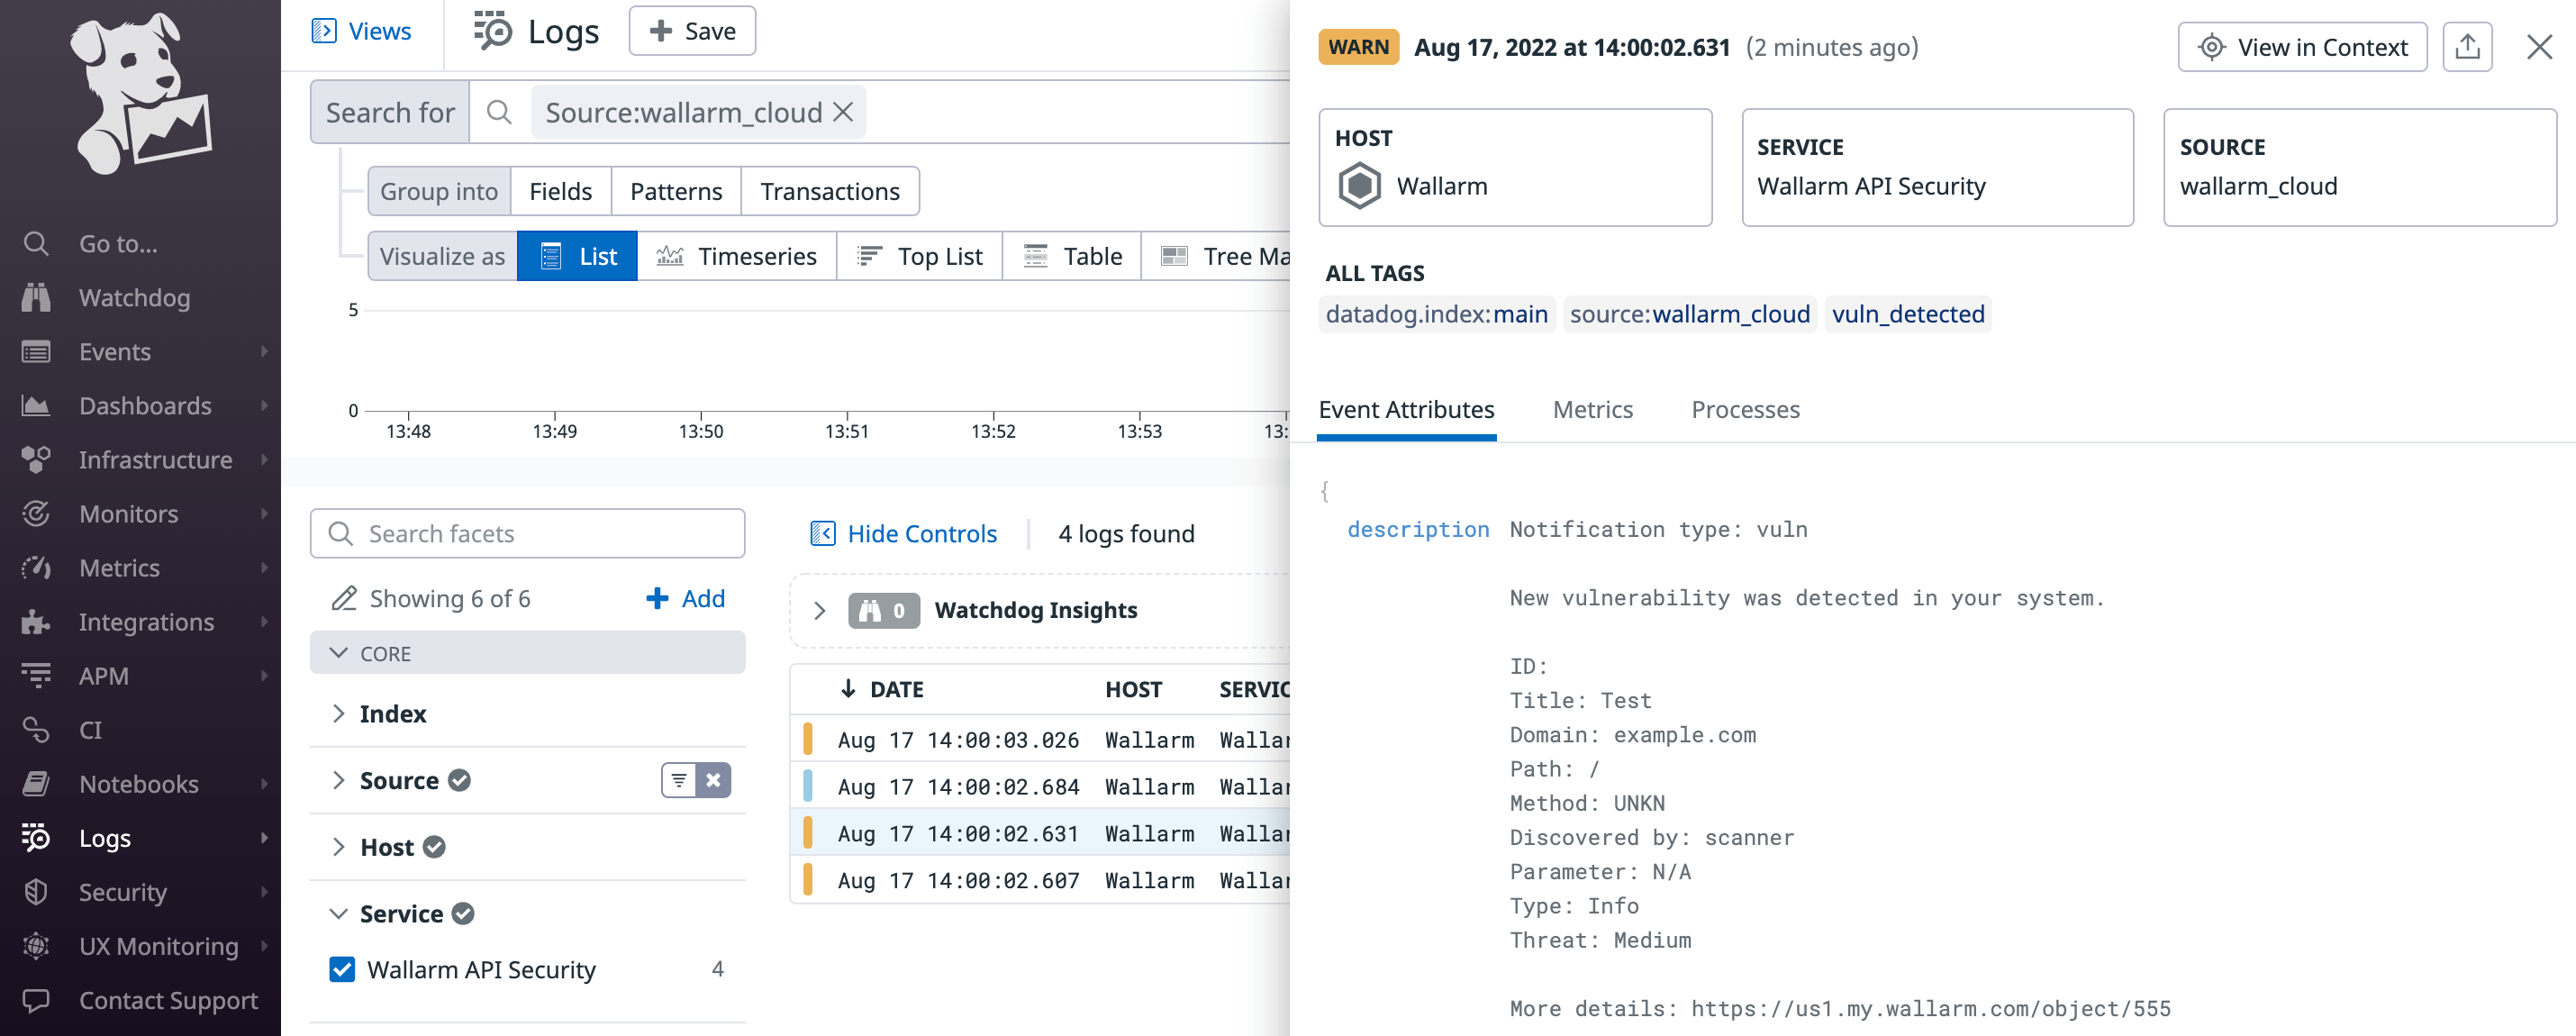
他のレコードの中からWallarmのログを見つけるには、DatadogのLogsサービスでsource:wallarm_cloud検索タグを使用できます。