AWS AMI
[link-ssh-keys]:            https://docs.aws.amazon.com/AWSEC2/latest/UserGuide/get-set-up-for-amazon-ec2.html#create-a-key-pair
[link-sg]:                  https://docs.aws.amazon.com/en_us/AWSEC2/latest/UserGuide/get-set-up-for-amazon-ec2.html#create-a-base-security-group
[link-launch-instance]:     https://docs.aws.amazon.com/AWSEC2/latest/UserGuide/EC2_GetStarted.html#ec2-launch-instance

[anchor1]:      #2-create-a-security-group
[anchor2]:      #1-create-a-pair-of-ssh-keys-in-aws

[img-create-sg]:                ../../../images/installation-ami/common/create_sg.png
[versioning-policy]:            ../../../updating-migrating/versioning-policy.md#version-list
[img-wl-console-users]:         ../../../images/check-user-no-2fa.png
[img-create-wallarm-node]:      ../../../images/user-guides/nodes/create-cloud-node.png
[deployment-platform-docs]:     ../../../installation/supported-deployment-options.md
[node-token]:                       ../../../quickstart.md#deploy-the-wallarm-filtering-node
[api-token]:                        ../../../user-guides/settings/api-tokens.md
[wallarm-token-types]:              ../../../user-guides/nodes/nodes.md#api-and-node-tokens-for-node-creation
[platform]:                         ../../../installation/supported-deployment-options.md
[ptrav-attack-docs]:                ../../../attacks-vulns-list.md#path-traversal
[attacks-in-ui-image]:              ../../../images/admin-guides/test-attacks-quickstart.png
[wallarm-nginx-directives]:         ../../../admin-en/configure-parameters-en.md
[autoscaling-docs]:                 ../../../admin-en/installation-guides/amazon-cloud/autoscaling-overview.md
[real-ip-docs]:                     ../../../admin-en/using-proxy-or-balancer-en.md
[allocate-memory-docs]:             ../../../admin-en/configuration-guides/allocate-resources-for-node.md
[limiting-request-processing]:      ../../../user-guides/rules/configure-overlimit-res-detection.md
[logs-docs]:                        ../../../admin-en/configure-logging.md
[oob-advantages-limitations]:       ../overview.md#limitations
[wallarm-mode]:                     ../../../admin-en/configure-wallarm-mode.md
[wallarm-api-via-proxy]:            ../../../admin-en/configuration-guides/access-to-wallarm-api-via-proxy.md
[img-grouped-nodes]:                ../../../images/user-guides/nodes/grouped-nodes.png
[cloud-init-spec]:                  ../../cloud-platforms/cloud-init.md
[wallarm_force_directive]:          ../../../admin-en/configure-parameters-en.md#wallarm_force
[web-server-mirroring-examples]:    overview.md#configuration-examples-for-traffic-mirroring
[ip-lists-docs]:                    ../../../user-guides/ip-lists/overview.md
[api-spec-enforcement-docs]:        ../../../api-specification-enforcement/overview.md

# AmazonイメージからWallarm OOBをデプロイする

本記事では、[公式Amazon Machine Image (AMI)](https://aws.amazon.com/marketplace/pp/B073VRFXSD)を使用してAWS上に[Wallarm OOB](overview.md)をデプロイする手順について説明します。本ソリューションは、Webサーバまたはプロキシサーバによってミラーリングされたトラフィックを解析するために設計されています。

## 利用ケース

Among all supported [Wallarm deployment options][deployment-platform-docs], AMI is recommended for Wallarm deployment in these **use cases**:

* Your existing infrastructure resides on AWS.
* You aim to deploy a security solution as a separate cloud instance, rather than installing it directly on frontend systems like NGINX.

## Requirements

* An AWS account
* Understanding of AWS EC2, Security Groups
* Any AWS region of your choice, there are no specific restrictions on the region for the Wallarm node deployment

    Wallarm supports both single availability zone (AZ) and multi availability zone deployments. In multi-AZ setups, Wallarm Nodes can be launched in separate availability zones and placed behind a Load Balancer for high availability.
* Access to the account with the **Administrator** role in Wallarm Console for the [US Cloud](https://us1.my.wallarm.com/) or [EU Cloud](https://my.wallarm.com/)
* Executing all commands on a Wallarm instance as a superuser (e.g. `root`)

## Installation

### 1. Launch a Wallarm Node instance

Launch an EC2 instance using the [Wallarm NGINX Node AMI](https://aws.amazon.com/marketplace/pp/prodview-5rl4dgi4wvbfe).

Recommended configuration:

* Latest available [AMI version][latest-node-version]
* Any preferred AWS region
* EC2 instance type: `t3.medium` (for testing) or `m4.xlarge` (for production), [see cost guidance for details][aws-costs]
* [SSH key pair](https://docs.aws.amazon.com/AWSEC2/latest/UserGuide/create-key-pairs.html) for accessing the instance
* Appropriate [VPC and subnet](https://docs.aws.amazon.com/vpc/latest/userguide/what-is-amazon-vpc.html) based on your infrastructure
* [Security Group](https://docs.aws.amazon.com/AWSEC2/latest/UserGuide/creating-security-group.html) inbound access to ports 22, 80, and 443

    !!! info "Using a security group preconfigured by Wallarm"
        When you deploy the instance and create a security group, AWS prompts you to use the one preconfigured by Wallarm. This group already has all the necessary ports open for inbound access.

        ![!Preconfigured security group][img-security-group]

* [Security Group](https://docs.aws.amazon.com/AWSEC2/latest/UserGuide/creating-security-group.html) outbound access to:

    * `https://meganode.wallarm.com` to download the Wallarm installer
    * `https://us1.api.wallarm.com` for working with US Wallarm Cloud or to `https://api.wallarm.com` for working with EU Wallarm Cloud. If access can be configured only via the proxy server, then use the [instructions][wallarm-api-via-proxy]
    * IP addresses below for downloading updates to attack detection rules and [API specifications][api-spec-enforcement-docs], as well as retrieving precise IPs for your [allowlisted, denylisted, or graylisted][ip-lists-docs] countries, regions, or data centers

        === "US Cloud"
            ```
            34.96.64.17
            34.110.183.149
            35.235.66.155
            34.102.90.100
            34.94.156.115
            35.235.115.105
            ```
        === "EU Cloud"
            ```
            34.160.38.183
            34.144.227.90
            34.90.110.226
            ```

### 2. Connect to the Wallarm Node instance via SSH

[Use the selected SSH key](https://docs.aws.amazon.com/AWSEC2/latest/UserGuide/connect-to-linux-instance.html) to connect to your running EC2 instance:

```bash
ssh -i <your-key.pem> admin@<your-ec2-public-ip>
You need to use the admin username to connect to the instance.
3. Generate a token to connect an instance to the Wallarm Cloud
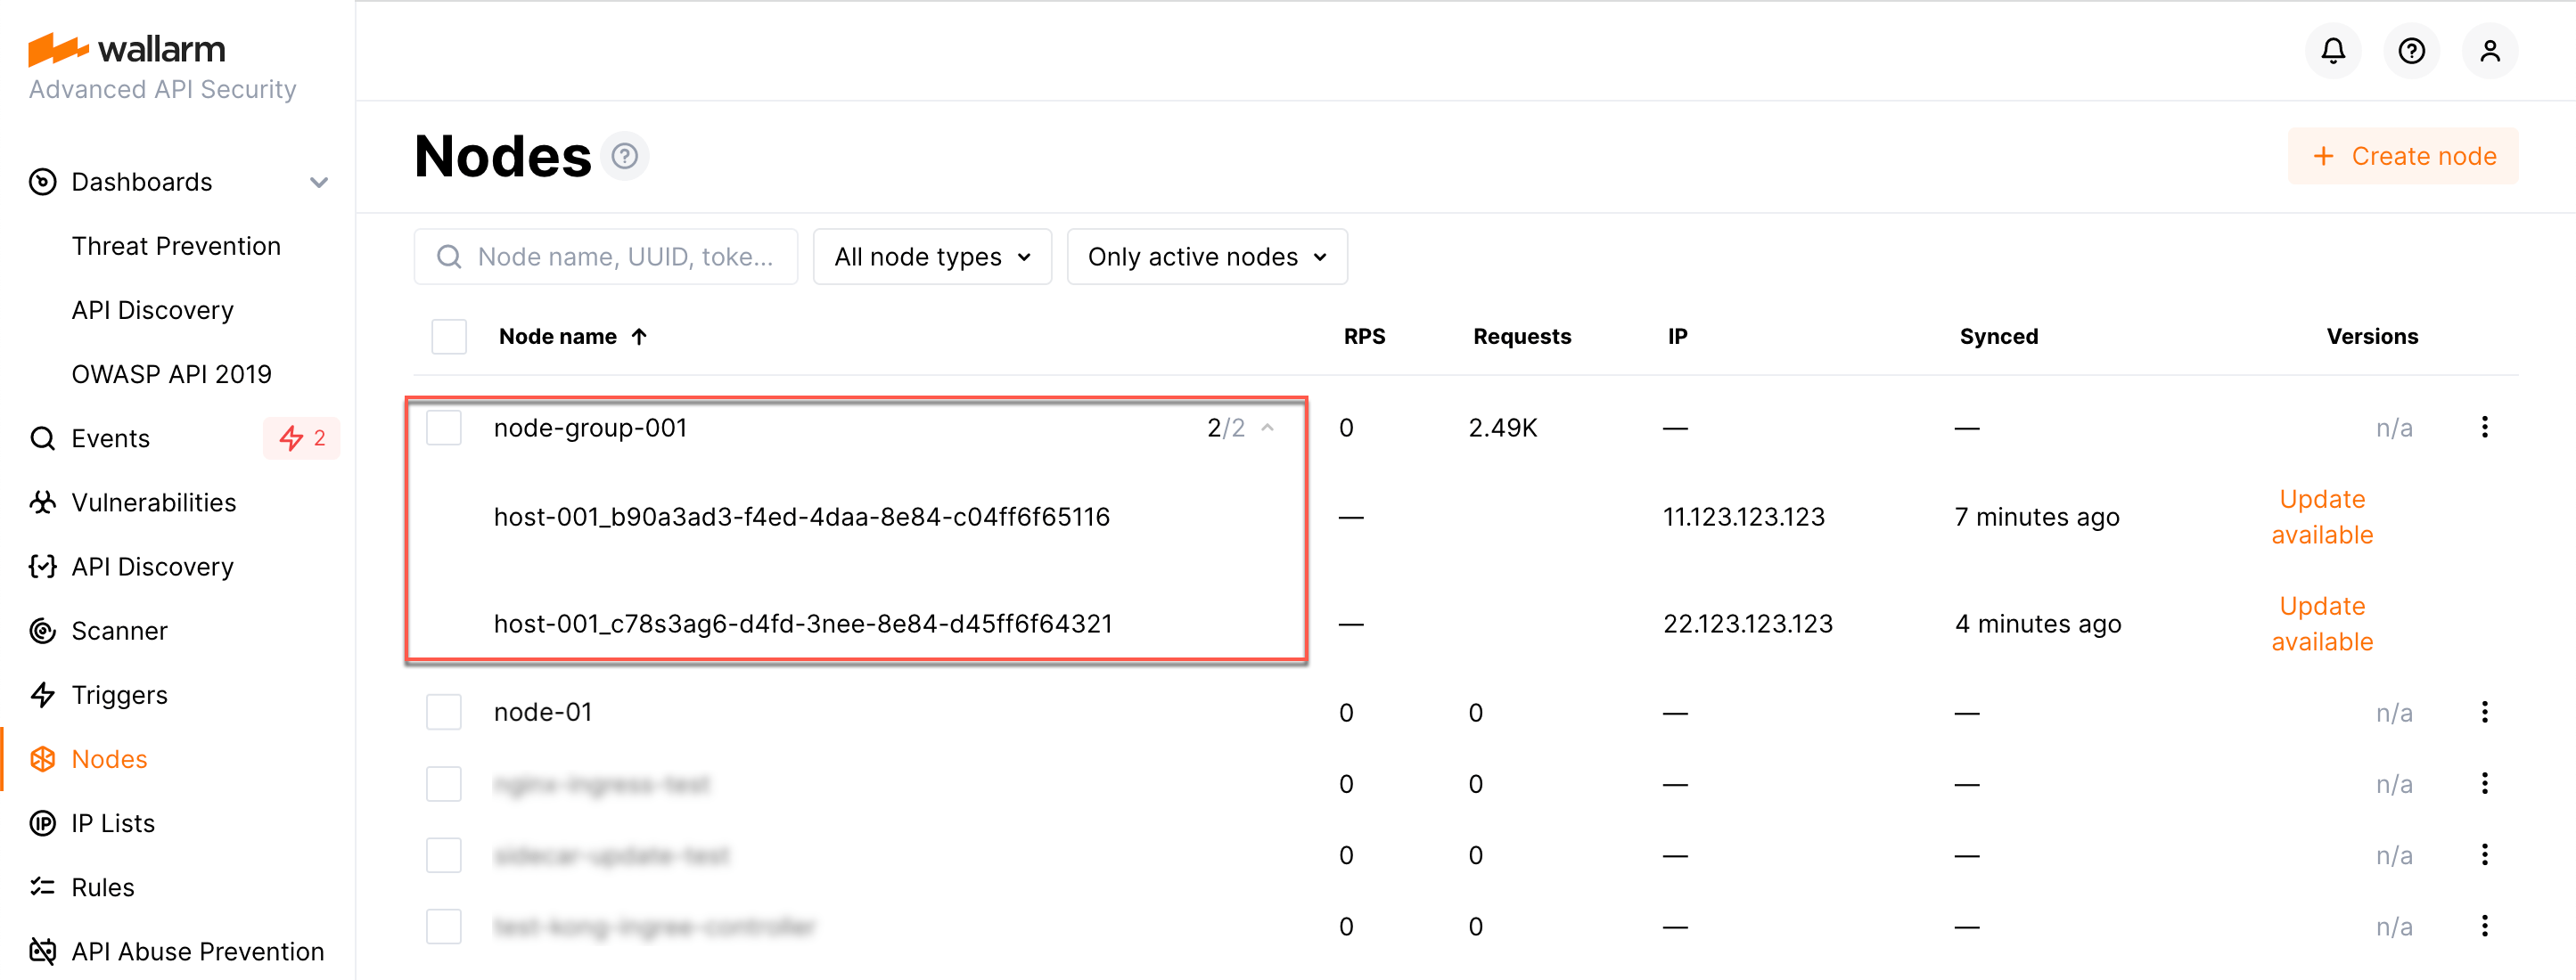
The Wallarm node needs to connect to the Wallarm Cloud using a Wallarm token of the appropriate type. An API token allows you to create a node group in the Wallarm Console UI, helping you organize your node instances more effectively.
Generate a token as follows:
6. インスタンスをWallarm Cloudに接続する
クラウドインスタンスのノードは、cloud-init.pyスクリプトを使用してCloudに接続します。このスクリプトは、指定されたトークンを用いてノードをWallarm Cloudに登録し、監視modeにグローバル設定し、 NGINGX のlocation /ブロック内にwallarm_forceディレクティブを設定してミラーリングされたトラフィックのコピーのみを解析するようにします。NGINXの再起動により、セットアップが完了します。
クラウドイメージから作成したインスタンス上でcloud-init.pyスクリプトを以下のように実行します:
-
WALLARM_LABELS='group=<GROUP>'は、ノードグループ名を設定します(既存の場合はそのまま、存在しなければ作成されます)。APIトークンを使用している場合にのみ適用されます。 -
<TOKEN>はコピーしたトークンの値です。
7. WebサーバまたはプロキシサーバでWallarmノードへのトラフィックミラーリングを設定する
-
Webサーバまたはプロキシサーバ(例: NGINX、Envoy)に対して、受信トラフィックをWallarmノードにミラーリングするよう設定します。設定の詳細については、それぞれのWebサーバまたはプロキシサーバのドキュメントを参照することを推奨します。
[link][web-server-mirroring-examples]内に、最も一般的なWebサーバおよびプロキシサーバ(NGINX、Traefik、Envoy)の設定例が記載されています。
-
ノードを持つインスタンスの
/etc/nginx/sites-enabled/defaultファイル内に、次の設定を記述します:location / { include /etc/nginx/presets.d/mirror.conf; # 222.222.222.22をミラーリングサーバのアドレスに変更してください set_real_ip_from 222.222.222.22; real_ip_header X-Forwarded-For; }set_real_ip_fromおよびreal_ip_headerディレクティブは、Wallarm Consoleが攻撃者のIPアドレスを表示するために必要です。
8. Wallarmの動作をテストする
-
The request with test Path Traversal attack to an address of either the web or proxy server mirroring traffic or the machine with the Wallarm node:
-
Open Wallarm Console → Attacks section in the US Cloud or EU Cloud and make sure the attack is displayed in the list.

Since Wallarm OOB operates in the monitoring mode, the Wallarm node does not block the attack but registers it.
9. デプロイしたソリューションの微調整
The deployment is now complete. The filtering node may require some additional configuration after deployment.
Wallarm settings are defined using the NGINX directives or the Wallarm Console UI. Directives should be set in the following files on the Wallarm instance:
-
/etc/nginx/sites-enabled/defaultdefines the configuration of NGINX -
/etc/nginx/conf.d/wallarm.confdefines the global configuration of Wallarm filtering node -
/etc/nginx/conf.d/wallarm-status.confdefines the filtering node monitoring service configuration -
/opt/wallarm/wstore/wstore.yamlwith the postanalytics service (wstore) settings
You can modify the listed files or create your own configuration files to define the operation of NGINX and Wallarm. It is recommended to create a separate configuration file with the server block for each group of the domains that should be processed in the same way (e.g. example.com.conf). To see detailed information about working with NGINX configuration files, proceed to the official NGINX documentation.
Creating a configuration file
When creating a custom configuration file, make sure that NGINX listens to the incoming connections on the free port.
Below there are a few of the typical settings that you can apply if needed:
To apply the settings, restart NGINX on the Wallarm instance:
Each configuration file change requires NGINX to be restarted to apply it.
```