Blocking in API Sessions  
As Wallarm's API Sessions aim to provide full visibility into sessions within your traffic, this visibility includes information about Wallarm intervention into session's traffic flow, particularly, request that were by different reasons defined as part of attack, marked as such and, if configured, blocked.
This includes requests marked as part of attack/blocked by different tools for attack detection:
-
Input validation attacks (SQL injection, cross‑site scripting, remote code execution, path traversal and others) found by basic set of detectors. Such requests are handled in accordance with the filtration mode for the target endpoint.
-
Requests filtered by IP - source IPs are in the IP Denylist or Graylist, put there for specific time or forever.
-
Requests filtered by session itself - session the request is grouped into in in the Session Denylist, put there for specific time or forever.
Blocking sessions
Requires either NGINX Node 6.5.1 or later, or Native Node 0.19.0 or later.
Session blocking allows for more intelligent security decisions based on the state of the current interaction with the application, rather than just its network origins (source IP addresses). It is required for the cases of:
-
Dynamic source IP addresses
-
Attackers switching IP addresses via proxy servers, VPNs or other means
-
Bot attacks, utilizing a number of machines with diverse IP addresses
-
Invalidating the specific stolen session (directly stops the hijack)
-
Necessity of immediate revocation of current access for actively logged in session
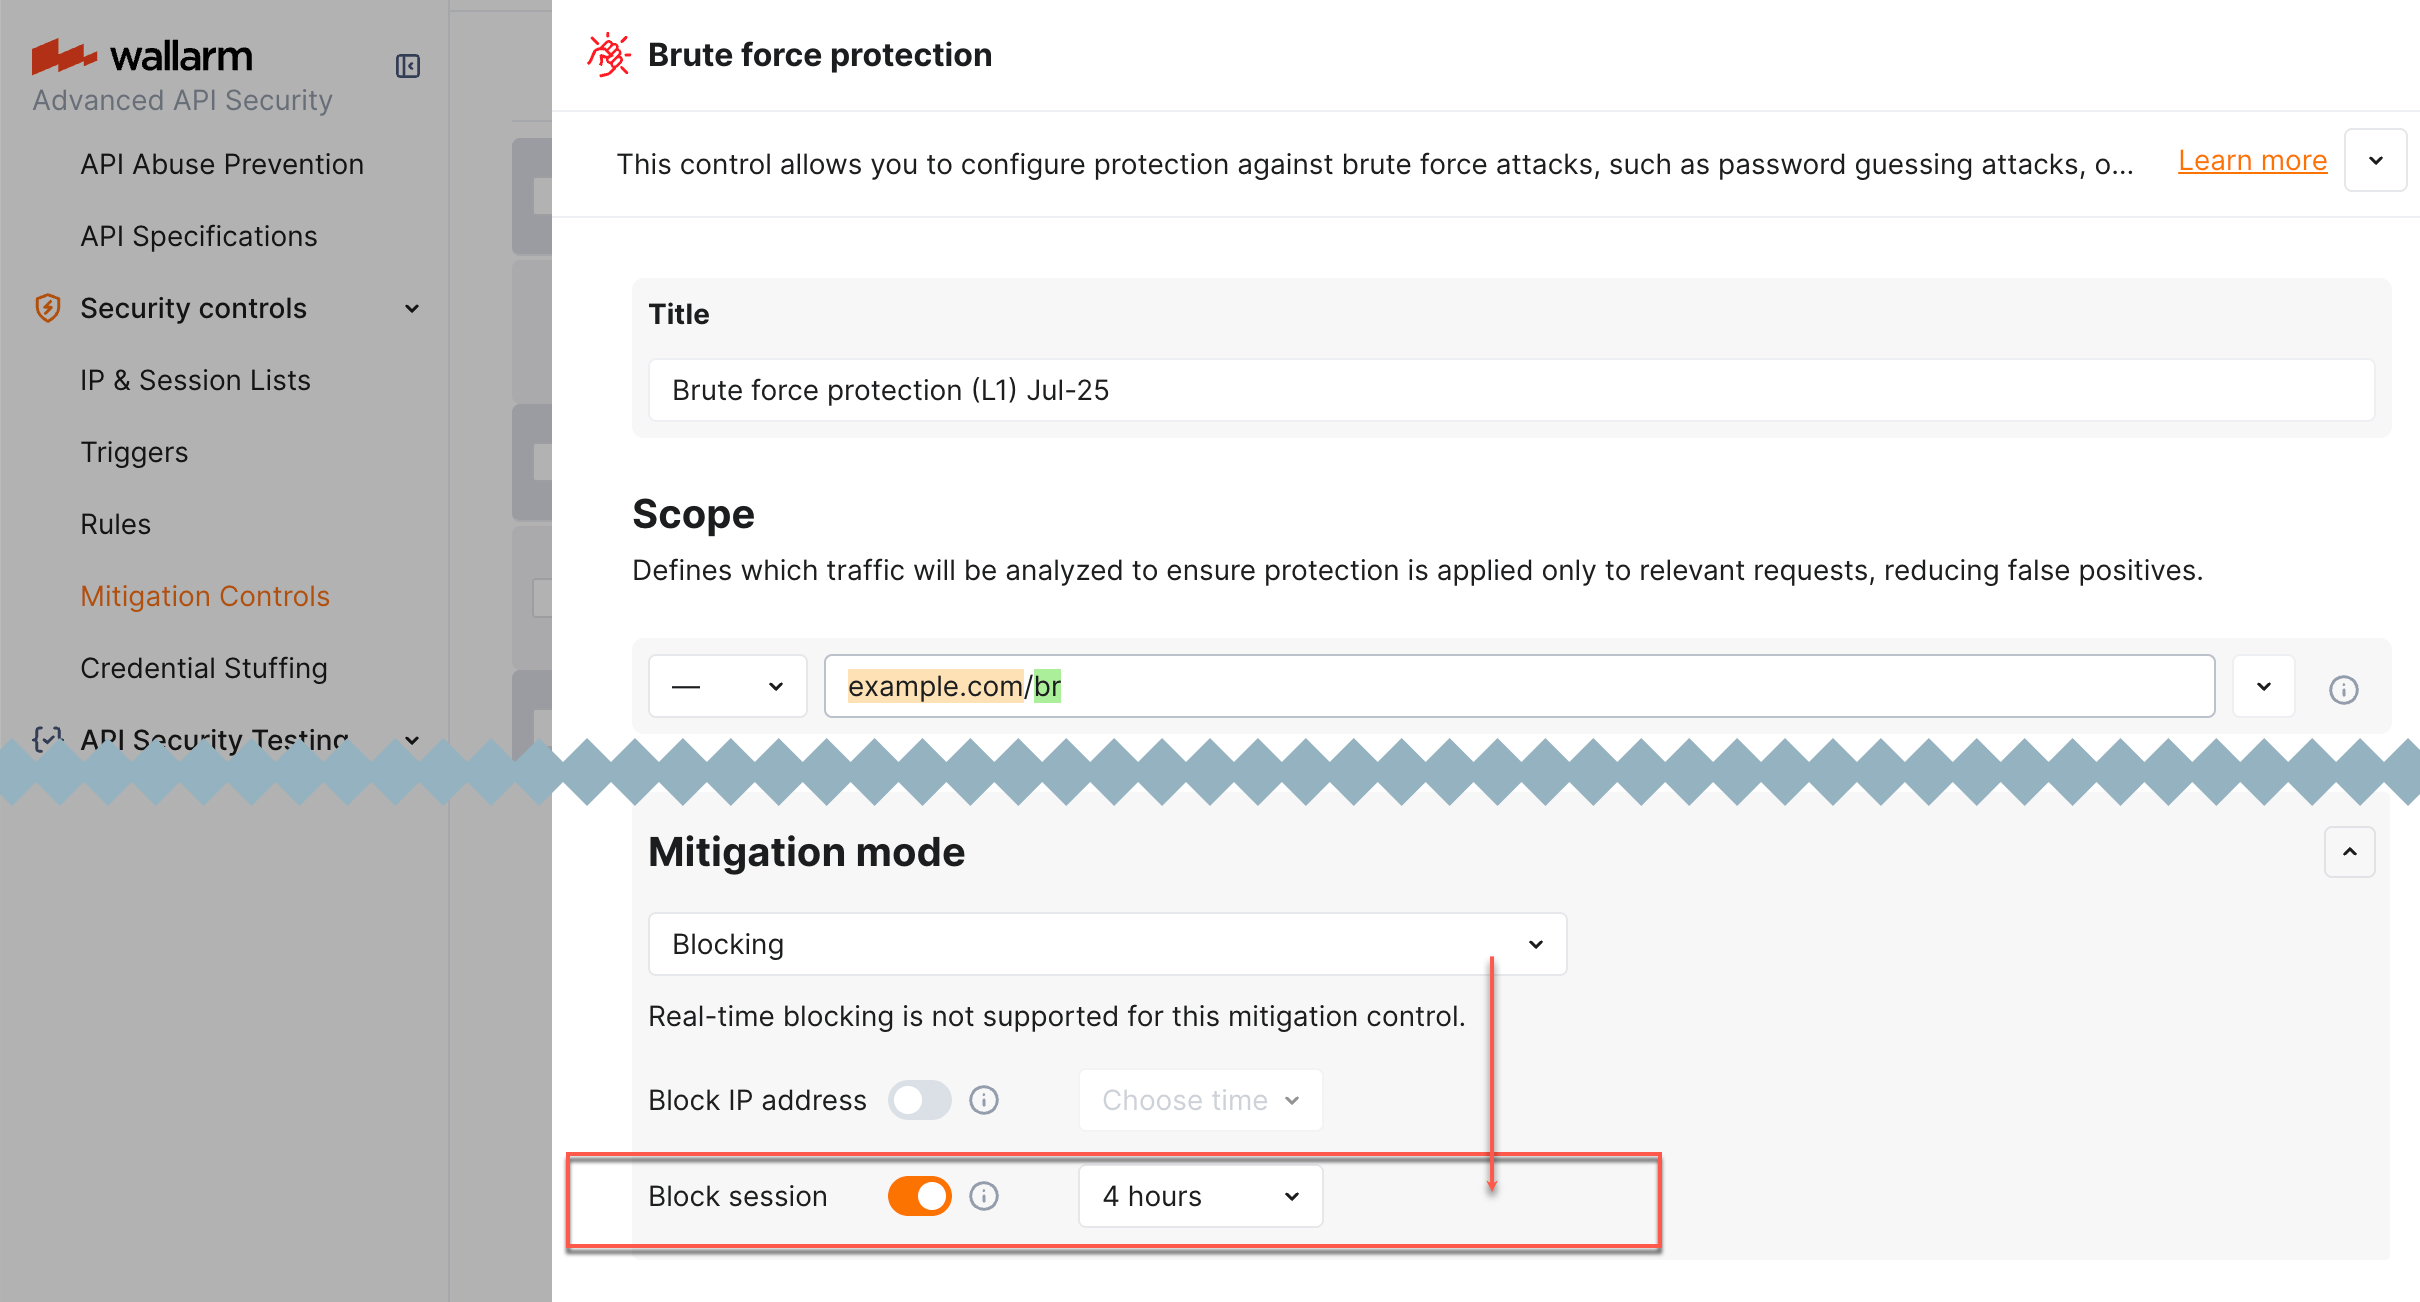
Wallarm can block the entire session by putting it in the Session Denylist for specific time or forever. While session is in the list, its request are blocked:
-
All requests (All applications option, default)
-
Only session requests targeting specific application(s), others will not be blocked
Requirements
For session blocking to be an effective measure against different types of threats, how requests are grouped into sessions should be properly configured.
We recommend using fingerprints for unauthenticated sessions and a user identifier (like user_id, token, etc.) for authenticated ones.
Session denylist
Both automatic and manual blocking puts session into Session Denylist accessible in Wallarm Console → IP & Session Lists → Session lists → Denylist.
While the session is in the Session Denylist, all its requests are blocked, 403 response is sent.
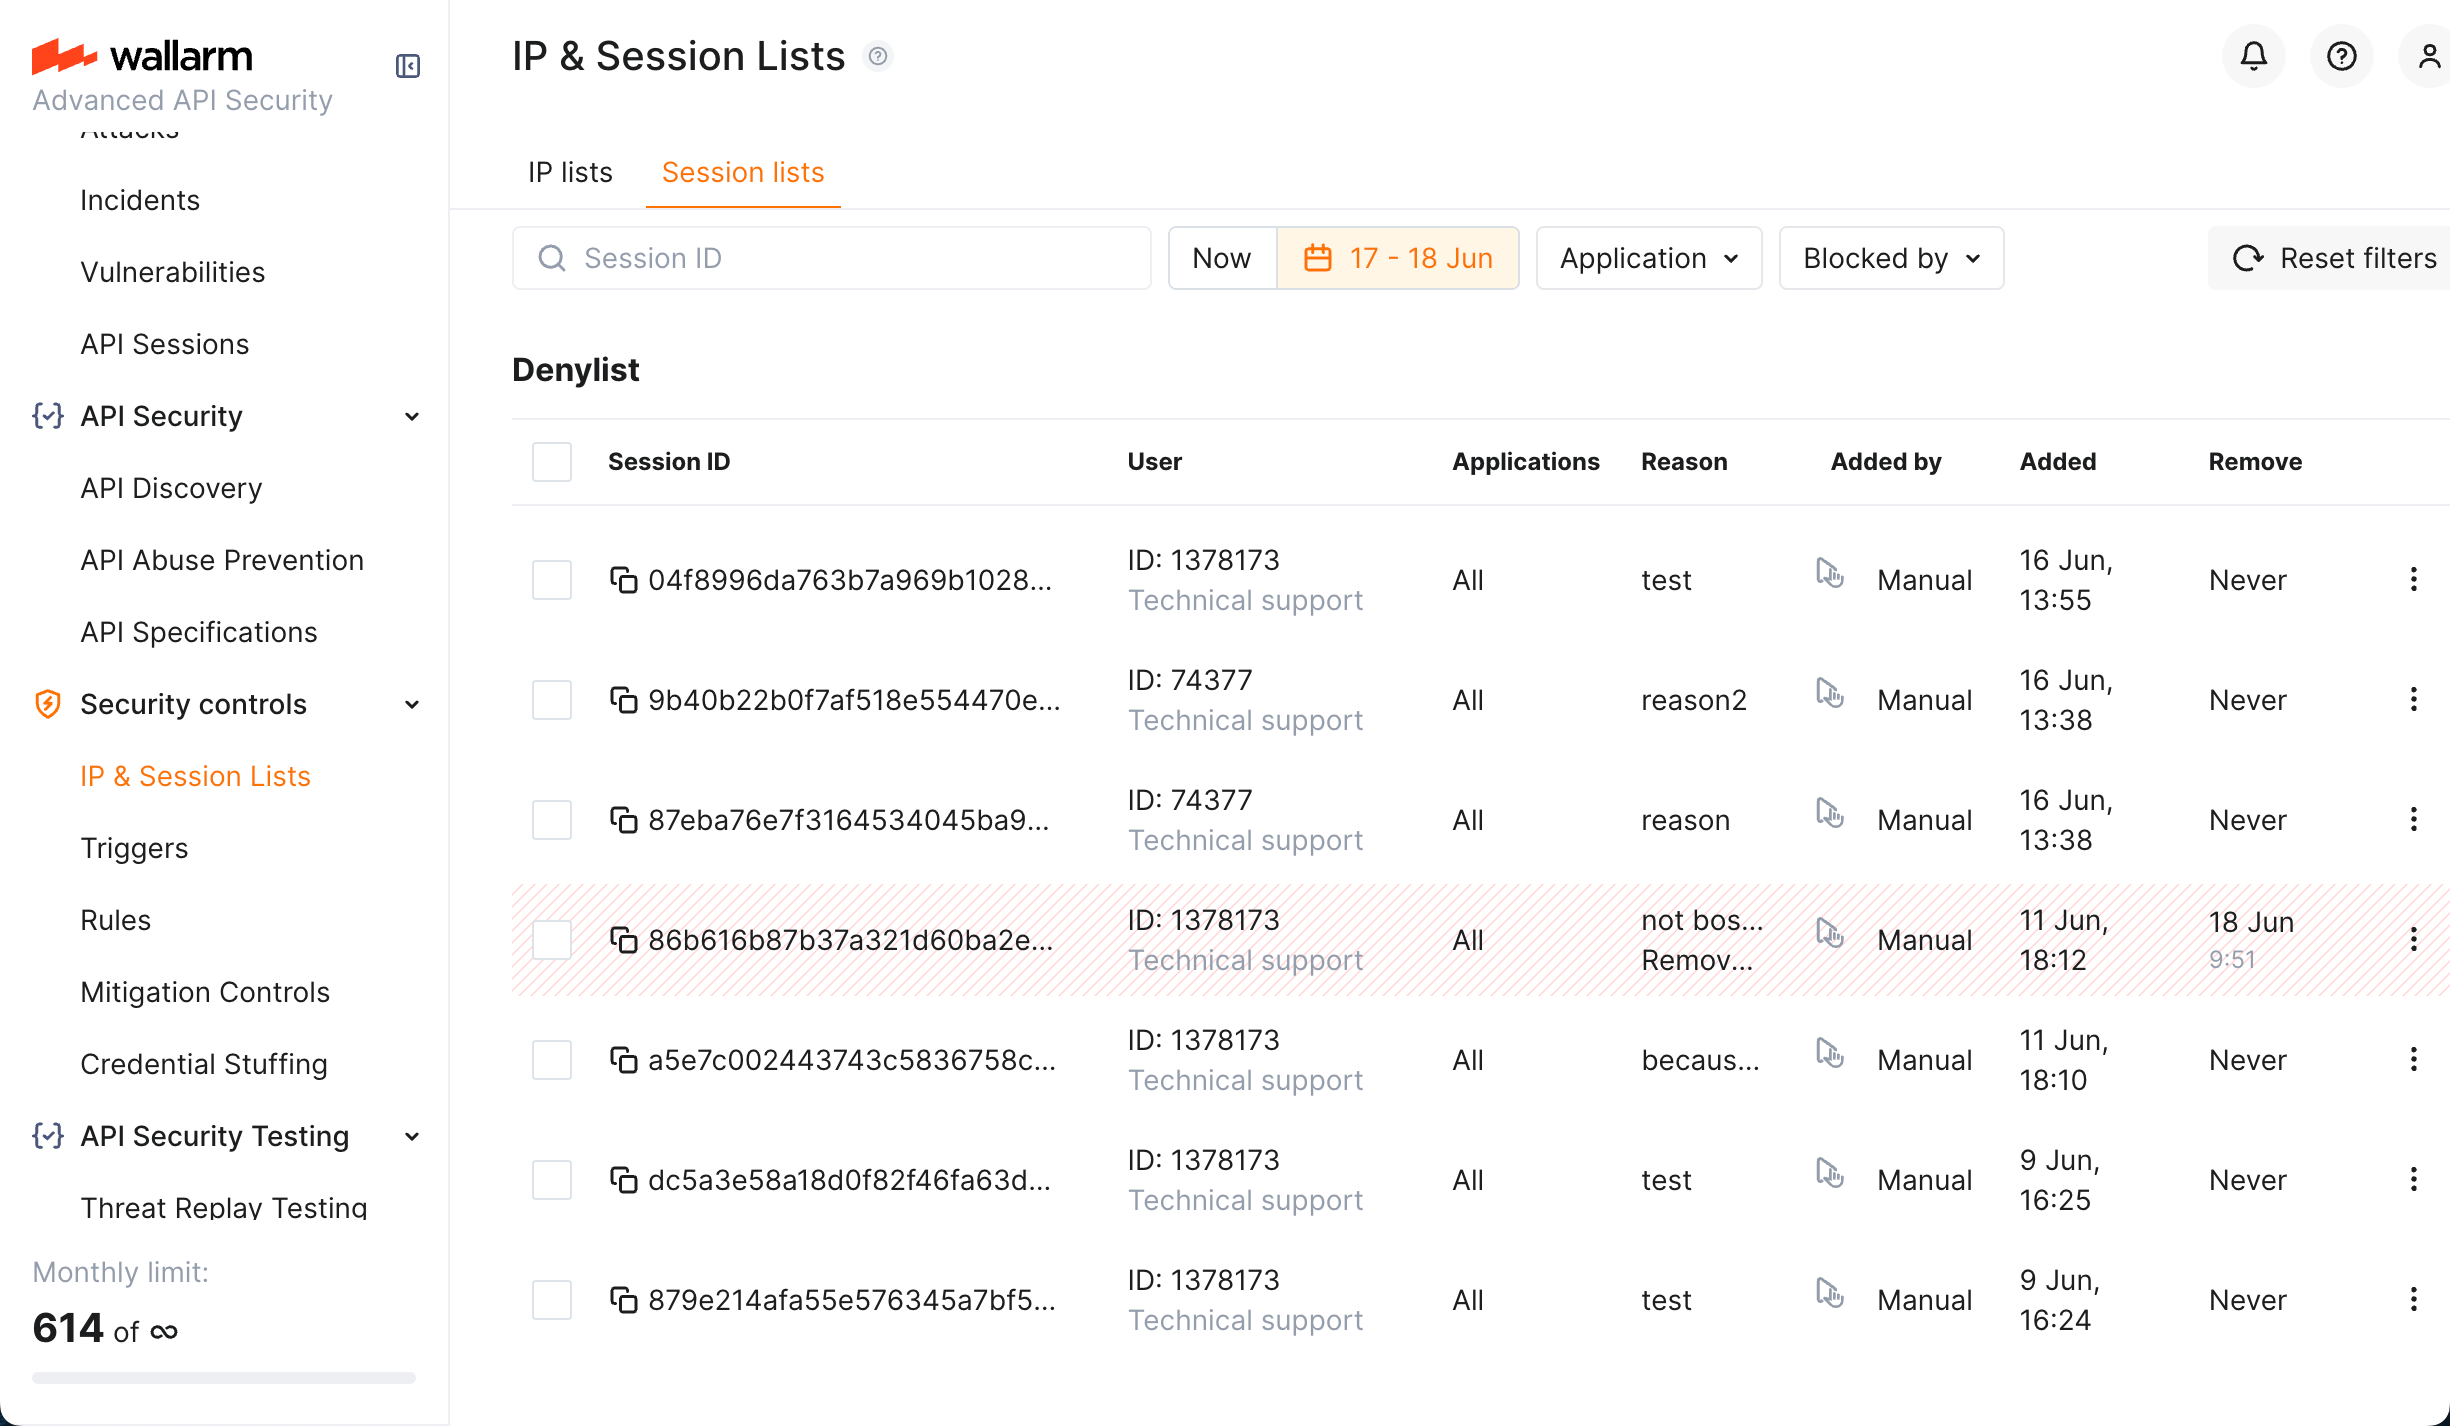
Note that Session Denylist by default is in Now state and displays sessions that are blocked now. However you can select specific date range, than the list will also display sessions that were in the list in that period but now are not in the list and thus are not blocked.
Such historical records will contain information on when they were removed from Denylist and by whom. For any record (current and historical), you can view the corresponding session details, by selecting View session details from the record menu.
Automatic blocking
The session can be blocked automatically by:
-
-
Wallarm's API Abuse Prevention
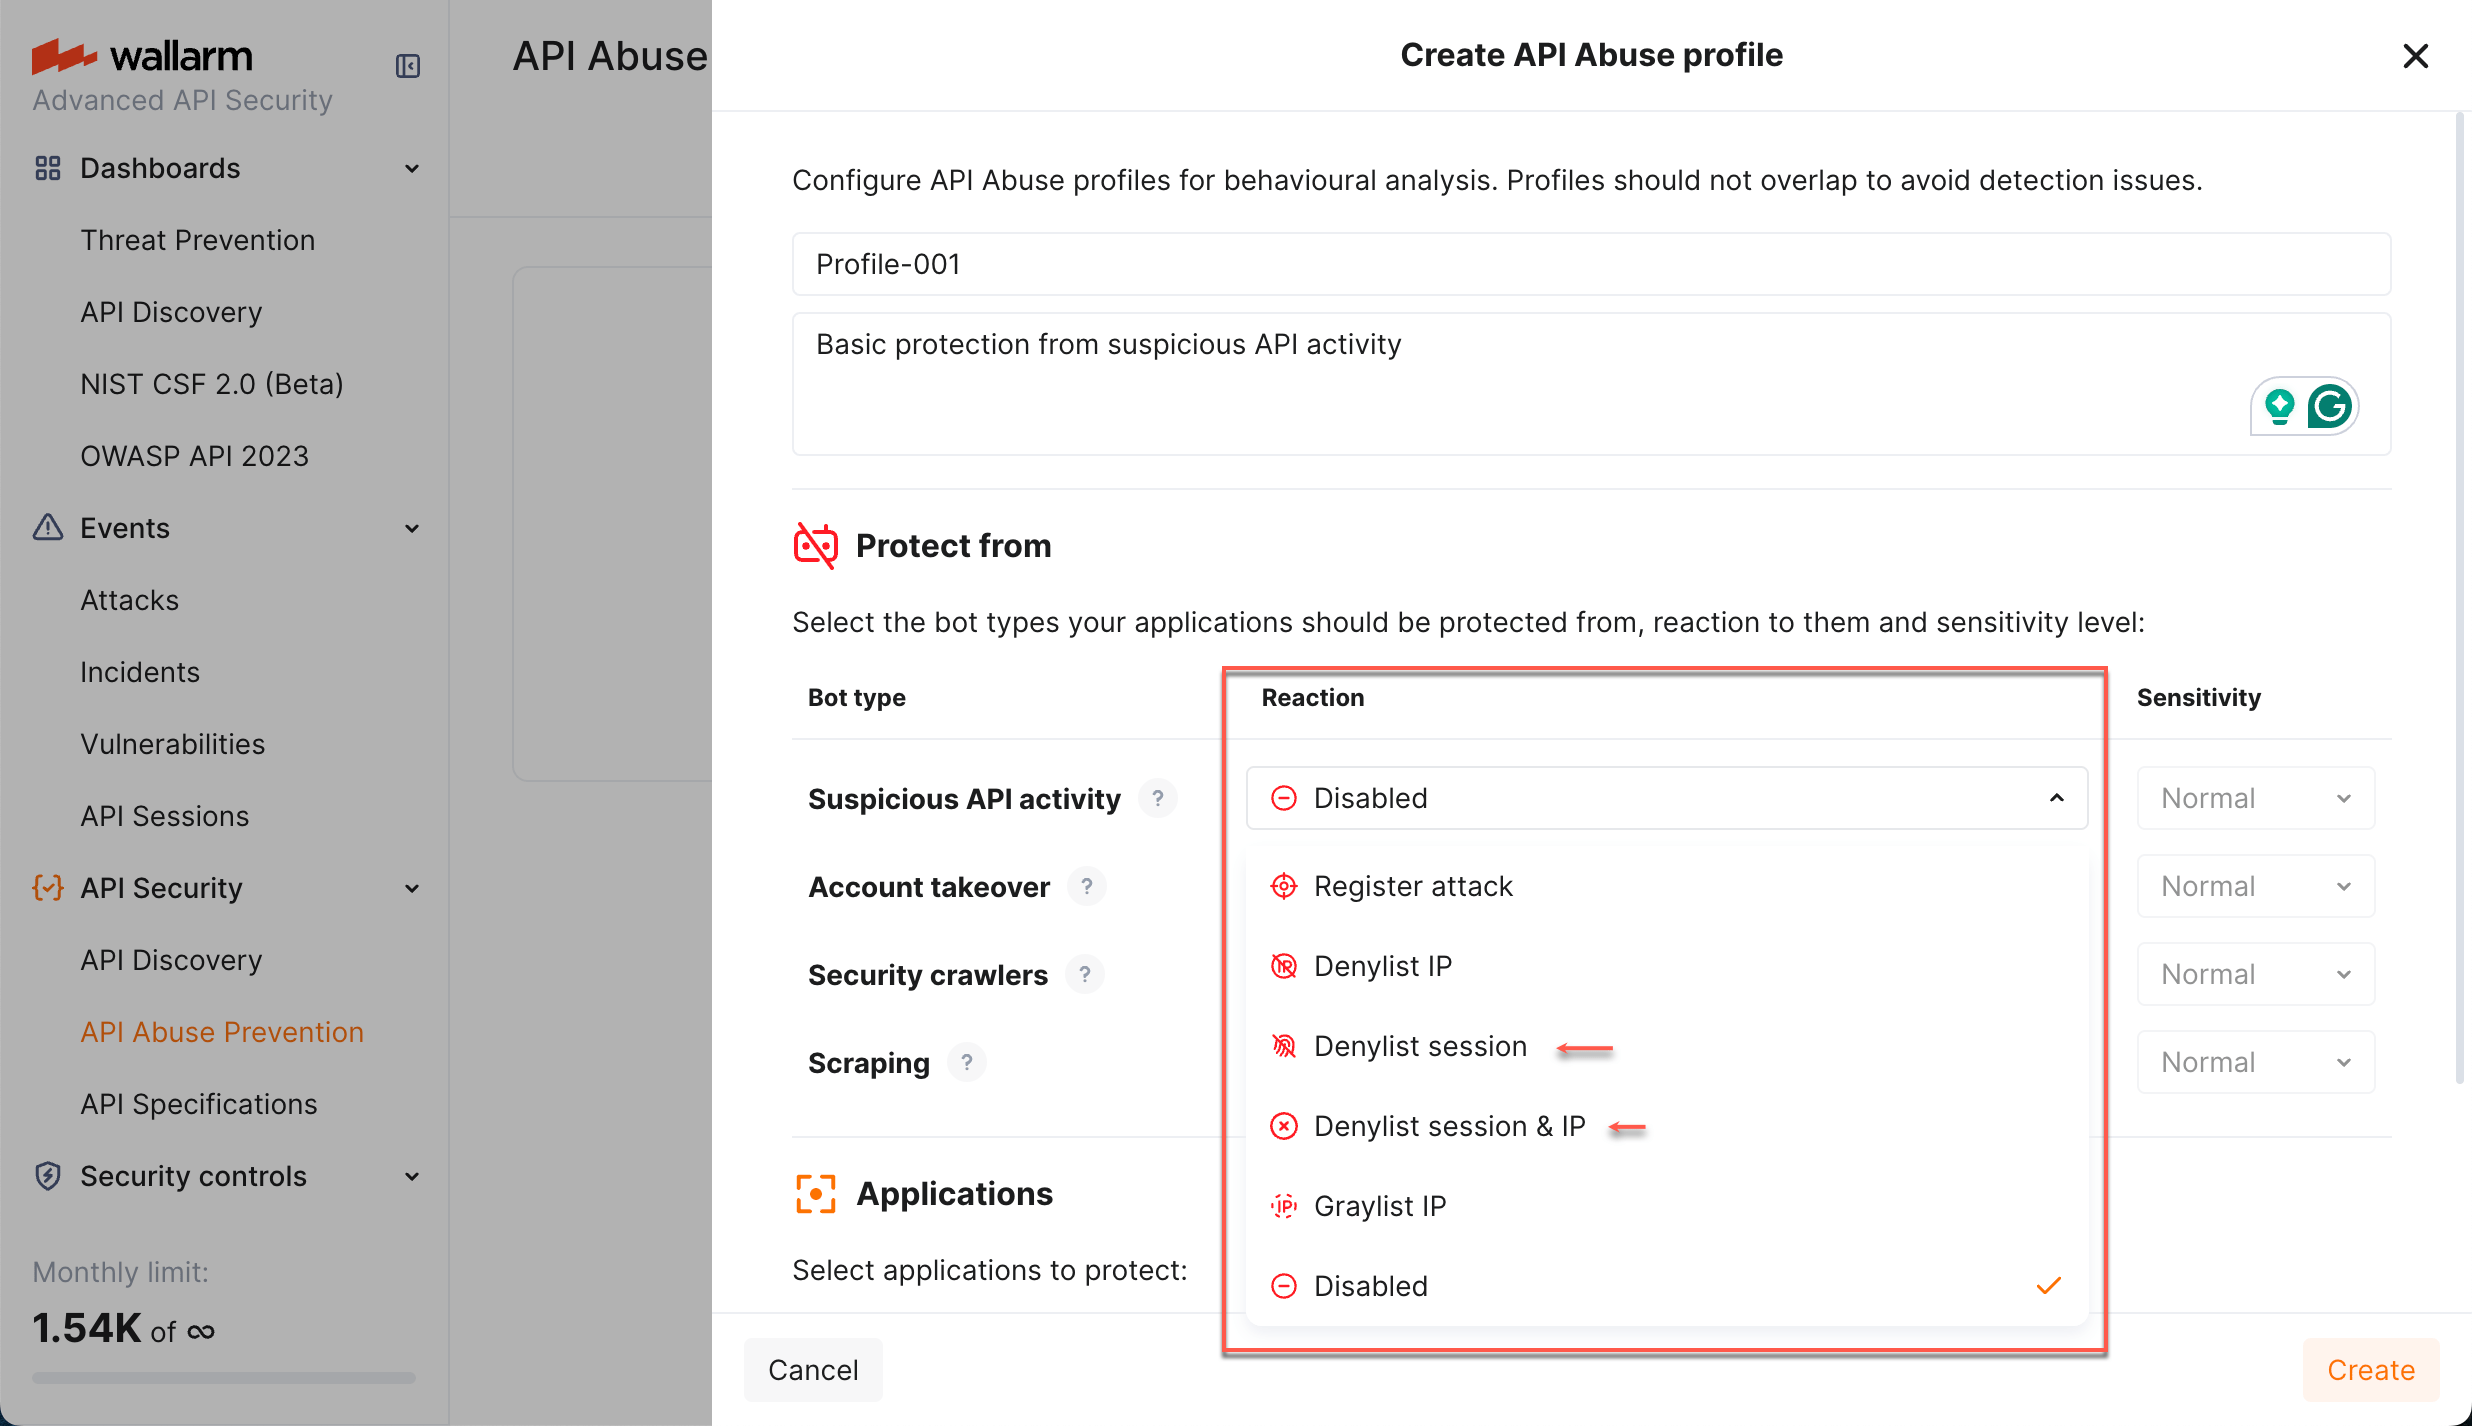
In that case, in API Sessions, it will obtain the Blocked status, from request details you can click link to the mitigation control that put session in the list. Click this link to view the details on mitigation control configuration and adjust if necessary.
Automatic blocking may be not forever, in that case, at specified moment, the session will be automatically unblocked. Historical record will remain in Session Denylist.
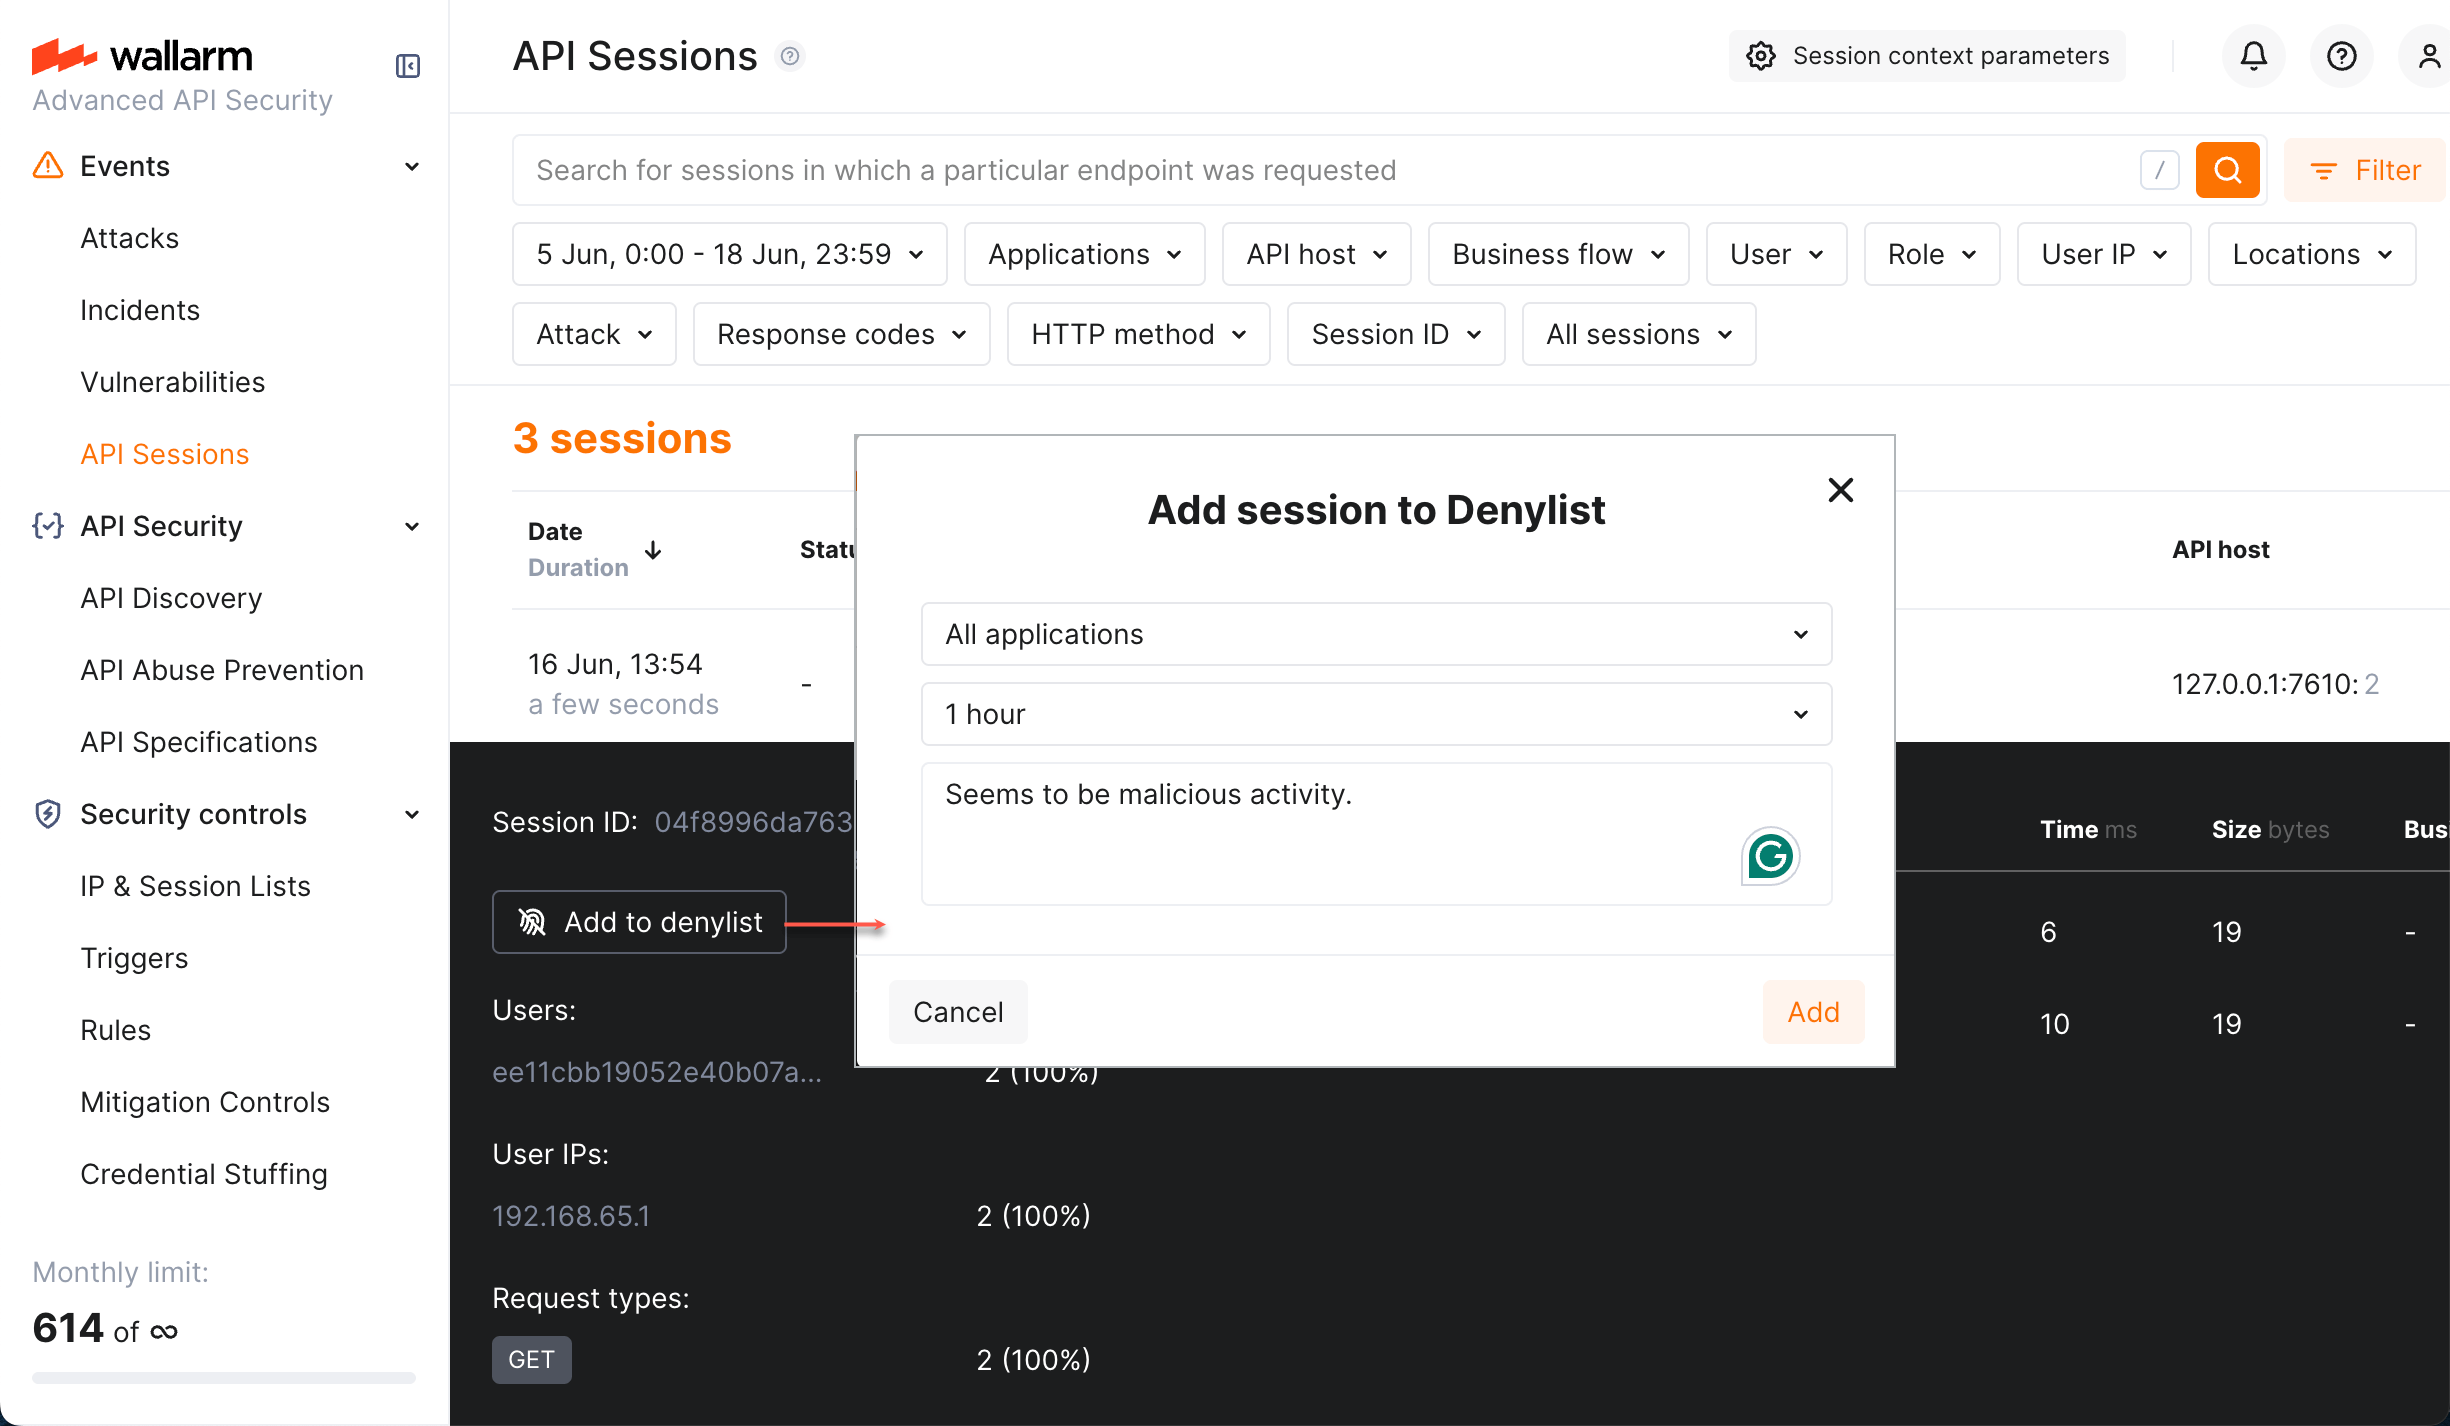
Manual blocking
You can manually block the session: expand the session details and click Add to denylist.
Unblocking
Sessions are usually put in the Session Denylist not forever, but for the specific period of time. After this period, the session is automatically unblocked.
You can also unblock the session manually: in Wallarm Console, do one of the following:
-
Go to API Sessions, blocked session details, click Unblock the session.
-
Go to IP & Session Lists → Session lists → Denylist, from the record menu, select Delete session.
Session status change
After session is blocked or unblocked, its new status is displayed only after the 1-st request following blocking or unblocking.
Viewing all blocked requests
As we mentioned in the introduction of this article, there can be different reasons of request blocking within a session. Whatever reason was, Wallarm provides a clear picture of all attacks (not obligatory blocked) and blocks within the session.
Consider the following:
-
Long sessions are split into one-day parts, no parts older than 7 days are stored and displayed.
-
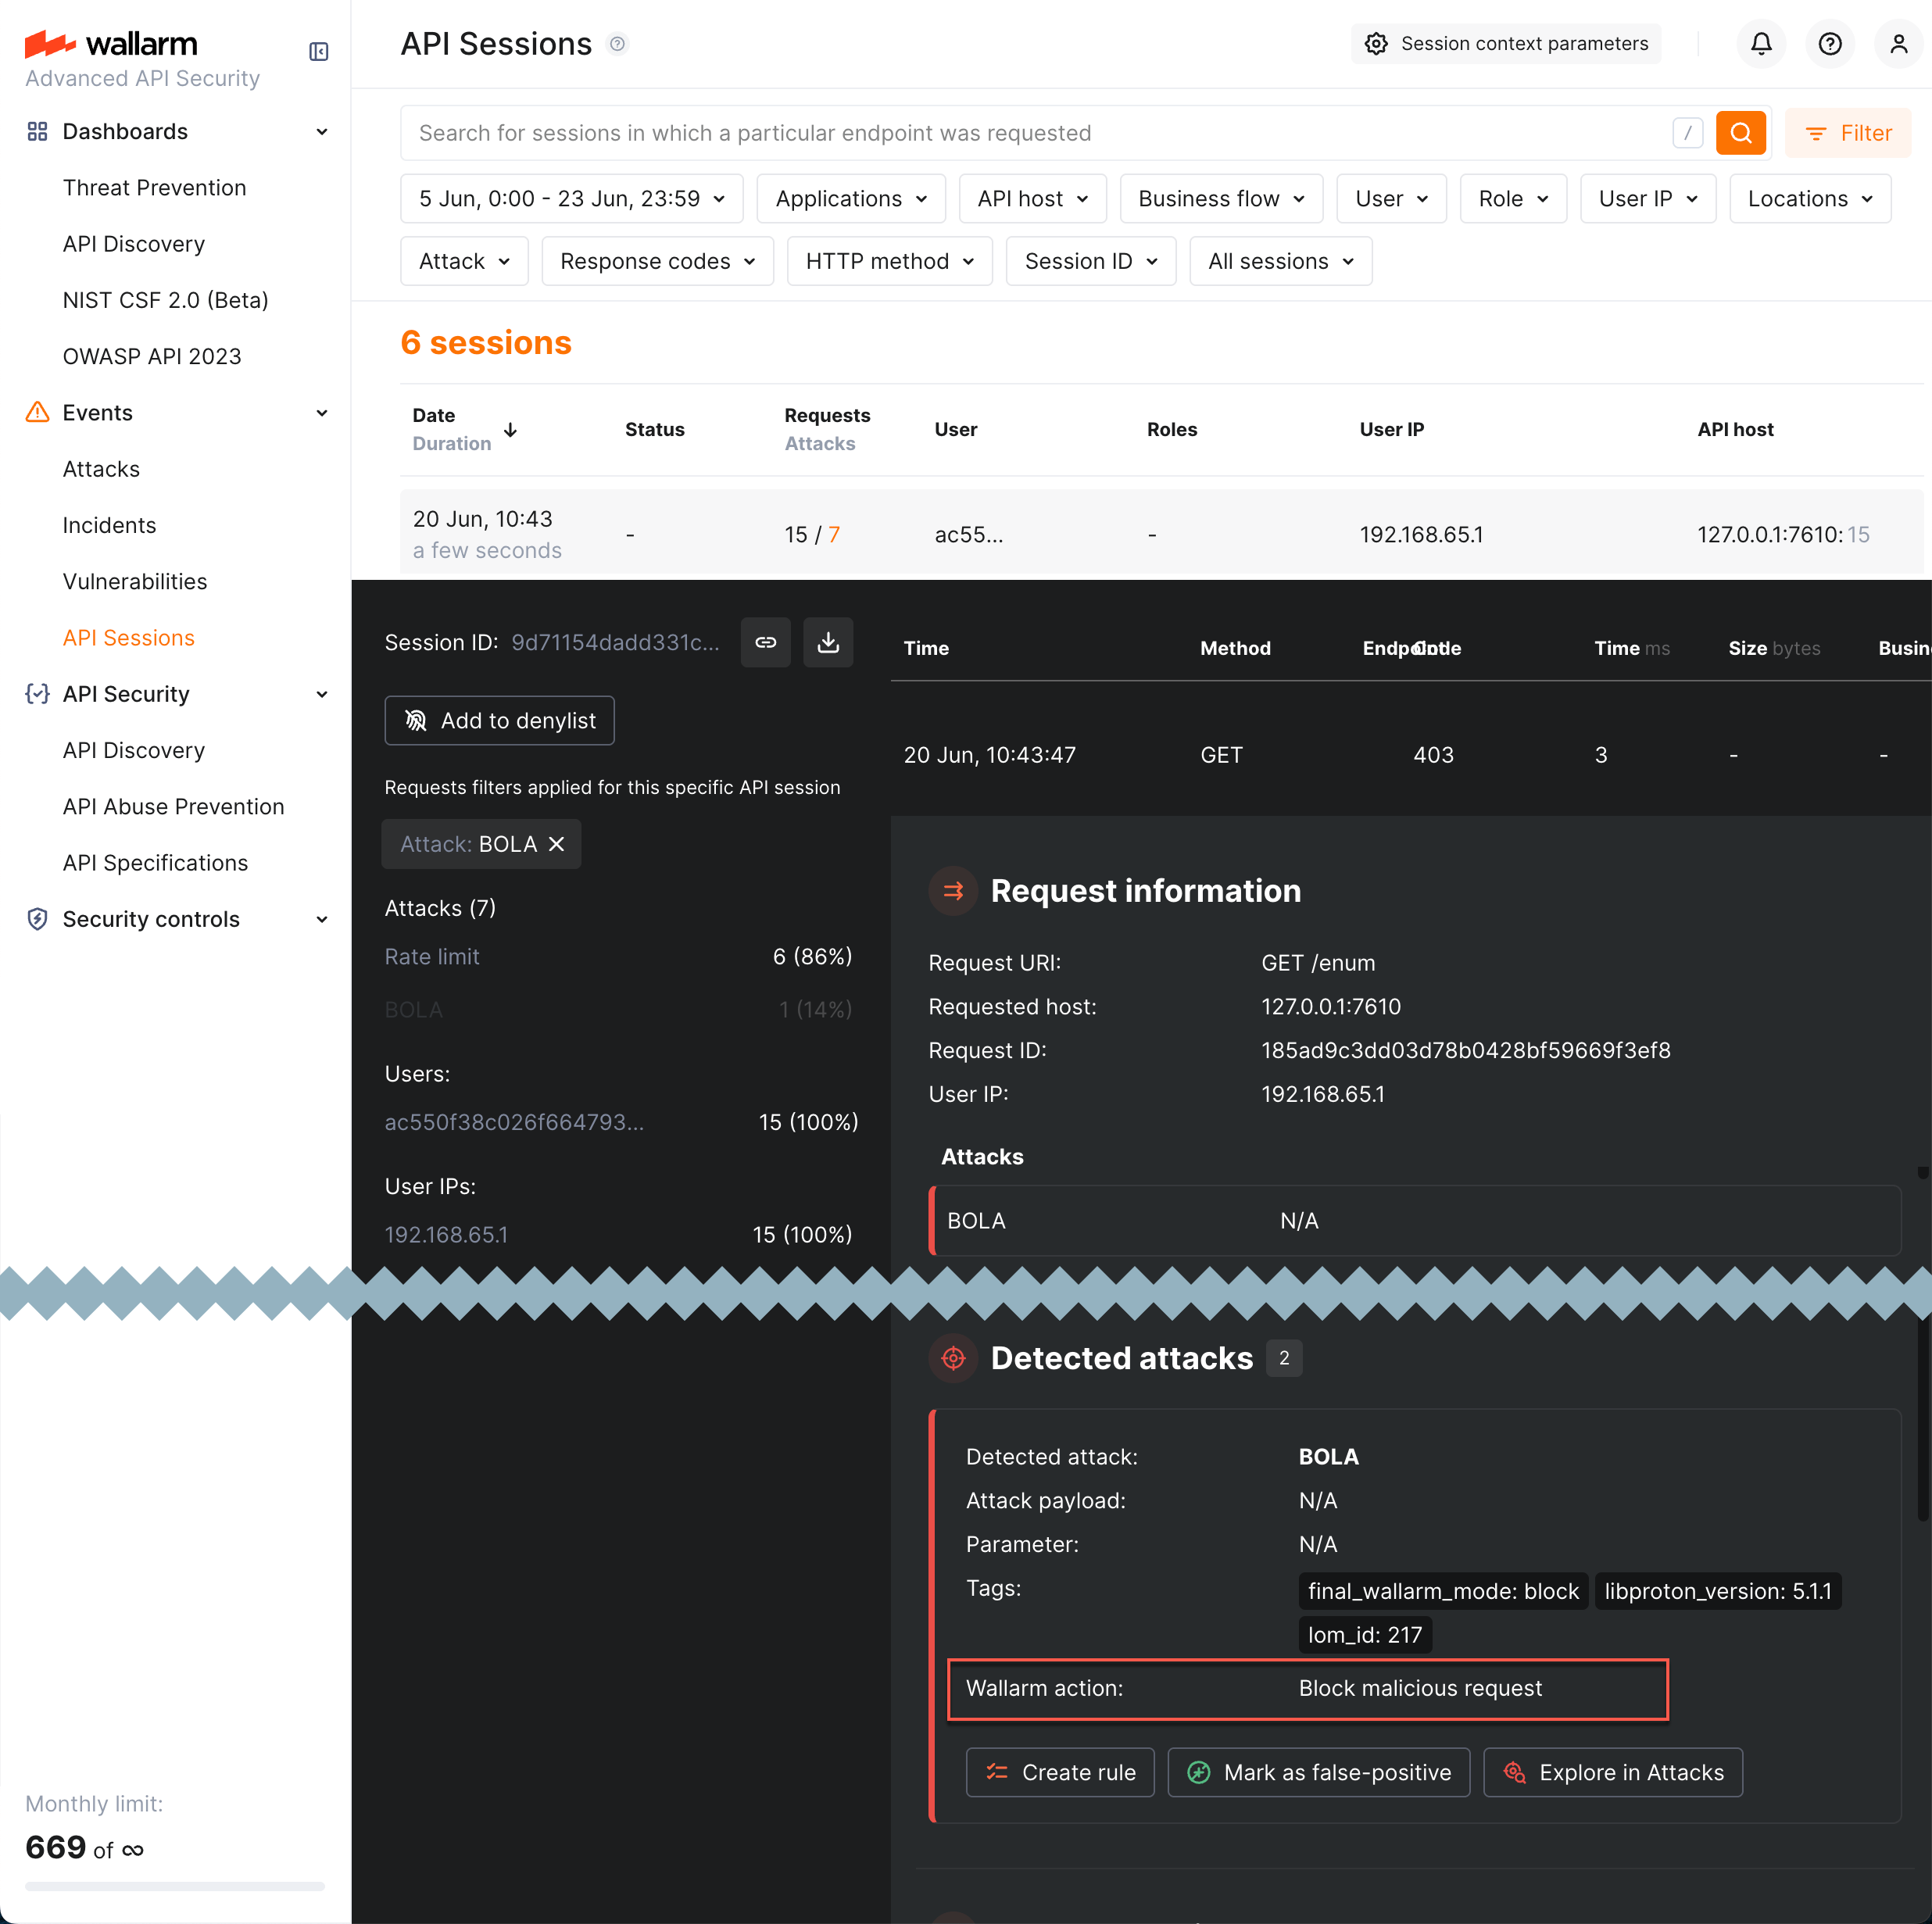
Detected attacks are listed in session details, left panel. Click filter mark in attack type to see in session details only the requests related to this attack type.
-
Not all request that are defined as part of attack, are blocked. Distinguish those that were blocked by opening request details and checking Wallarm action in the Detected attacks section.
-
After blocking the session, only 10 requests following the block moment, are displayed.
-
Even in the currently Blocked session, there can be unblocked requests (as session was not always blocked).
-
Even in the session that is not currently blocked, there can be blocked requests (different reasons, discussed in the introduction of this article), including blocked by session if session was blocked at some period in past.