ブロッキングページとエラーコードの設定(NGINX)
本手順では、ブロックされたリクエストへの応答で返されるブロッキングページおよびエラーコードをカスタマイズする方法を説明します。本設定はセルフホスト型のNGINXノードにのみ該当します。
カスタムのブロッキングページは、以下の理由でブロックされたリクエストに対する応答として返されます:
-
リクエストに次の種類の悪意あるペイロードが含まれている場合: 入力値検証攻撃、vpatch攻撃、または正規表現に基づいて検出された攻撃。
-
上記の悪意あるペイロードを含むリクエストがgraylistに登録されたIPアドレスから送信され、ノードがsafe blockingモードでリクエストをフィルタリングしている場合。
-
リクエストがdenylistに登録されたIPアドレスから送信された場合。
設定の制限事項
ブロッキングページとエラーコードの設定は、セルフホスト型のNGINXベースのWallarmノードのデプロイでサポートされますが、Native Nodeではサポートされません。
設定方法
デフォルトでは、レスポンスコード403とデフォルトのNGINXブロッキングページがクライアントに返されます。以下のNGINXディレクティブを使用してデフォルト設定を変更できます:
-
wallarm_block_page -
wallarm_block_page_add_dynamic_path
NGINXディレクティブwallarm_block_page
wallarm_block_page NGINXディレクティブに次のパラメータを渡すことで、ブロッキングページとエラーコードを設定できます:
-
ブロッキングページのHTMまたはHTMLファイルへのパス。カスタムのブロッキングページ、またはWallarmが提供するサンプルのブロッキングページのパスを指定できます。
-
ブロックされたリクエストに対する応答で返すメッセージの本文。
-
クライアントをリダイレクトするURL。
-
response_code: レスポンスコード。 -
type: 指定した設定を返す対象となるブロック済みリクエストの種類。以下の一覧から1つまたは複数(カンマ区切り)を指定できます:
wallarm_block_pageディレクティブは、以下の形式でこれらのパラメータを受け付けます:
-
ブロッキングページのHTMまたはHTMLファイルへのパス、エラーコード(任意)、ブロック済みリクエストの種類(任意)
wallarm_block_page &/<PATH_TO_FILE/HTML_HTM_FILE_NAME> response_code=<CUSTOM_CODE> type=<BLOCKED_REQUEST_TYPE>;Wallarmはサンプルのブロッキングページを提供しており、カスタマイズの出発点として使用できます。ページは次のパスにあります:
ブロッキングページ内でNGINX変数を使用できます。その場合、
${variable_name}形式で変数名をブロッキングページのコードに追加します。例えば、${remote_addr}でブロックされたリクエストの送信元IPアドレスを表示できます。DebianおよびCentOSユーザーへの重要な情報
CentOS/DebianリポジトリからインストールされたNGINX 1.11未満のバージョンを使用している場合、動的なブロッキングページを正しく表示するために、ページのコードから
request_id変数を削除する必要があります:
これは
wallarm_blocked.htmlおよびカスタムのブロックページの双方に適用されます。 -
クライアントのリダイレクト先URL、およびブロック済みリクエストの種類(任意)
-
名前付きNGINX
location、およびブロック済みリクエストの種類(任意) -
HTMまたはHTMLファイルへのパスを設定する変数名、エラーコード(任意)、ブロック済みリクエストの種類(任意)
コード内でNGINX変数を使用するブロッキングページの初期化
この方法で、コード内にNGINX変数を用いるブロッキングページを設定する場合は、ディレクティブ
wallarm_block_page_add_dynamic_pathを使用して当該ページを初期化してください。
wallarm_block_pageディレクティブは、NGINX設定ファイルのhttp、server、location各ブロック内に設定できます。
NGINXディレクティブwallarm_block_page_add_dynamic_path
wallarm_block_page_add_dynamic_pathディレクティブは、コード内でNGINX変数を使用しており、かつそのブロッキングページへのパスも変数で指定されているブロッキングページを初期化するために使用します。その他の場合は、このディレクティブは使用しません。
このディレクティブは、NGINX設定ファイルのhttpブロック内に設定できます。
サンプルのブロッキングページのカスタマイズ
Wallarmが提供するサンプルのブロッキングページは次のとおりです:
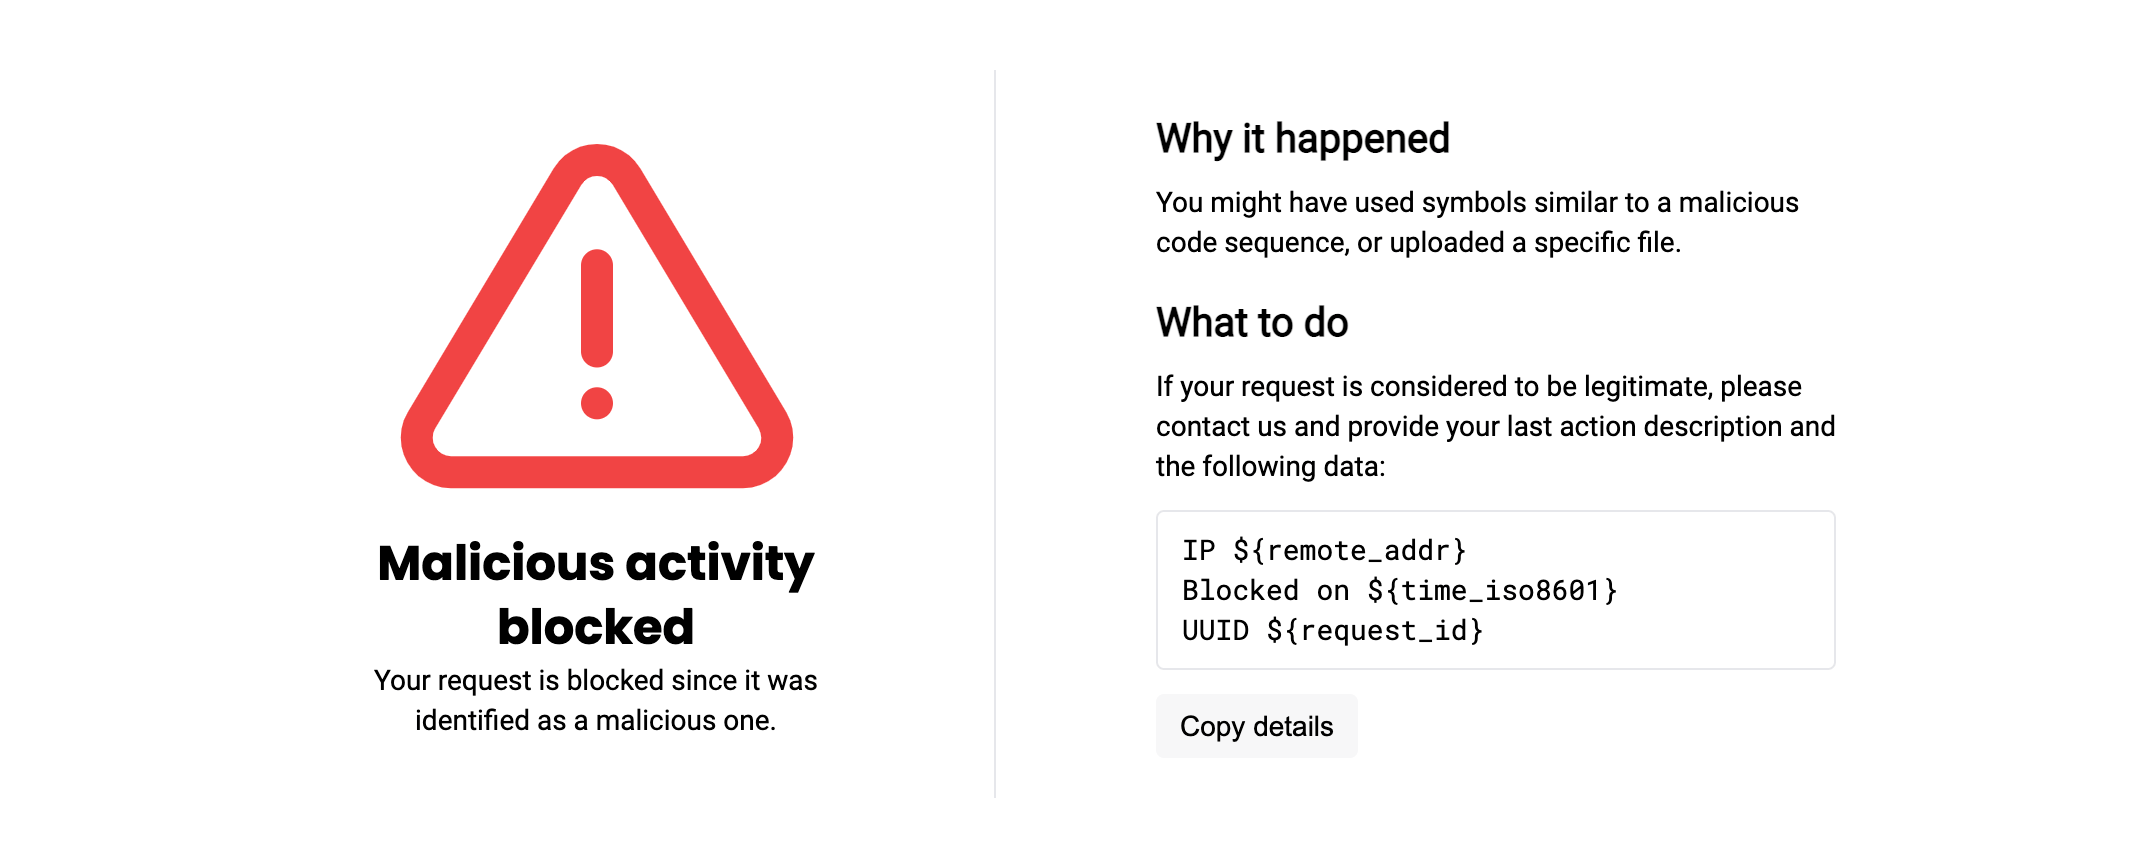
このサンプルページをカスタマイズの出発点として用い、次のような拡張が可能です:
-
会社のロゴを追加する — 既定ではページにロゴは表示されません。
-
会社のサポート用メールアドレスを追加する — 既定ではメールリンクは使用されず、
contact usという文言はリンクのない単なるテキストです。 -
その他のHTML要素を変更する、または独自の要素を追加する。
カスタムブロッキングページのバリエーション
Wallarm提供のサンプルページを変更する代わりに、ゼロからカスタムページを作成してもかまいません。
一般的な手順
サンプルページ自体を直接変更すると、Wallarmコンポーネントのアップデート時に変更が失われる場合があります。そのため、サンプルページをコピーして新しい名前を付け、その後に変更することを推奨します。以下のセクションに記載のとおり、インストール形態に応じて操作してください。
フィルタリングノードをインストールした環境にある/usr/share/nginx/html/wallarm_blocked.html(/opt/wallarm/usr/share/nginx/html/wallarm_blocked.html)をコピーできます。別案として、以下のコードをコピーし、新しいファイルとして保存してください:
サンプルページのコードを表示
<!DOCTYPE html>
<html lang="en">

<head>
    <meta charset="UTF-8">
    <meta name="viewport" content="width=device-width, initial-scale=1.0">
    <meta http-equiv="X-UA-Compatible" content="ie=edge">
    <title>You are blocked</title>
    <link href="https://fonts.googleapis.com/css?family=Poppins:700|Roboto|Roboto+Mono&display=swap" rel="stylesheet">
    <style>
        html {
            font-family: 'Roboto', sans-serif;
        }

        body {
            margin: 0;
            height: 100vh;
        }

        .content {
            display: flex;
            flex-direction: column;
            justify-content: space-between;
            align-items: center;
            min-height: 100%;
        }

        .logo {
            margin-top: 32px;
        }

        .message {
            display: flex;
            margin-bottom: 100px;
        }

        .alert {
            padding-top: 20px;
            width: 246px;
            text-align: center;
        }

        .alert-title {
            font-family: 'Poppins', sans-serif;
            font-weight: bold;
            font-size: 24px;
            line-height: 32px;
        }

        .alert-desc {
            font-size: 14px;
            line-height: 20px;
        }

        .info {
            margin-left: 76px;
            border-left: 1px solid rgba(149, 157, 172, 0.24);
            padding: 20px 0 20px 80px;
            width: 340px;
        }

        .info-title {
            font-weight: bold;
            font-size: 20px;
            line-height: 28px;
        }

        .info-text {
            margin-top: 8px;
            font-size: 14px;
            line-height: 20px;
        }

        .info-divider {
            margin-top: 16px;
        }

        .info-data {
            margin-top: 12px;
            border: 1px solid rgba(149, 157, 172, 0.24);
            border-radius: 4px;
            padding: 9px 12px;
            font-size: 14px;
            line-height: 20px;
            font-family: 'Roboto Mono', monospace;
        }

        .info-copy {
            margin-top: 12px;

            padding: 6px 12px;
            border: none;
            outline: none;
            background: rgba(149, 157, 172, 0.08);
            cursor: pointer;
            transition: 0.24s cubic-bezier(0.24, 0.1, 0.24, 1);
            border-radius: 4px;

            font-size: 14px;
            line-height: 20px;
        }

        .info-copy:hover {
            background-color: rgba(149, 157, 172, 0.24);
        }

        .info-copy:active {
            background-color: rgba(149, 157, 172, 0.08);
        }

        .info-mailto,
        .info-mailto:visited {
            color: #fc7303;
        }
    </style>
    <script>
        // サポート用メールアドレスをここに指定します
        const SUPPORT_EMAIL = "";
    </script>
</head>

<body>
    <div class="content">
        <div id="logo" class="logo">
            <!--
                ここにロゴを配置します。
                外部画像を使用できます:
                <img src="https://example.com/logo.png" width="160" alt="Company Name" />
                またはロゴのソースコード(SVGなど)をここに直接記述します:
                <svg width="160" height="80"> ... </svg>
            -->
        </div>

        <div class="message">
            <div class="alert">
                <svg width="207" height="207" viewBox="0 0 207 207" fill="none" xmlns="http://www.w3.org/2000/svg">
                    <path
                        d="M88.7512 33.2924L15.6975 155.25C14.1913 157.858 13.3943 160.816 13.3859 163.828C13.3775 166.84 14.1579 169.801 15.6494 172.418C17.141 175.035 19.2918 177.216 21.8877 178.743C24.4837 180.271 27.4344 181.092 30.4462 181.125H176.554C179.566 181.092 182.516 180.271 185.112 178.743C187.708 177.216 189.859 175.035 191.351 172.418C192.842 169.801 193.623 166.84 193.614 163.828C193.606 160.816 192.809 157.858 191.303 155.25L118.249 33.2924C116.711 30.7576 114.546 28.6618 111.963 27.2074C109.379 25.7529 106.465 24.9888 103.5 24.9888C100.535 24.9888 97.6206 25.7529 95.0372 27.2074C92.4538 28.6618 90.2888 30.7576 88.7512 33.2924V33.2924Z"
                        stroke="#F24444" stroke-width="16" stroke-linecap="round" stroke-linejoin="round" />
                    <path d="M103.5 77.625V120.75" stroke="#F24444" stroke-width="16" stroke-linecap="round"
                        stroke-linejoin="round" />
                    <path d="M103.5 146.625V146.668" stroke="#F24444" stroke-width="16" stroke-linecap="round"
                        stroke-linejoin="round" />
                </svg>
                <div class="alert-title">Malicious activity blocked</div>
                <div class="alert-desc">Your request is blocked since it was identified as a malicious one.</div>
            </div>
            <div class="info">
                <div class="info-title">Why it happened</div>
                <div class="info-text">
                    You might have used symbols similar to a malicious code sequence, or uploaded a specific file.
                </div>

                <div class="info-divider"></div>

                <div class="info-title">What to do</div>
                <div class="info-text">
                    If your request is considered to be legitimate, please <a id="mailto" href="" class="info-mailto">contact us</a> and provide your last action description and the following data:
                </div>

                <div id="data" class="info-data">
                    IP ${remote_addr}<br />
                    Blocked on ${time_iso8601}<br />
                    UUID ${request_id}
                </div>

                <button id="copy-btn" class="info-copy">
                    Copy details
                </button>
            </div>
        </div>
        <div></div>
    </div>
    <script>
        // 警告: ES5コードのみ

        function writeText(str) {
            const range = document.createRange();

            function listener(e) {
                e.clipboardData.setData('text/plain', str);
                e.preventDefault();
            }

            range.selectNodeContents(document.body);
            document.getSelection().addRange(range);
            document.addEventListener('copy', listener);
            document.execCommand('copy');
            document.removeEventListener('copy', listener);
            document.getSelection().removeAllRanges();
        }

        function copy() {
            const text = document.querySelector('#data').innerText;

            if (navigator.clipboard && navigator.clipboard.writeText) {
                return navigator.clipboard.writeText(text);
            }

            return writeText(text);
        }

        document.querySelector('#copy-btn').addEventListener('click', copy);

        const mailto = document.getElementById('mailto');
        if (SUPPORT_EMAIL) mailto.href = `mailto:${wallarm_dollar}{SUPPORT_EMAIL}`;
        else mailto.replaceWith(mailto.textContent);
    </script>
</body>
共通ファイルシステム
/usr/share/nginx/html/wallarm_blocked.html(/opt/wallarm/usr/share/nginx/html/wallarm_blocked.html)のコピーを、新しい名前で任意の場所(同じフォルダ内でも可、NGINXが読み取り可能である必要があります)に作成できます。
Dockerコンテナ
サンプルのブロッキングページを変更する、またはゼロから独自のページを用意するには、Dockerのbind mount機能を利用できます。これを使用すると、ホストマシン上のページとNGINX設定ファイルがコンテナにコピーされ、元ファイルへの参照として扱われるため、ホスト側のファイルを変更するとコンテナ側のコピーに同期され、逆も同様です。
そのため、サンプルのブロッキングページを変更する、または独自のページを提供するには、次の手順を実施してください:
-
初回の実行前に、準備した変更済み
wallarm_blocked_renamed.htmlを用意します。 -
ブロッキングページへのパスを記載したNGINX設定ファイルを用意します。設定例を参照してください。
-
コンテナを実行し、準備したブロッキングページと設定ファイルをマウントします。
-
稼働中のコンテナ内のブロッキングページを後から更新する必要がある場合は、ホストマシン上の参照元
wallarm_blocked_renamed.htmlを変更し、コンテナ内のNGINXを再起動してください。
Ingressコントローラ
サンプルのブロッキングページを変更する、または独自のページを用意するには、次を実施します:
-
変更済み
wallarm_blocked_renamed.htmlを準備します。 -
wallarm_blocked_renamed.htmlからConfigMapを作成します。 -
作成したConfigMapを、Wallarm IngressコントローラのPodにマウントします。そのために、手順に従って、Wallarm Ingressコントローラに対応するDeploymentオブジェクトを更新してください。
ConfigMapのマウント先ディレクトリ
ConfigMapのマウント先ディレクトリに既存のファイルがある場合は削除されます。
-
Ingressのアノテーションを指定し、Podにカスタムページの使用を指示します:
詳細な例をご覧ください。
よく行われる変更
会社のロゴを追加するには、wallarm_blocked_renamed.htmlファイルの次の部分を編集してコメントアウトを解除してください:
<div class="content">
    <div id="logo" class="logo">
        <!--
            ここにロゴを配置します。
            外部画像を使用できます:
            <img src="https://example.com/logo.png" width="160" alt="Company Name" />
            またはロゴのソースコード(SVGなど)をここに直接記述します:
            <svg width="160" height="80"> ... </svg>
        -->
    </div>
会社のサポート用メールアドレスを追加するには、wallarm_blocked_renamed.htmlファイルのSUPPORT_EMAIL変数を編集してください:
値に$を含むカスタム変数を初期化する場合は、変数名の前に{wallarm_dollar}を付けてこの記号をエスケープします。例: ${wallarm_dollar}{variable_name}。wallarm_dollar変数は&を返します。
設定例
以下は、wallarm_block_pageおよびwallarm_block_page_add_dynamic_pathディレクティブでブロッキングページとエラーコードを設定する例です。
各例ではwallarm_block_pageディレクティブのtypeパラメータを明示的に指定しています。typeパラメータを省略した場合、設定したブロックページやメッセージなどは、ブロッキングまたはsafe blockingモードでフィルタリングノードによりブロックされたリクエストへの応答にのみ返されます。
ブロッキングページのHTMまたはHTMLファイルとエラーコードのパス
この例では、以下の応答設定を示します:
-
変更済みのWallarmサンプルブロッキングページ
/opt/wallarm/usr/share/nginx/html/wallarm_blocked_renamed.htmlとエラーコード445を、フィルタリングノードがブロッキングまたはsafe blockingモードでリクエストをブロックした場合に返します。 -
カスタムブロッキングページ
/usr/share/nginx/html/block.htmlとエラーコード445を、denylistに登録された任意のIPアドレスからのリクエストの場合に返します。
NGINX設定ファイル
wallarm_block_page &/opt/wallarm/usr/share/nginx/html/wallarm_blocked_renamed.html response_code=445 type=attack;
wallarm_block_page &/usr/share/nginx/html/block.html response_code=445 type=acl_ip,acl_source;
Dockerコンテナに設定を適用するには、適切な設定を含むNGINX設定ファイルを、wallarm_blocked_renamed.htmlおよびblock.htmlファイルとともにコンテナへマウントします。設定ファイルをマウントしてコンテナを起動 →
Ingressアノテーション
Ingressアノテーションを追加する前に:
-
攻撃ブロック用の変更済み
wallarm_blocked_renamed.htmlと、denylistのIPからのブロック用wallarm_blocked_renamed-2.htmlを準備します。 -
作成したConfigMapをWallarm IngressコントローラのPodにmountするには、次を実施します:
-
Ingressチャートのデプロイに使用しているvalues.yamlを更新します:
controller: wallarm: <...> # -- Additional volumeMounts to the controller main container. extraVolumeMounts: - name: custom-block-pages mountPath: /usr/share/nginx/blockpages # -- Additional volumes to the controller pod. extraVolumes: - name: custom-block-pages configMap: name: customized-pages <...> -
コントローラのリリースに変更を適用します:
helm -n <CONTROLLER_NAMESPACE> upgrade <CHART-RELEASE-NAME> wallarm/wallarm-ingress --reuse-values -f values.yamlConfigMapのマウント先ディレクトリ
ConfigMapのマウント先ディレクトリに既存ファイルがあると削除される可能性があるため、ConfigMapでマウントするファイル用に新しいディレクトリを作成することを推奨します。
-
Ingressアノテーション:
kubectl -n <INGRESS_NAMESPACE> annotate ingress <INGRESS_NAME> nginx.ingress.kubernetes.io/wallarm-block-page="&/usr/share/nginx/blockpages/wallarm_blocked_renamed.html response_code=445 type=attack;&/usr/share/nginx/blockpages/wallarm_blocked_renamed-2.html response_code=445 type=acl_ip,acl_source"
Podアノテーション(Sidecarコントローラ使用時)
sidecar.wallarm.io/wallarm-block-pageアノテーションを使用して、Pod単位でブロックページを設定できます。例:
apiVersion: apps/v1
kind: Deployment
metadata:
  name: myapp
  namespace: default
spec:
  replicas: 1
  selector:
    matchLabels:
      app: myapp
  template:
    metadata:
      labels:
        app: myapp
        wallarm-sidecar: enabled
      annotations:
        sidecar.wallarm.io/wallarm-mode: block
        sidecar.wallarm.io/wallarm-block-page: "&/path/to/block/page1.html response_code=403 type=attack;&/path/to/block/page2.html response_code=403 type=acl_ip,acl_source"
    spec:
      containers:
        - name: application
          image: kennethreitz/httpbin
          ports:
            - name: http
              containerPort: 80
クライアントリダイレクト用URL
この例では、denylistに登録された国・地域・データセンターからのリクエストをフィルタリングノードがブロックした場合、クライアントをhost/err445のページへリダイレクトする設定を示します。
NGINX設定ファイル
Dockerコンテナに設定を適用するには、適切な設定を含むNGINX設定ファイルをコンテナへマウントします。設定ファイルをマウントしてコンテナを起動 →
Ingressアノテーション
kubectl annotate ingress <INGRESS_NAME> -n <INGRESS_NAMESPACE> nginx.ingress.kubernetes.io/wallarm-block-page="/err445 type=acl_source"
名前付きNGINXlocation
この例では、リクエストがどの理由でブロックされた場合(ブロッキングまたはsafe blockingモード、送信元が単一IP/サブネット/国または地域/データセンターとしてdenylistに登録されている場合)でも、クライアントにメッセージThe page is blockedとエラーコード445を返す設定を示します。
NGINX設定ファイル
wallarm_block_page @block type=attack,acl_ip,acl_source;
location @block {
    return 445 'The page is blocked';
}
Dockerコンテナに設定を適用するには、適切な設定を含むNGINX設定ファイルをコンテナへマウントします。設定ファイルをマウントしてコンテナを起動 →
Ingressアノテーション
kubectl annotate ingress <INGRESS_NAME> -n <INGRESS_NAMESPACE> nginx.ingress.kubernetes.io/server-snippet="location @block {return 445 'The page is blocked';}"
kubectl annotate ingress <INGRESS_NAME> -n <INGRESS_NAMESPACE> nginx.ingress.kubernetes.io/wallarm-block-page="@block type=attack,acl_ip,acl_source"
変数とエラーコード
この設定は、送信元が単一IPまたはサブネットとしてdenylistに登録されている場合にクライアントへ返されます。Wallarmノードはコード445と、User-Agentヘッダーの値に応じて内容が変わるブロッキングページを返します:
-
既定では、変更済みのWallarmサンプルブロッキングページ
/opt/wallarm/usr/share/nginx/html/wallarm_blocked_renamed.htmlが返されます。ブロッキングページのコードでNGINX変数を使用しているため、このページはwallarm_block_page_add_dynamic_pathディレクティブで初期化する必要があります。 -
Firefoxユーザーには
/usr/share/nginx/html/block_page_firefox.html(Wallarm Ingressコントローラをデプロイしている場合は、カスタムブロックページ用に別ディレクトリを作成することを推奨します。例:/usr/custom-block-pages/block_page_firefox.html)を返します:このページはブロッキングページのコードでNGINX変数を使用しているため、
wallarm_block_page_add_dynamic_pathディレクティブで初期化する必要があります。 -
Chromeユーザーには
/usr/share/nginx/html/block_page_chrome.html(Wallarm Ingressコントローラをデプロイしている場合は、カスタムブロックページ用に別ディレクトリを作成することを推奨します。例:/usr/custom-block-pages/block_page_chrome.html)を返します:このページはブロッキングページのコードでNGINX変数を使用していないため、初期化は不要です。
NGINX設定ファイル
wallarm_block_page_add_dynamic_path /usr/share/nginx/html/block_page_firefox.html /opt/wallarm/usr/share/nginx/html/wallarm_blocked_renamed.html;

map $http_user_agent $block_page {
  "~Firefox"  &/usr/share/nginx/html/block_page_firefox.html;
  "~Chrome"   &/usr/share/nginx/html/block_page_chrome.html;
  default     &/opt/wallarm/usr/share/nginx/html/wallarm_blocked_renamed.html;
}

wallarm_block_page $block_page response_code=445 type=acl_ip;
Dockerコンテナに設定を適用するには、適切な設定を含むNGINX設定ファイルを、wallarm_blocked_renamed.html、block_page_firefox.html、block_page_chrome.htmlファイルとともにコンテナへマウントします。設定ファイルをマウントしてコンテナを起動 →
Ingressコントローラ
-
コマンド
helm upgradeを使用して、デプロイ済みのHelmチャートにパラメータcontroller.config.http-snippetを渡します:helm upgrade --reuse-values --set controller.config.http-snippet='wallarm_block_page_add_dynamic_path /usr/custom-block-pages/block_page_firefox.html /opt/wallarm/usr/share/nginx/html/wallarm_blocked_renamed.html; map $http_user_agent $block_page { "~Firefox" &/usr/custom-block-pages/block_page_firefox.html; "~Chrome" &/usr/custom-block-pages/block_page_chrome.html; default &/opt/wallarm/usr/share/nginx/html/wallarm_blocked_renamed.html;}' <INGRESS_CONTROLLER_RELEASE_NAME> wallarm/wallarm-ingress -n <KUBERNETES_NAMESPACE> -
wallarm_blocked_renamed.html、block_page_firefox.html、block_page_chrome.htmlからConfigMapを作成します。 -
作成したConfigMapをWallarm IngressコントローラのPodにマウントします。そのために、手順に従って、Wallarm Ingressコントローラに対応するDeploymentオブジェクトを更新してください。
ConfigMapのマウント先ディレクトリ
ConfigMapのマウント先ディレクトリに既存ファイルがあると削除される可能性があるため、ConfigMapでマウントするファイル用に新しいディレクトリを作成することを推奨します。
-
次のアノテーションをIngressに追加します: