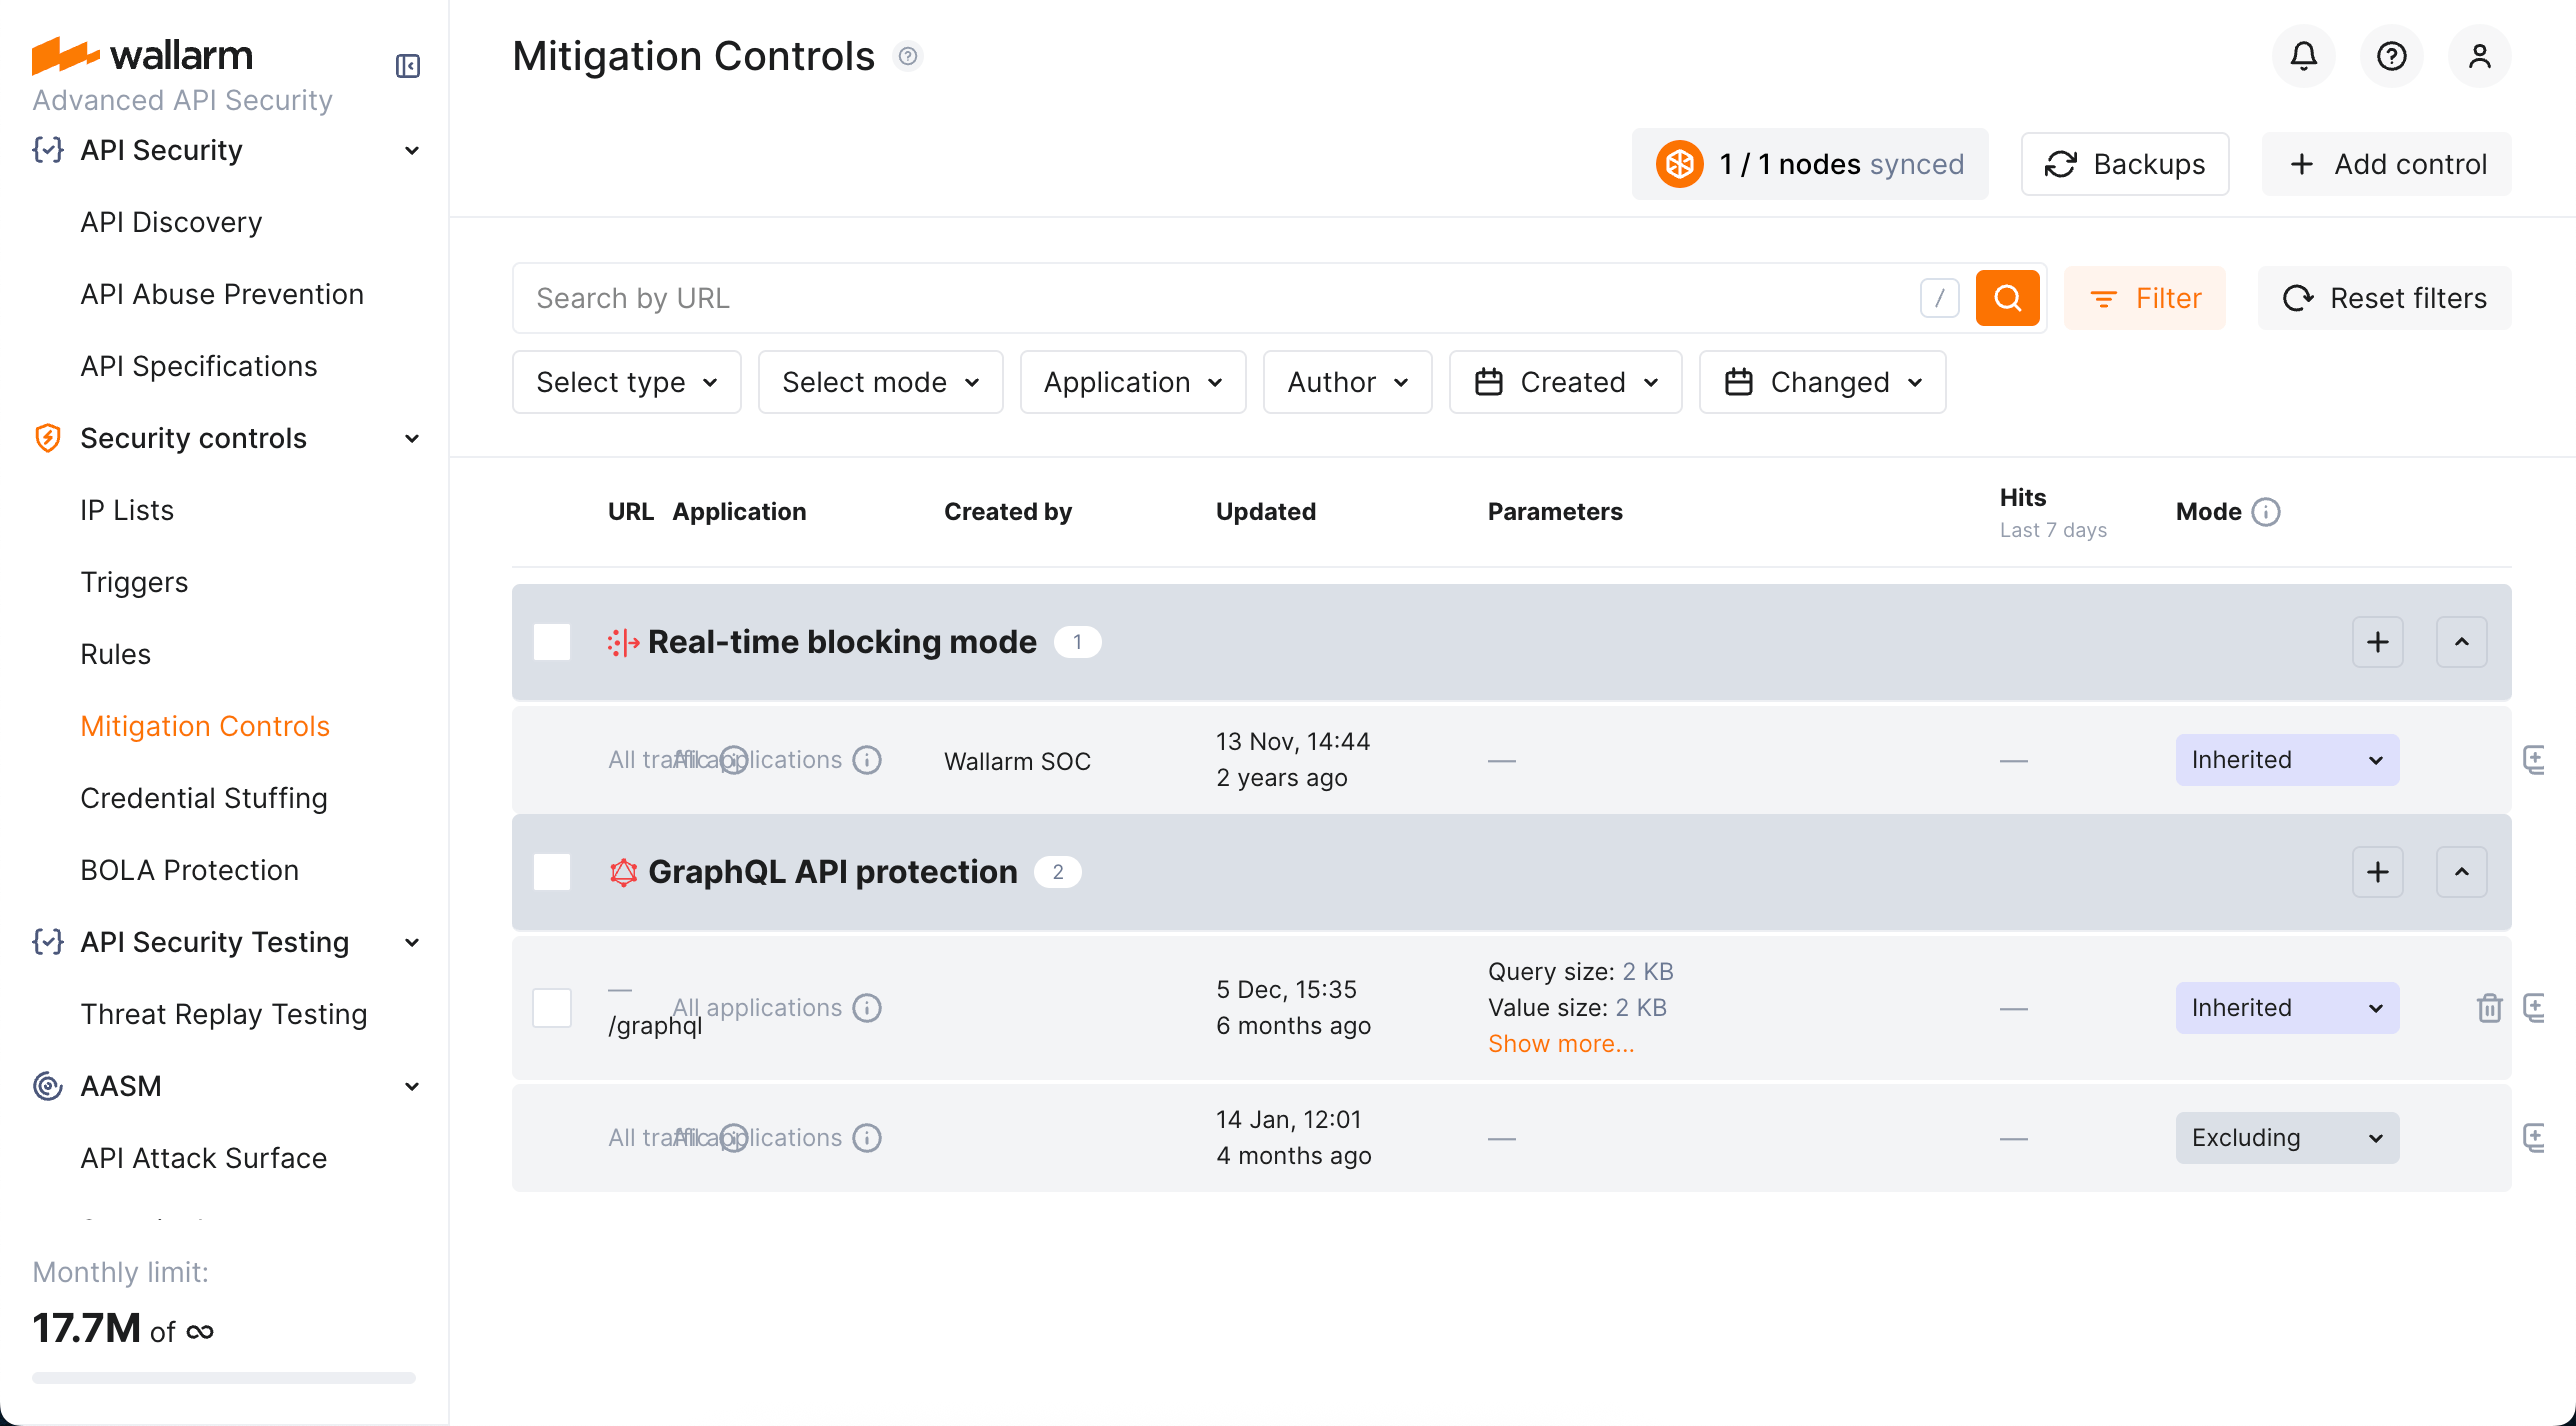
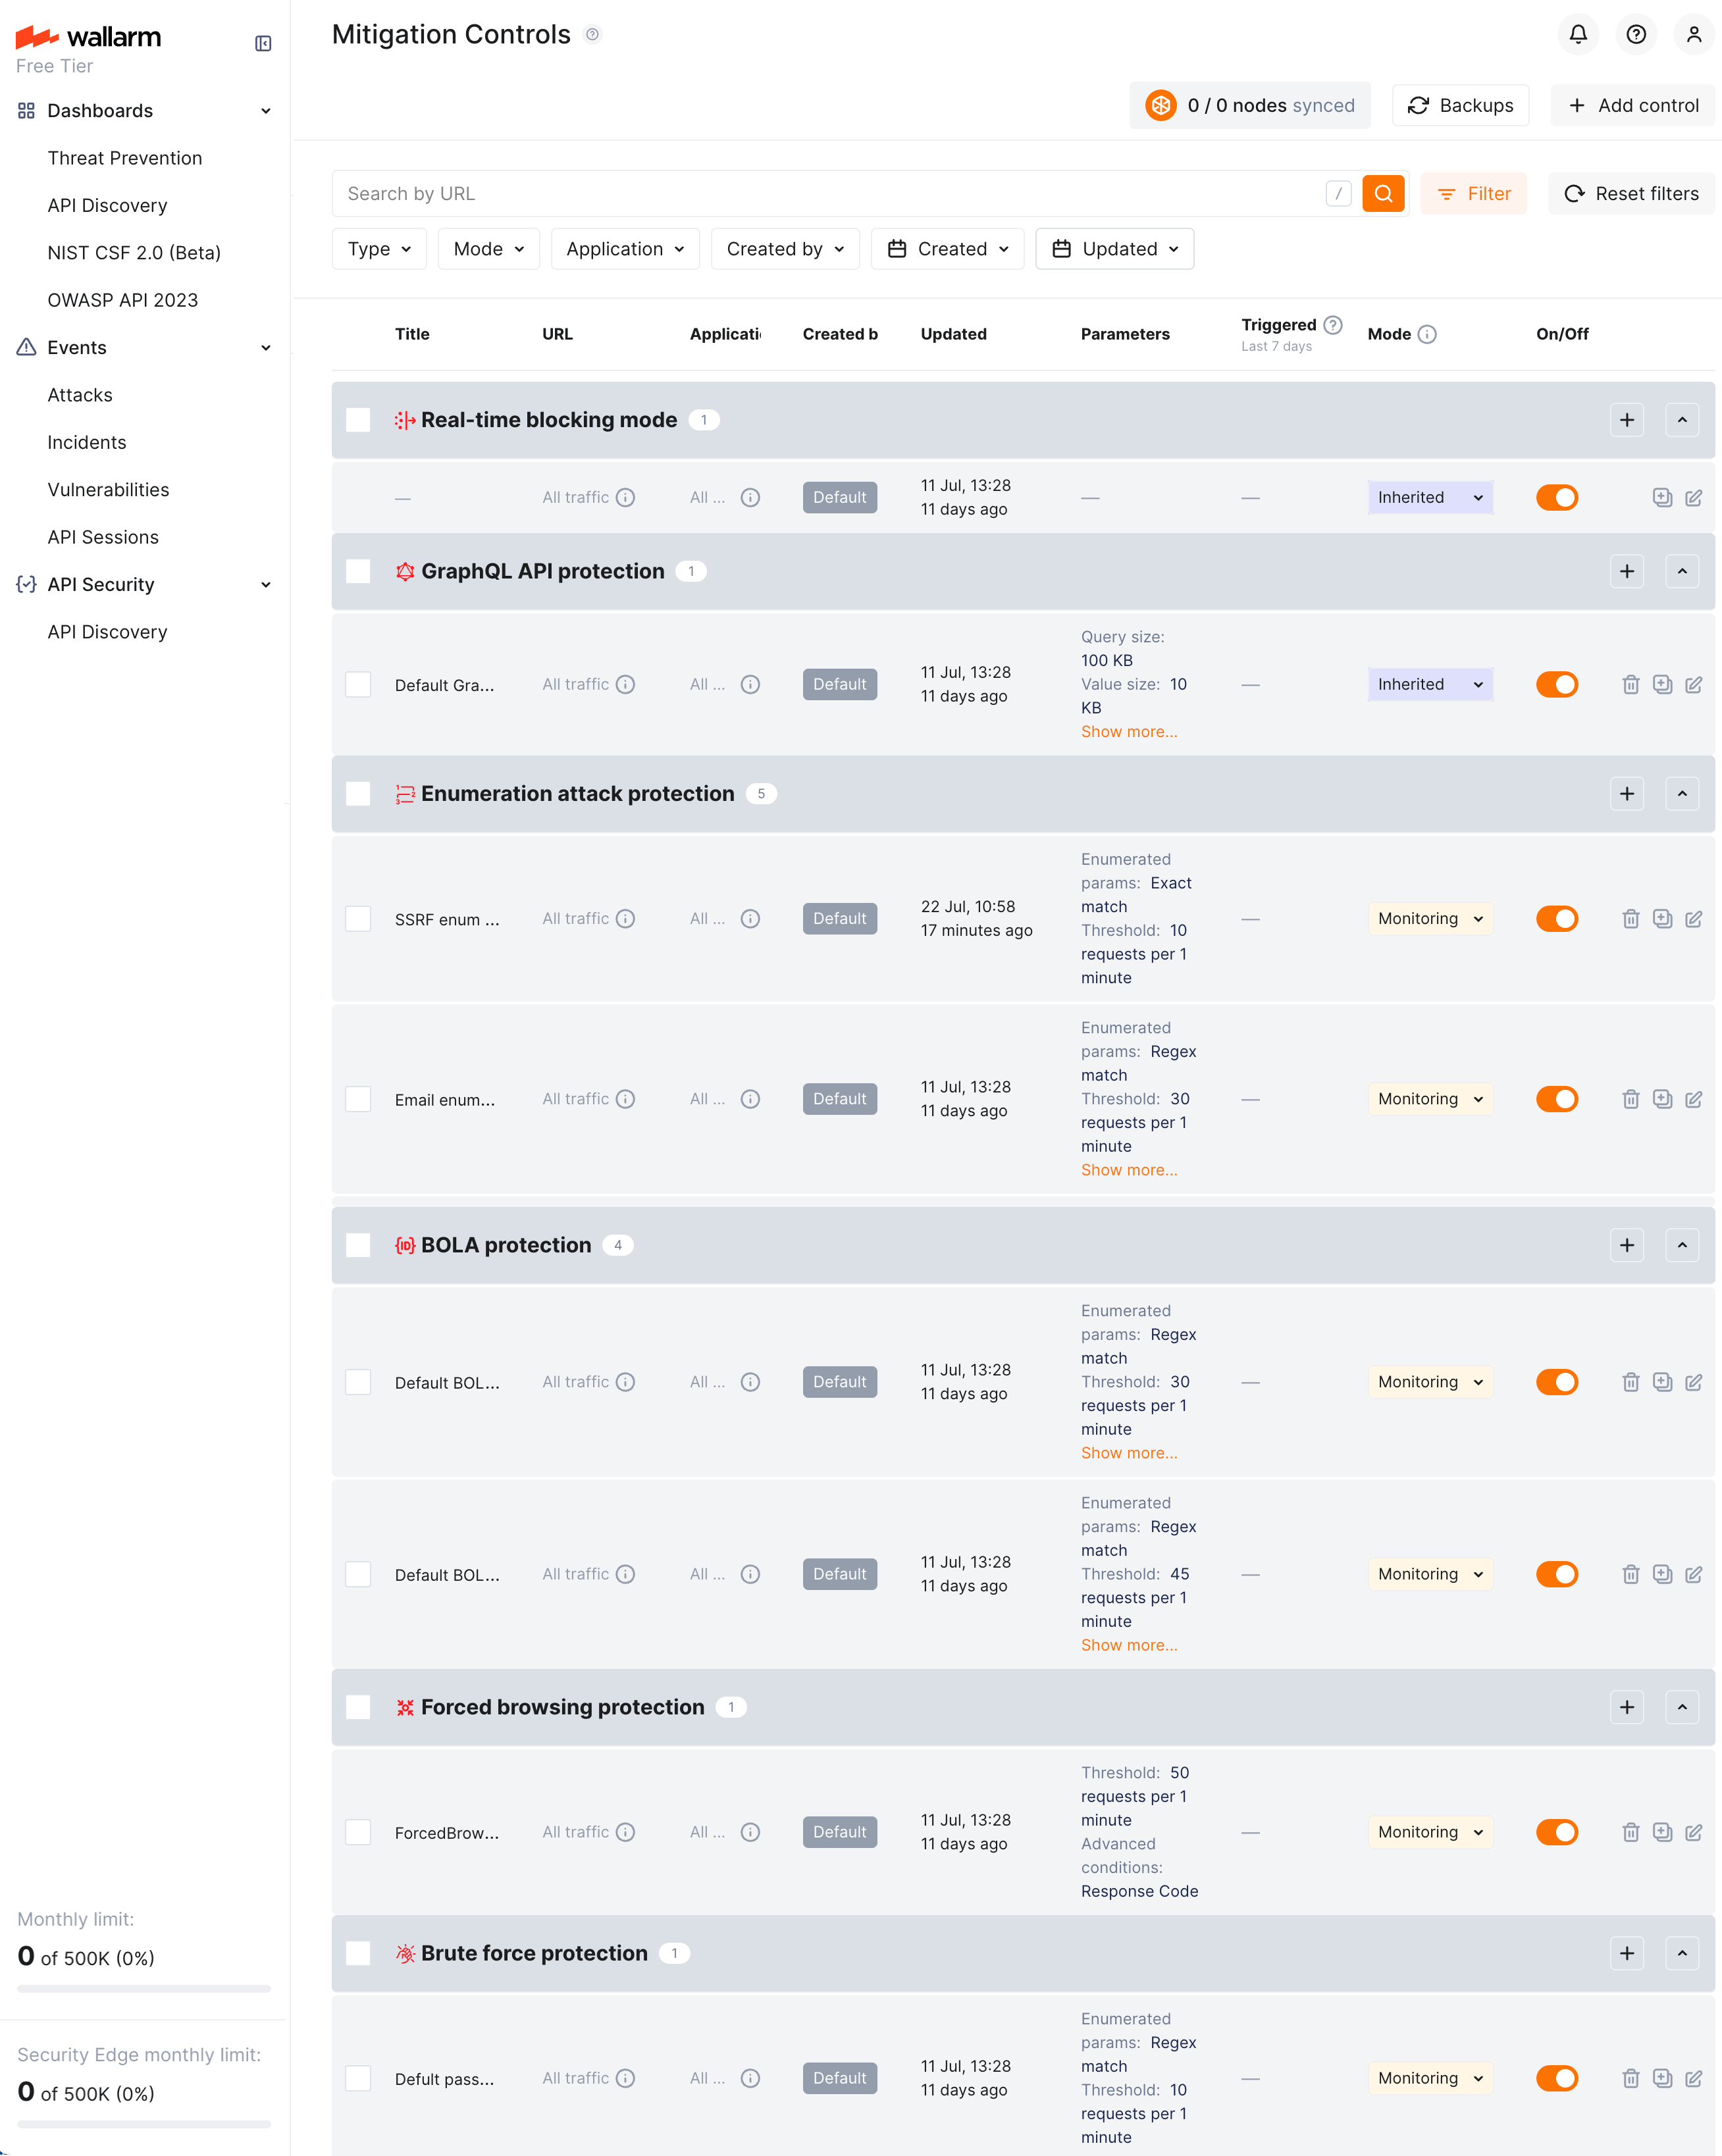
Mitigation Controls  
Mitigation controlsはWallarmの攻撃保護を追加のセキュリティ対策で拡張し、Wallarmの動作をきめ細かく調整できるようにします。
Mitigation controlsでできること
Mitigation controlsを使用すると、次の機能を有効化および設定できます。
Mitigation control branches
Mitigation controlsは、エンドポイントURIやその他の条件に基づいて自動的に入れ子のブランチにグループ化されます。これにより、Mitigation controlの効果が下位に継承されるツリー状の構造が形成されます。原則は次のとおりです。
-
すべてのブランチはall trafficのMitigation controlsを継承します。
-
各ブランチでは、子エンドポイントは親からMitigation controlの効果を継承します。
-
個別指定が継承より優先されます。
-
直接指定が正規表現より優先されます。
-
大文字小文字を区別する指定が区別しない指定より優先されます。
Enabling
Mitigation controlsを使用するには以下が必要です。
-
Advanced API Securityサブスクリプションプラン
-
(大半のコントロール)NGINX Node 6.0.1またはNative Node 0.14.1
これらの条件を満たしていてもWallarm ConsoleにSecurity controls → Mitigation Controlsセクションが表示されない場合は、有効化のためWallarmサポートチームにお問い合わせください。
Configuration
設定はWallarm ConsoleのSecurity controls → Mitigation Controlsセクションで行います。また、API Sessionsなど、システム内の別の場所から一部のMitigation control設定にアクセスすることもできます。
設定前にブランチの考え方に慣れ、既存の設定を確認してください。
一般に、任意のMitigation controlの設定は以下の手順で構成されます。
-
必要に応じて、カスタムのTitleを設定します。
-
条件を設定します(すべて満たされた場合に→アクション)。
-
アクション(Mitigation mode)を設定します。
Scope
Scopeは、そのコントロールを適用するリクエスト(URIやその他のパラメータに基づく)を定義します。ルールのリクエスト条件と同様の方法で設定します。詳細はこちらをご覧ください。
Scopeセクションを空のままにすると、Mitigation controlはall trafficおよびall applicationsに適用され、このようなコントロールはすべてのブランチに継承されます。
Advanced conditions
Scopeに加えて、Mitigation controlには、アクションを実行するかどうかを決定する他の条件を含めることがあります。例:
-
GraphQL API protectionの場合はpolicy positionsで、リクエストがいずれかに違反した場合にのみコントロールが動作します。
-
Enumeration attack protectionの場合は、リクエストの複数のパラメータで構成され、指定したすべてのパラメータ/値が満たされた場合にのみコントロールが動作します。
Enumeration attack protectionやDoS protectionのような一部のコントロールでは、Scope filtersセクションでsession context parametersを使用し、API Sessionsで重要として定義されたパラメータのリストから素早く選択できます。このセクションのAdd customオプションを使用すると、現在API Sessionsに存在しないパラメータをフィルタとして追加できます。その場合、これらのパラメータはAPI Sessionsのcontext parametersにも追加されます(hidden。つまり、リクエストに含まれていればsession detailsでこれらのパラメータは表示されますが、API Sessionのcontext parameter configurationには表示されません)。
詳細条件を指定するために、regular expressionsを使用できます。
Mitigation mode
すべての条件が満たされると、Mitigation controlはアクションを実行します。必要なアクションはMitigation modeセクションで選択します。
| Mitigation mode | 説明 |
|---|---|
| Inherited | モードはall-traffic Real-time blocking modeおよびWallarmノードの構成から継承されます。 |
| Monitoring | 検出された攻撃を記録するだけで、ブロックは行いません。記録された攻撃はAPI Sessionsの該当するsession detailsに表示されます。 一部のコントロールでは、このモード中に送信元IPをGraylistに追加する追加オプションを選択できます。 |
| Blocking | 攻撃を記録してブロックします。ブロック方法はコントロールの種類によって異なり、real-time blocking、IP-based blocking、またはsession-based blocking*になります。 |
| Excluding | 指定したscopeに対するこのタイプのMitigation controlを停止します。詳細はExcluding mode vs. disablingをご覧ください。 |
| Safe blocking | 攻撃を記録しますが、送信元IPがGraylistにある場合にのみブロックします。 |
* 現時点ではsession-based blockingは未対応です。
利用可能なモードの一覧はコントロールによって異なる場合があります。
Excluding mode vs. disabling
On/Offスイッチャーを使用してMitigation controlを一時的に無効化し、必要に応じて再度有効化できます。以下の例で、無効化したMitigation controlと、Excludingモードで有効化したMitigation controlの違いをご確認ください。
-
コントロールはブランチで動作することを考慮してください。
-
たとえば、
example.comに対してDoS protectionコントロール(1分あたり50リクエスト)を設定し、子のexample.com/loginに同種のコントロール(1分あたり10リクエスト)を設定しているとします。これにより、example.com配下のすべてのアドレスには1分あたり50リクエストの制限が適用されますが、example.com/login配下ではより厳しく1分あたり10リクエストの制限となります。 -
example.com/loginのrate abuse protectionコントロールを無効化(スイッチャーをOff)すると、そのコントロールは何もしなくなります(削除したのと同じ状態)——この場合、全体の制限は親コントロールにより決まります(1分あたり50リクエスト)。 -
example.com/loginのrate abuse protectionコントロールを再有効化し、そのMitigation modeをExcludingに設定すると、このブランチではrate abuse protectionが停止します。つまり、example.com全体では1分あたり50リクエストの制限が適用されますが、example.com/loginではrate abuse protectionタイプの制限は一切適用されません。
Regular expressions
ScopeやScope filtersなどのさまざまなMitigation controlパラメータの指定には、正規表現を使用できます。
-
ScopeセクションはPIRE正規表現ライブラリを使用します。使い方の詳細はこちらをご覧ください。
-
その他のセクションはPCREを使用します。正規表現を使用するには以下の演算子を使います。
演算子 説明 ~ (Aa) 大文字小文字を区別しない正規表現で検索します。 !~ (Aa) 大文字小文字を区別しない正規表現で除外します。 ~ 大文字小文字を区別する正規表現で検索します。 !~ 大文字小文字を区別する正規表現で除外します。
デフォルトコントロール
Wallarmは一連のデフォルトのMitigation controlsを提供しており、有効化するとWallarmプラットフォームの検出能力が大幅に向上します。これらのコントロールは、多様な一般的攻撃パターンに対して堅牢な保護を提供するよう事前設定されています。現在のデフォルトMitigation controlsは以下のとおりです。
-
ユーザーID、オブジェクトID、ファイル名に対するBOLA (Broken Object Level Authorization) enumeration protection
-
パスワード、OTP、認証コードに対するBrute force protection
-
Forced browsing protection(404 probing)
-
Enumeration attack protectionとして以下を含みます:
- ユーザー/メールの列挙
- SSRF(Server-Side Request Forgery)の列挙
- User-agentのローテーション
デフォルトセットのすべてのコントロールにはDefaultラベルが付与されています。これらのコントロールは次のとおりです。
-
新規クライアントにはWallarmによって自動追加され有効(
On)、既存クライアントでは無効(Off)です。デフォルトコントロールが見当たらない場合
必須のものを除いてデフォルトコントロールが表示されず、試してみたい場合は、Wallarmサポートチームまでご連絡ください。
-
すべては初期状態でall trafficに適用されています(変更可能)。
-
すべては初期状態で
MonitoringMitigation modeを使用しています(変更可能)。 -
削除はできません。
-
他のコントロールと同様に無効化/再有効化や編集が可能です。編集により、アプリケーションの特性、トラフィックパターン、ビジネスコンテキストに応じて任意のデフォルトコントロールをカスタマイズできます。たとえば、既定のしきい値を調整したり、Scope filtersセクションを使用して特定のエンドポイントを除外したりできます。
Subject to change
The list of default mitigation controls is subject to change:
- New controls may be introduced over time.
- If a mitigation control is disabled, Wallarm may still update its parameters to improve quality and performance.
-
All traffic Real-time blocking modeコントロール
ルールセットのライフサイクル
作成したMitigation controlsとrulesはカスタムルールセットを形成します。Wallarmノードは受信リクエストの解析時にこのカスタムルールセットに依存します。
rulesおよびMitigation controlsの変更は即時には反映されません。変更は、カスタムルールセットのビルドとフィルタリングノードへのアップロードが完了した後にのみ、リクエスト解析プロセスに適用されます。
Custom ruleset building
Adding a new rule/mitigation control, deleting or changing existing ones in the Wallarm Console → Security Controls → Rules or Mitigation Controls launch a custom ruleset build. During the building process, rules and controls are optimized and compiled into a format adopted for the filtering node. The process of building a custom ruleset typically takes from a few seconds for a small number of rules to up to an hour for complex rule trees.
Uploading to filtering node
Custom ruleset build is uploaded to the filtering node during the filtering node and Wallarm Cloud synchronization. By default, synchronization of the filtering node and Wallarm Cloud is launched every 2‑4 minutes. More details on the filtering node and Wallarm Cloud synchronization configuration →
The status of uploading a custom ruleset to the filtering node is logged to the /opt/wallarm/var/log/wallarm/wcli-out.log file.
All Wallarm nodes connected to the same Wallarm account receive the same set of default and custom rules for traffic filtering. You still can apply different rules for different applications by using proper application IDs or unique HTTP request parameters like headers, query string parameters, etc.
Backup and restore
To protect yourself from accidentally misconfigured or deleted rules, you can backup your current custom ruleset.
There are the following rule backup options:
-
Automatic backup creation after each custom ruleset build. The number of automatic backups is limited to 7: for each day when you change the rules several times, only the last backup is kept.
-
Manual backup creation at any time. The number of manual backups is limited to 5 by default. If you need more, contact the Wallarm technical support team.
You can:
-
Access current backups: in the Rules section, click Backups.
-
Create a new backup manually: in the Backups window, click Create backup.
-
Set name and description for the manual backup and edit them at any moment.
Naming for automatic backups
The automatic backups are named by the system and cannot be renamed.
-
Load from existing backup: click Load for the required backup. When loading from the backup, your current rule configuration is deleted and replaced with the configuration from the backup.
-
Delete backup.

Rule modification restrictions
You cannot create or modify rules or mitigation controls until creating backup or load from backup is complete.