Block Page in Security Edge Inline  
When the Security Edge Inline Node blocks a malicious request, it returns a block page along with an HTTP 403 Forbidden response. You can choose from 3 types of block pages:
-
Standard - the default NGINX 403 Forbidden page (selected by default)
-
Wallarm page - a Wallarm-branded page with blocked request details and HTTP 403
-
Custom - your own uploaded HTML page
Requirements
-
Wallarm block page is supported starting from Edge Node version 5.3.16.
-
Custom block page is supported starting from Edge Node version 6.5.0-2.
Enabling the Wallarm block page
The Wallarm-branded block page provides a user-friendly message that the request was blocked:
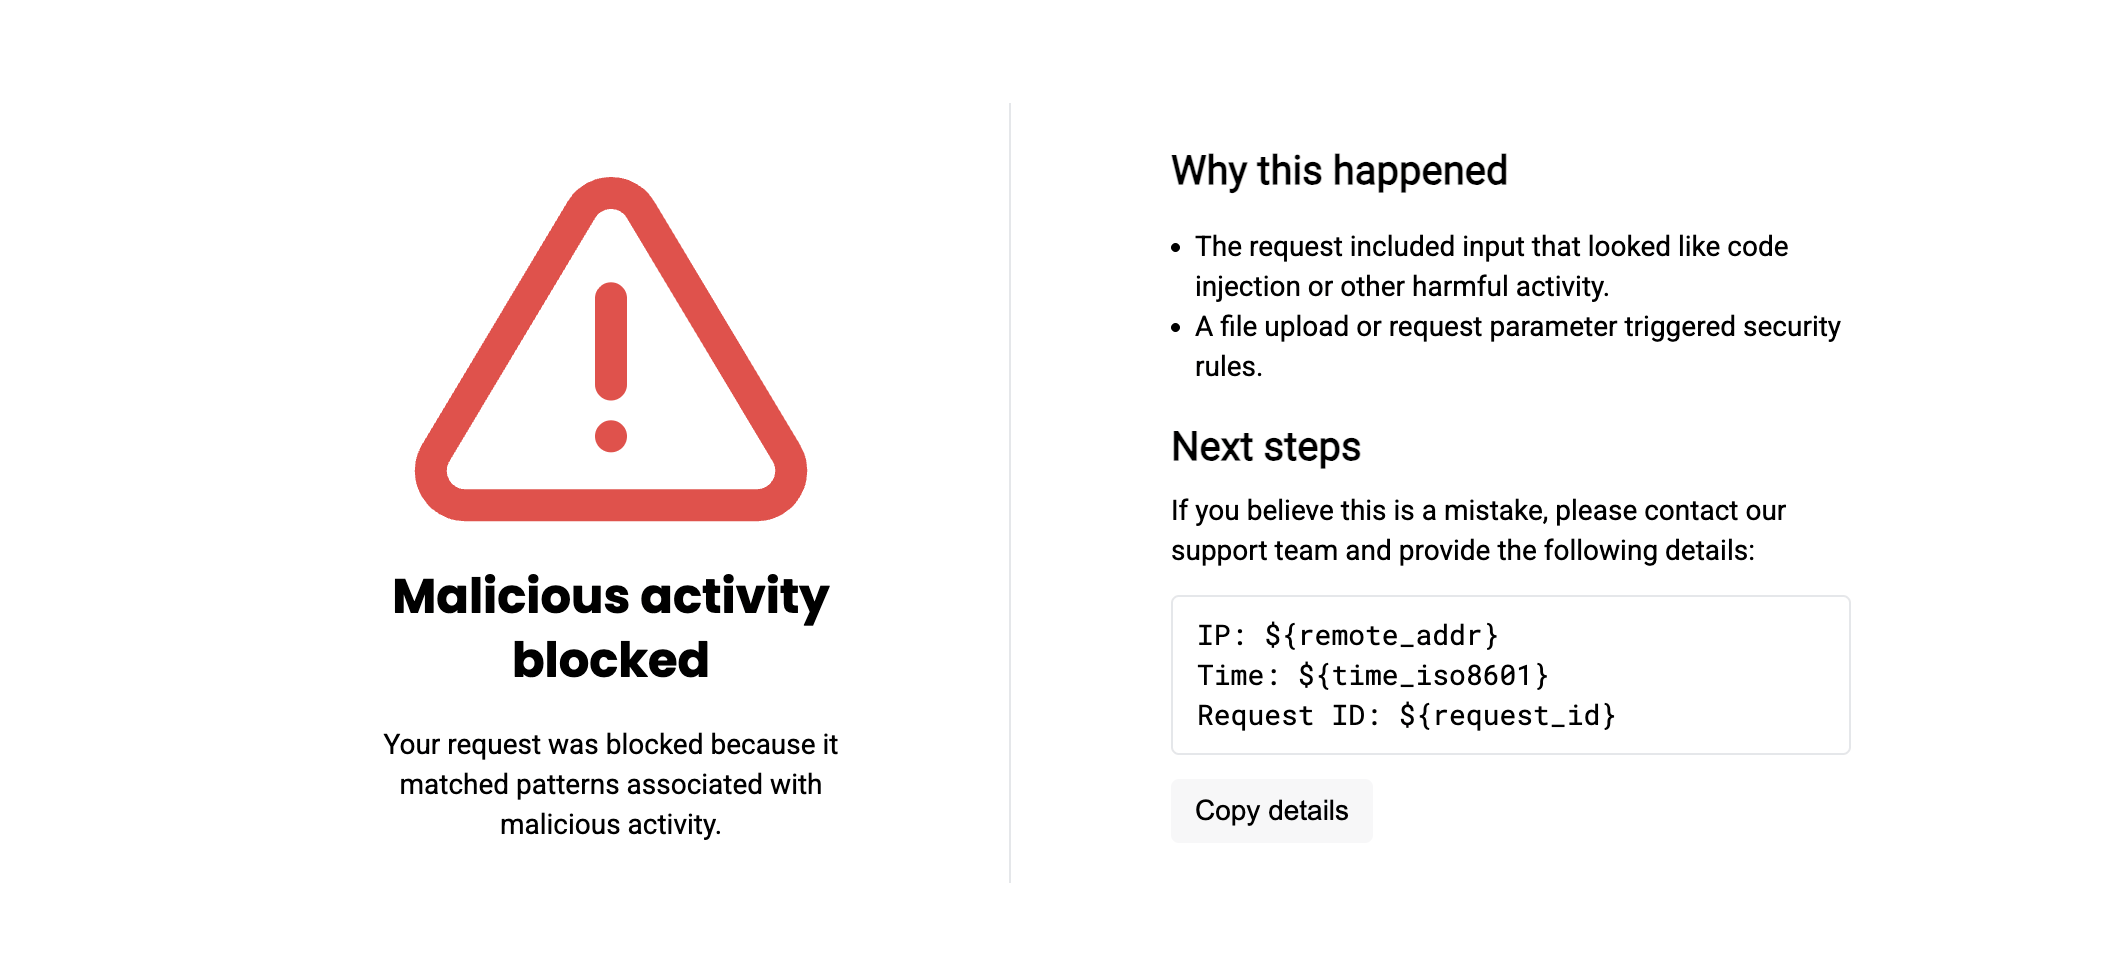
This page is preloaded. You can enable it without uploading anything.
Enabling a custom block page
To enable a custom block page, first upload it and then select it during or after Edge Node deployment.
-
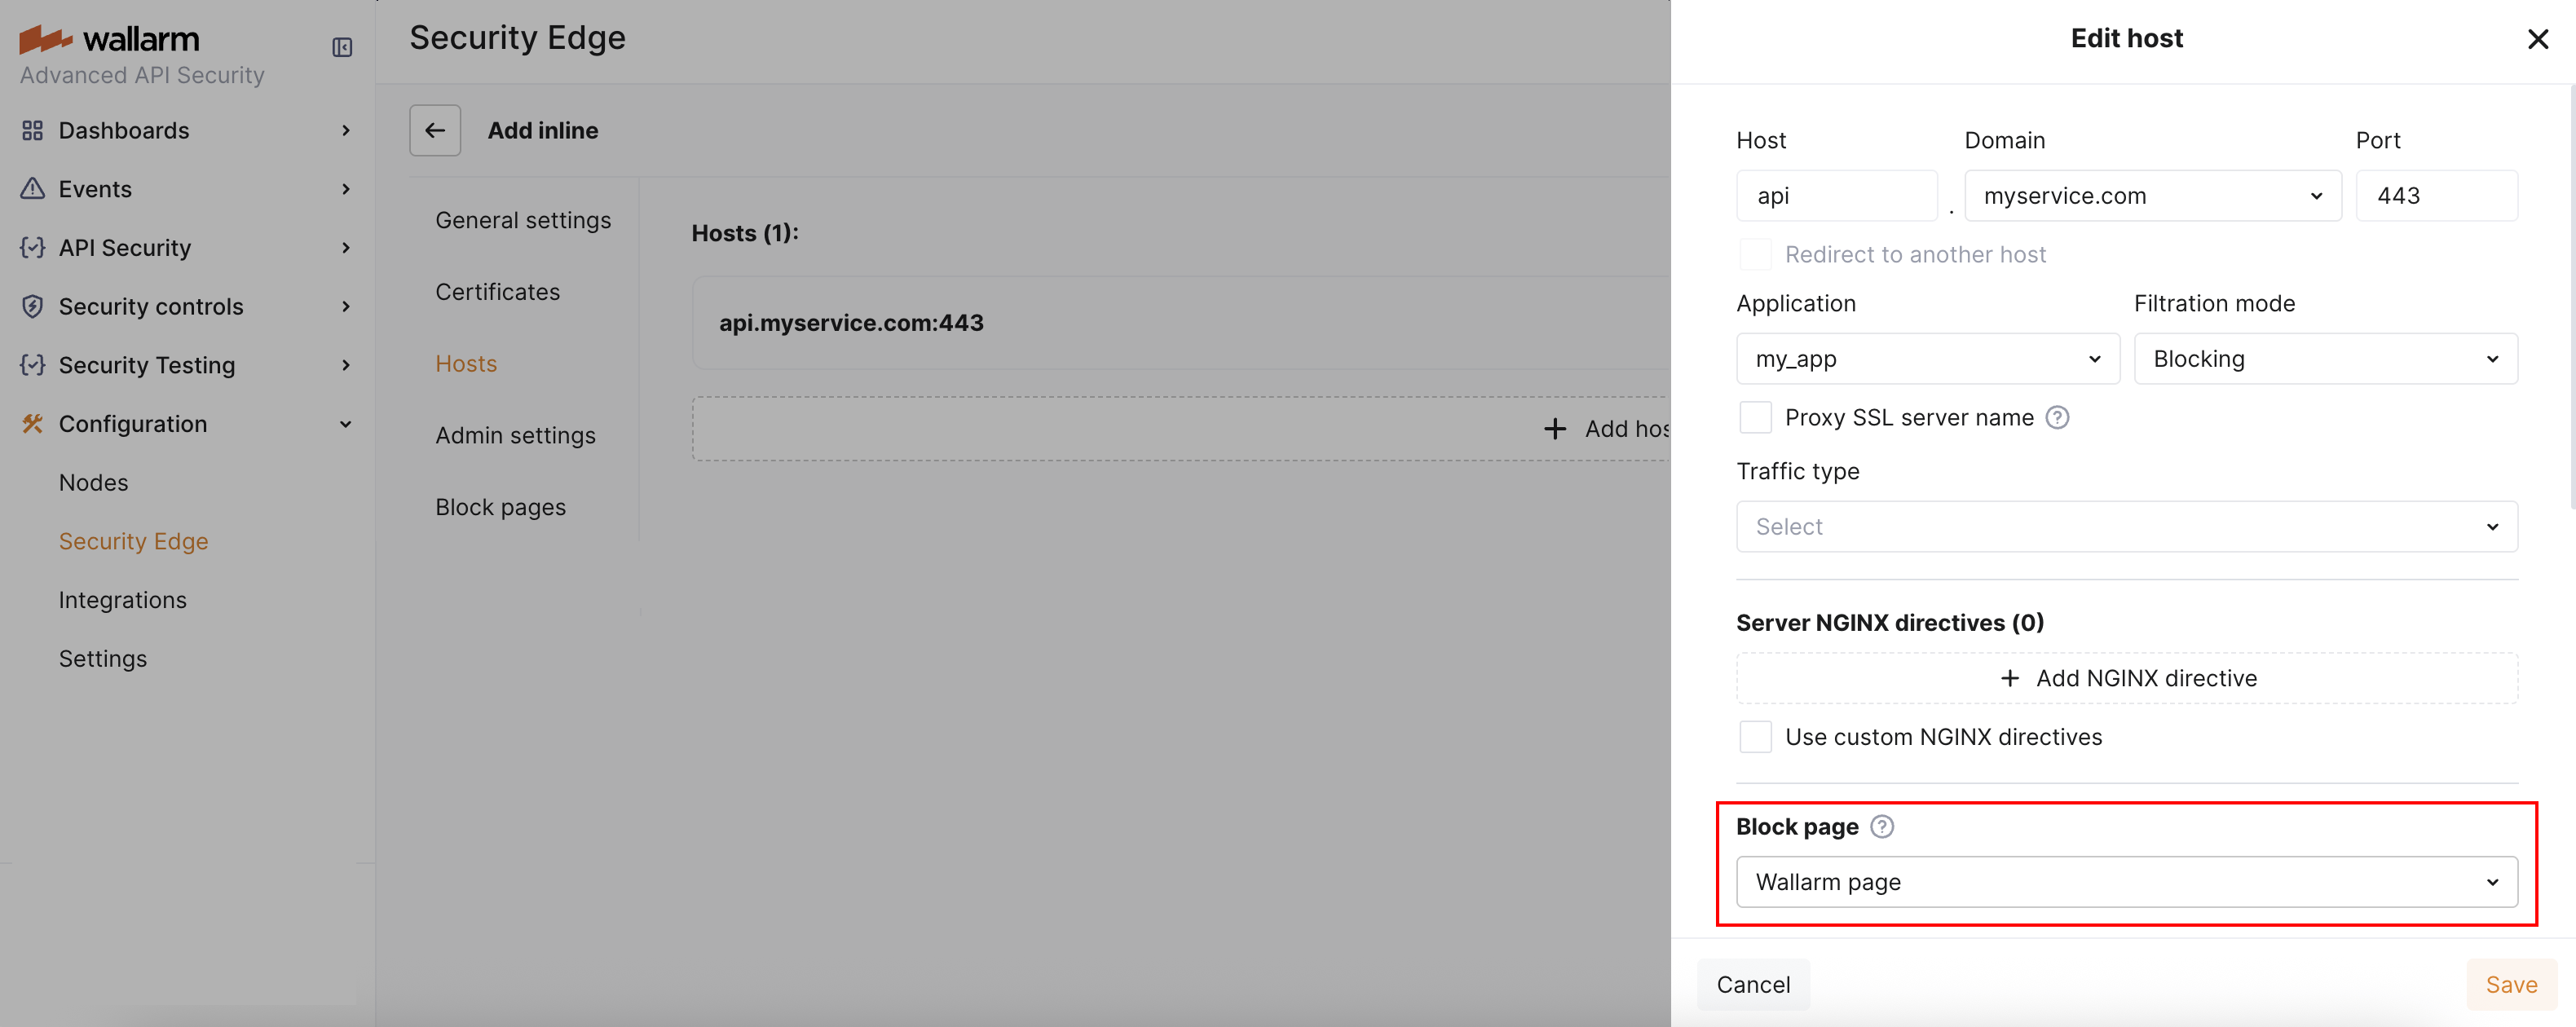
Go to Wallarm Console → Security Edge → Inline → Configure → Block pages.
-
Upload your custom file. It must:
- Be a single HTML or JSON file (maximum size: 1 MB, UTF-8 encoded).
- Contain only inline CSS and embedded images.
- Not rely on relative or external image paths (they may not work).
If you do not have a file, you can download the Wallarm block page as a starting point and then customize it.
To make the block page more informative, you can use the following NGINX variables. These will be automatically replaced with actual values when the block page is rendered:
$request_id- a unique identifier of the blocked HTTP request.$http_host- the API hostname the client was trying to access.$remote_addr- the IP address from which the HTTP request originated.
-
The uploaded page appears in the list. You can preview it to confirm it renders correctly.
-
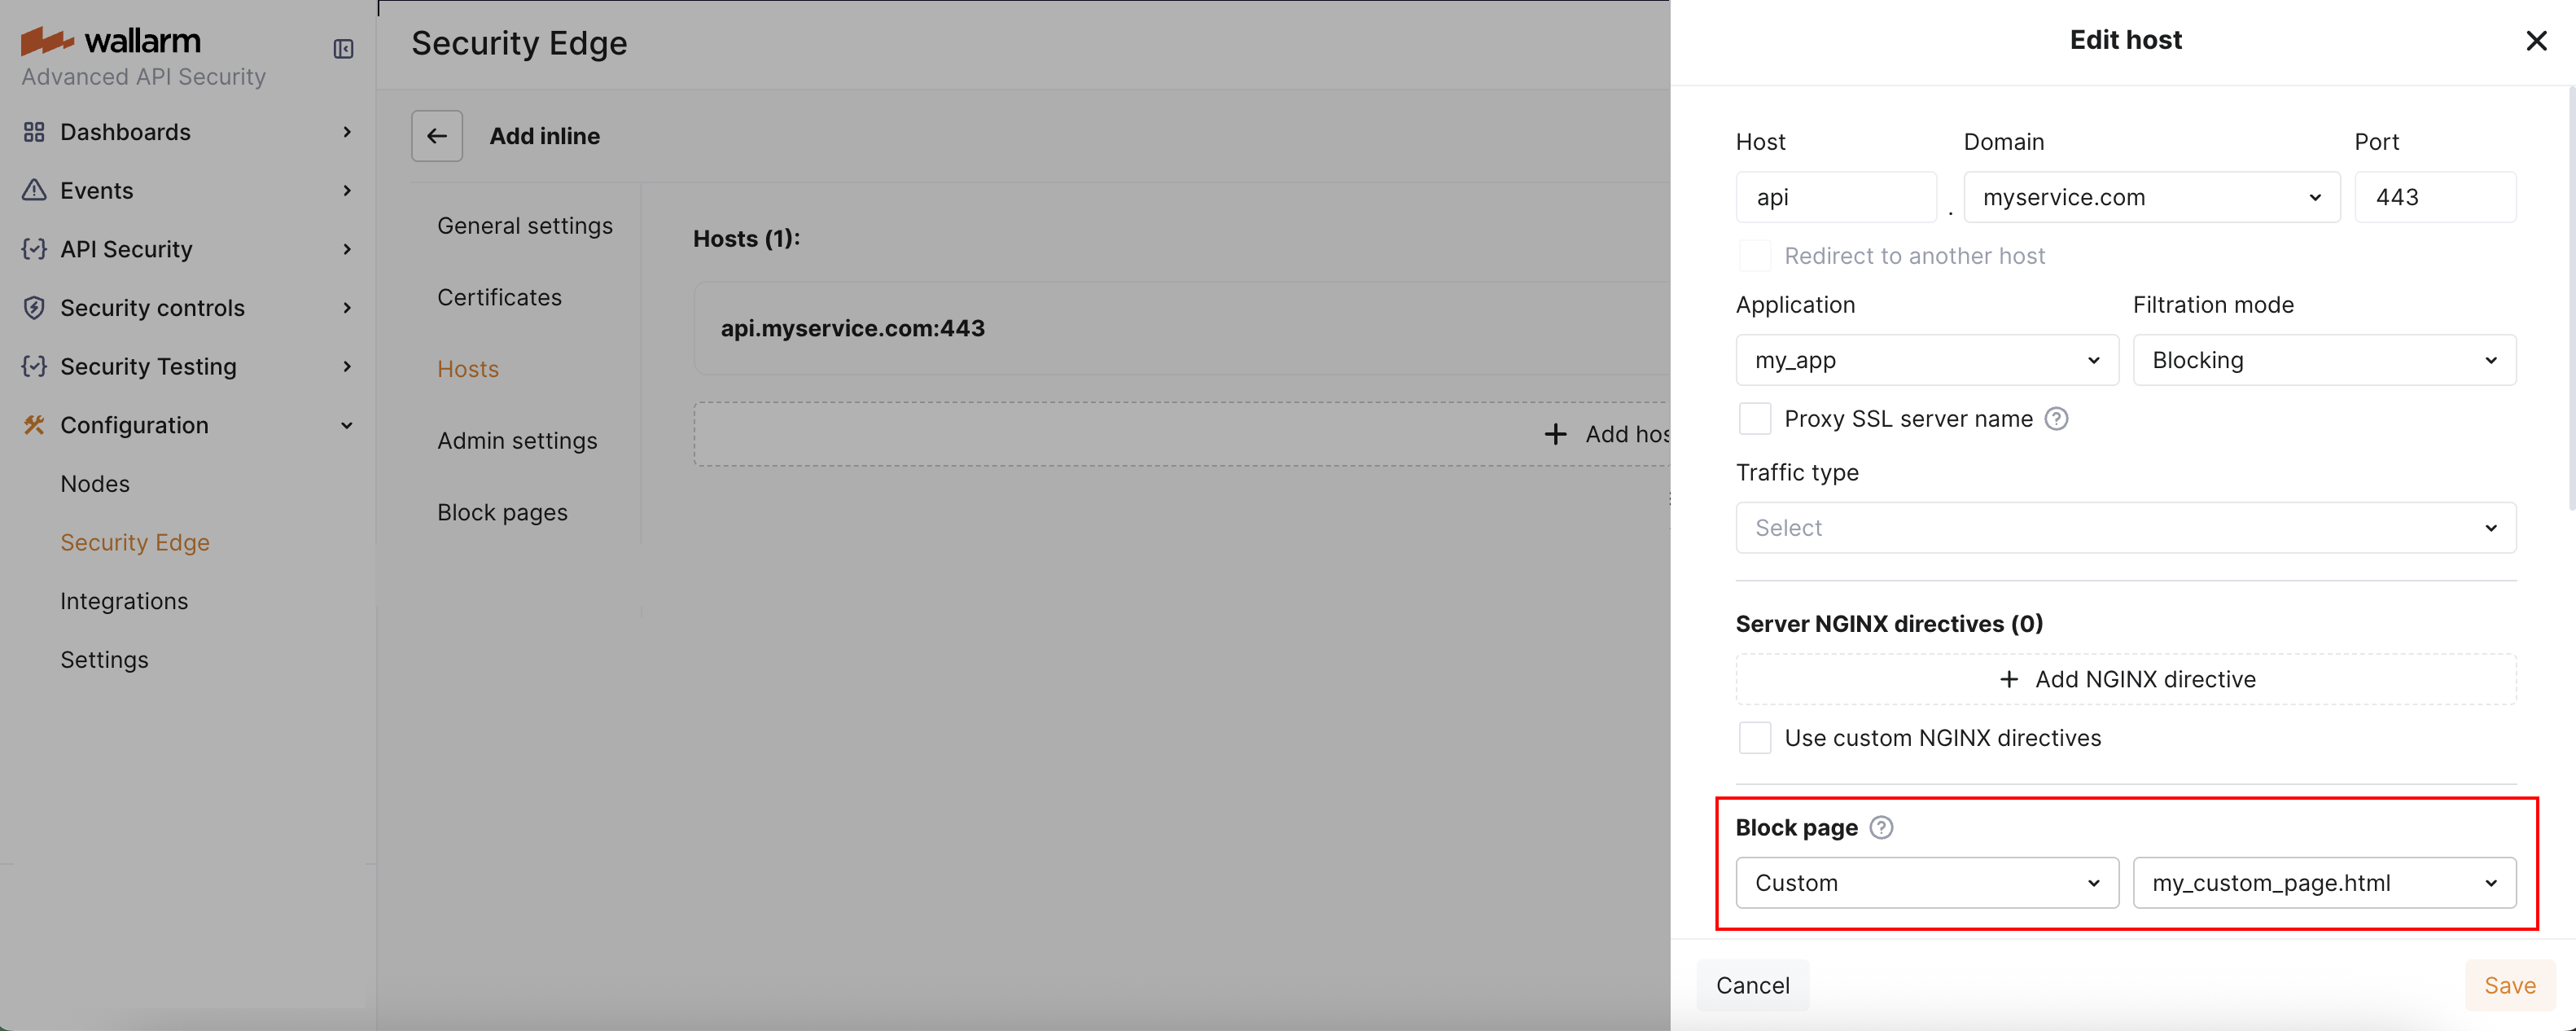
To enable the custom page, go to the Hosts section. Under "Block page", select "Custom" and choose the name of the uploaded page.
Deleting a custom block page
-
To delete a custom block page currently assigned to a host, go to the Hosts section and select a different block page for that host (e.g., standard or Wallarm).
-
Once the custom block page is no longer in use, you can delete it in the Block pages section.