Wallarm Connector for Cloudflare
Cloudflare is a security and performance service which offers features designed to enhance the security, speed, and reliability of websites and internet applications, including CDN, WAF, DNS services and SSL/TLS encryption. Wallarm can act as a connector to secure APIs running on Cloudflare.
To use Wallarm as a connector for Cloudflare, you need to deploy the Wallarm Node externally and run a Cloudflare worker using the Wallarm-provided code to route traffic to the Wallarm Node for analysis.
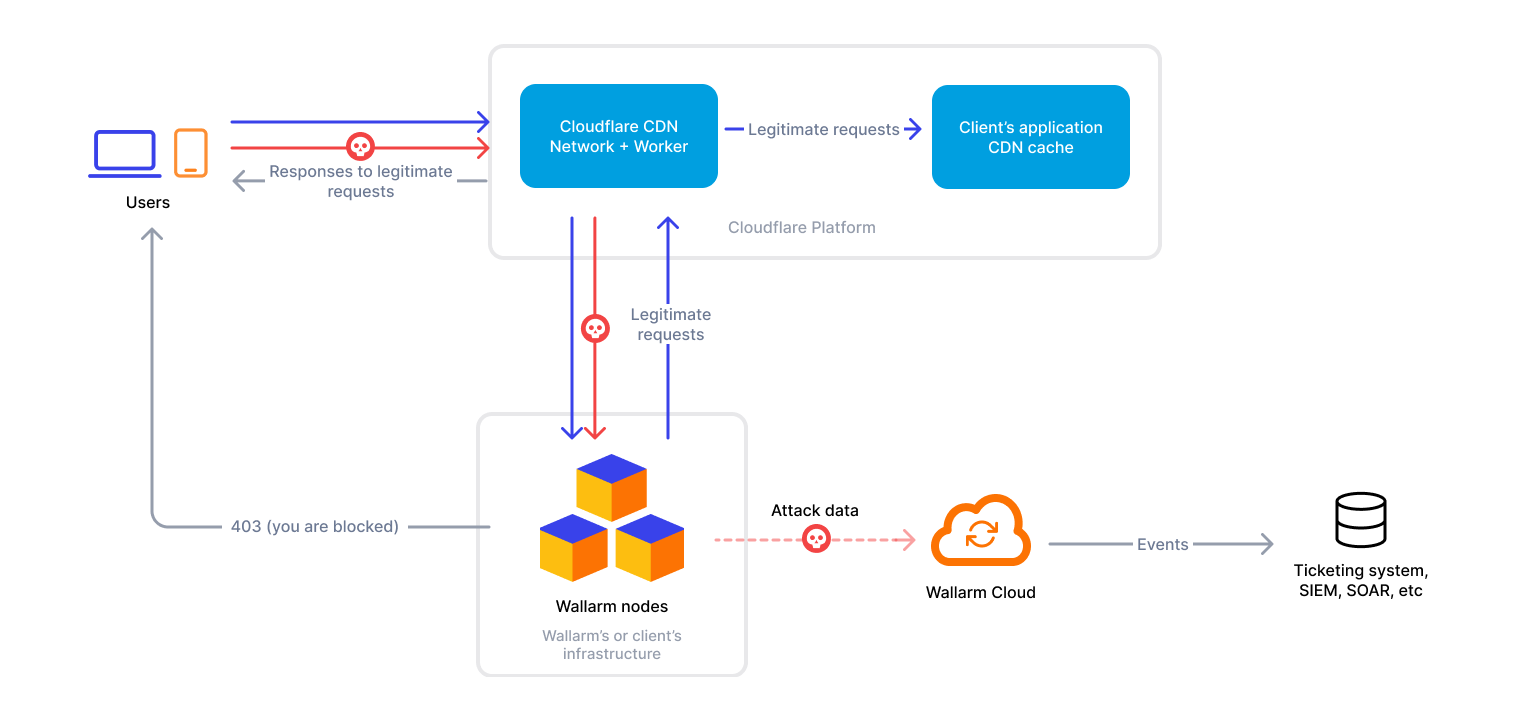
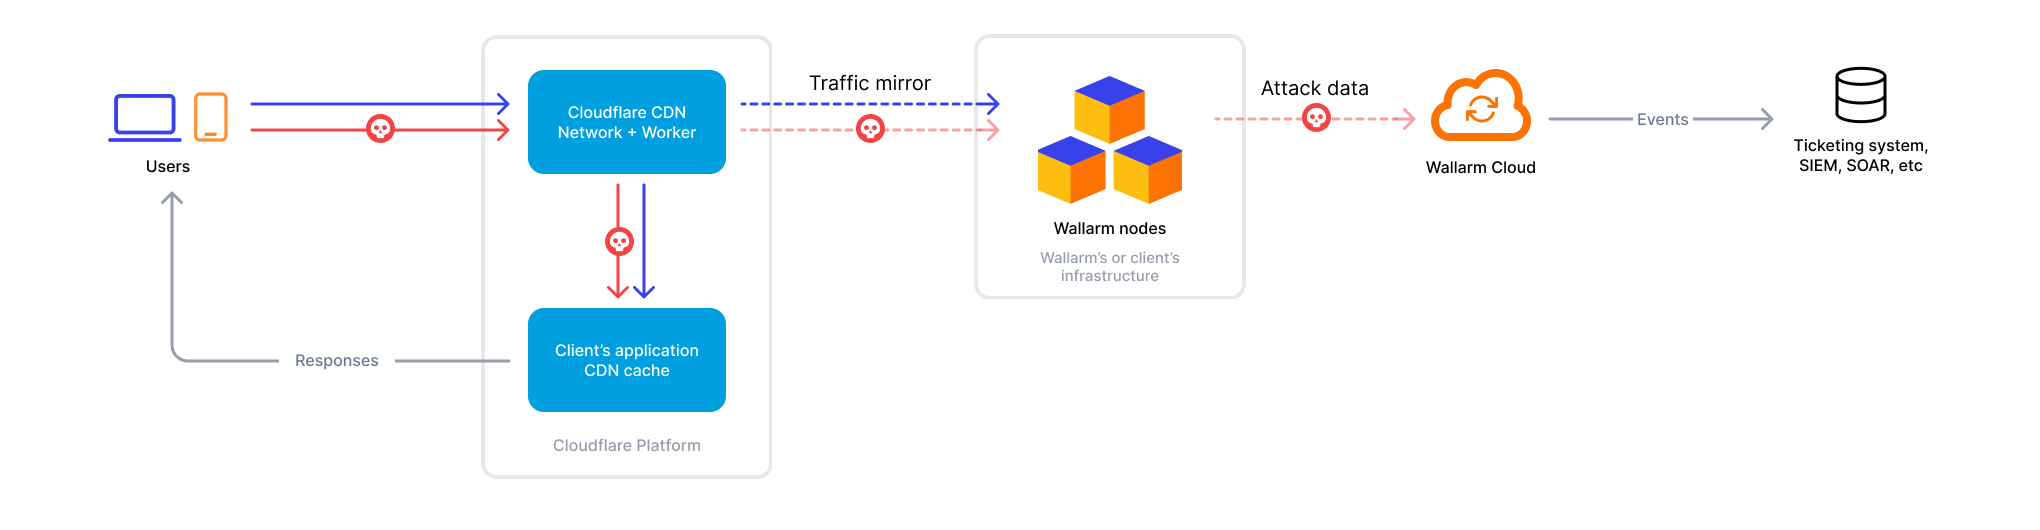
The Cloudflare connector supports both in-line and out-of-band traffic flows:
If Wallarm is configured to block malicious activity:
Use cases
This solution is recommended in case when you provide access to your applications via Cloudflare.
Limitations
-
When deploying the Wallarm service with the
LoadBalancertype using the Helm chart, a trusted SSL/TLS certificate is required for the Node instance domain. Self-signed certificates are not yet supported. -
Rate limiting by the Wallarm rule is not supported.
-
Multitenancy is not supported on Security Edge hosting, but it is supported for self-hosted nodes deployed with the connector.
Requirements
To proceed with the deployment, ensure that the following requirements are met:
-
Understanding of Cloudflare technologies.
-
APIs or traffic running through Cloudflare.
Deployment
1. Deploy a Wallarm Node
The Wallarm Node is a core component of the Wallarm platform that you need to deploy. It inspects incoming traffic, detects malicious activities, and can be configured to mitigate threats.
You can deploy it either hosted by Wallarm or in your own infrastructure, depending on the level of control you require.
To deploy a Wallarm-hosted node for the connector, follow the instructions.
Choose an artifact for a self-hosted node deployment and follow the attached instructions:
- All-in-one installer for Linux infrastructures on bare metal or VMs
- Docker image for environments that use containerized deployments
- AWS AMI for AWS infrastructures
- Helm chart for infrastructures utilizing Kubernetes
2. Obtain and deploy the Wallarm worker code
To run a Cloudflare worker routing traffic to the Wallarm Node:
-
Proceed to Wallarm Console → Security Edge → Connectors → Download code bundle and download a code bundle for your platform.
If running a self-hosted node, contact sales@wallarm.com to get the code bundle.
-
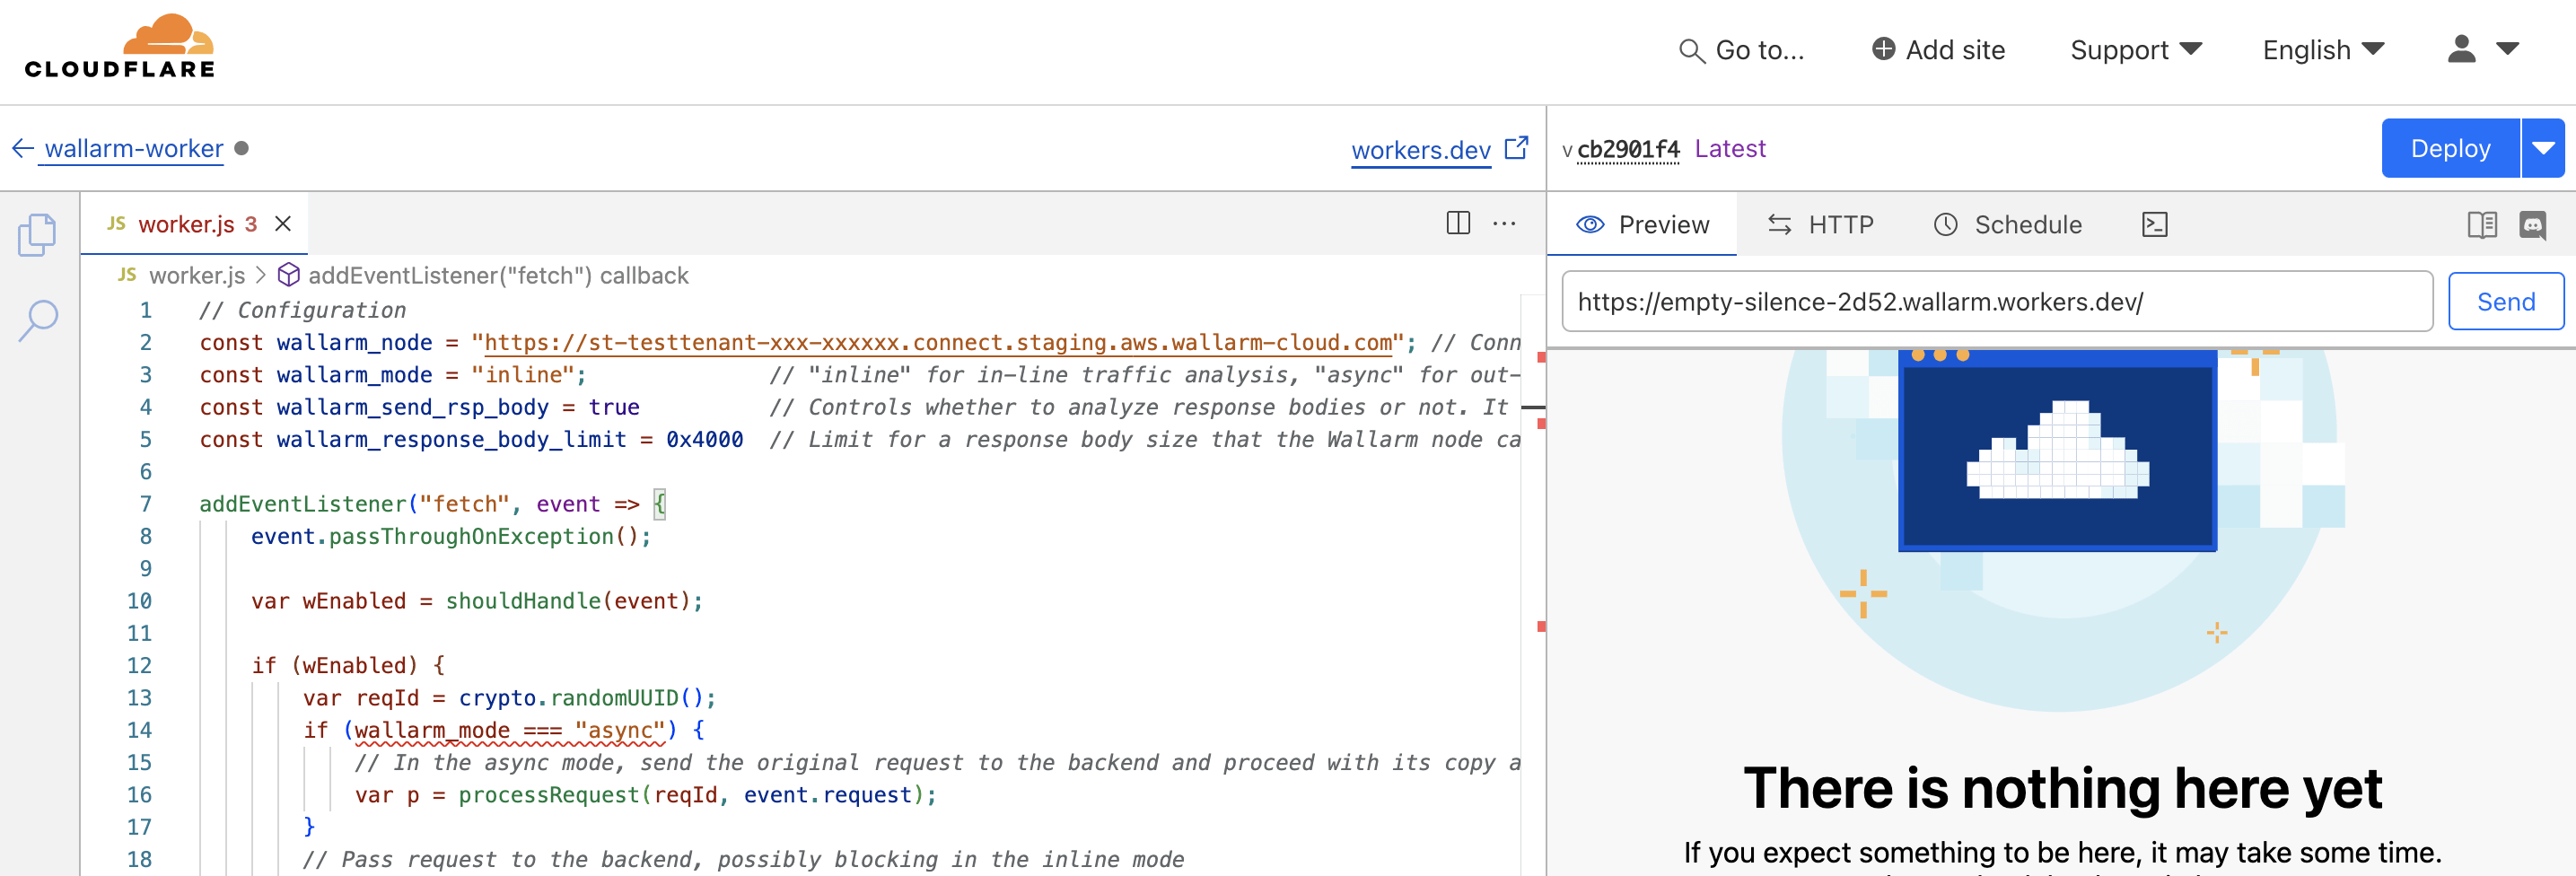
Create a Cloudflare worker using the downloaded code.
-
Set the Wallarm node URL in the
wallarm_nodeparameter. -
If using asynchronous (out-of-band) mode, set the
wallarm_modeparameter toasync. -
If required, modify other parameters.
-
In Website → your domain, go to Workers Routes → Add route:
- In Route, specify the paths to be routed to Wallarm for analysis (e.g.,
*.example.com/*for all paths). - In Worker, select the Wallarm worker you created.
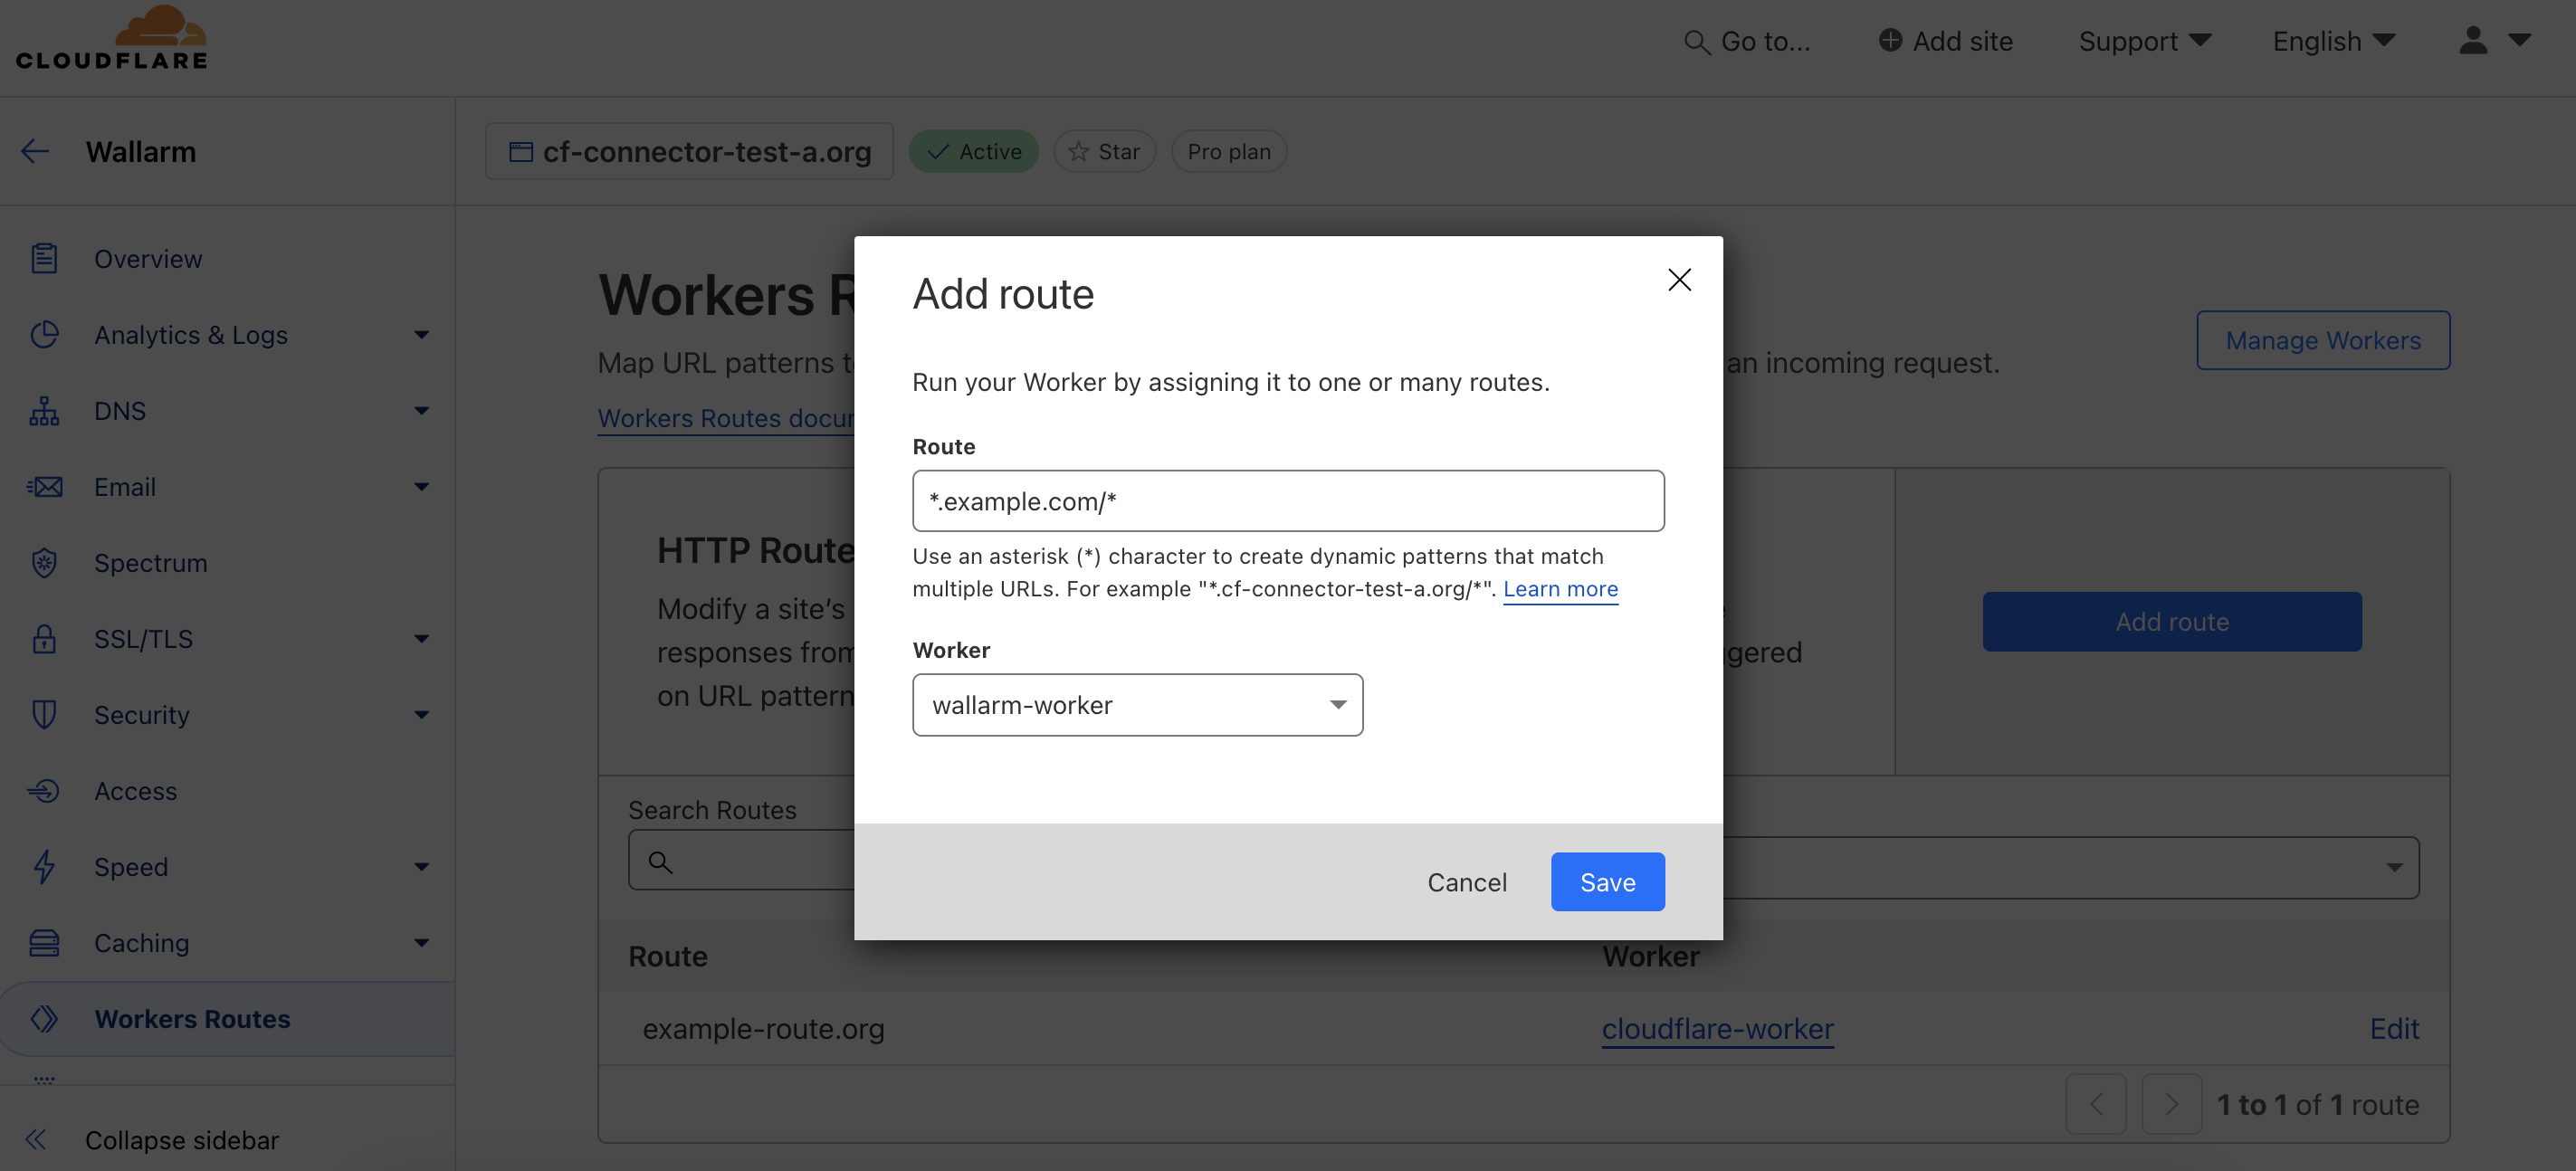
- In Route, specify the paths to be routed to Wallarm for analysis (e.g.,
Testing
To test the functionality of the deployed solution, follow these steps:
-
Send the request with the test Path Traversal attack to your API:
-
Open Wallarm Console → Attacks section in the US Cloud or EU Cloud and make sure the attack is displayed in the list.

If the Wallarm Node mode is set to blocking and the traffic flows in-line, the request will also be blocked.
Configuration options
In the worker code, you can specify the following parameters:
| Parameter | Description | Required? |
|---|---|---|
wallarm_node | Sets the address of your Wallarm Node instance. | Yes |
wallarm_mode | Determines traffic handling mode: inline (default) processes traffic through the Wallarm Node directly, while async analyzes a copy of the traffic without affecting the original flow. | No |
wallarm_send_rsp_body | Enables response body analysis for schema discovery and enhanced attack detection, such as brute force. Default: true (enabled). | No |
wallarm_response_body_limit | Limit for a response body size (in bytes) the Node can parse and analyze. Default is 0x4000. | No |
wallarm_block_page.custom_path(Worker version 1.0.1+) | URL of a custom blocking page returned with HTTP 403 responses from the Node, for example: https://example.com/block-page.html.Default: null (uses detailed Wallarm-provided error page if html_page is true). | No |
wallarm_block_page.html_page(Worker version 1.0.1+) | Enables a custom HTML blocking page for malicious requests. Default: false (returns a simple HTTP 403). | No |
wallarm_block_page.support_email(Worker version 1.0.1+) | Email displayed on the blocking page for reporting issues. Default: support@mycorp.com. | Yes, if html_page is true |
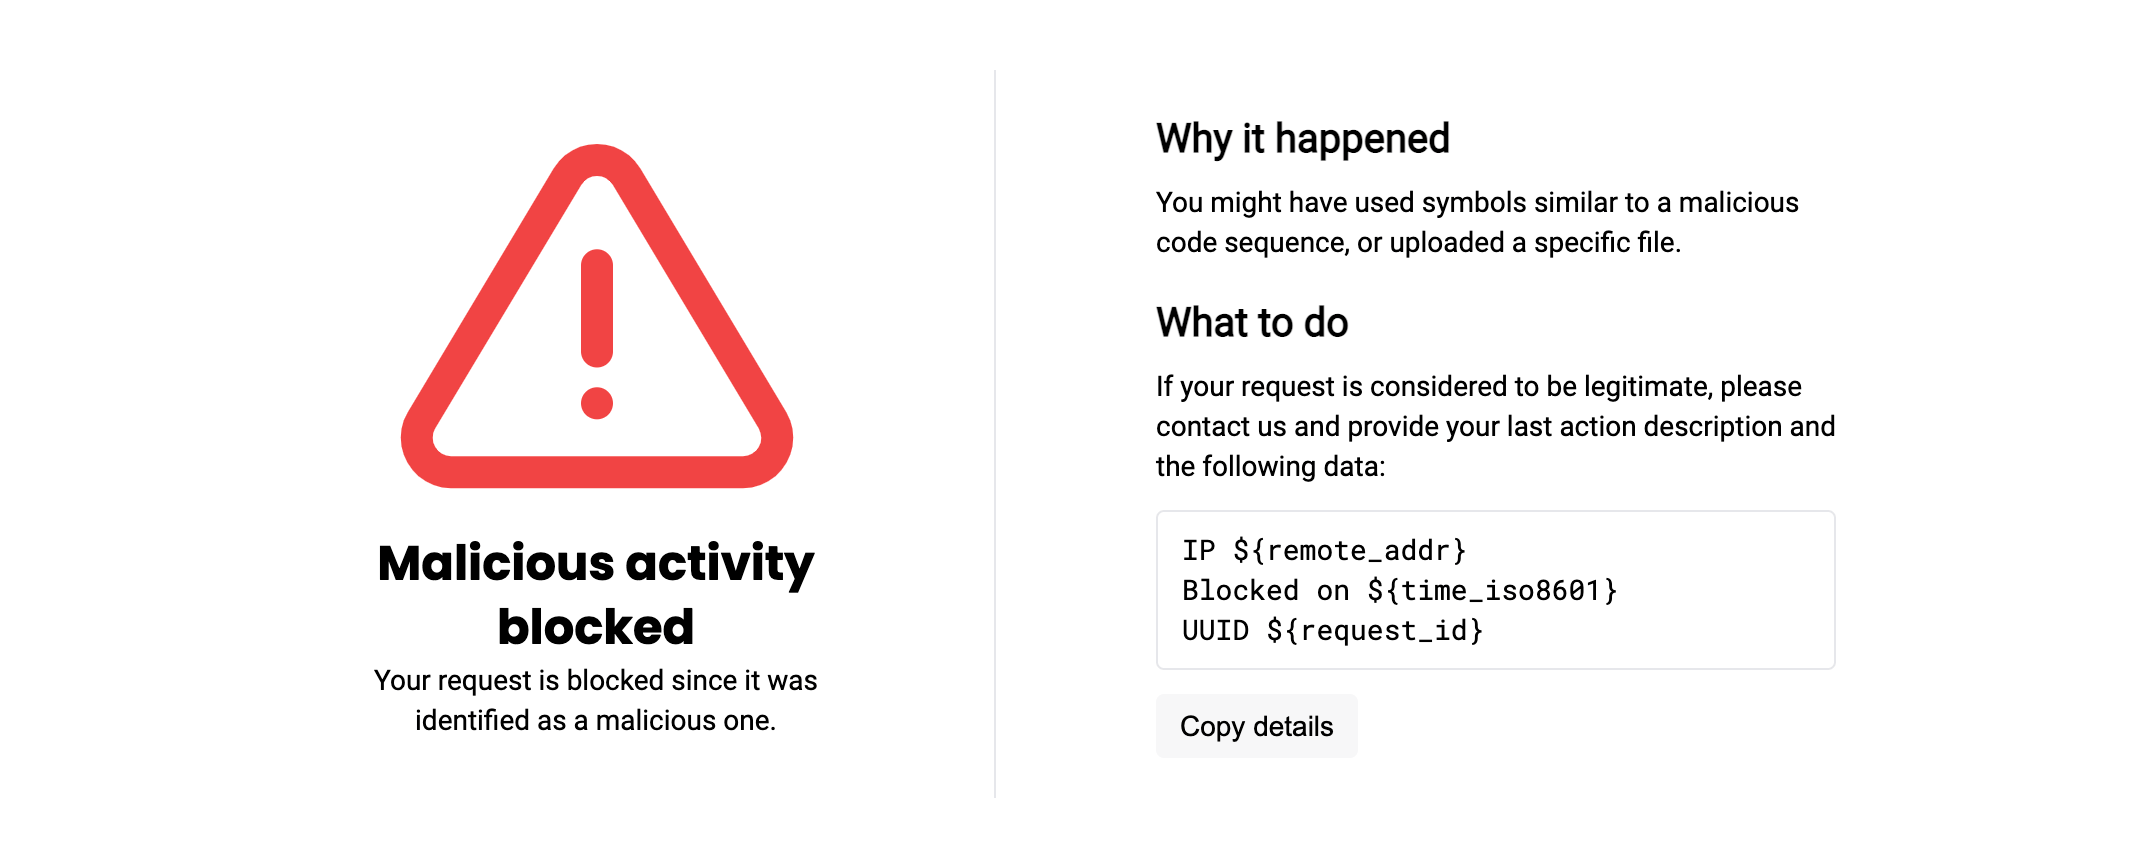
Show Wallarm-provided error page
The Wallarm-provided error page returned with HTTP 403 responses looks as follows:
Upgrading the Cloudflare worker
To upgrade the deployed Cloudflare worker to a newer version:
-
Proceed to Wallarm Console → Security Edge → Connectors → Download code bundle and download the updated Wallarm Cloudflare code bundle.
If running a self-hosted node, contact sales@wallarm.com to get the updated code bundle.
-
Replace the code in your deployed Cloudflare worker with the updated bundle.
Preserve the existing values for parameters like
wallarm_node,wallarm_mode, and others. -
Deploy the updated functions.
Worker upgrades may require a Wallarm Node upgrade, especially for major version updates. See the Native Node changelog for the self-hosted Node release notes and upgrade instructions or the Edge connector upgrade procedure. Regular node updates are recommended to avoid deprecation and simplify future upgrades.