FAST node deployment
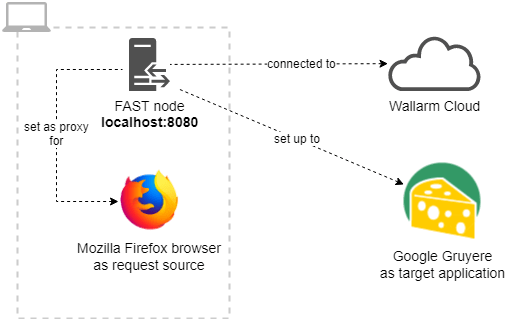
This chapter will guide you through the process of installation and initial configuration of the FAST node. Upon completion of all necessary steps, you will have an operating FAST node. It will be listening on localhost:8080, ready to proxy HTTP and HTTPS requests to the Google Gruyere application. The node will be installed on your machine along with the Mozilla Firefox browser.
Note on the browser to use
It is suggested in the guide that you use the Mozilla Firefox browser. However, it is possible to use any browser of your choice, provided that you successfully configured it to send all the HTTP and HTTPS traffic to the FAST node.
To install and configure the FAST node, do the following:
-
Obtain a token that will be used to connect your FAST node to the Wallarm cloud.
-
Prepare a file containing the necessary environment variables.
1. Install the Docker software
Set up the Docker software on your machine. See the official Docker installation guide for more information.
It is suggested that you use the Docker Community Edition (CE). However, any Docker edition can be used.
2. Obtain a token that will be used to connect your FAST node to the Wallarm cloud
-
Log in to the My Wallarm portal using your Wallarm account.
If you do not have one, then contact the Wallarm Sales Team to get access.
-
Select the “Nodes” tab, then click the Create FAST node button (or the Add FAST node link).
-
A dialog window will appear. Give a meaningful name to the node and select the Create button. The guide suggests that you use the name
DEMO NODE. -
Move your mouse cursor over the Token field of the created node and copy the value.
Note on token
It is possible to retrieve the token via a Wallarm API call as well. However, that is beyond the scope of this document.
3. Prepare a file containing the necessary environment variables
It is required that you set up several environment variables in order to get the FAST node working.
In order to do that, create a text file and add the following text to it:
You have set the environment variables. Their purpose can be described as follows:
-
WALLARM_API_TOKEN— sets the token value that is used to connect the node to the Wallarm cloud -
ALLOWED_HOSTS— limits the scope of requests to generate a security test from; security tests will be generated only from the requests to the domaingoogle-gruyere.appspot.com, which is where the target application resides.
Using the ALLOWED_HOSTS environment variable
Setting the fully qualified domain name is not necessary. You could use a substring (e. g. google-gruyere or appspot.com).
Connecting FAST node to one of the Wallarm clouds
A FAST node interacts with one of the available Wallarm clouds. By default, a FAST node works with the Wallarm API server that is located in the American cloud.
To instruct a FAST node to use the API server from another cloud, pass to the node container the WALLARM_API_HOST environment variable that points to the address of the necessary Wallarm API server.
Example (for a FAST node using the API server located in the European Wallarm cloud):
4. Deploy the FAST node Docker container
To do this, execute the following command:
docker run --name <name> --env-file=<environment variables file created on the previous step> -p <target port>:8080 wallarm/fast
You should provide several arguments to the command:
-
--name<name>Specifies the name of the Docker container.
It should be unique among all existing containers' names.
-
--env-file=<environment variables file created in the previous step>Specifies a file containing all the environment variables to export into the container.
You should specify a path to the file you created in the previous step.
-
-p<target port>:8080Specifies a port of the Docker host to which the container’s 8080 port should be mapped. None of the container ports are available to the Docker host by default.
To grant access to a certain container’s port from the Docker host, you should publish the container’s internal port to the external port by employing the
-pargument.You also could publish the container’s port to a non-loopback IP address on the host by providing the
-p <host IP>:<target port>:8080argument to make it accessible from outside the Docker host as well.
Example of a docker run command
The execution of the following command will run a container named fast-node employing the environment variables file /home/user/fast.cfg and publish its port to localhost:8080:
If the container deployment is successful, you will be presented with a console output like this:
 __      __    _ _
 \ \    / /_ _| | |__ _ _ _ _ __
  \ \/\/ / _` | | / _` | '_| '  \
   \_/\_/\__,_|_|_\__,_|_| |_|_|_|
            ___ _   ___ _____
           | __/_\ / __|_   _|
           | _/ _ \\__ \ | |
           |_/_/ \_\___/ |_|

[info] Node connected to Wallarm Cloud
[info] Loaded 0 custom extensions for fast scanner
[info] Loaded 51 default extensions for fast scanner
[info] Waiting for TestRun to check...
Now you should have the ready-to-work FAST node connected to the Wallarm cloud. The node is listening to the incoming HTTP and HTTPS requests on localhost:8080 by recognizing the requests to the google-gruyere.appspot.com domain as baseline ones.
5. Configure the browser to work with the proxy
Configure the browser to proxy all HTTP and HTTPS requests through the FAST node.
To set up proxying in the Mozilla Firefox browser, do the following:
-
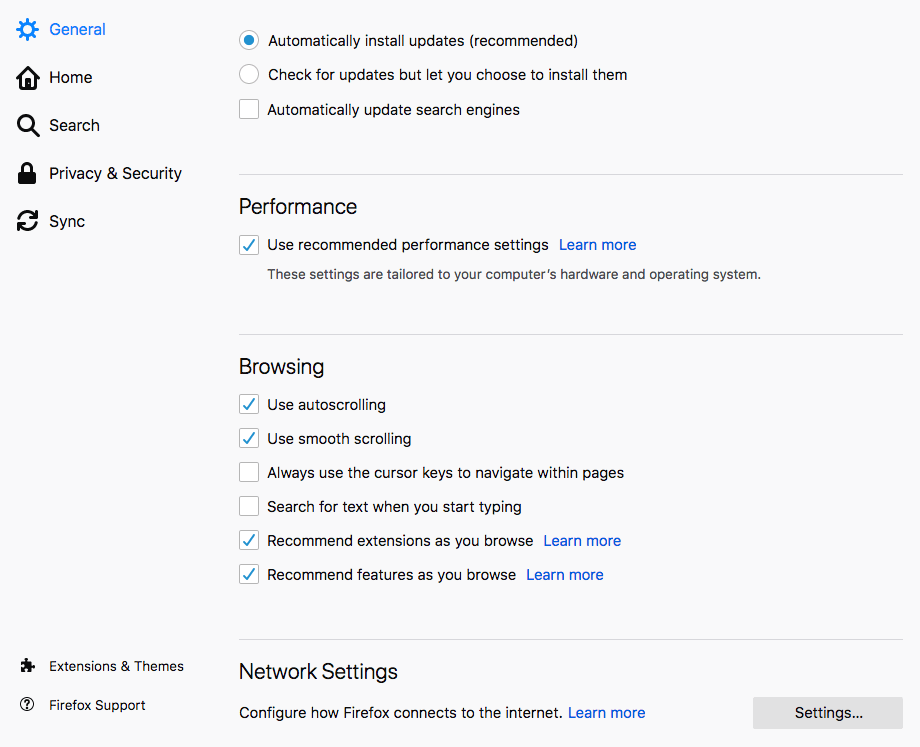
Open the browser. Select “Preferences” in the menu. Select the “General” tab and scroll down to the “Network Settings.” Select the Settings button.
-
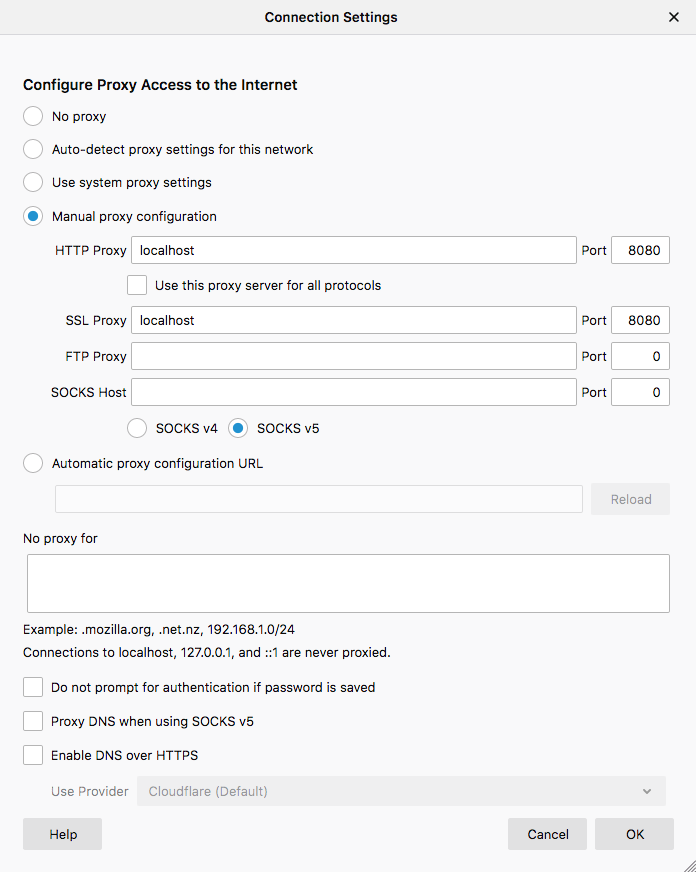
The “Connection Settings” window should open up. Select the Manual proxy configuration option. Configure the proxy by entering the following values:
localhostas HTTP proxy address and8080as HTTP proxy port.localhostas SSL proxy address and8080as SSL proxy port.
Select the ОК button to apply the changes you have made.
6. Install SSL certificates
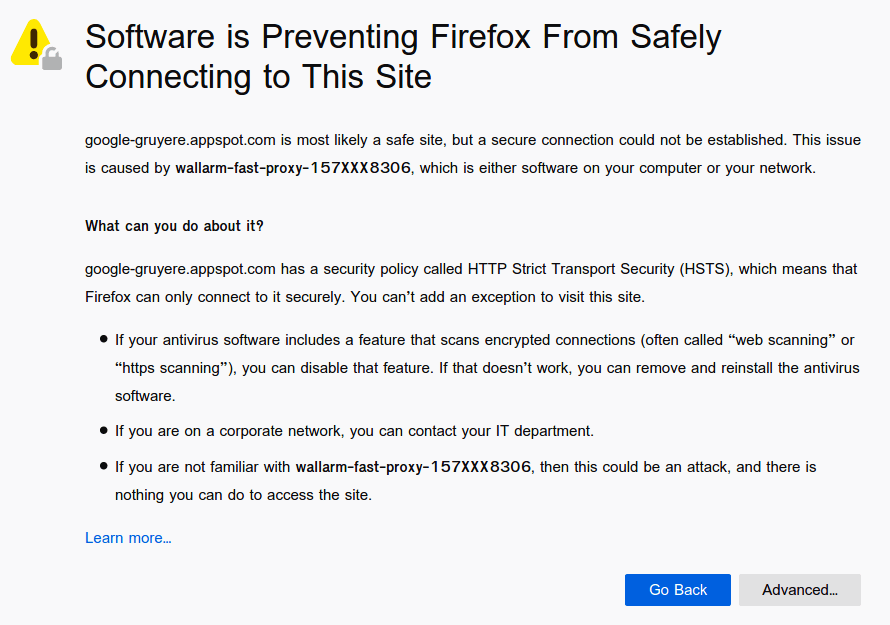
While working with the Google Gruyere application via HTTPS you might encounter the following browser message regarding the interruption of a safe connection:
You should add a self-signed FAST node SSL certificate to be able to interact with the web application via HTTPS. To do so, navigate to this link, select your browser from the list, and perform the necessary actions described. This guide suggests that you use the Mozilla Firefox browser.
Having run and configured your FAST node, you should now have all of the chapter goals completed. In the next chapter, you will learn what is required to generate a set of security tests based on a few baseline requests.


