Deployment options
FAST is a two-component solution, comprising of the FAST node and the Wallarm cloud. This guide instructs you on deploying the FAST node.
A note about Wallarm clouds
FAST interacts with one of the available Wallarm clouds.
All information from the documentation is equally applicable to all the clouds, unless stated otherwise.
For the sake of simplicity, it is assumed throughout the documentation that FAST interacts with the American Wallarm cloud. If you need to interact with another cloud, use the corresponding addresses of the Wallarm portal and the API server.
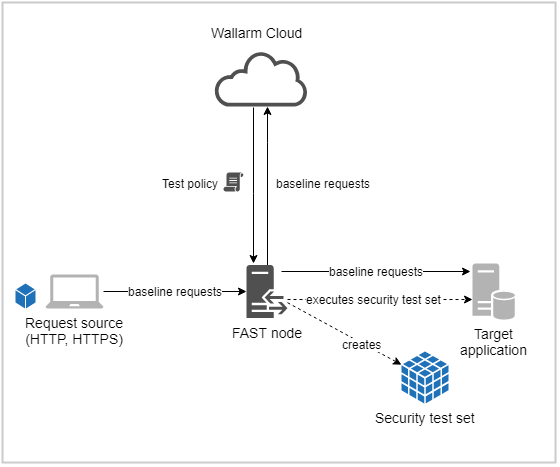
To conduct application testing, HTTP or HTTPS requests are proxied through the FAST node first. FAST creates a new request set based on the original queries according to policy obtained from the cloud. The newly created requests form a security test set are executed in order to test the application for vulnerabilities.
Baseline requests (the original requests to the applications) can be obtained from different sources. For example, baseline requests can be written by an application tester or generated by an existing testing automation tool. FAST does not require all of the baseline requests to be malicious ones: a security test set could be generated based on legitimate requests as well. The FAST node is used for security test set creation and execution purposes.
Available deployment options
You have a choice of three FAST node deployment options. The node installation could be located at
-
The host that serves as a baseline request source (for example, a tester’s laptop)
-
The host where the target application resides
-
The dedicated host
Main deployment considerations
FAST node is shipped as a Docker container and can be run on every platform that supports Docker (this includes Linux, Windows and macOS).
An account in the Wallarm cloud is a mandatory requirement for FAST deployment. The cloud is responsible for providing a user interface for FAST configuration. The testing results are also gathered by the cloud.
After completing the FAST node deployment you should ensure that
-
The node has access to the target application.
-
The node has access to the Wallarm cloud.
-
All the baseline HTTP or HTTPS requests will be proxied through the node.
SSL certificate installation
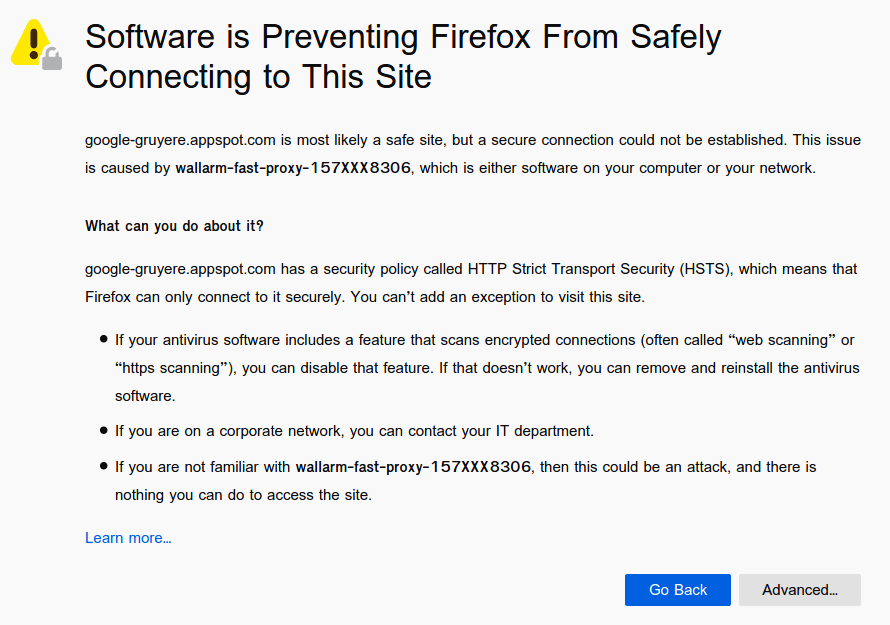
In the case of using HTTPS to interact with the target application, the request source might not trust the self-signed SSL certificate obtained from the FAST node installation. For example, if you use the Mozilla Firefox browser as the requests source, you may encounter a similar message (it may differ for other browsers or request sources):
To resolve the certificate issue, you have two options:
- Install the self-signed SSL certificate from FAST node as a trusted certificate to the request source.
- Install the existing trusted SSL certificate to your FAST node.
FAST deployment specifics in the Quick Start guide
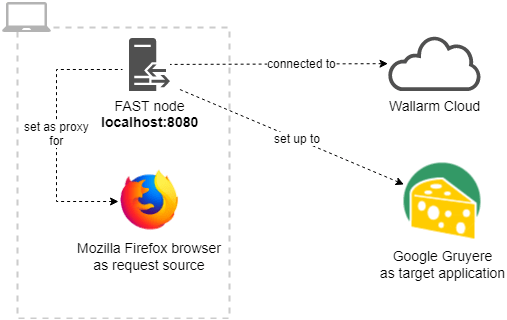
This guide aims to demonstrate the FAST operation by exploiting the deployment option where the node is installed locally with the request source.
The installation that is used in this guide has the following specifics:
-
The Mozilla Firefox browser serves as the baseline request source.
-
One HTTPS baseline request is constructed.
-
A self-signed SSL certificate from the FAST node is installed into the browser.
-
Google Gruyere serves as the target application.
-
The target application is tested against XSS vulnerabilities.
-
The policy is created with the web interface of Wallarm cloud.
-
The testing process is started with the web interface of Wallarm cloud.
Google Gruyere
Google Gruyere is a purpose-built application for security testing. It contains a lot of intentionally integrated vulnerabilities. Therefore, every application instance runs in an isolated sandbox for security reasons. To begin working with the application, you should navigate to https://google-gruyere.appspot.com and run a sandbox with the separated instance of Gruyere application.


