Example of FAST Integration into CI/CD
Chapter conventions
The following token value is used as an example value throughout the chapter: token_Qwe12345.
A sample project fast-example-api-circleci-rails-integration is available on the Wallarm’s GitHub. It’s purpose is to demonstrate how to perform FAST integration into existing CI/CD processes. This example follows the “Deployment via the API when Baseline Requests Recording Takes Place” scenario.
This document contains the following pieces of information:
How the Sample Application Works
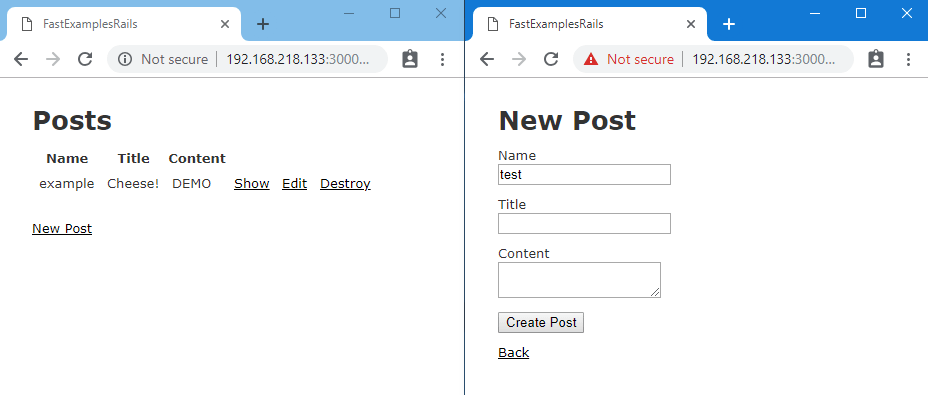
The sample application is a web application that allows you to publish posts on a blog and the capability to manage the blog posts.
The application is written in Ruby on Rails and shipped as a Docker container.
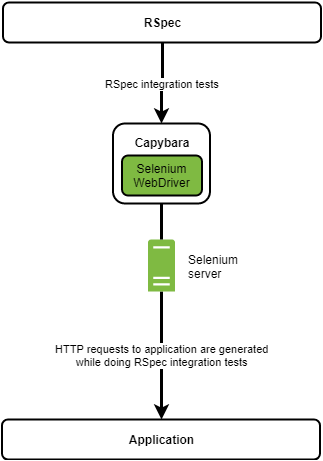
Also, RSpec integration tests are created for the application. RSpec employs Capybara to interact with the web application and Capybara uses Selenium to send HTTP requests to the application:
RSpec executes a few integration tests to test the following scenarios:
-
Navigating to the page with posts
-
Creating a new post
-
Updating an existing post
-
Deleting an existing post
Capybara and Selenium help to convert these tests into a set of HTTP requests to the application.
Tests Location
The aforementioned integration tests are described in the spec/features/posts_spec.rb file.
How FAST Integrates with RSpec and CircleCI
Here you will find an overview of the FAST integration with RSpec and CircleCI for the sample project.
RSpec supports pre-test and post-test hooks:
config.before :context, type: :feature do
    # Actions to take before the RSpec tests’ execution
  end
    # RSpec tests’ execution
  config.after :context, type: :feature do
    # Actions to take after the RSpec tests’ execution
  end
This essentially means that it is possible to augment the steps RSpec takes to test the application with the steps involving FAST security testing.
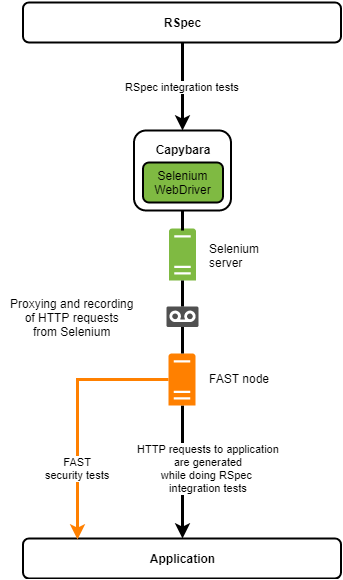
We can point a Selenium server to a proxy server with the HTTP_PROXY environment variable. Thus, HTTP requests to the application will be proxied. Usage of proxying mechanism allows you to pass the requests issued by the integration tests through the FAST node with the minimal intervention into the existing testing flow:
A CircleCI job is built with all the aforementioned facts in mind. The job comprises the following steps (see the .circleci/config.yml file):
-
Necessary preparations:
You need to obtain a token and pass its value into the CircleCI project via the
TOKENenvironment variable.
After a new CI job is in place, the variable’s value is passed to the Docker container, where the job is executed. -
Build services
In this stage a few Docker containers are to be built for a set of services. The containers are placed to a shared Docker network. Therefore, they could communicate with each using the IP addresses as well as containers’ names.
The following services are built (see the
docker-compose.yamlfile):-
app-test: a service for the target application and the test tool.A Docker image for the service comprises the following components:
-
The target application (it is reachable via HTTP at
app-test:3000after deployment). -
The RSpec test tool combined with Capybara; The tool contains all of the functions required to run the FAST security tests.
-
Capybara: configured to send HTTP requests to the target application
app-test:3000with the use of Selenium serverselenium:4444(see thespec/support/capybara_settings.rbfile).
The token is passed into the service’s container by the
WALLARM_API_TOKEN=$TOKENenvironment variable. The token is used by the functions, which are described in theconfig.beforeandconfig.aftersections (see thespec/support/fast-helper.rbfile), to perform manipulations with a test run. -
-
fast: a service for the FAST node.The node is reachable via HTTP at
fast:8080after deployment.The token is passed into the service’s container by the
WALLARM_API_TOKEN=$TOKENenvironment variable. The token is required for the proper FAST operation.Note on baseline requests
The provided example does not employ the
ALLOWED_HOSTSenvironment variable. Therefore, the FAST node recognizes all incoming requests as the baseline ones. -
selenium: a service for the Selenium server. Capybara from theapp-testcontainer uses the server for its operation.The
HTTP_PROXY=http://fast:8080environment variable is passed into the service’s container to enable requests’ proxying through the FAST node.The service is reachable via HTTP at
selenium:4444after deployment.
All services form following relations between them:
-
-
Due to the aforementioned relations, the services should be deployed in a strict order as follows:
fast.selenium.app-test.
The
fastandseleniumservices are deployed in a sequential manner by issuing thedocker-compose up -d fast seleniumcommand. -
Upon successful deployment of the Selenium server and FAST node, it is time to deploy the
app-testservice and execute the RSpec tests.To do so, the following command is issued:
docker-compose run --name app-test --service-ports app-test bundle exec rspec spec/features/posts_spec.rb.Test and HTTP traffic flows are shown in the image:
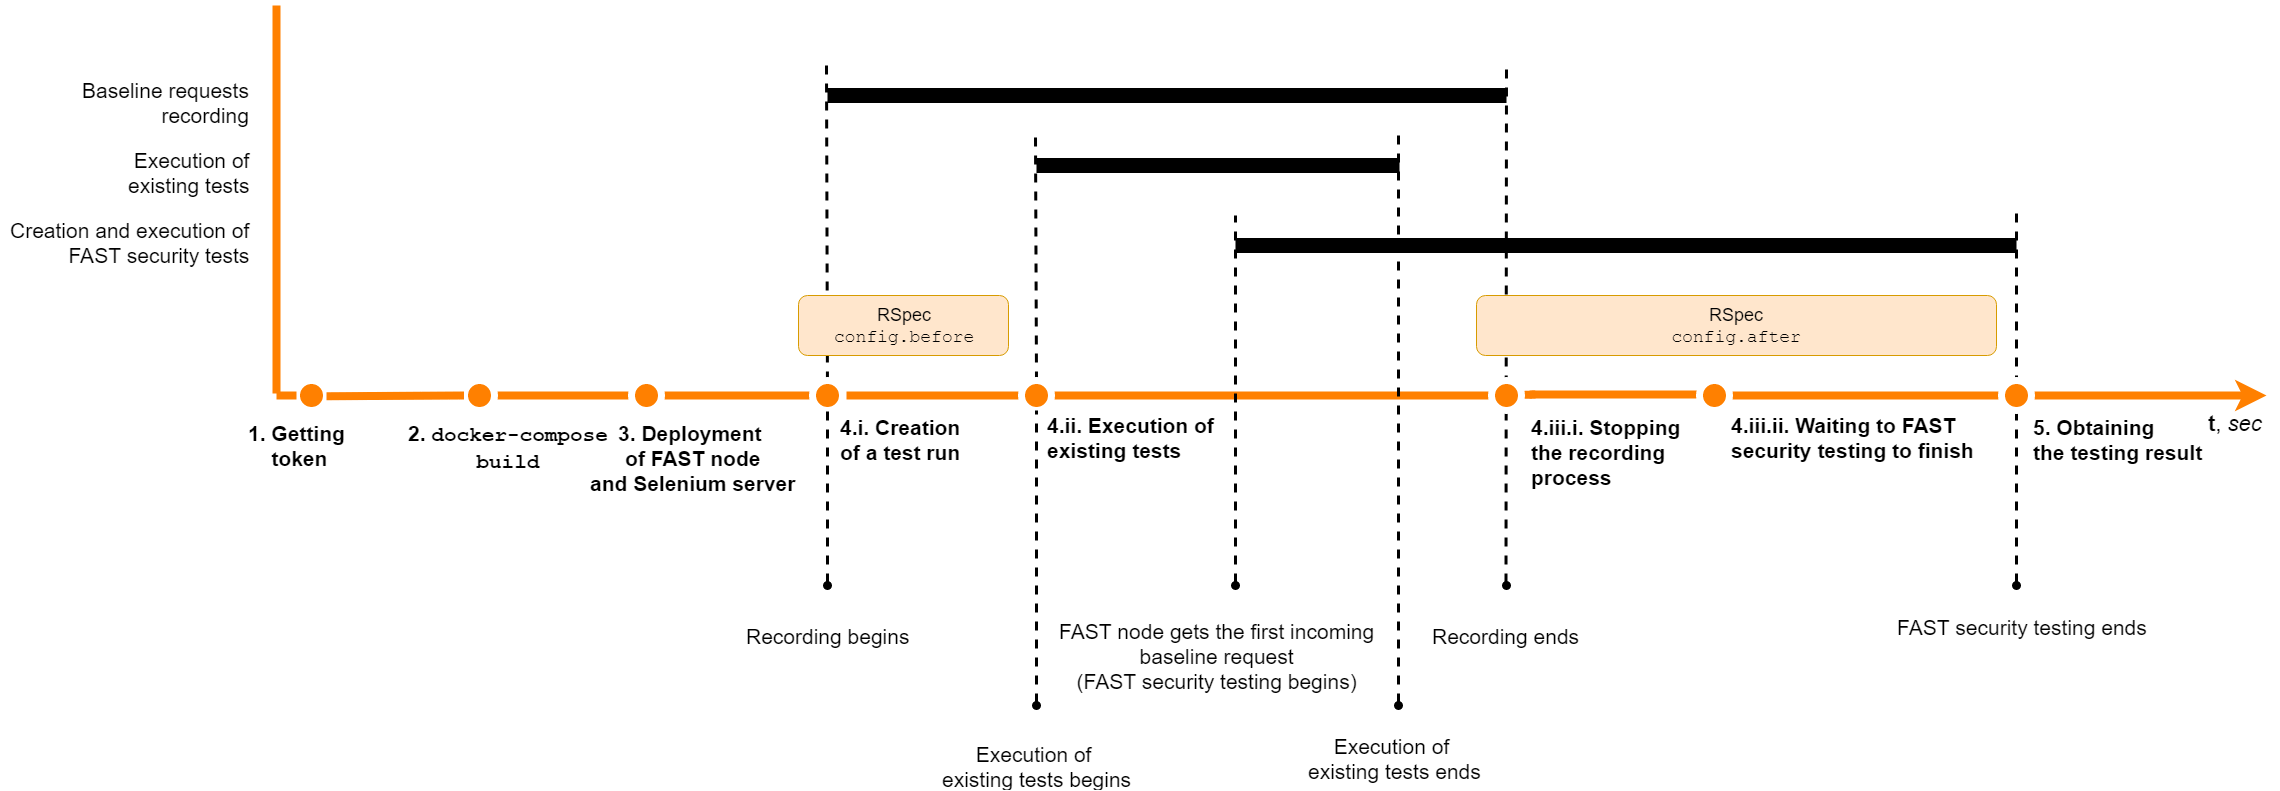
In accordance with the scenario, RSpec tests include all steps that are required to run the FAST security tests (see the
spec/support/fast_hooks.rbfile):-
A test run is created prior to the execution of the RSpec tests.
Then the API call is issued to check if the FAST node is ready to record the baseline requests. The existing tests’ execution process is not started until the node is ready.
Test policy in use
This example uses the default test policy.
-
RSpec tests are executed.
- The following actions are performed after the RSpec tests are done:
- The baseline requests recording process is stopped;
- The test run state is being monitored periodically:
- If FAST security tests are completed successfully (the test run’s state is
state: passed), thene an exit code0is returned to the RSpec. - If FAST security tests are completed unsuccessfully (some vulnerabilities were detected and the test run’s state is
state: failed), then an exit code1is returned to the RSpec.
- If FAST security tests are completed successfully (the test run’s state is
-
-
The testing result is obtained:
The RSpec process’ exit code is passed to the
docker-compose runprocess and then to the CircleCI.
The described CircleCI job closely follows the steps listed earlier:
Demo of the FAST integration
-
Create a FAST node in the Wallarm cloud and copy the provided token.
-
Copy the sample project files into your own GitHub repository.
-
Add your GitHub repository to the CircleCI (press the “Follow Project” button in CircleCI) so that CI job fires up every time you change the content of the repository. A repository is called “a project” in the CircleCI terminology.
-
Add a
TOKENenvironment variable to your CircleCI project. You can do this in the settings of the project. Pass the FAST token as a value of this variable: -
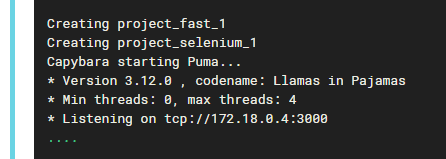
Push something to the repository to start the CI job. Make sure that the RSpec integration tests are finished with success (see the console output of the job):
-
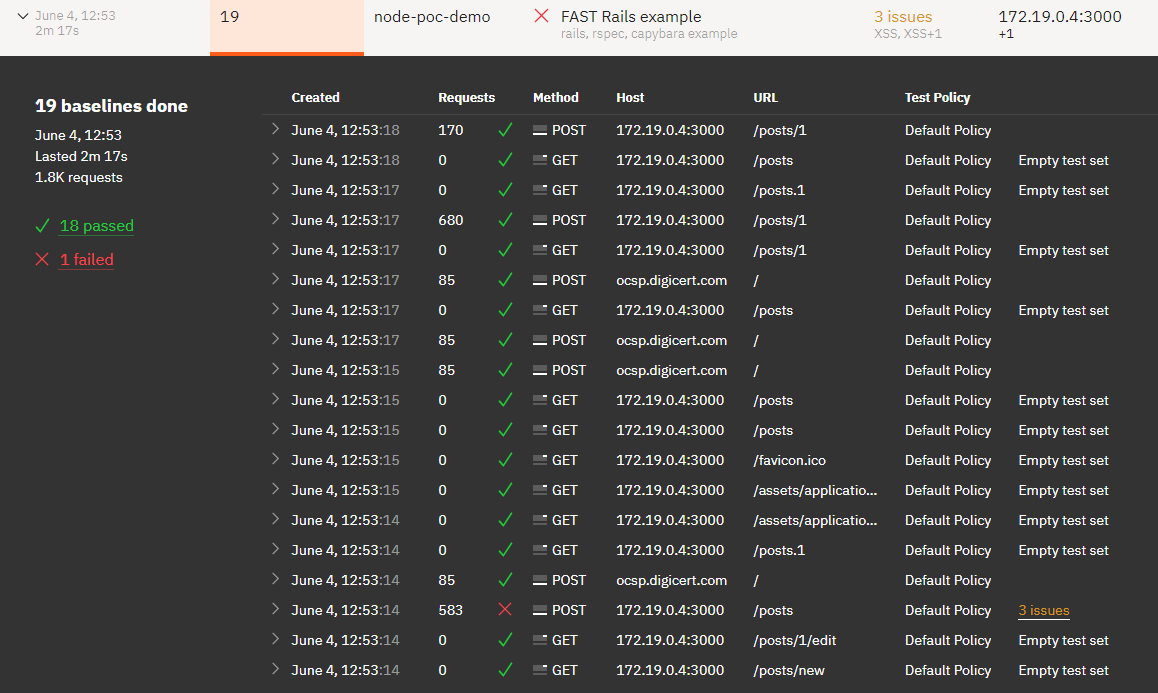
Make sure that the test run is executing.
You can log into the Wallarm portal using your Wallarm account information and navigate to the “Testruns” tab to observe the process of testing the application against vulnerabilities in real time:
-
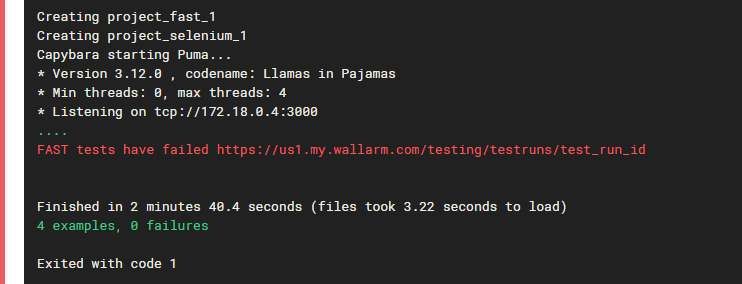
You can see the CI job status reported as “Failed” after the testing process finishes:
Given that there is the Wallarm demo application under the test, the failed CI job represents the vulnerabilities FAST detected in the application (the message “FAST tests have failed” should appear in the build log files). The failure is not invoked by any build-related technical issues in this case.
Error message
The “FAST tests have failed” error message is produced by the
wait_test_run_finishmethod that is located in thespec/support/fast_helper.rbfile, which is before the termination with the exit code1. -
There is no information about detected vulnerabilities displayed in the CircleCI console during testing process.
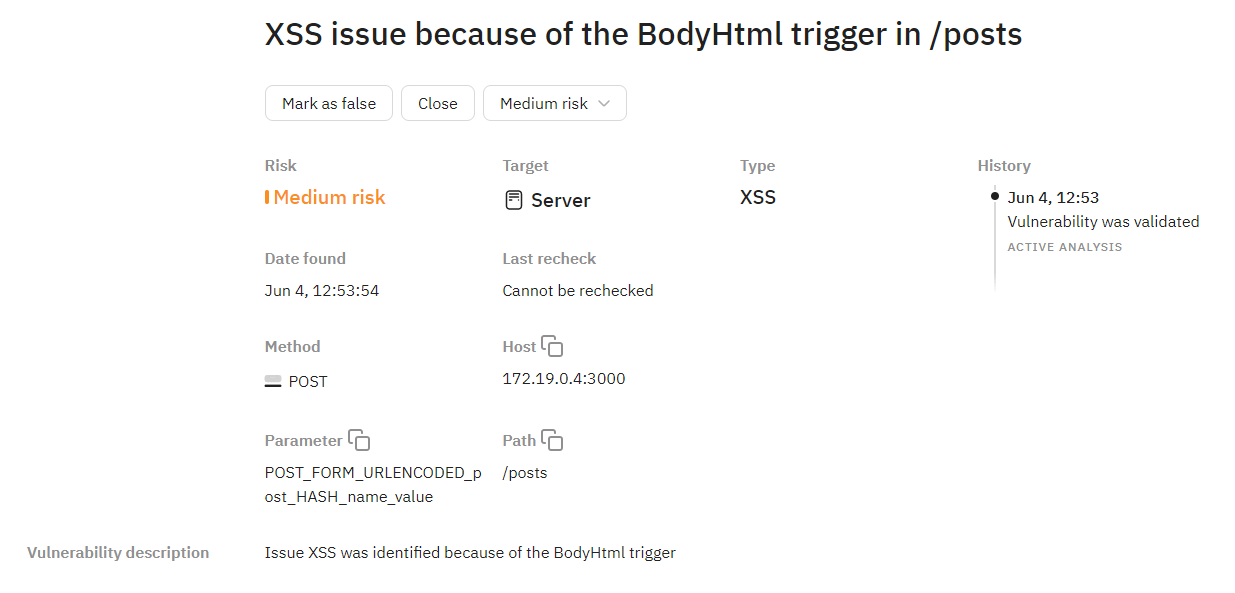
You can explore the vulnerabilities in detail on the Wallarm portal. To do this, navigate to the test run link. The link is displayed as a part of the FAST informational message in the CircleCI console.
This link should look like this one:
https://us1.my.wallarm.com/testing/testruns/test_run_idFor example, you can take a look at the completed test run to find out that a few XSS vulnerabilities were found in the sample application:
To conclude, it has been demonstrated that FAST has strong capabilities of integration into existing CI/CD processes as well as finding vulnerabilities in the application even when the integration tests are passed without any errors.
