التركيب باستخدام المثبت المتكامل
تم تصميم المثبت المتكامل لتبسيط وتوحيد عملية تثبيت وحدة Wallarm كوحدة نمطية ديناميكية لـ NGINX في مختلف البيئات. يقوم المثبت هذا بتحديد نظام التشغيل وإصدارات NGINX تلقائيًا، ويثبت جميع الاعتماديات اللازمة.
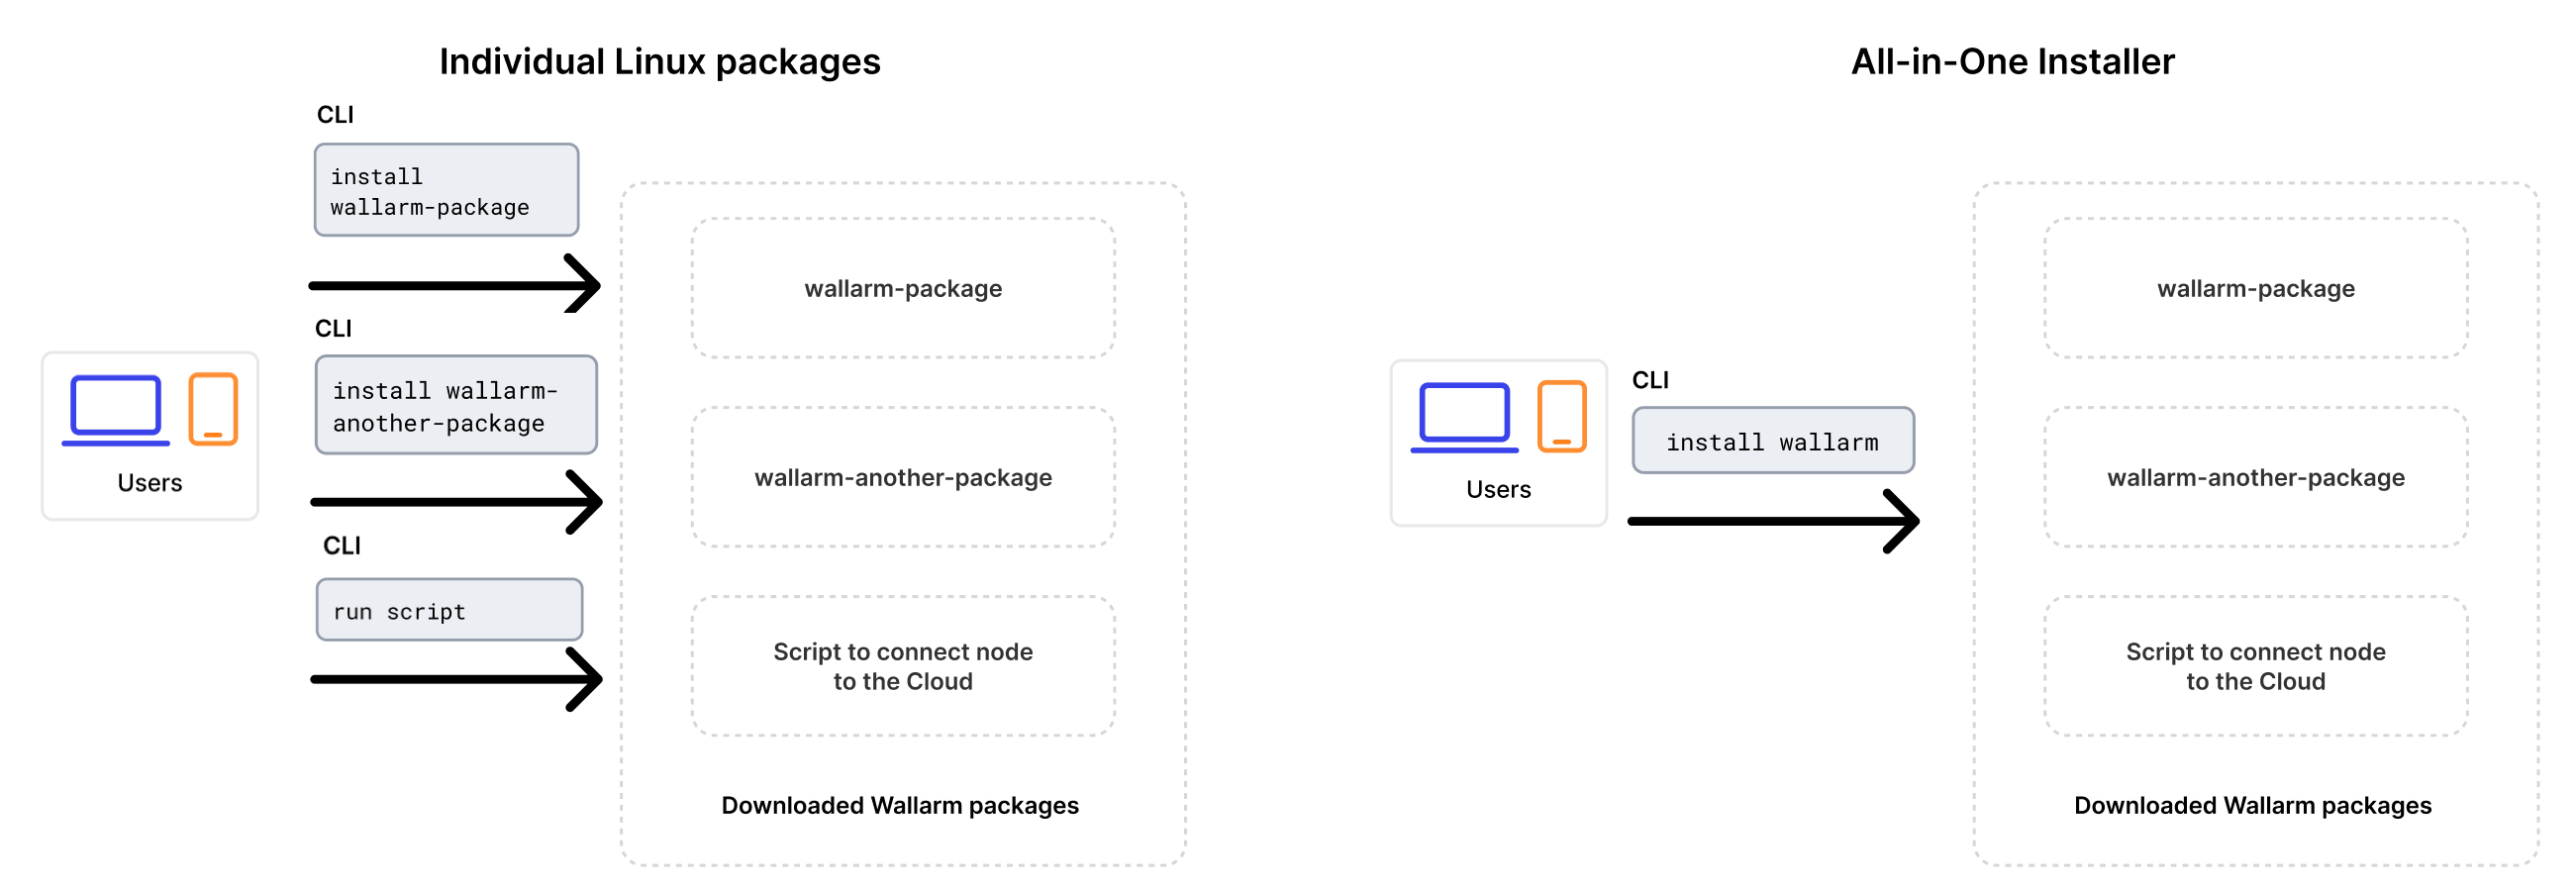
أما بالمقارنة مع الحزم الفردية لنظام التشغيل اللينكس التي تقدمها Wallarm لـ NGINX، وNGINX Plus، وNGINX الموزع، فإن المثبت المتكامل يبسط العملية من خلال تنفيذ التعليمات البرمجية التالية تلقائيًا:
-
التحقق من نظام التشغيل ونسخة NGINX الخاصة بك.
-
إضافة مستودعات Wallarm لنسخة نظام التشغيل وNGINX الذي تم الكشف عنهما.
-
تنصيب حزم Wallarm من هذه المستودعات.
-
ربط وحدة Wallarm المثبتة بـ NGINX الخاص بك.
-
الاتصال بالعقدة التصفية إلى Wallarm Cloud باستخدام الرمز المميز المقدم.
استخدام الحالات
Among all supported Wallarm deployment options, this solution is the recommended one for the following use cases:
-
Your infrastructure is based on bare metal or virtual machines without using container-based methods. Typically, these setups are managed with Infrastructure as Code (IaC) tools like Ansible or SaltStack.
-
Your services are built around NGINX. Wallarm can extend its functionalities using the all-in-one installer.
المتطلبات
-
Access to the account with the Administrator role in Wallarm Console for the US Cloud or EU Cloud.
-
Supported OS:
- Debian 10, 11 and 12.x
- Ubuntu LTS 18.04, 20.04, 22.04
- CentOS 7, 8 Stream, 9 Stream
- Alma/Rocky Linux 9
- RHEL 8.x
- Oracle Linux 8.x
- Oracle Linux 9.x
- Redox
- SuSe Linux
- Others (the list is constantly widening, contact Wallarm support team to check if your OS is in the list)
-
Access to
https://meganode.wallarm.comto download all-in-one Wallarm installer. Ensure the access is not blocked by a firewall. -
Access to
https://us1.api.wallarm.comfor working with US Wallarm Cloud or tohttps://api.wallarm.comfor working with EU Wallarm Cloud. If access can be configured only via the proxy server, then use the instructions. -
Access to the IP addresses and their corresponding hostnames (if any) listed below. This is needed for downloading updates to attack detection rules, as well as retrieving precise IPs for your allowlisted, denylisted, or graylisted countries, regions, or data centers
-
Executing all commands as a superuser (e.g.
root).
الخطوة 1: تثبيت NGINX والاعتماديات
Install the latest NGINX version of:
-
NGINX
stable(the latest supported version is v1.28.1) - see how to install it in the NGINX documentation. -
NGINX Mainline (the latest supported version is v1.27.5) - see how to install it in the NGINX documentation.
-
NGINX Plus (the latest supported version is NGINX Plus R33) - see how to install it in the NGINX documentation.
-
Distribution-Provided NGINX - to install, use the following commands:
الخطوة 2: تحضير كود مميز لـ Wallarm
To install node, you will need a Wallarm token of the appropriate type. To prepare a token:
الخطوة 3: تنزيل مثبت Wallarm المتكامل
Wallarm suggests all-in-one installations for the following processors:
-
x86_64
-
ARM64
To download all-in-one Wallarm installation script, execute the command: