How to Install Wallarm Packages from the Local JFrog Artifactory Repository for CentOS
To install Wallarm packages from the JFrog Artifactory repository on a host dedicated to an NGINX filter node, perform the following actions on this host:
-
Navigate to the JFrog Artifactory web UI via either the domain name or IP address (e.g.,
http://jfrog.example.local:8081/artifactory).Log in to the web UI with a user account.
-
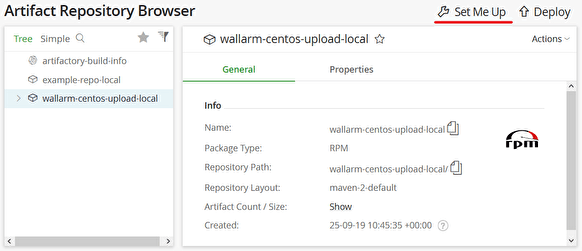
Click the Artifacts menu entry and select a repository containing the Wallarm packages.
-
Click the Set Me Up link.
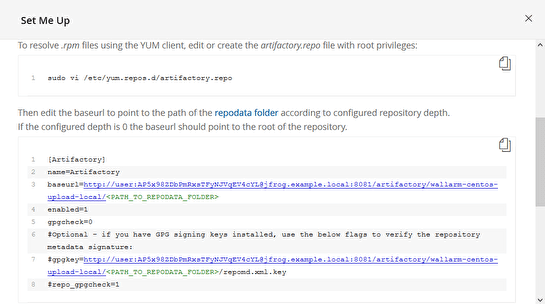
A pop-up window will appear. Type your user account’s password in the Type Password field and press Enter. Now, the instructions in this window will contain your credentials.
-
Scroll down to the
yumconfiguration example and click theCopy Snippet to Clipboardbutton to copy this example to the clipboard. -
Create a
yumconfiguration file (e.g.,/etc/yum.repos.d/artifactory.repo) and paste the copied snippet into it.Important!
Make sure to remove the
<PATH_TO_REPODATA_FOLDER>fragment from thebaseurlparameter so that thebaseurlpoints to the root of the repository.An example of the
/etc/yum.repos.d/artifactory.repofile for thewallarm-centos-upload-localsample repository:[Artifactory] name=Artifactory baseurl=http://user:password@jfrog.example.local:8081/artifactory/wallarm-centos-upload-local/ enabled=1 gpgcheck=0 #Optional - if you have GPG signing keys installed, use the below flags to verify the repository metadata signature: #gpgkey=http://user:password@jfrog.example.local:8081/artifactory/wallarm-centos-upload-local/<PATH_TO_REPODATA_FOLDER>/repomd.xml.key #repo_gpgcheck=1 -
Install the
epel-releasepackage on the host:
Now you can follow any installation instructions for CentOS. You will need to skip the step where the repository is added because you have set up a local repository instead.


