Deploying the NGINX Node with AWS AMI
This article provides instructions for deploying the Wallarm NGINX node on AWS in-line using the official Amazon Machine Image (AMI).
The image is based on Debian and the NGINX version provided by Debian. Currently, the latest image uses Debian 12, which includes NGINX stable 1.22.1.
Deploying the Wallarm Node from the AMI on AWS typically takes around 10 minutes.
Security note
This solution is designed to follow AWS security best practices. We recommend avoiding the use of the AWS root account for deployment. Instead, use IAM users or roles with only the necessary permissions.
The deployment process assumes the principle of least privilege, granting only the minimal access required to provision and operate Wallarm components.
For guidance on estimating AWS infrastructure costs for this deployment, see the Cost Guidance for Deploying Wallarm in AWS page.
Use cases
Among all supported Wallarm deployment options, AMI is recommended for Wallarm deployment in these use cases:
-
Your existing infrastructure resides on AWS.
-
You aim to deploy a security solution as a separate cloud instance, rather than installing it directly on frontend systems like NGINX.
Requirements
-
An AWS account
-
Understanding of AWS EC2, Security Groups
-
Any AWS region of your choice, there are no specific restrictions on the region for the Wallarm node deployment
Wallarm supports both single availability zone (AZ) and multi availability zone deployments. In multi-AZ setups, Wallarm Nodes can be launched in separate availability zones and placed behind a Load Balancer for high availability.
-
Access to the account with the Administrator role in Wallarm Console for the US Cloud or EU Cloud, or ME Cloud
-
Executing all commands on a Wallarm instance as a superuser (e.g.
root) -
No system user named
wallarmexists
Installation
1. Launch a Wallarm Node instance
Launch an EC2 instance using the Wallarm NGINX Node AMI.
Recommended configuration:
-
Latest available AMI version
-
Any preferred AWS region
-
EC2 instance type:
t3.medium(for testing) orm4.xlarge(for production), see cost guidance for details -
SSH key pair for accessing the instance
-
Appropriate VPC and subnet based on your infrastructure
-
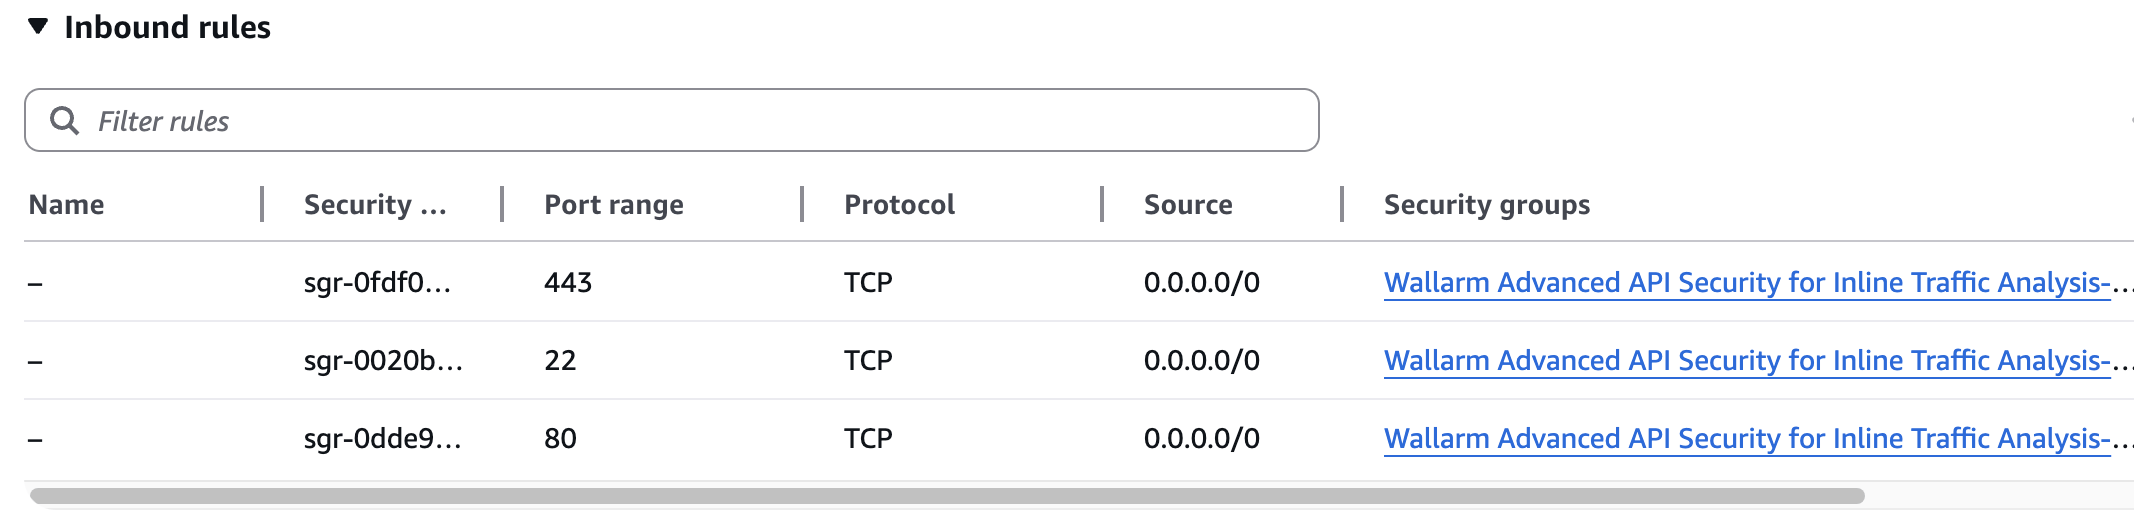
Security Group inbound access to ports 22, 80, and 443
Using a security group preconfigured by Wallarm
When you deploy the instance and create a security group, AWS prompts you to use the one preconfigured by Wallarm. This group already has all the necessary ports open for inbound access.
-
Security Group outbound access to:
https://meganode.wallarm.comto download the Wallarm installer- Wallarm API host for your Cloud:
https://us1.api.wallarm.com,https://api.wallarm.com, orhttps://me1.api.wallarm.com. If access can be configured only via the proxy server, then use the instructions -
IP addresses below for downloading updates to attack detection rules and API specifications, as well as retrieving precise IPs for your allowlisted, denylisted, or graylisted countries, regions, or data centers
2. Prepare the Wallarm API token
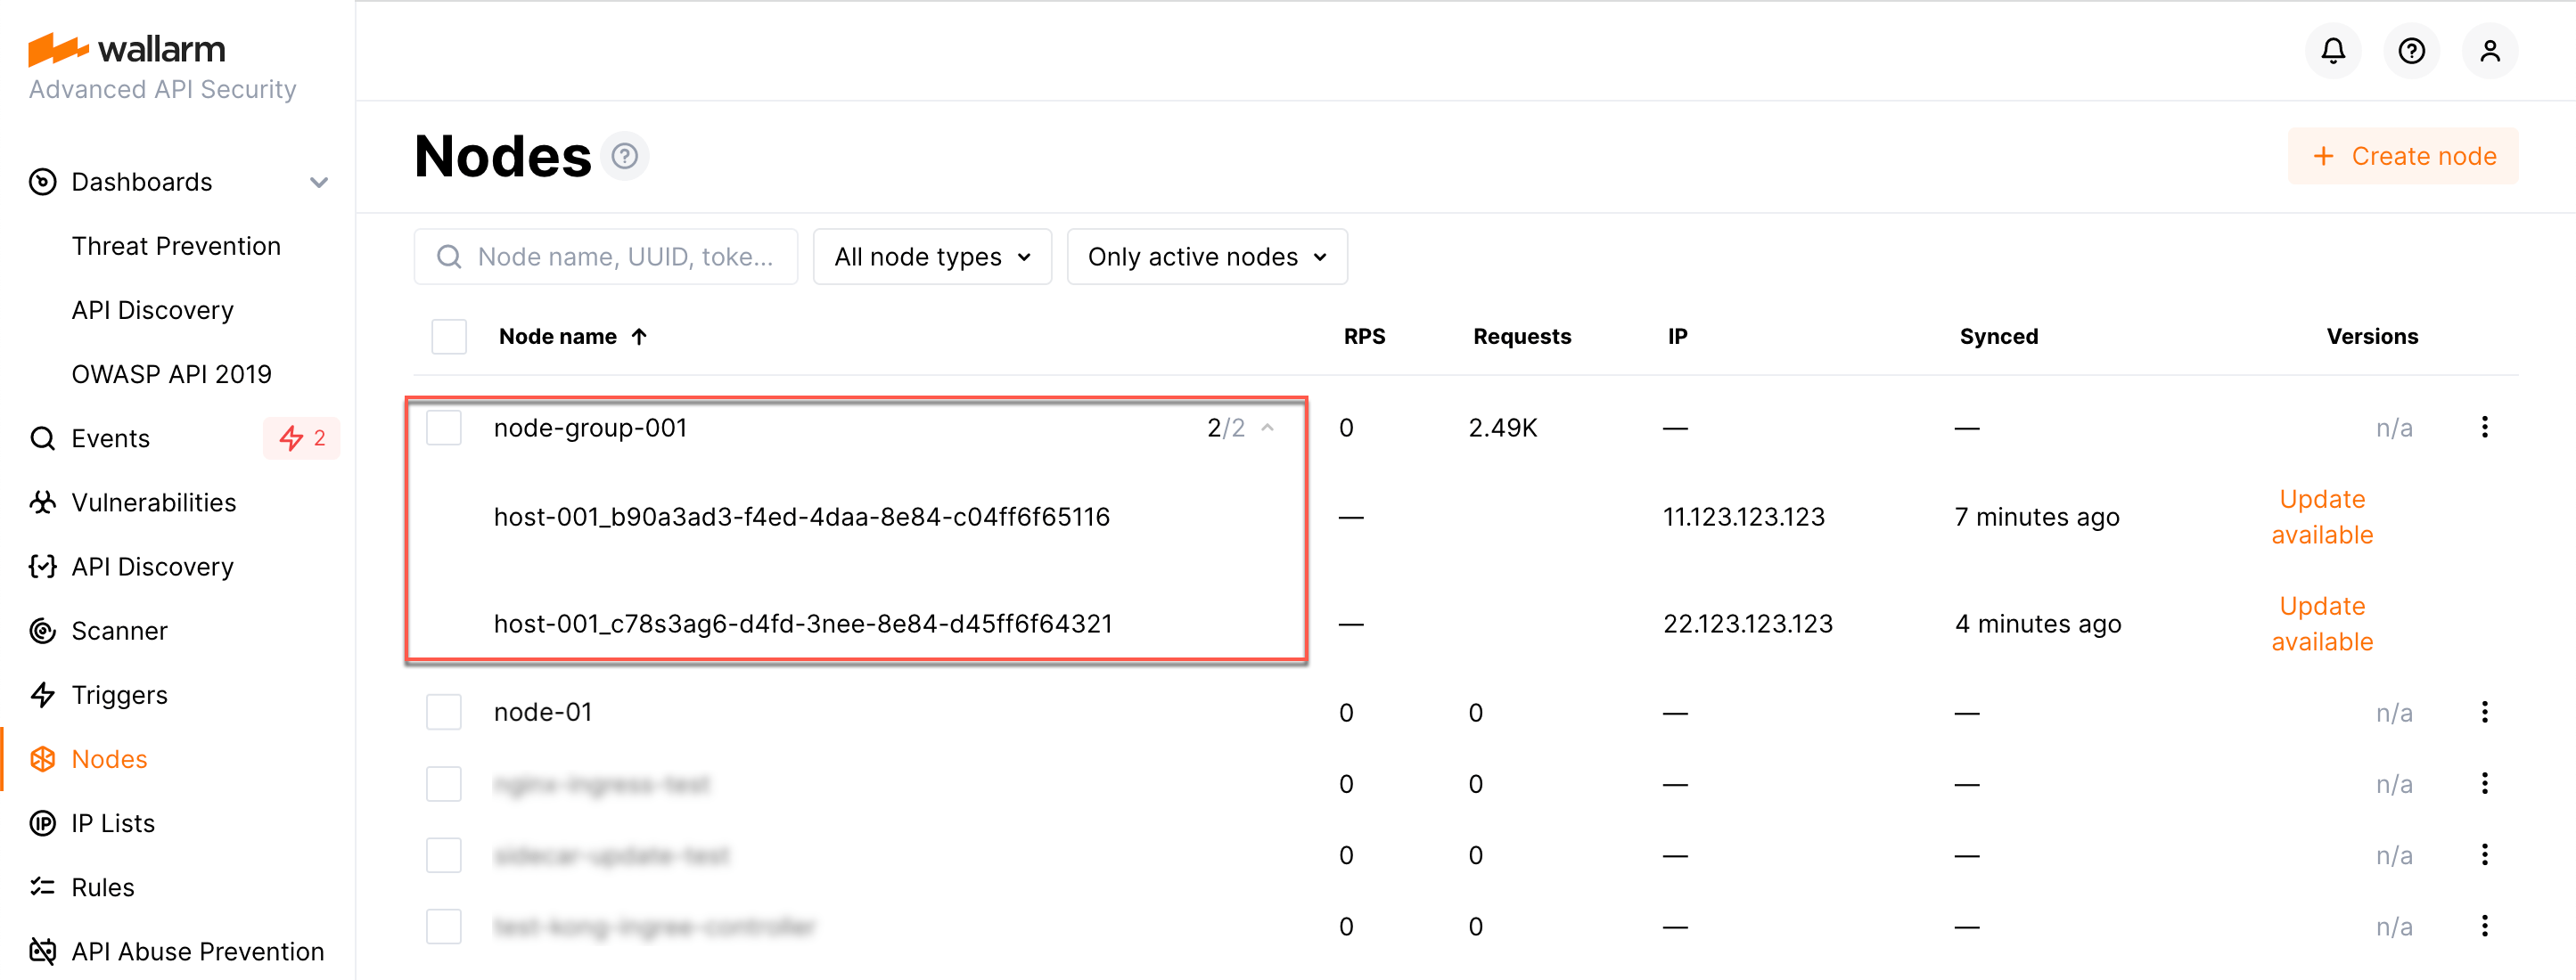
The Wallarm node needs to connect to the Wallarm Cloud using a Wallarm token of the appropriate type. An API token allows you to create a node group in the Wallarm Console UI, helping you organize your node instances more effectively.
Generate a token as follows:
3. Store the token in AWS Secrets Manager (recommended)
For secure token handling, store the token in AWS Secrets Manager.
The secret must be in the same AWS region as your Wallarm Node EC2 instance.
-
Store the token in AWS Secrets Manager:
- Open the AWS Secrets Manager console.
- Click Store a new secret.
- Select Other type of secret.
- In Key/value pairs, switch to Plaintext and paste your Wallarm API token.
- Click Next, set the secret name to
wallarm/api-token, then complete the wizard.
If you have the AWS CLI installed and configured, run the
aws secretsmanagercommand: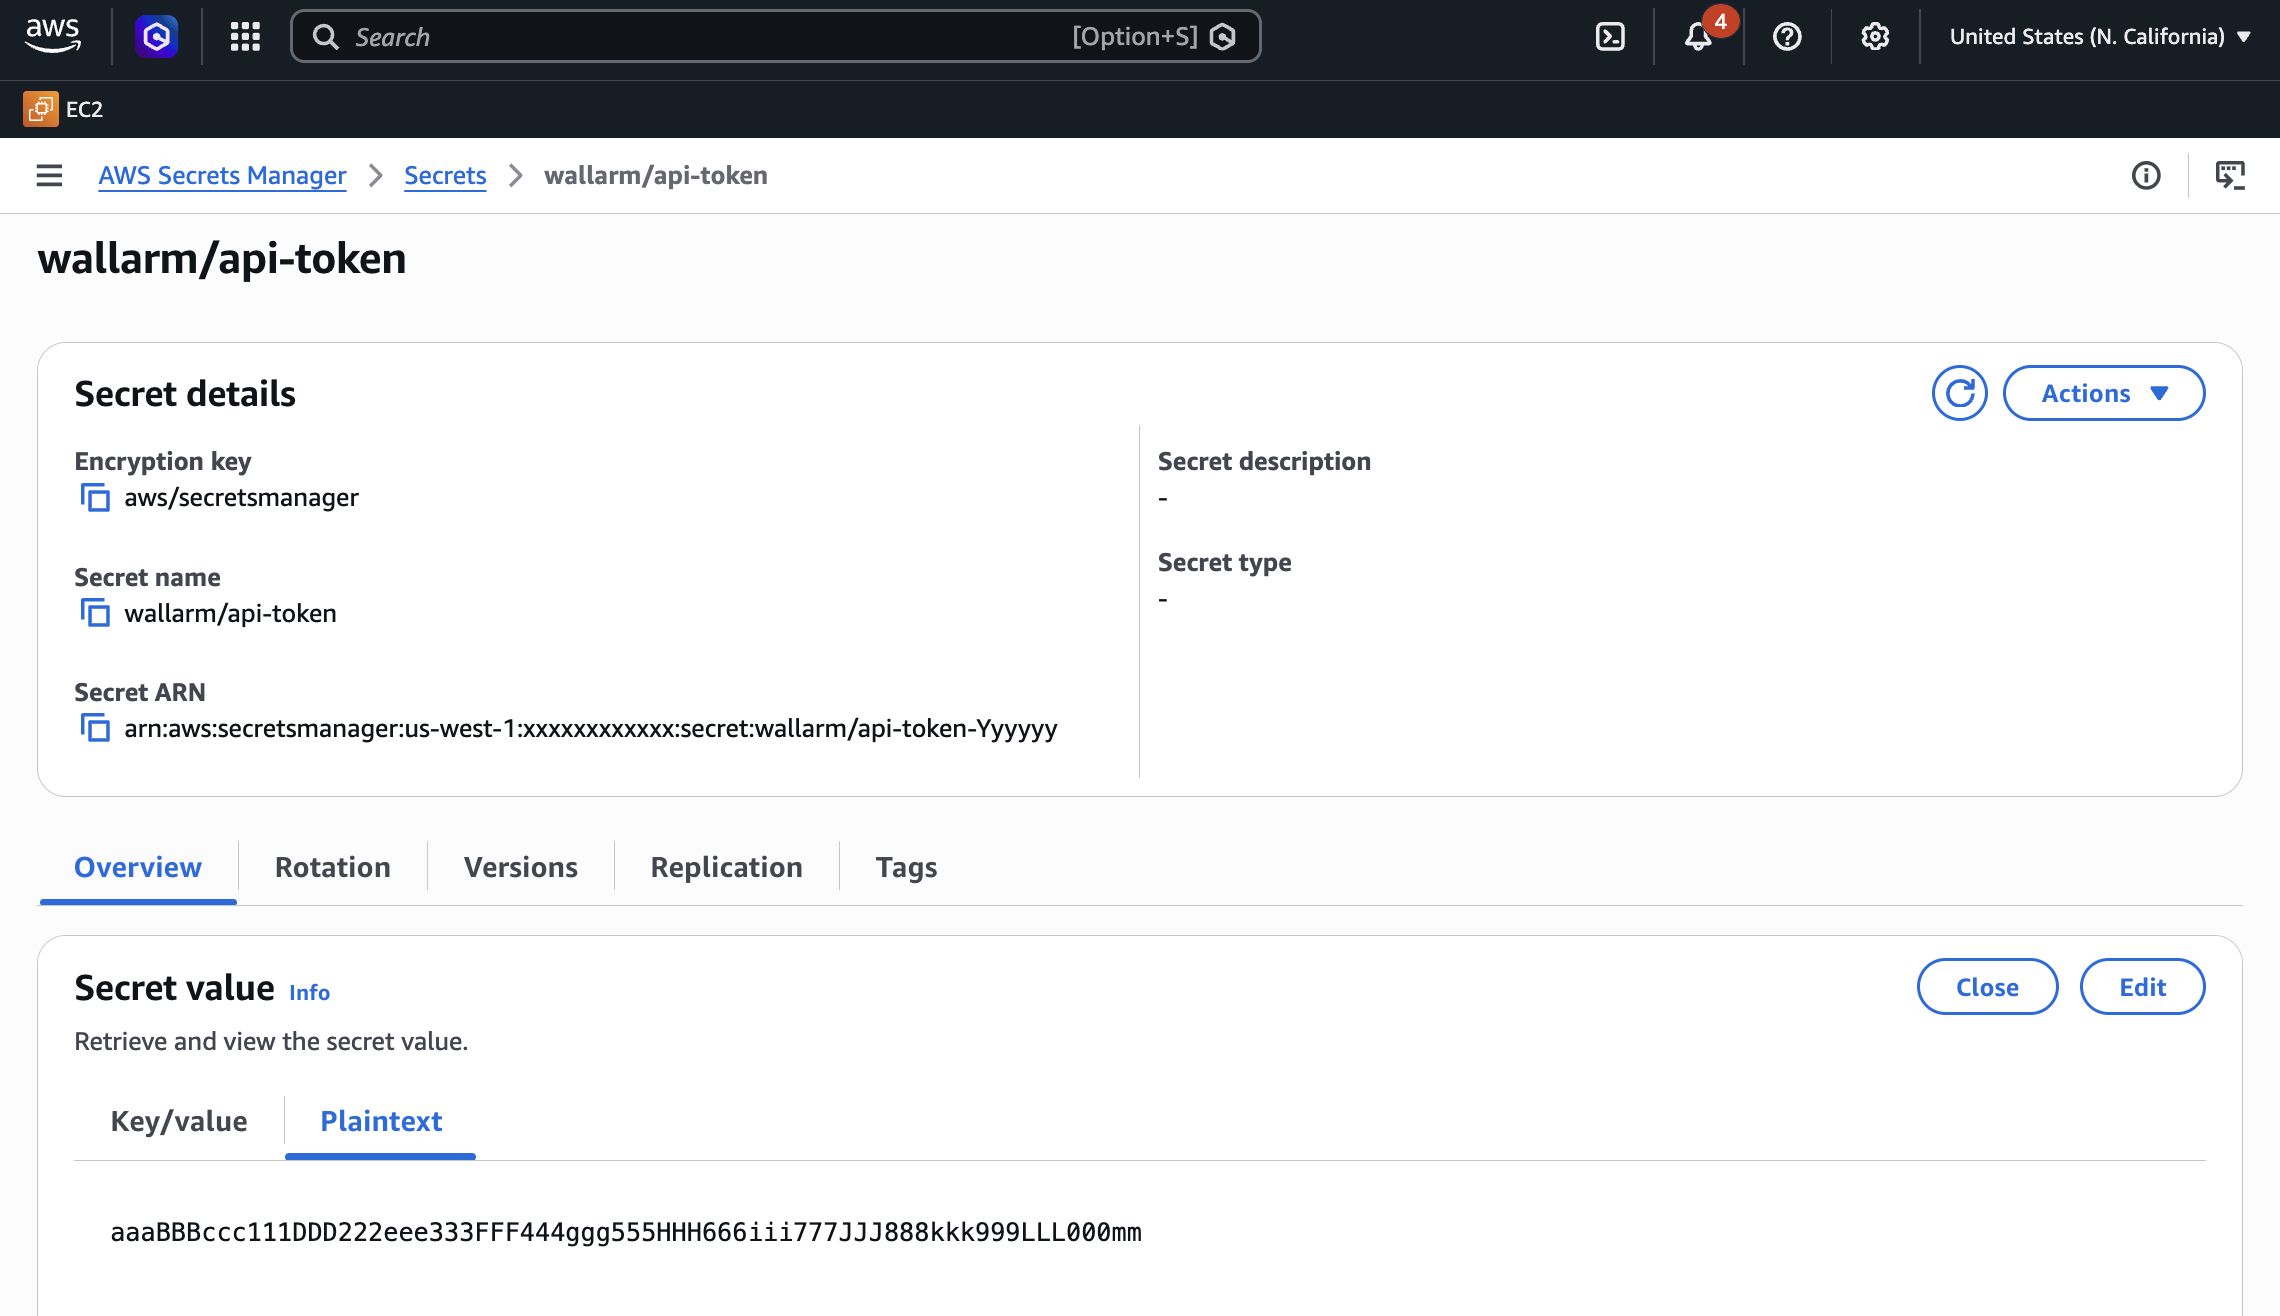
-
Grant the EC2 instance access to the secret. Create an IAM policy with least-privilege access to the secret, then attach it to the EC2 instance via an IAM role.
- Open the IAM console → Policies and click Create policy.
-
Switch to the JSON tab and paste the policy.
{
"Version": "2012-10-17",
"Statement": [
    {
    "Effect": "Allow",
    "Action": [
        "secretsmanager:GetSecretValue"
    ],
    "Resource": "arn:aws:secretsmanager:<REGION>:<ACCOUNT_ID>:secret:wallarm/api-token*"
    }
  ]
}
Replace
<REGION>and<ACCOUNT_ID>with your values.If the secret is encrypted with a customer managed KMS key (rather than the default AWS managed key), also add
kms:Decryptpermission for that key. -
Name the policy (e.g.,
WallarmSecretsReadOnly) and create it. - Open the IAM console → Roles and click Create role.
- Select AWS service → EC2 as the trusted entity, then click Next.
- Attach the
WallarmSecretsReadOnlypolicy and complete the wizard. - Open the EC2 console, select your Wallarm Node instance, then go to Actions → Security → Modify IAM role and attach the role you created.
-
Create a trust policy file that allows EC2 to assume the role:
-
Create the IAM role and attach the policy:
aws iam create-role \
  --role-name WallarmNodeRole \
  --assume-role-policy-document file://trust-policy.json

aws iam put-role-policy \
  --role-name WallarmNodeRole \
  --policy-name WallarmSecretsReadOnly \
  --policy-document '{
    "Version": "2012-10-17",
    "Statement": [
      {
        "Effect": "Allow",
        "Action": ["secretsmanager:GetSecretValue"],
        "Resource": "arn:aws:secretsmanager:<REGION>:<ACCOUNT_ID>:secret:wallarm/api-token*"
      }
    ]
  }'
Replace
<REGION>and<ACCOUNT_ID>with your values. -
Create an instance profile and attach the role to your EC2 instance:
aws iam create-instance-profile \
  --instance-profile-name WallarmNodeProfile

aws iam add-role-to-instance-profile \
  --instance-profile-name WallarmNodeProfile \
  --role-name WallarmNodeRole

aws ec2 associate-iam-instance-profile \
  --instance-id <INSTANCE_ID> \
  --iam-instance-profile Name=WallarmNodeProfile
4. Connect to the Wallarm Node instance via SSH
Use the selected SSH key to connect to your running EC2 instance:
You need to use the admin username to connect to the instance.
5. Connect the instance to the Wallarm Cloud
The instance's node connects to the Wallarm Cloud via the cloud-init.py script. This script registers the node with the Wallarm Cloud using a provided token, globally sets it to the monitoring mode, and sets up the node to forward legitimate traffic based on the --proxy-pass flag.
If you stored the token in AWS Secrets Manager (step 3), retrieve it and run the script:
WALLARM_TOKEN=$(aws secretsmanager get-secret-value \
  --secret-id wallarm/api-token \
  --query SecretString --output text)

sudo env WALLARM_LABELS='group=<GROUP>' \
  /opt/wallarm/usr/share/wallarm-common/cloud-init.py \
  -t "$WALLARM_TOKEN" -m monitoring \
  --proxy-pass <PROXY_ADDRESS> -H us1.api.wallarm.com
WALLARM_TOKEN=$(aws secretsmanager get-secret-value \
  --secret-id wallarm/api-token \
  --query SecretString --output text)

sudo env WALLARM_LABELS='group=<GROUP>' \
  /opt/wallarm/usr/share/wallarm-common/cloud-init.py \
  -t "$WALLARM_TOKEN" -m monitoring \
--proxy-pass <PROXY_ADDRESS> -H me1.api.wallarm.com
-
WALLARM_LABELS='group=<GROUP>'sets a node group name (existing, or, if does not exist, it will be created). It is only applied if using an API token. -
<PROXY_ADDRESS>is the address the Wallarm node proxies legitimate traffic to. It can be the IP of an application instance, a load balancer, or a DNS name (depending on your architecture), with the specifiedhttporhttpsprotocol, e.g.,http://example.comorhttps://192.0.2.1. See more information on the proxy address format.
Alternatively, you can pass the token directly on the command line. This approach is simpler for testing but is not recommended for production:
6. Configure sending traffic to the Wallarm instance
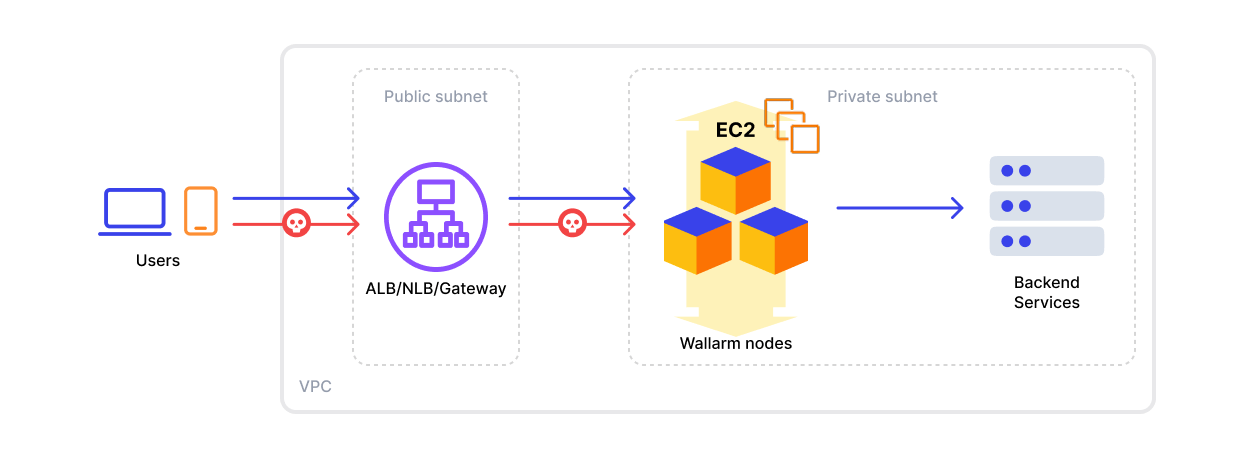
Configure your AWS infrastructure to route all traffic through the Wallarm Node. See Routing Traffic to the Wallarm Node on AWS for guidance on ALB, NLB, CloudFront, and API Gateway configurations.
7. Test the Wallarm operation
-
The request with test Path Traversal attack to an address of either the load balancer or the machine with the Wallarm node:
-
Open Wallarm Console → Attacks section in the US Cloud or EU Cloud, or ME Cloud and make sure the attack is displayed in the list.

Since Wallarm operates in the monitoring mode, the Wallarm node does not block the attack but registers it.
-
Optionally, test other aspects of the node functioning.
Verifying the node operation using logs and metrics
To verify the node is detecting traffic, you can check the metrics and logs as follows:
-
Check Prometheus metrics exposed by the node:
-
Review NGINX logs to inspect incoming requests and errors:
- Access logs:
/var/log/nginx/access.log - Error logs:
/var/log/nginx/error.log
- Access logs:
-
Review Wallarm-specific logs, which include details such as data sent to the Wallarm Cloud, detected attacks, and more. These logs are located in the
/opt/wallarm/var/log/wallarmdirectory.
Fine-tune the deployed solution
The deployment is now complete. The filtering node may require some additional configuration after deployment.
Wallarm settings are defined using the NGINX directives or the Wallarm Console UI. Directives should be set in the following files on the Wallarm instance:
-
/etc/nginx/sites-enabled/defaultdefines the configuration of NGINX -
/etc/nginx/conf.d/wallarm.confdefines the global configuration of Wallarm filtering node -
/etc/nginx/conf.d/wallarm-status.confdefines the filtering node monitoring service configuration -
/opt/wallarm/wstore/wstore.yamlwith the postanalytics service (wstore) settings
You can modify the listed files or create your own configuration files to define the operation of NGINX and Wallarm. It is recommended to create a separate configuration file with the server block for each group of the domains that should be processed in the same way (e.g. example.com.conf). To see detailed information about working with NGINX configuration files, proceed to the official NGINX documentation.
Creating a configuration file
When creating a custom configuration file, make sure that NGINX listens to the incoming connections on the free port.
Below there are a few of the typical settings that you can apply if needed:
To apply the settings, restart NGINX on the Wallarm instance:
Each configuration file change requires NGINX to be restarted to apply it.