Protection from Multi-Attack Perpetrators
When Wallarm is in blocking mode, it automatically blocks all requests with malicious payloads, letting only legitimate requests through. You can configure additional protection for your applications and API by setting the Wallarm reaction for when the number of different malicious payloads from the same IP (often referred to as multi-attack perpetrator) exceeds a specified threshold.
Such perpetrators can be automatically placed into the denylist, which starts blocking all requests from them, not spending time on analysis of whether they are malicious or not, just because this source produced a lot of malicious requests in the past.
Configuring
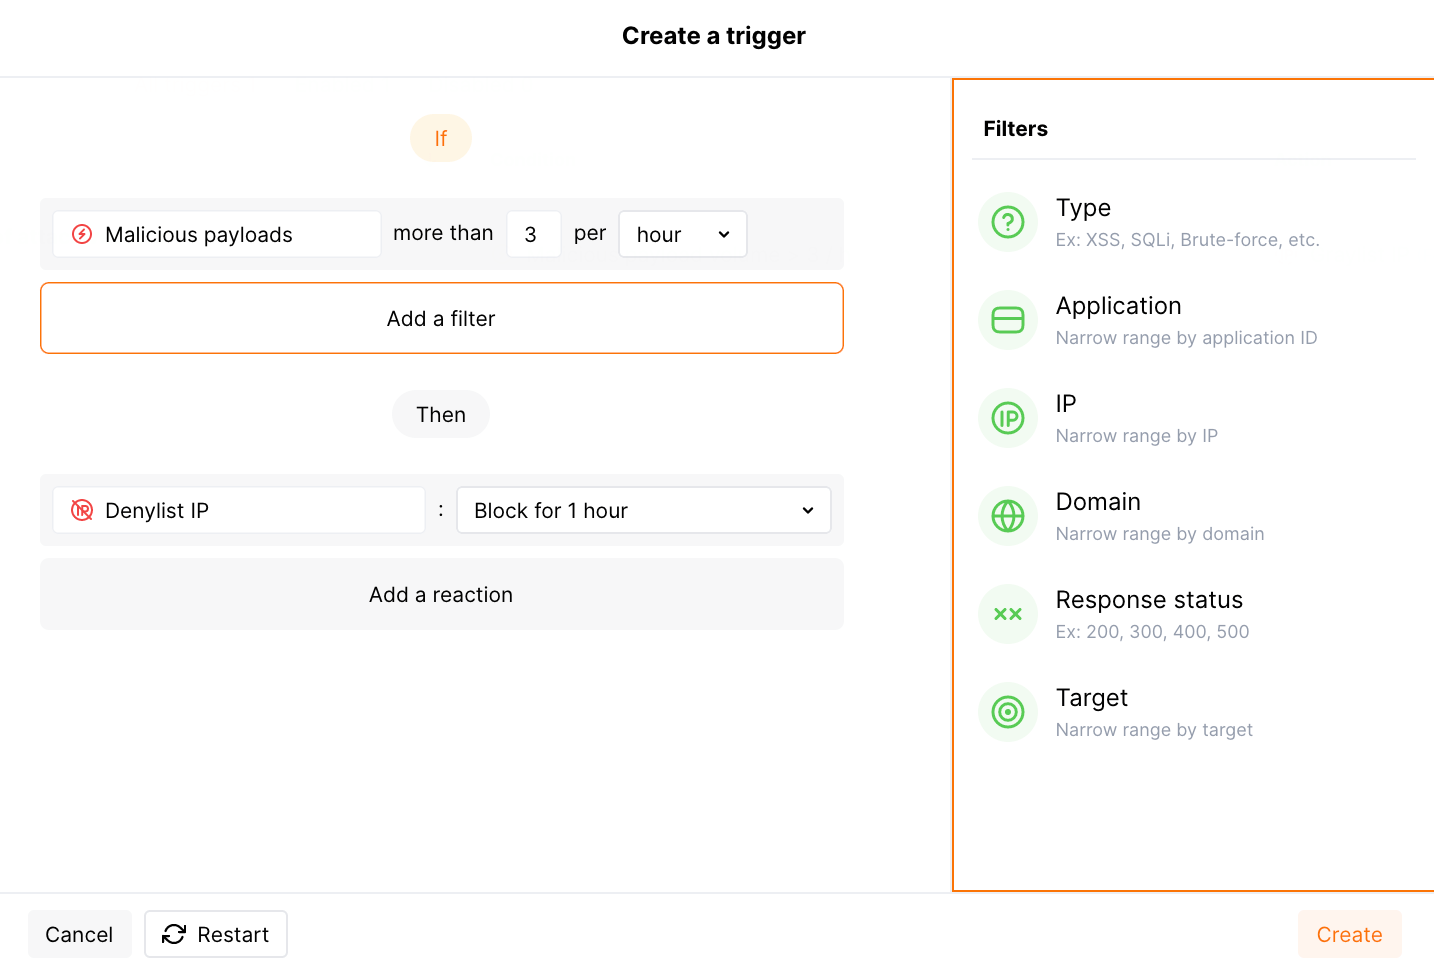
Consider the example below to learn how to configure protection from multi-attack perpetrators.
Let us say you consider more than 3 malicious payloads per hour from some IP as enough reason to block it completely. To do that, you set the corresponding threshold and instruct the system to block the origin IP for 1 hour.
To provide this protection:
-
Open Wallarm Console → Triggers and open the window for trigger creation.
-
Select the Number of malicious payloads condition.
-
Set the threshold to
more than 3 malicious requests from the same IP per hour.What is not counted
The experimental payloads based on the custom regular expressions.
-
Do not set any filters, but be aware that in other cases you can use separately or combined:
- Type is a type of attack detected in the request or a type of vulnerability the request is directed to.
- Application is the application that receives the request.
- IP is an IP address from which the request is sent. The filter expects only single IPs, it does not allow subnets, locations and source types.
- Domain is the domain that receives the request.
- Response status is the response code returned to the request.
-
Select the Denylist IP address -
Block for 1 hourtrigger reaction. Wallarm will put the origin IP on the denylist after the threshold is exceeded and block all further requests from it.Note that even if the bot IP is placed into the denylist by multi-attack protection, by default, Wallarm collects and displays statistics regarding blocked requests originating from it.
-
Save the trigger and wait for the Cloud and node synchronization completion (usually it takes 2-4 minutes).
Pre-configured trigger
New company accounts come with the pre-configured (default) Number of malicious payloads trigger which graylists an IP for 1 hour when it originates more than 3 different malicious payloads within 1 hour.
Graylist is a list of suspicious IP addresses processed by the node as follows: if graylisted IP originates malicious requests, the node blocks them while allowing legitimate requests. In contrast to graylist, denylist points to IP addresses that are not allowed to reach your applications at all - the node blocks even legitimate traffic produced by denylisted sources. IP graylisting is one of the options aimed at the reduction of false positives.
The trigger is released in any node filtration mode, so it will graylist IPs regardless of the node mode.
However, the node analyzes the graylist only in the safe blocking mode. To block malicious requests originating from graylisted IPs, switch the node mode to safe blocking learning its features first.
The hits with the Brute force, Forced browsing, Resource overlimit, Data bomb, or Virtual patch attack types are not considered in this trigger.
You can temporarily disable, modify or delete the default trigger.
Testing
The following is the testing example for the pre-configured trigger. You can adjust it to your trigger view.
-
Send the following requests to the protected resource:
curl 'http://localhost/?id=1%27%20UNION%20SELECT%20username,%20password%20FROM%20users--<script>prompt(1)</script>'
curl 'http://localhost/?id=1%27%20select%20version();'
curl http://localhost/instructions.php/etc/passwd
There are 4 malicious payloads of the SQLi, XSS, and Path Traversal types.
-
Open Wallarm Console → IP lists → Graylist and check that the IP address from which the requests originated is graylisted for 1 hour.
-
Open the section Attacks and check that the attacks are displayed in the list:
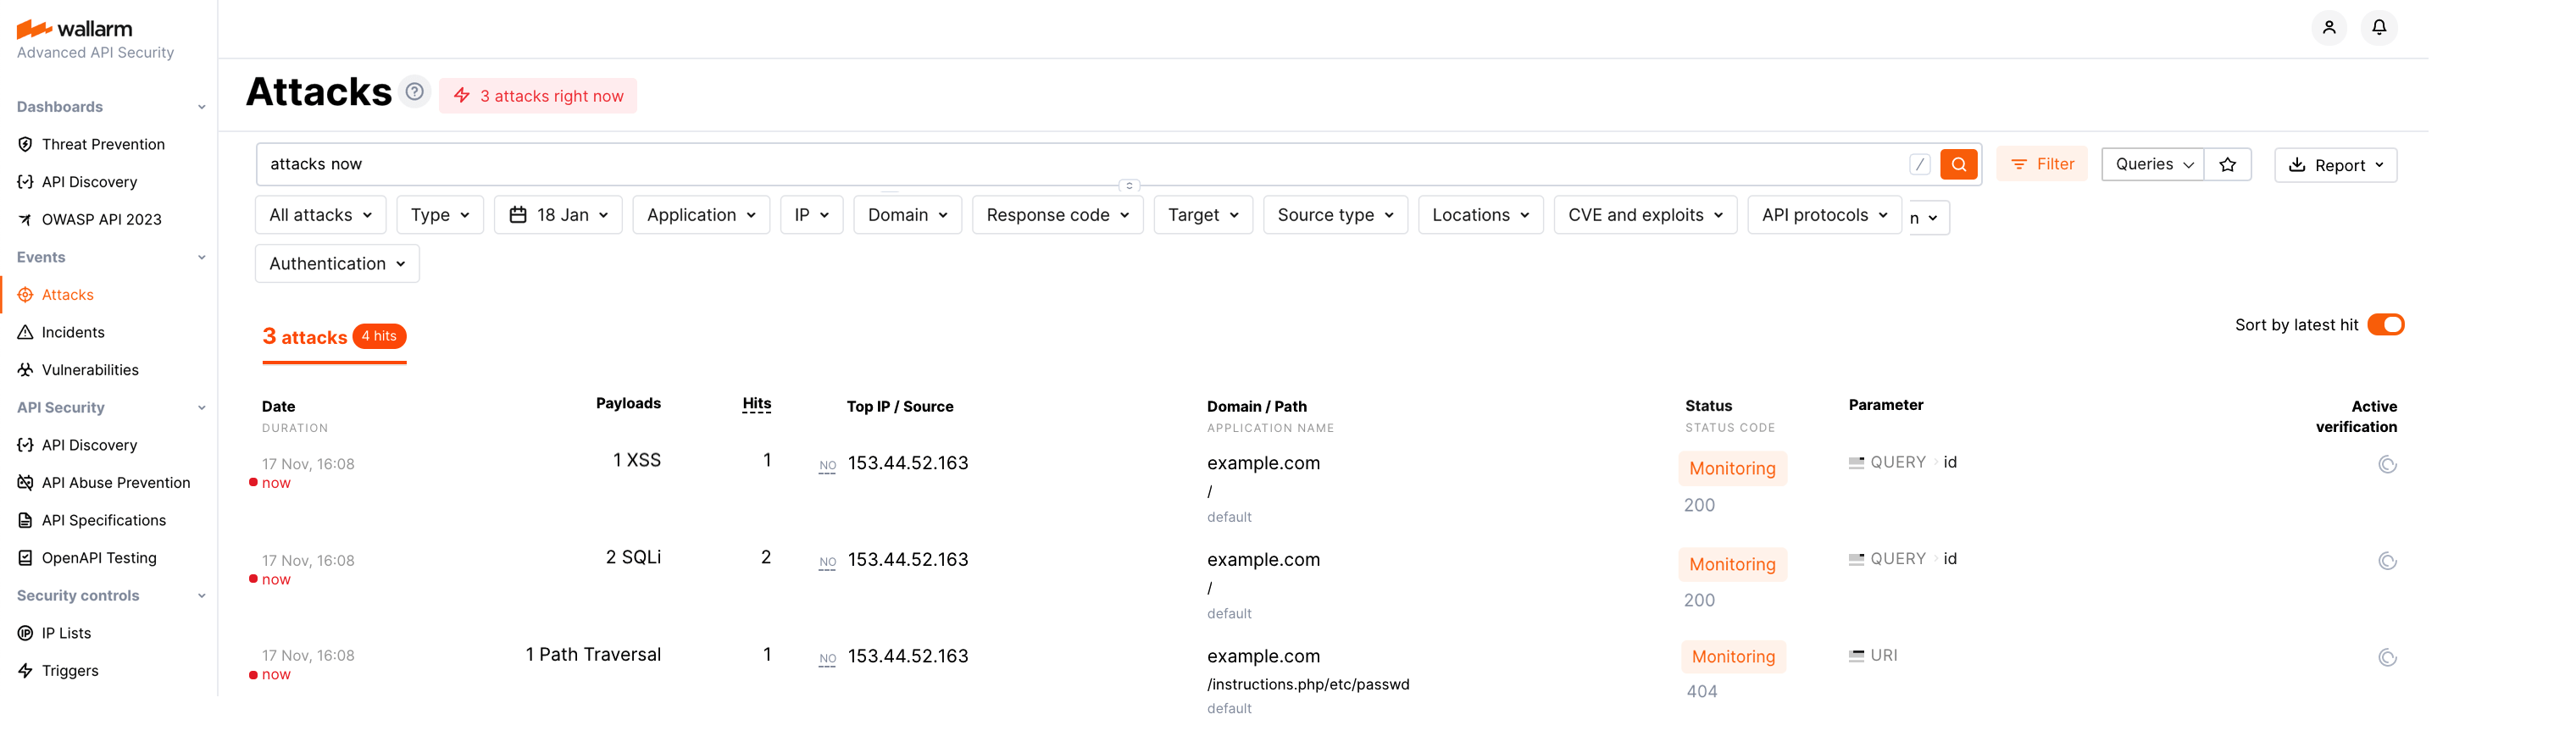
To search for the attacks, you can use the
multiple_payloadssearch tag.