Deploying F5 NGINX Ingress Controller with Integrated Wallarm Services
These instructions provide you with the steps to deploy the Wallarm NGINX-based Ingress controller to your K8s cluster. The solution is deployed from the Wallarm Helm chart.
The solution is based on the F5 NGINX Ingress Controller with integrated Wallarm services. It uses the NGINX Ingress Controller image version 5.4.0. The Wallarm controller image is built on NGINX stable 1.29.x and uses Alpine Linux 3.23 as the base image.
Migrating from Community-based solution
If you currently have the Wallarm NGINX Ingress Controller based on the Community NGINX Ingress Controller, refer to the migration guide for instructions on migrating to this F5-based solution.
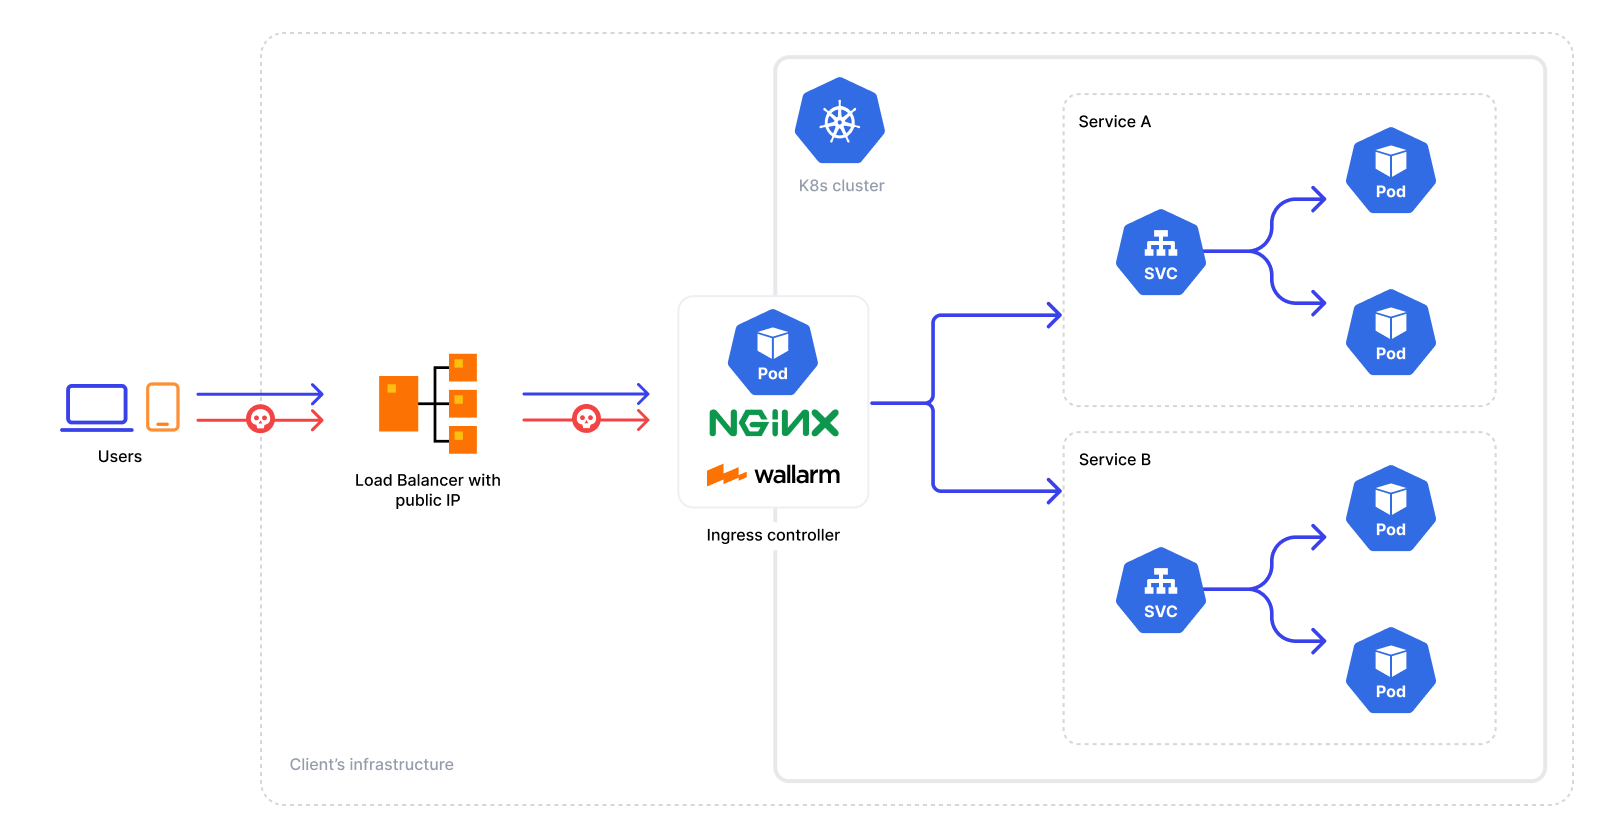
Traffic flow
Traffic flow with Wallarm Ingress Controller:
Use cases
Among all supported Wallarm deployment options, this solution is the recommended one for the following use cases:
-
There is no Ingress controller and security layer routing traffic to Ingress resources compatible with F5 NGINX Ingress Controller
-
You are currently using F5 NGINX Ingress Controller and are in search of a security solution that offers both the standard controller functionality and enhanced security features. In this case, you can effortlessly switch to the Wallarm-NGINX Ingress Controller detailed in these instructions. Simply migrate your existing configuration to a new deployment to complete the replacement.
For simultaneous use of both the existing Ingress controller and the Wallarm controller, refer to the Ingress Controller chaining guide for configuration details.
-
You are currently using the Community Ingress NGINX controller (with or without Wallarm) and want to ensure continued support and integrated security capabilities. Since the upstream Community Ingress NGINX project has been retired, we recommend migrating to the F5-based Wallarm Ingress Controller.
See the migration guide for detailed instructions.
Requirements
-
Kubernetes platform version 1.28-1.35
-
Helm version 3.10+
-
Ability to create, modify, and delete resources in the target Kubernetes namespace
-
Compatibility of your services with the Wallarm Ingress Controller based on the F5 NGINX Ingress Controller version 5.4.0
-
Access to the account with the Administrator role in Wallarm Console for the US Cloud or EU Cloud
-
Access to
https://us1.api.wallarm.comfor working with US Wallarm Cloud or tohttps://api.wallarm.comfor working with EU Wallarm Cloud -
Access to
https://charts.wallarm.comto add the Wallarm Helm charts. Ensure the access is not blocked by a firewall -
Access to the Wallarm repositories on Docker Hub
https://hub.docker.com/r/wallarm. Make sure the access is not blocked by a firewall -
Access to the IP addresses and their corresponding hostnames (if any) listed below. This is needed for downloading updates to attack detection rules and API specifications, as well as retrieving precise IPs for your allowlisted, denylisted, or graylisted countries, regions, or data centers
Known restrictions
-
Operation without the Postanalytics module is not supported.
-
Scaling down the Postanalytics module may result in a partial loss of attack data.
Deployment
Step 1: Generate a filtering node token
Generate a Node API token:
-
Open Wallarm Console → Settings → API tokens in the US Cloud or EU Cloud.
-
Find or create API token with the
Node deployment/Deploymentusage type. -
Copy this token.
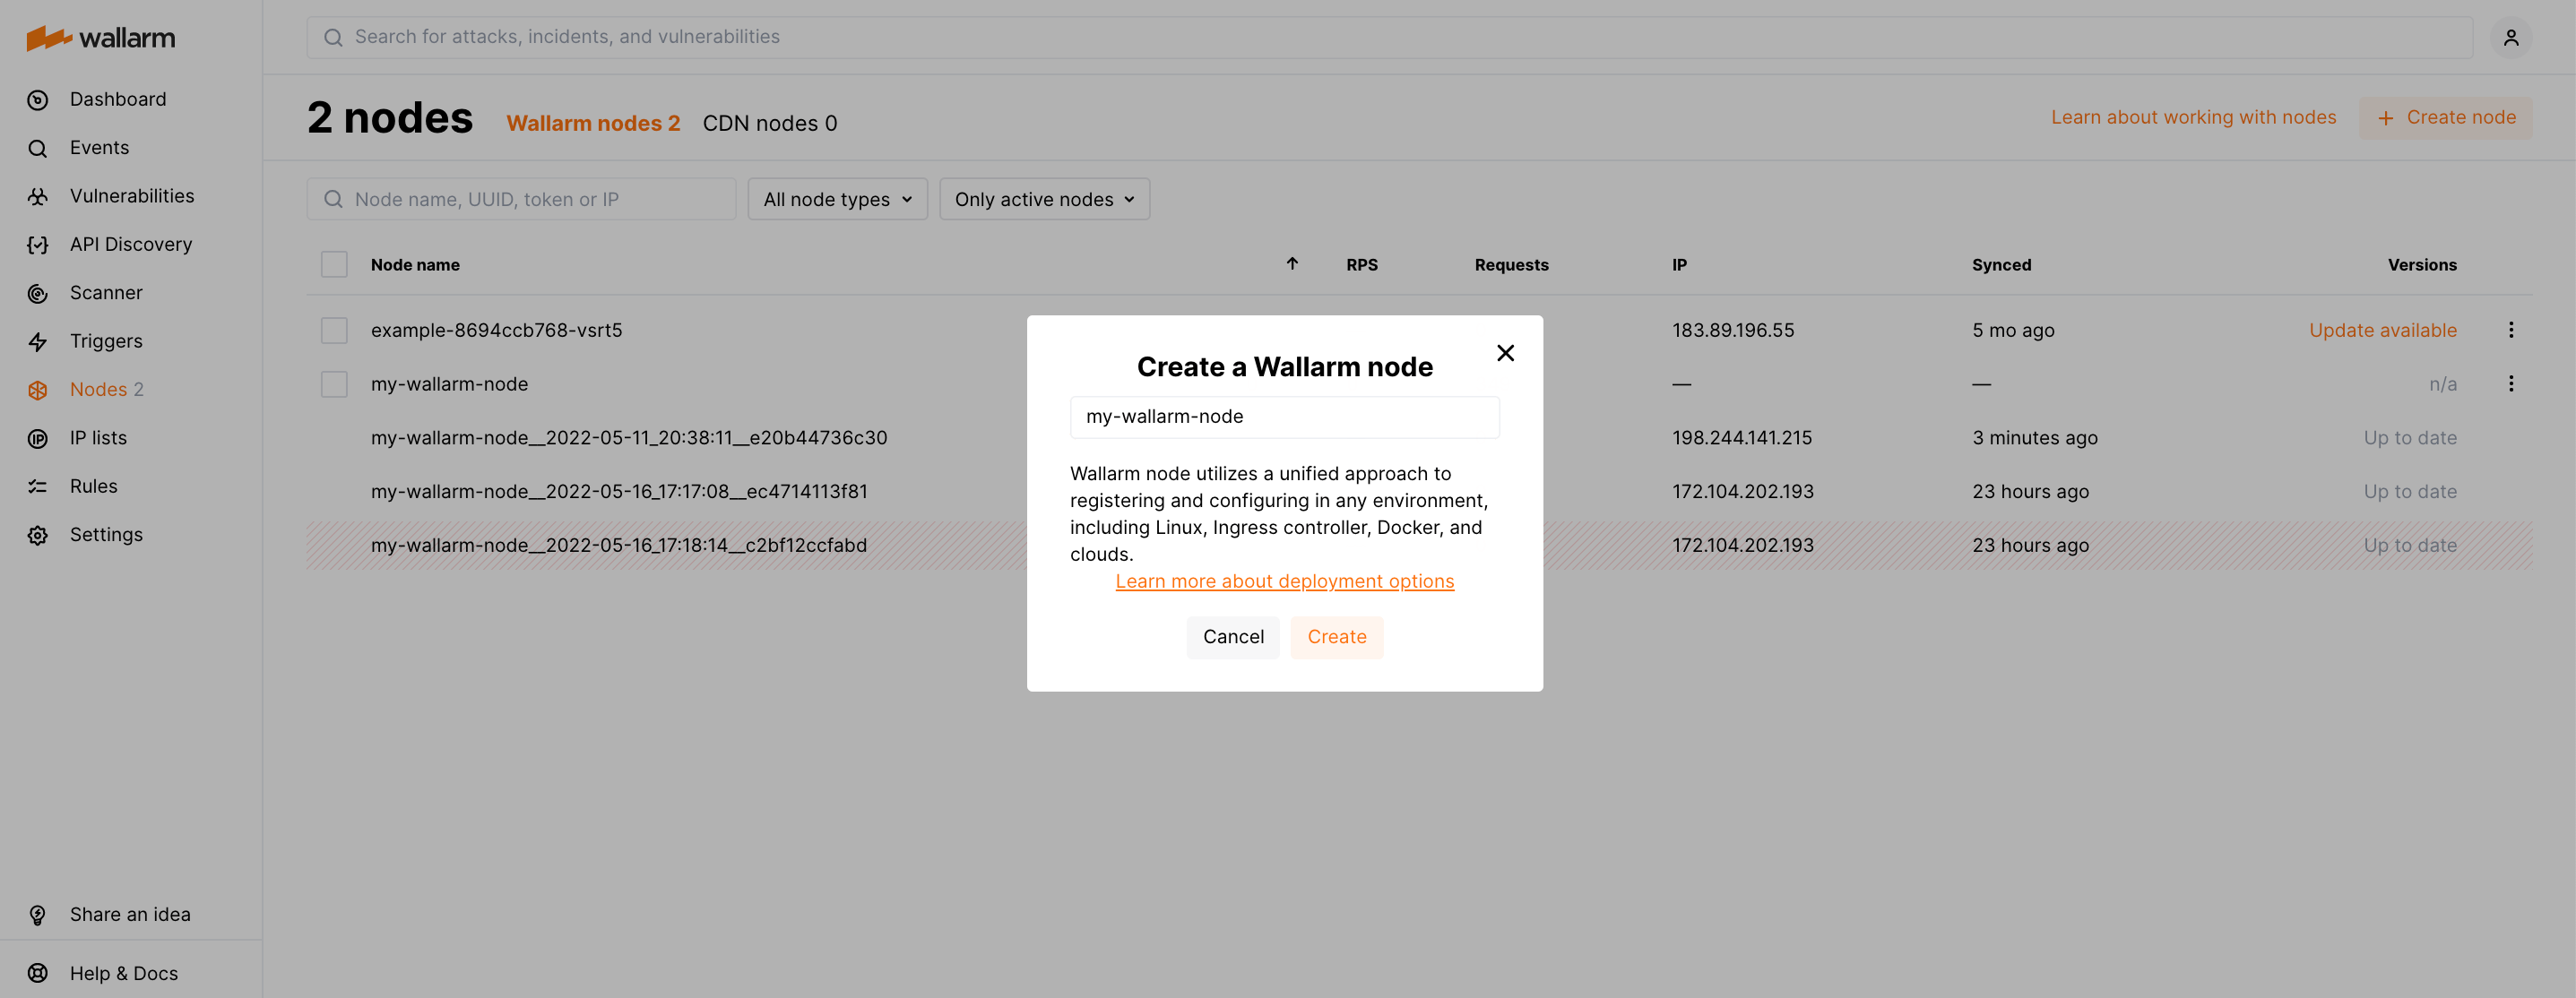
Step 2: Install the Wallarm Ingress Controller
-
Create a Kubernetes namespace to deploy the Helm chart with the Wallarm Ingress Controller:
-
Add the Wallarm chart repository:
-
Create the
values.yamlfile with the Wallarm configuration. Example of the file with the minimum configuration is below.When using an API token, specify a node group name in the
nodeGroupparameter. Your node will be assigned to this group, shown in the Wallarm Console's Nodes section. The default group name isdefaultIngressGroup.<NODE_TOKEN>is the API token generated for Wallarm Node deployment.You can also store the Wallarm node token in Kubernetes secrets and pull it to the Helm chart.
Deployment from your own registries
You can overwrite elements of the
values.yamlfile to install the Wallarm Ingress Controller from the images stored in your own registries. -
Install the Wallarm packages:
helm install --version 7.0.0 <RELEASE_NAME> wallarm/wallarm-ingress -n <KUBERNETES_NAMESPACE> -f <PATH_TO_VALUES><RELEASE_NAME>is the name for the Helm release of the Ingress controller chart<KUBERNETES_NAMESPACE>is the Kubernetes namespace you have created for the Helm chart with the Wallarm Ingress Controller<PATH_TO_VALUES>is the path to thevalues.yamlfile
Step 3: Enable traffic analysis for your Ingress
kubectl annotate ingress <YOUR_INGRESS_NAME> -n <YOUR_INGRESS_NAMESPACE> nginx.org/wallarm-mode=monitoring
kubectl annotate ingress <YOUR_INGRESS_NAME> -n <YOUR_INGRESS_NAMESPACE> nginx.org/wallarm-application="<APPLICATION_ID>"
-
<YOUR_INGRESS_NAME>is the name of your Ingress -
<YOUR_INGRESS_NAMESPACE>is the namespace of your Ingress -
<APPLICATION_ID>is a positive number that is unique to each of your applications or application groups. This will allow you to obtain separate statistics and to distinguish between attacks aimed at the corresponding applications
Step 4: Test the Wallarm Ingress Controller operation
-
Verify that the Wallarm Ingress Controller pods are running:
The Wallarm pod status should be STATUS: Running and READY: N/N:
-
Send the test Path Traversal attack to the Ingress Controller Service:
If the filtering node is working in the
blockmode, the code403 Forbiddenwill be returned in the response to the request and the attack will be displayed in Wallarm Console → Attacks.
ARM64 deployment
The F5 NGINX Ingress Controller supports ARM64 processors. Originally designed for x86 architectures, deploying on ARM64 nodes requires updating the Helm chart parameters.
In ARM64 settings, Kubernetes nodes often carry an arm64 label. To assist the Kubernetes scheduler in allocating the Wallarm workload to the appropriate node type, reference this label using nodeSelector, tolerations, or affinity rules in the Wallarm Helm chart configuration.
Below is the Wallarm Helm chart example for Google Kubernetes Engine (GKE), which uses the kubernetes.io/arch: arm64 label for relevant nodes. This template is modifiable for compatibility with other cloud setups, respecting their ARM64 labeling conventions.
Deployment from your own registries
If you cannot pull Docker images from the Wallarm public repository (e.g., due to company security policies restricting external resources), you can instead:
-
Clone these images to your private registry.
-
Install Wallarm NGINX-based Ingress controller using them.
The following Docker images are used by the Helm chart for NGINX-based Ingress Controller deployment:
To install Wallarm NGINX-based Ingress controller using images stored in your registry, overwrite the values.yaml file of Wallarm Ingress Controller Helm chart:
config:
  images:
    controller:
      repository: <YOUR_REGISTRY>
      tag: <IMAGE_TAG>
      pullPolicy: IfNotPresent
    helper:
      repository: <YOUR_REGISTRY>
      tag: <IMAGE_TAG>
      pullPolicy: IfNotPresent
Then run installation using your modified values.yaml.
Security Context Constraints (SCC) in OpenShift
When deploying the F5 NGINX Ingress Controller on OpenShift, it is necessary to define a custom Security Context Constraint (SCC) to suit the security requirements of the platform. The default constraints may be insufficient for the Wallarm solution, potentially leading to errors.
Below is the recommended custom SCC for the Wallarm NGINX Ingress Controller.
Important
Apply the SCC before deploying the controller.
-
Create the
wallarm-scc.yamlfile with the following SCC:--- allowHostDirVolumePlugin: false allowHostIPC: false allowHostNetwork: false allowHostPID: false allowHostPorts: false allowPrivilegeEscalation: false allowPrivilegedContainer: false allowedCapabilities: - NET_BIND_SERVICE apiVersion: security.openshift.io/v1 defaultAddCapabilities: null fsGroup: type: MustRunAs groups: [] kind: SecurityContextConstraints metadata: name: wallarm-ingress-controller annotations: kubernetes.io/description: wallarm-ingress-controller provides features similar to restricted-v2 SCC but pins user id to 101 and is a little more restrictive for volumes priority: null readOnlyRootFilesystem: false requiredDropCapabilities: - ALL runAsUser: type: MustRunAs uid: 101 seLinuxContext: type: MustRunAs seccompProfiles: - runtime/default supplementalGroups: type: RunAsAny users: [] volumes: - configMap - secret - emptyDir - projected -
Apply this policy to a cluster:
-
Create a Kubernetes namespace where the NGINX Ingress controller will be deployed:
-
Deploy the Wallarm Ingress Controller Helm chart into
wallarm-ingressnamespace. -
Determine the ServiceAccount name used by the controller workloads:
- If the controller is deployed as a
Deployment:
kubectl -n <KUBERNETES_NAMESPACE> get deployment -l app.kubernetes.io/component=controller \ -o jsonpath='{.items[0].spec.template.spec.serviceAccountName}{"\n"}'- If the controller is deployed as a
DaemonSet:
- If the controller is deployed as a
-
Grant the SCC to that
ServiceAccount, e.g.: -
Verify the SCC is applied by checking the SCC annotation on a controller pod:
The expected output is wallarm-ingress-controller.