Configuring Users
You can manage user accounts in the Users tab located in Settings.
Administrator access
Only users with the Administrator role can access this setting.
User Roles
Users of Wallarm clients can have the following roles:
-
Administrator with access to all Wallarm settings
-
Analyst with access to view main Wallarm settings, and manage information about attacks, incidents and vulnerabilities
-
Read Only with access to view main Wallarm settings
-
API Developer with access to view and download the API inventory discovered by the API Discovery module. This role allows distinguishing users whose tasks only require using Wallarm to get actual data on company APIs. These users do not have access to any Wallarm Console sections except for API Discovery and Settings → Profile.
-
Deploy with access to create Wallarm filtering nodes using the
addnodescript and with no access to Wallarm Console
The multitenancy feature also enables you to use the global roles Global Administrator, Global Analyst, Global Read Only. Global roles provide users with access to the technical tenant account and linked tenant accounts, regular roles provide users with access only to the technical tenant account.
More detailed information about access of different user roles to the Wallarm entities is provided in the table below. Entity management covers entity creating, editing, and deleting.
| Entity | Administrator / Global Administrator | Analyst / Global Analyst | Read Only / Global Read Only | API Developer | Deploy |
|---|---|---|---|---|---|
| Filtering nodes | View and manage | View | View | - | Create using the addnode and addcloudnode scripts |
| Dashboard | View | View | View | - | - |
| Events | View and manage | View and manage | View | - | - |
| Vulnerabilities | View and manage | View and manage | View | - | - |
| API inventory by API Discovery | View and manage | View and manage | - | View and download | - |
| Scanner | View and manage | View and manage | View | - | - |
| Triggers | View and manage | - | - | - | - |
| IP lists | View, manage, and export | View, manage, and export | View and export | - | - |
| Rules | View and manage | View and manage | View | - | - |
| Integrations | View and manage | - | - | - | - |
| Filtration mode | View and manage | View | View | - | - |
| Applications | View and manage | View | View | - | - |
| Users | View and manage | - | View | - | - |
| Activity log | View | - | View | - | - |
Viewing Users
You can view user lists in the following tabs:
-
The main Users tab contains all users of your company registered in the Wallarm cloud. In this tab, any disabled users are highlighted in gray.

-
The Disabled tab contains only disabled users.

You can click the cells in the table header to sort users by name, role, email, and last login date.
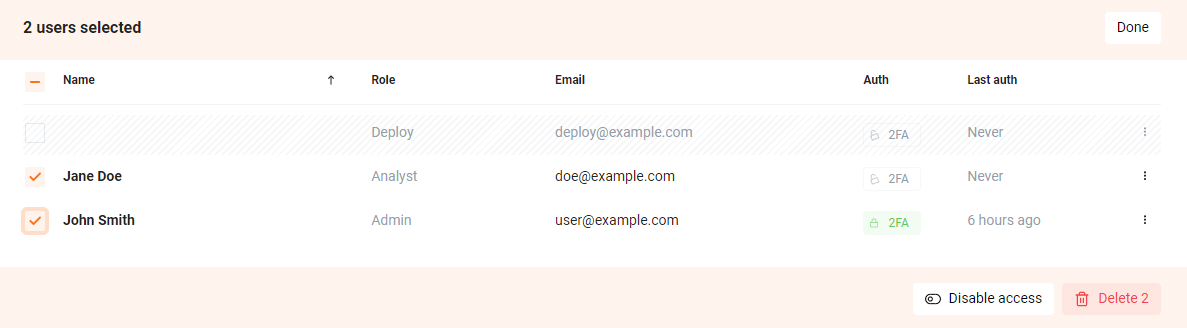
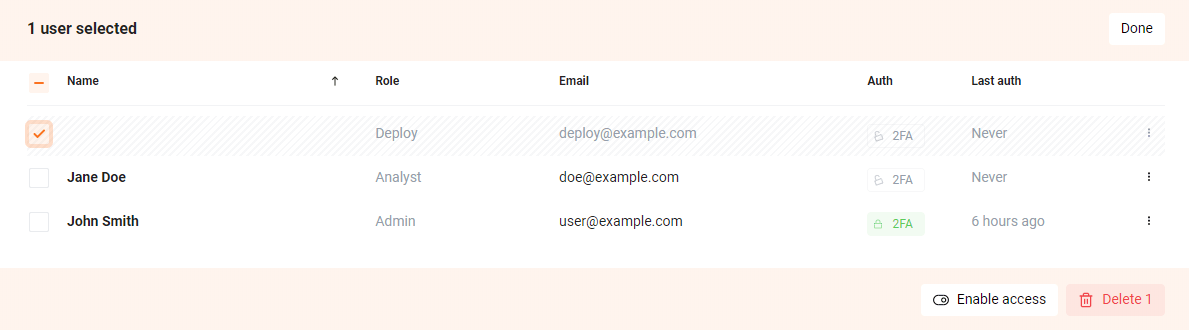
You also can choose one or several users by checking the checkboxes on the left of the usernames; therefore, you will be able to do operations on a group of users.
Searching Users
You can use the search field above the table to search users by name, email, or system role.

Create a User
-
In the Users tab of the Settings section, click the Add user button.
-
Select the user role from the dropdown list.
-
Enter a first and last name, and an email for the user.
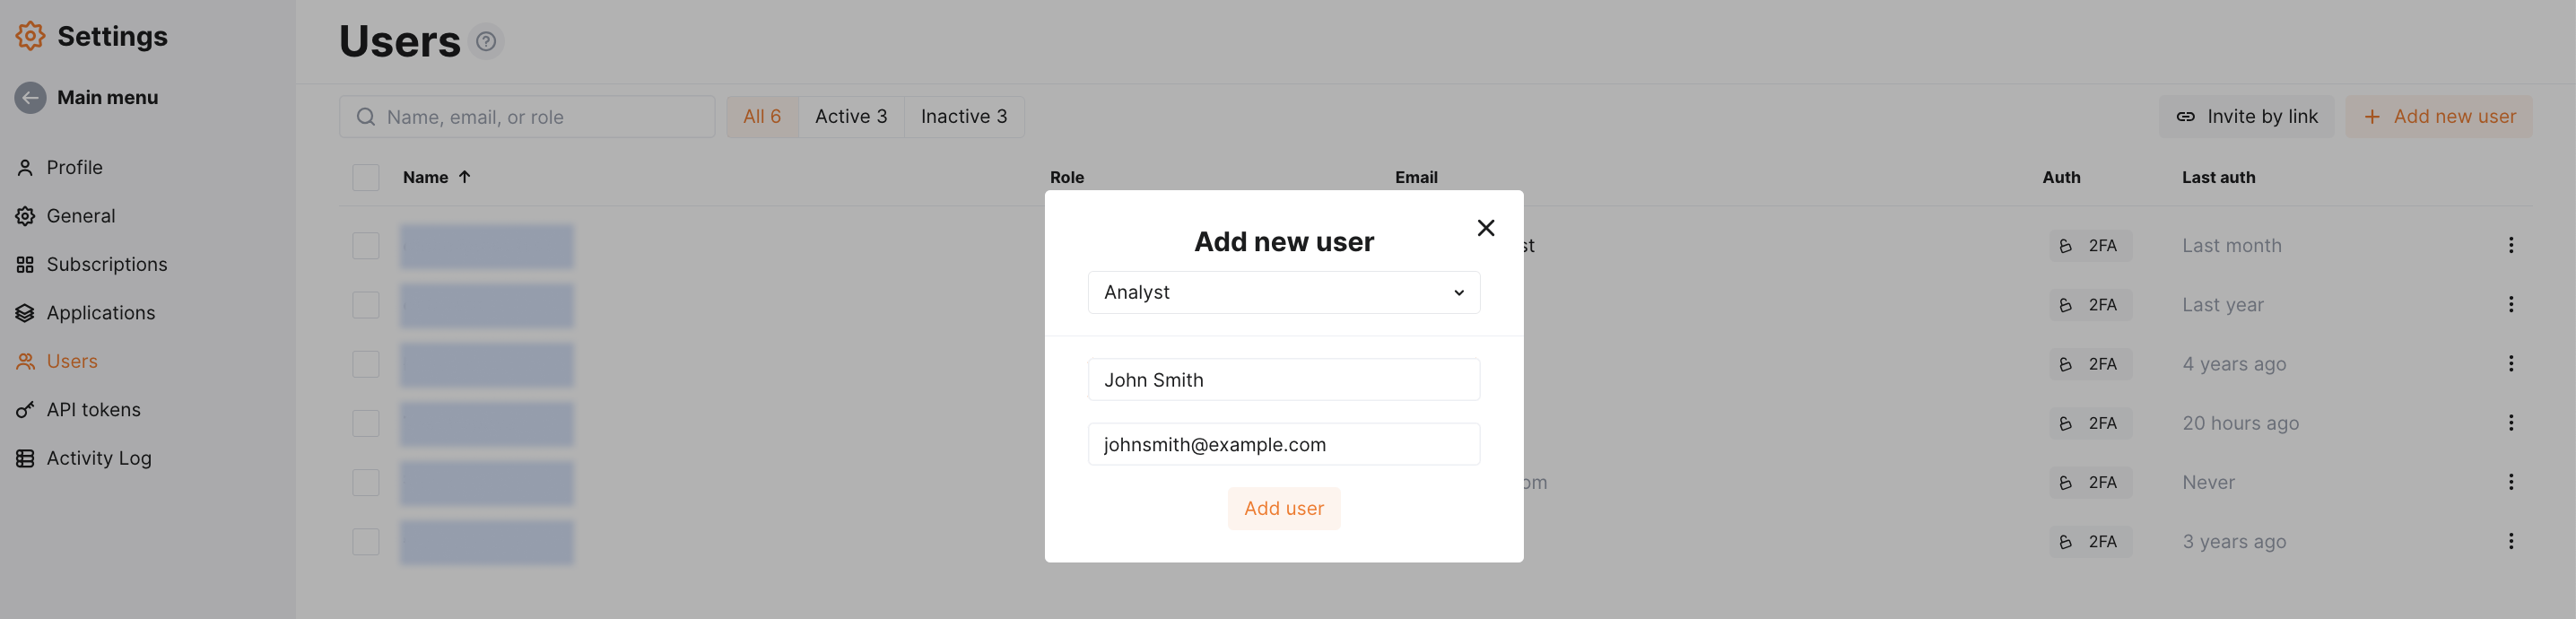
-
Click the Add user button.
The new user will receive an automatic email with a link to login and set a password.
To be notified about newly added users, you can configure the appropriate trigger. Notifications will be sent to the messengers and SOAR systems (e.g. Slack, Microsoft Teams, OpsGenie).
Change the User Info
To change the data on the user, perform the following actions:
-
In the Users tab of the Settings section, select the user to edit.
-
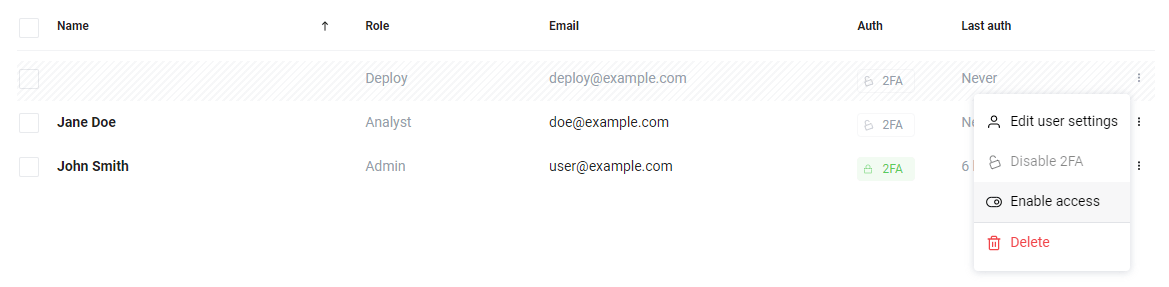
Open the user actions menu by clicking the button to the right of the corresponding user.

-
Click Edit user settings.
-
In the form that appears, enter the new user info and click the Save button.
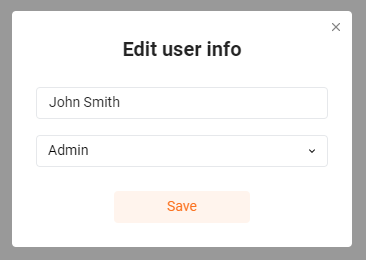
The old user info will be replaced with the new.
Two-Factor Authentication Settings Reset
To reset the two-factor authentication settings, perform the following actions:
-
In the Users tab of the Settings section, select the desired user.
-
Open the user actions menu by clicking the button to the right of the corresponding user.
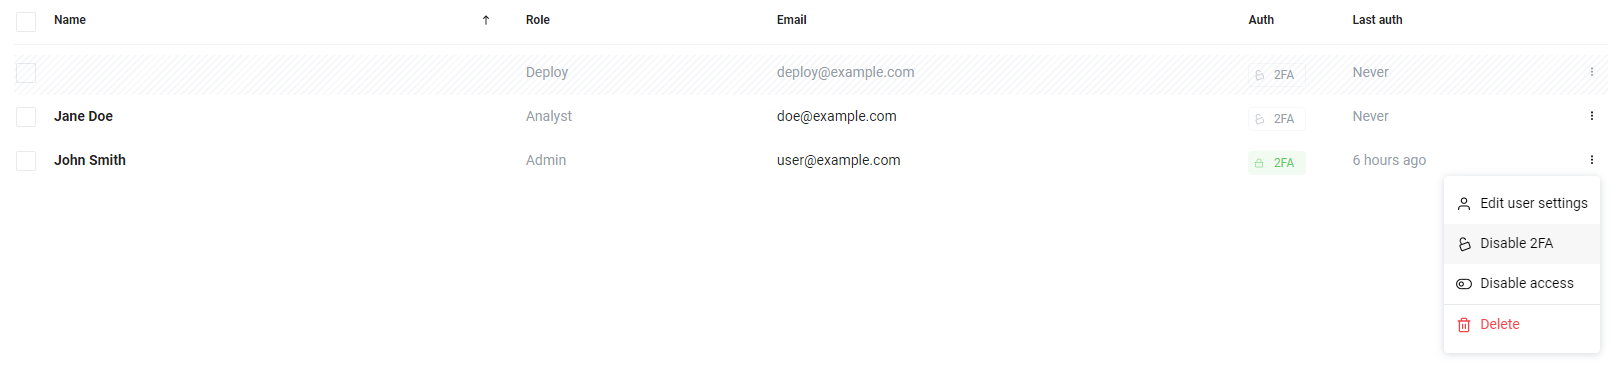
-
Click Disable 2FA.
-
In the form that appears, enter your Wallarm administrator account password and click the Disable 2FA button.
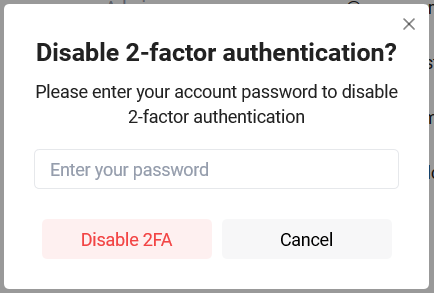
The 2-factor authentication function will be disabled for the selected user. The user may re‑enable the 2‑factor authentication in the profile settings.
Disable Access for a User
Disabling access for a user disables their Wallarm account.
To disable a particular user’s Wallarm account, perform the following actions:
-
In the Users tab of the Settings section, select the desired user.
-
Open the user actions menu by clicking the button to the right of the corresponding user.
-
Click Disable Access.
Now the selected user from your company will not be able to use their Wallarm account.
If it is necessary to disable access for several user accounts, select the users whose access you need to revoke. The action panel will appear. Click the Disable Access button on this panel.
Enable Access for a User
Enabling access for a user enables their Wallarm account.
To enable a particular user’s Wallarm account, perform the following actions:
-
In the Users tab of the Settings section, select the desired user with disabled access.
-
Open the user actions menu by clicking the button to the right of the corresponding user.
-
Click Enable Access.
Now the selected user from your company will be able to use their Wallarm account.
If it is necessary to enable access for several user accounts, select the users you need to grant access to. The action panel will appear. Click the Enable Access button on this panel.
Delete a User
To delete a particular user account, perform the following actions:
-
In the Users tab of the Settings section, select the user to delete.
-
Open the user actions menu by clicking the button to the right of the corresponding user.
-
Click Delete.
If it is necessary to delete several user accounts, select the users whose accounts you need to delete. The action panel will appear. Click the Delete button on this panel.