Email Report
You can set additional email addresses that will be used to deliver scheduled PDF reports and instant notifications. Sending messages to your primary email is configured by default.
-
Scheduled PDF reports can be sent on a daily, weekly, or monthly basis. PDF reports include detailed information about vulnerabilities, attacks, and incidents detected in your system over the selected period.
-
Notifications include brief details of triggered events:
- System related:
- User changes (newly created, deleted, role change)
- Integration changes (disabled, deleted)
- Application changes (newly created, deleted, name change)
- Vulnerabilities detected, all by default or only for the selected risk level(s):
- High risk
- Medium risk
- Low risk
- Scope (exposed assets) changed: updates in hosts, services, and domains
- System related:
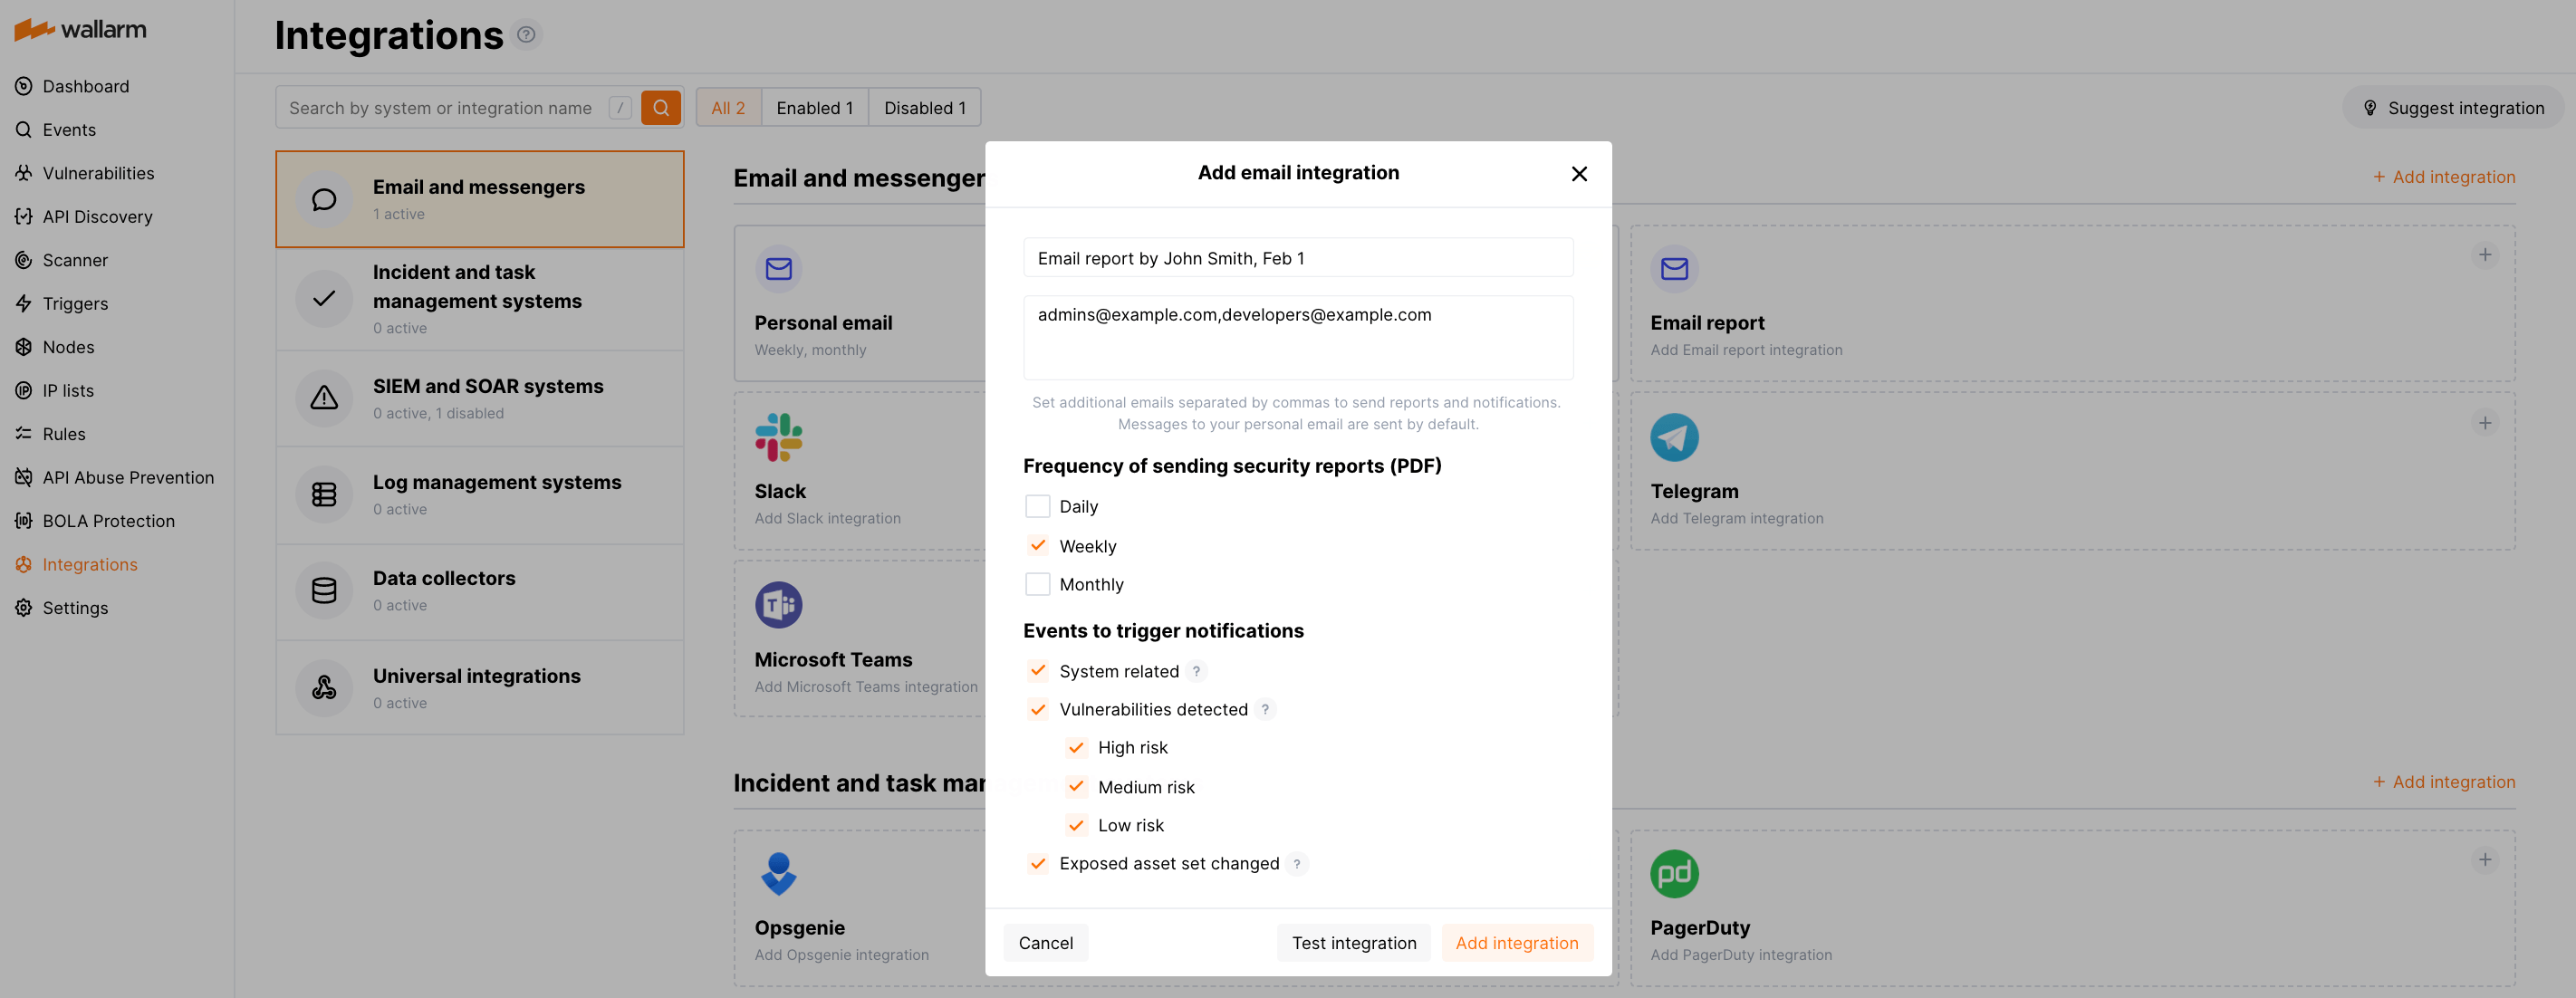
Setting up integration
-
Open the Integrations section.
-
Click the Email report block or click the Add integration button and choose Email report.
-
Enter an integration name.
-
Enter email addresses using a comma as a separator.
-
Choose the frequency of sending security reports. If the frequency is not chosen, then reports will not be sent.
-
Choose event types to trigger notifications. If the events are not chosen, then notifications will not be sent.
-
Test the integration and make sure the settings are correct.
-
Click Add integration.
Testing integration
Integration testing allows checking configuration correctness, availability of the Wallarm Cloud, and the notification format. To test the integration, you can use the button Test integration when creating or editing the integration.
The integration is tested as follows:
-
Test notifications with the prefix
[Test message]are sent to the selected system. -
Test notifications cover the following events (each in a single record):
- New user in the company account
- Newly discovered IP in the company scope
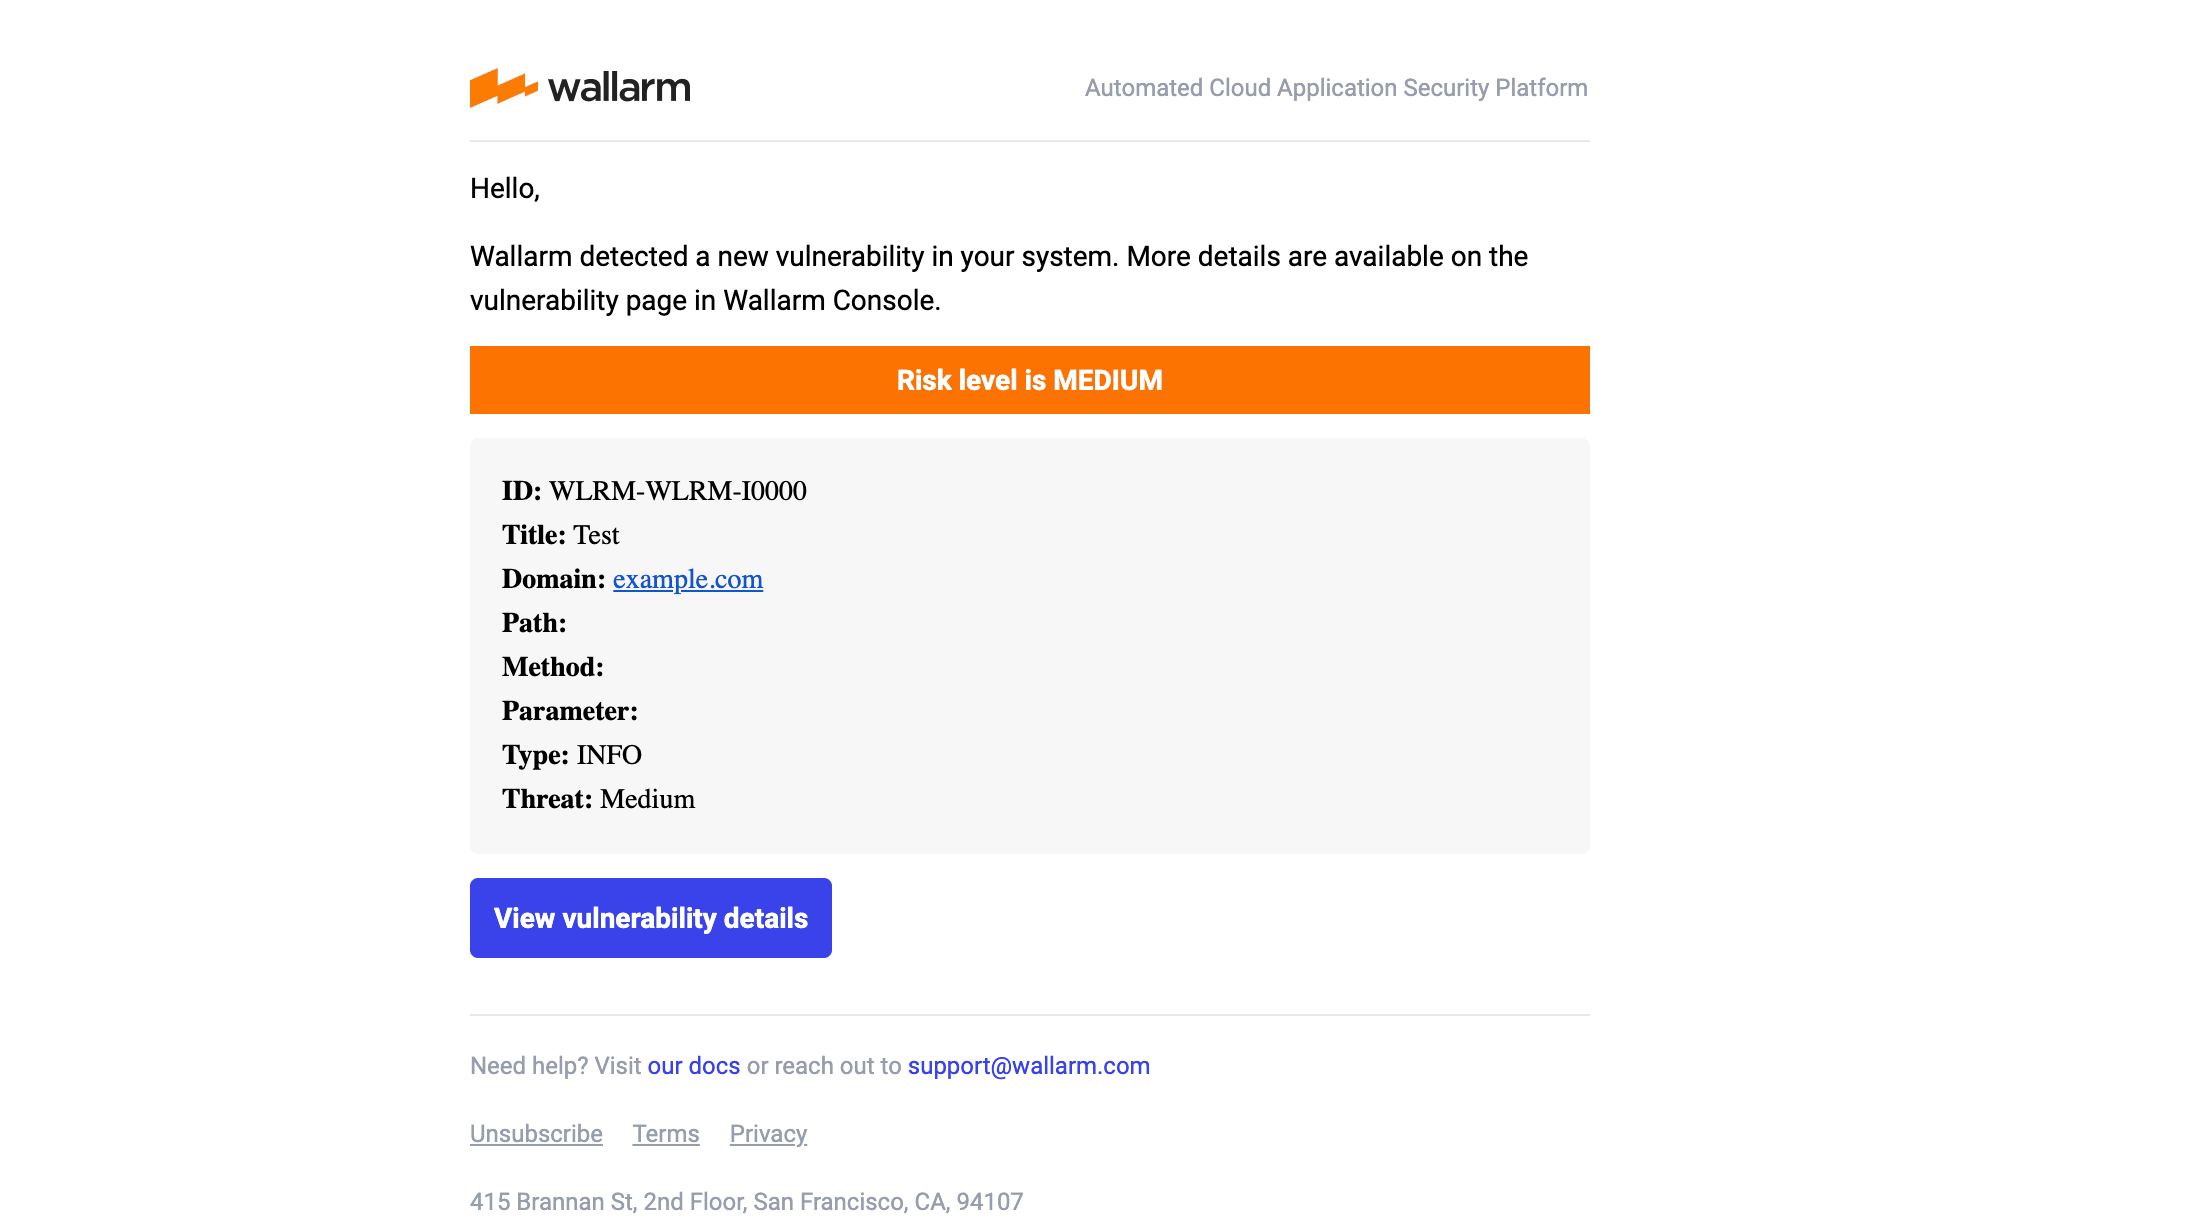
- Newly discovered security vulnerability
-
Test notifications include test data.
Test notification example:
Updating integration
To update the settings of active integration:
-
Open an active integration.
-
Make required changes and click Save.
Disabling integration
To stop sending reports and notifications temporarily, you can disable the integration:
-
Open an active integration and click Disable.
To re-enable sending reports and notifications, open the disabled integration and click Enable.
Disabling the integration is the system event. If you receive system notifications, messages about disabled integration will be sent to the configured system.
Deleting integration
To stop sending reports and notifications permanently, you can delete the integration. Deleting an integration cannot be undone. The integration will be removed from the list permanently.
-
Open integration and click Delete.
-
Confirm the action.
Deleting the integration is the system event. If you receive system notifications, messages about deleted integration will be sent to the configured system.