Creating a Load Balancer on AWS
Now, once you have a configured filtering node Auto Scaling Group, you need to create and configure a Load Balancer that distributes incoming HTTP and HTTPS connections among several filtering nodes from the Auto Scaling Group.
Load Balancer creation process includes the following steps:
1. Creating a Load Balancer
You can configure the following types of Load Balancers in the Amazon cloud:
-
Classic Load Balancer
-
Network Load Balancer
-
Application Load Balancer
Load Balancers differences
To see detailed information about the differences between the Load Balancers, proceed to this link.
This document demonstrates configuring and using the Network Load Balancer that distributes traffic at the transport level of the OSI/ISO network model.
Create a Load Balancer by completing the following actions:
-
Navigate to the Load Balancers tab on the Amazon EC2 dashboard and click the Create Load Balancer button.
-
Create a Network Load Balancer by clicking the corresponding Create button.
-
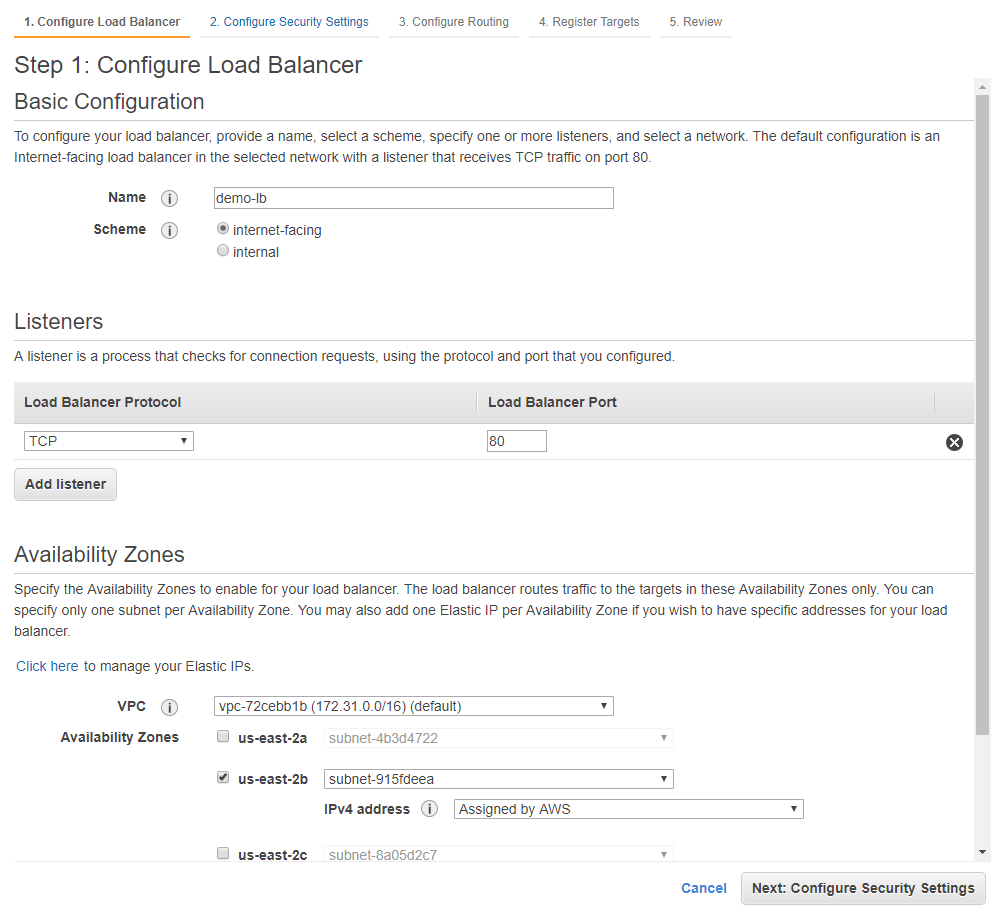
Configure the basic Load Balancer parameters:
-
The name of the balancer (the Name parameter).
-
The type of balancer (the Scheme parameter). Select the internet-facing type for the balancer to be available on the internet.
-
Specify ports for the balancer to listen to using the Listeners parameter group.
-
Specify the required VPC and Availability Zones in which the balancer should be working.
Check the Auto Scaling Group availability
Make sure you selected the VPC and Availability Zones that contain the previously created Auto Scaling Group for the load balancer to operate properly.
-
-
Proceed to the next step by clicking the Next: Configure Security Settings button.
Configure the security parameters if necessary.
-
Continue to the next step by clicking the Next: Configure Routing button.
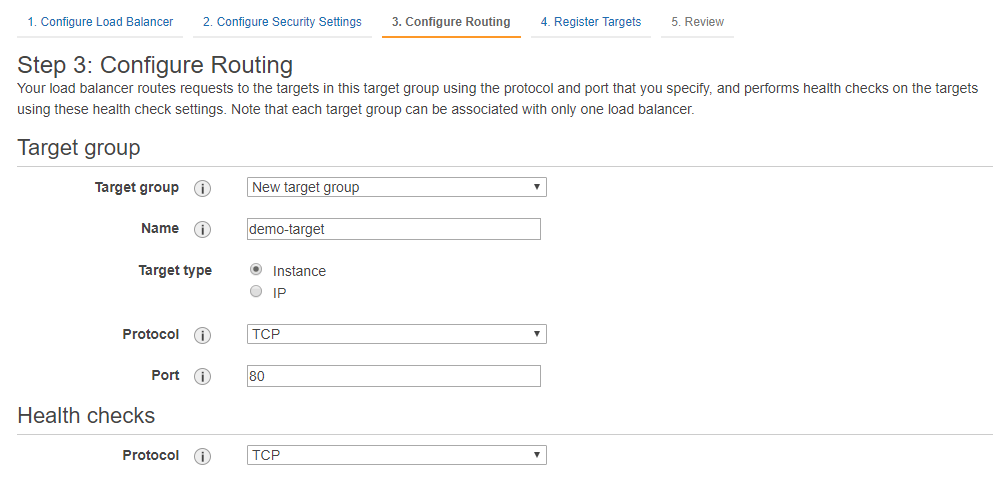
Configure the routing of the incoming requests to the filtering nodes in the Auto Scaling Group.
-
Create a new target group and specify its name in the Name field. The Load Balancer will route incoming requests to the instances located in the specified target group (e.g.,
demo-target). -
Configure the protocol and port to be used for request routing.
Specify the TCP protocol and the 80 and 443 (if you have HTTPS traffic) ports for the filtering node.
-
If necessary, configure the availability checks using the Health Checks parameter group.
-
-
Proceed to the next step by clicking the Next: Register Targets button.
This step requires no actions.
-
Switch to the next step by clicking the Next: Review button.
Make sure that all of the parameters are specified correctly, and launch the Load Balancer creation process by clicking the Create button.
Wait until the Load Balancer is initialized
After the Load Balancer is created, some time must pass for it to be ready to receive traffic.
2. Setting up an Auto Scaling Group for using the created balancer
Configure your Auto Scaling Group for using the Load Balancer you created earlier. This will allow the balancer to route traffic to the filtering node instances that are launched in the group.
To do this, complete the following actions:
-
Navigate to the Auto Scaling Groups tab on the Amazon EC2 dashboard and select the Auto Scaling Group created earlier.
-
Open the group configuration editing dialog by selecting Edit in the Actions dropdown menu.
-
Select the demo-target target group created when setting up the Load Balancer in the Target groups drop-down list.
-
Apply the changes by clicking the Save button.
Now the dynamically scaling set of the Wallarm filtering nodes will process the incoming traffic to your application.
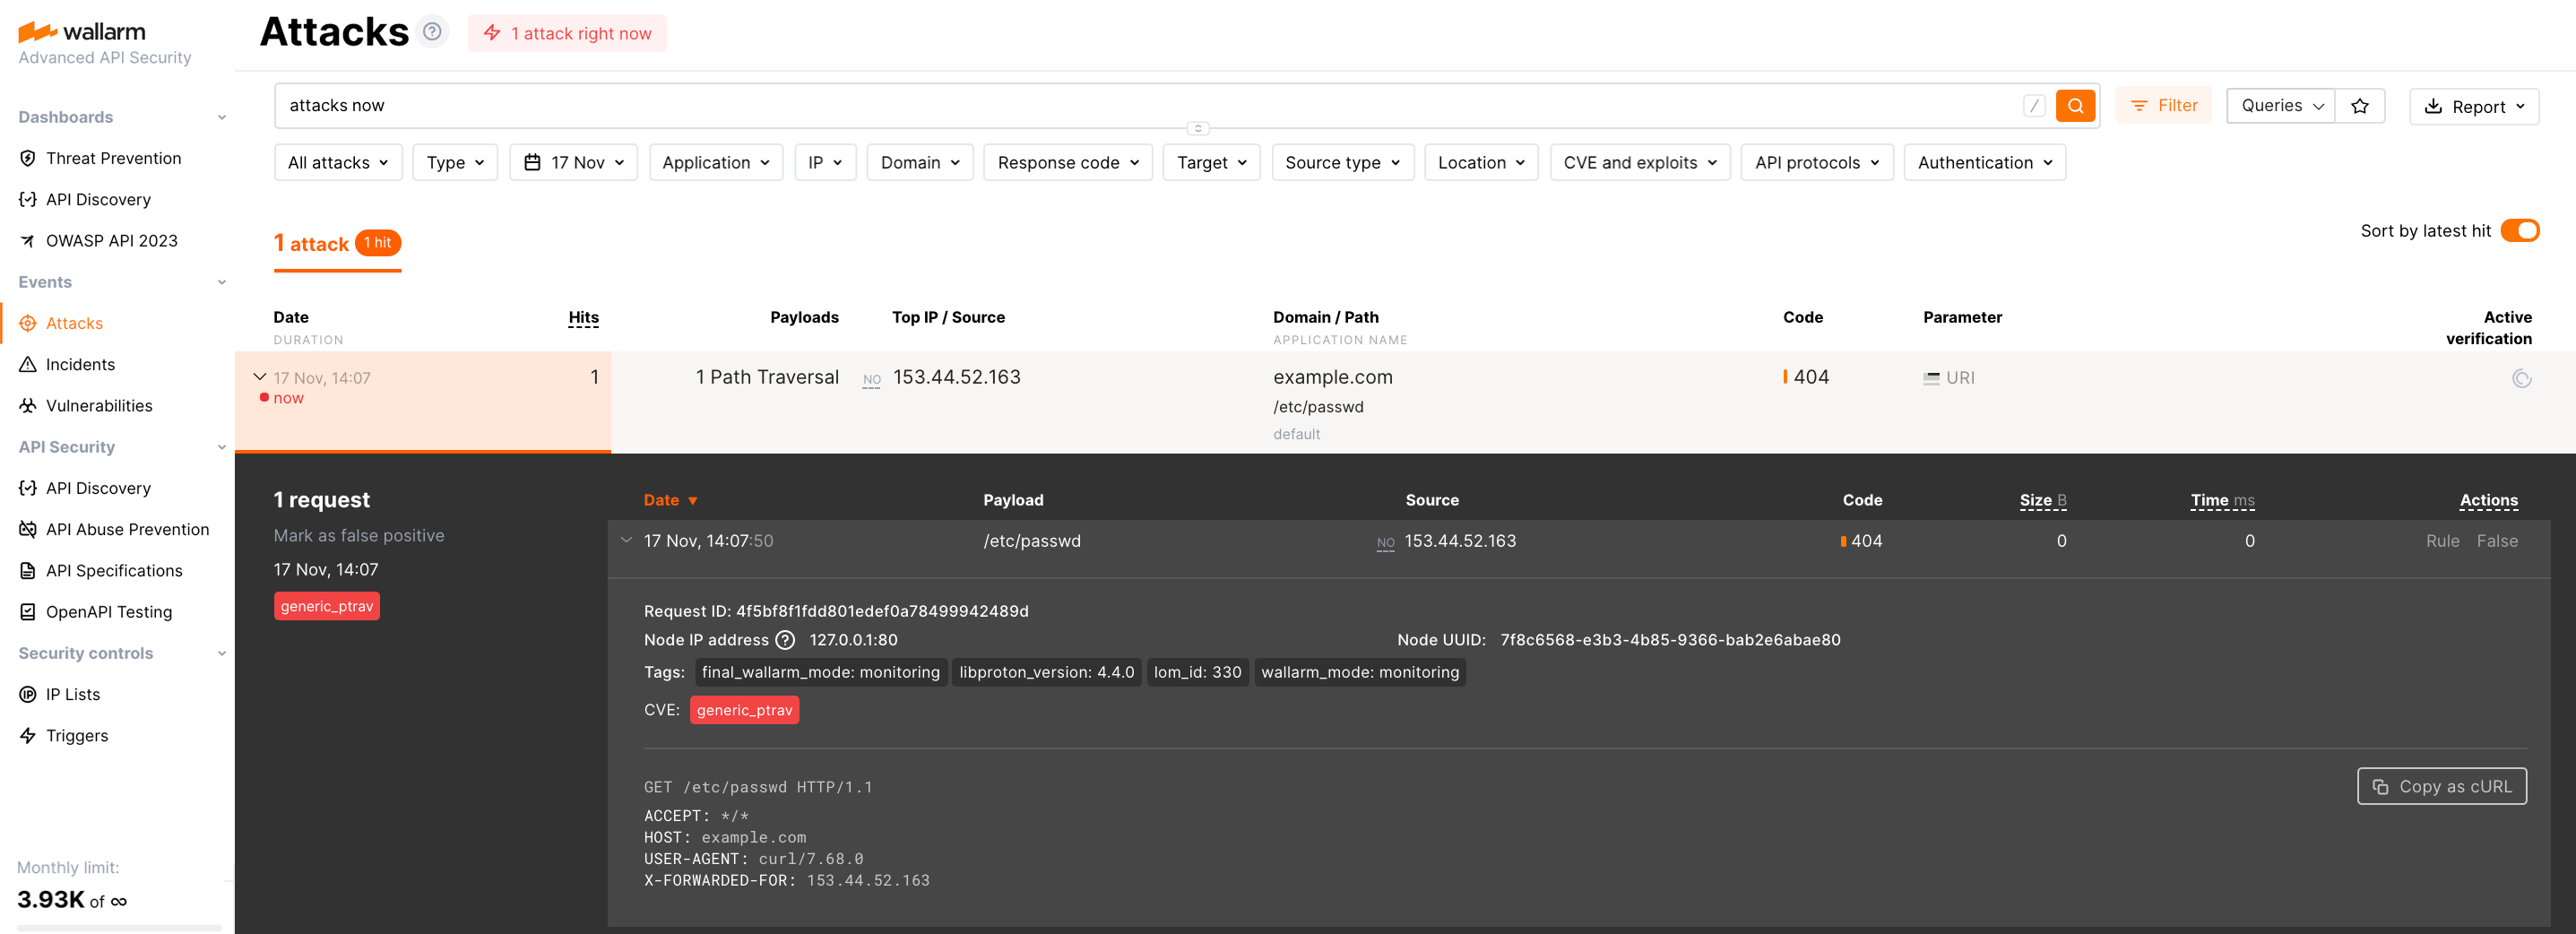
To check the deployed filtering nodes operation, perform the following steps:
-
Make sure that your application is accessible through the Load Balancer and the Wallarm filtering nodes by referring to the balancer IP address or domain name using the browser.
-
Make sure that the Wallarm services protect your application by performing a test attack.