Setting up filtering node auto scaling
Required rights
Before setting up auto scaling, make sure that your Amazon AWS account is granted with one of the following rights:
AutoScalingFullAccessAutoScalingConsoleFullAccess
To set up filtering node auto scaling, proceed with the following steps:
1. Creating a Launch Template
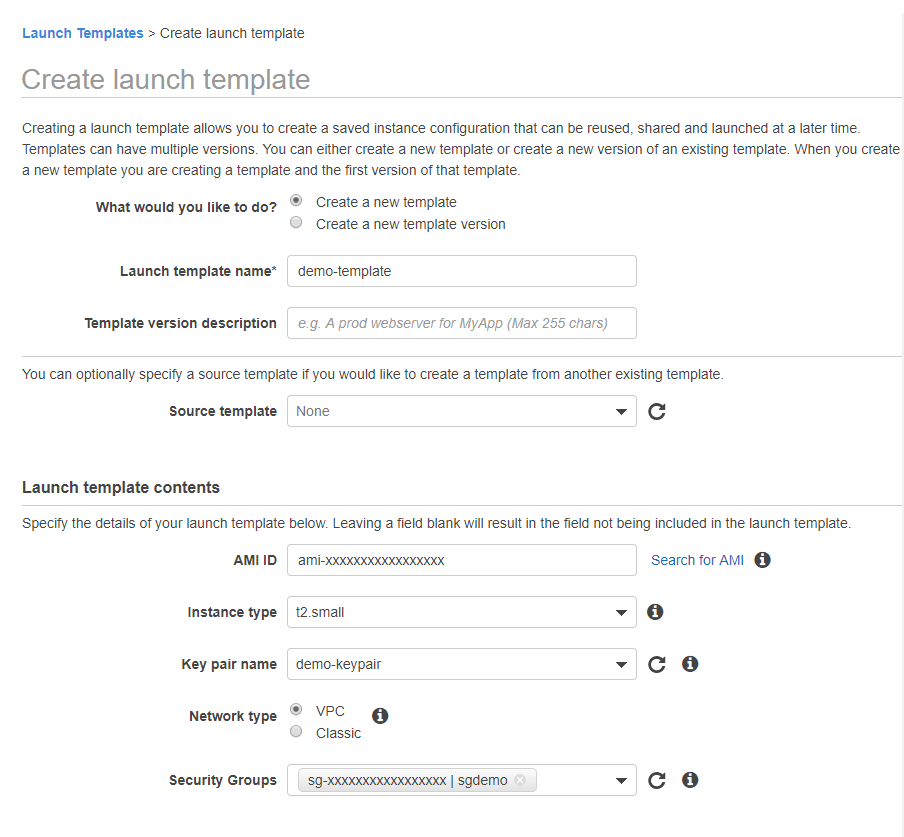
A Launch Template defines the instance type to be used during the deployment of an Amazon Machine Image (AMI) and sets up some of the general virtual machine parameters.
Create a Launch Template by doing the following steps:
-
Navigate to the Launch Templates tab on the Amazon EC2 dashboard and click the Create launch template button.
-
Enter the template name into the Launch template name field.
-
Select the previously created Amazon Machine Image. To do this, click the Search for AMI link and select the required image from the My AMIs catalog.
-
Select the instance type to launch a filtering node virtual machine on from the Instance type list.
Select the proper instance type
Select the same instance type that you used when you initially configured the filtering node or a more powerful one.
Using a less powerful instance type may lead to issues in filtering node operation.
-
Select the name of the previously created pair of SSH keys to access the filtering node from the Key pair name list.
-
Select the previously created Security Group from the Security Groups list.
-
Click the Create launch template button.
Wait until the template creation process is finished.
After creating the Launch Template, you can proceed with the creation of an Auto Scaling Group.
2. Creating an Auto Scaling Group
Selecting an auto scaling method
This section describes the process of creating an Auto Scaling Group using the EC2 Auto Scaling method.
You can also use the AWS Auto Scaling method.
To see a detailed FAQ about auto scaling methods from Amazon, proceed to this link.
To create an Auto Scaling Group, do the following steps:
-
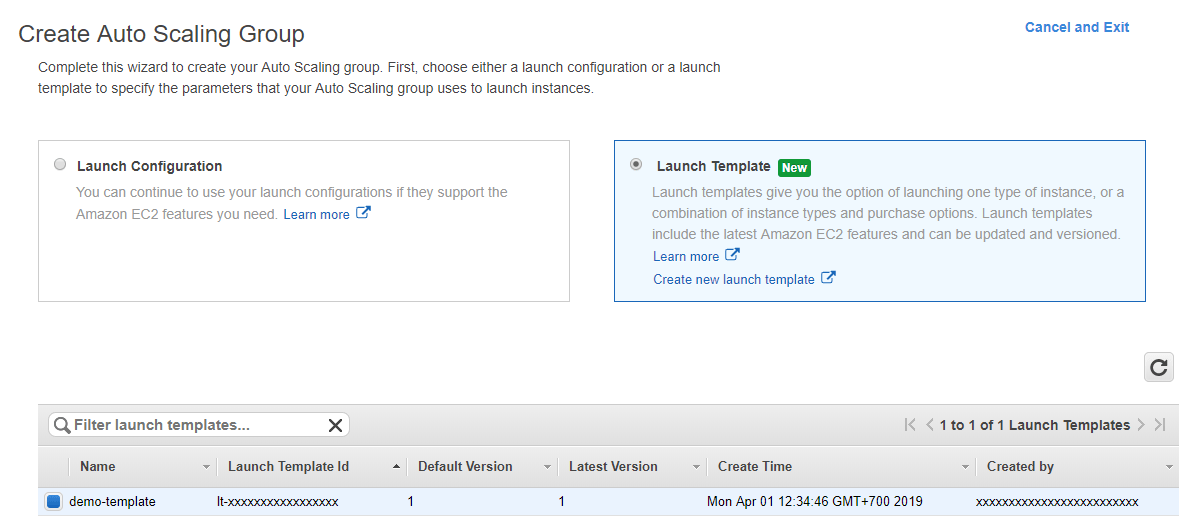
Navigate to the Auto Scaling Groups tab on the Amazon EC2 dashboard and click the Create Auto Scaling Group button.
-
Select the Launch Template option, then select the previously created Launch Template from the list and click the Next Step button.
-
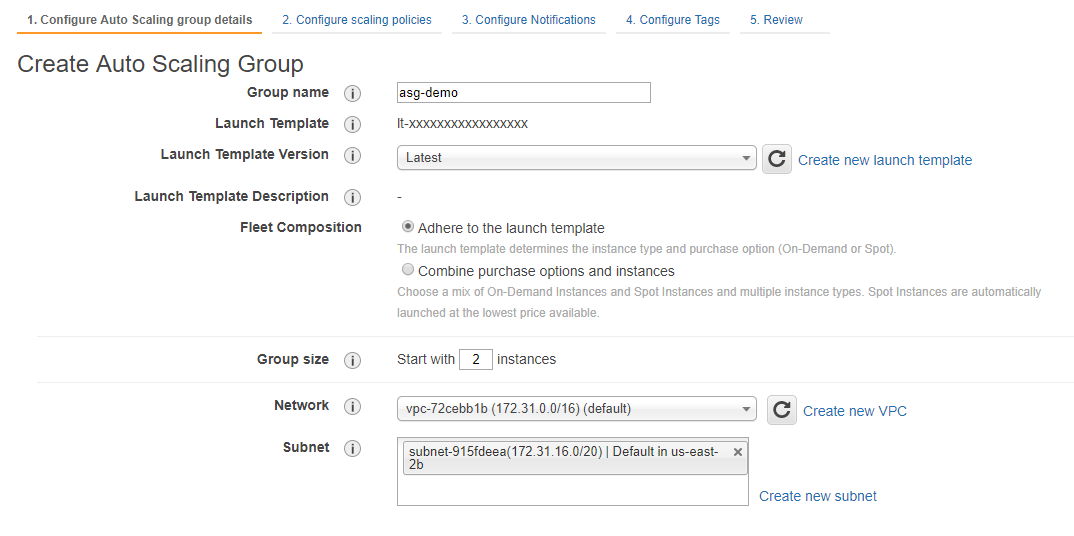
Enter the desired Auto Scaling Group name into the Group name field.
-
Select the Latest version of the Launch Template from the Launch Template Version list.
-
Select the instance type required for the Auto Scaling Group by picking one of the Fleet Composition options.
If you followed this guide when creating a Launch Template and an instance type to launch virtual machines on was specified, then you can use the Adhere to the launch template option.
Select the proper instance type
You can also select the Combine purchase options and instances option if no instance type is specified in your Launch Template or if you want to select multiple different instance types for auto scaling.
Select the same instance type that you used when you initially configured the filtering node or a more powerful one. Using a less powerful instance type may lead to issues in filtering node operation.
-
Enter the initial Auto Scaling Group size into the Group size field (e.g., two instances).
-
Select the correct VPC from the Network drop-down list.
-
Select the correct subnets from the Subnets drop-down list.
Provide the filtering node with an internet connection
The filtering node requires access to the Wallarm API server for proper operation. The choice of the Wallarm API server depends on the Wallarm Cloud you are using:
- If you are using the EU Cloud, your node needs to be granted access to
https://api.wallarm.com:444. - If you are using the US Cloud, your node needs to be granted access to
https://us1.api.wallarm.com:444.
Make sure that you choose the correct VPC and subnets and configure a security group in a way that does not prevent the filtering node access to Wallarm API servers.
- If you are using the EU Cloud, your node needs to be granted access to
-
Navigate to the Configure scaling policies page by clicking the Next: Configure scaling policies button.
-
Select the Use scaling policies to adjust the capacity of this group option to enable auto scaling.
-
Enter the minimum and the maximum Auto Scaling Group size.
Auto Scaling Group size
Note that the minimum Auto Scaling Group size can be less than the initial group size specified in the sixth step.
-
Enable the step-by-step policies configuration mode by selecting the Scale the Auto Scaling group using step or simple scaling policies option.
-
Configure the group size increase policy using the Increase Group Size parameter group.

-
If necessary, specify the group size increase policy name using the Name parameter.
-
Select the event from the Execute policy when to specify the event that will trigger the increase of the group size. If you did not create any events earlier, click the Add Alarm button to create an event.
-
You can set up an event name, a metric to monitor, and notifications about event occurrences.
Roles required for configuring notifications
Your Amazon AWS account needs the AutoScalingNotificationAccessRole for notifications configuration.
Example
You can set up triggering of an event with the name High CPU utilization upon reaching a 60% average processor load within five minutes:
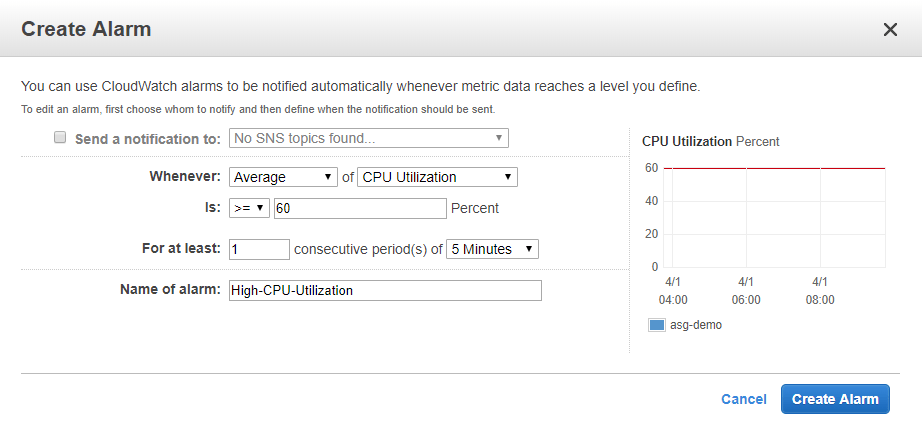
Available standard metrics of Amazon cloud
- CPU Utilization (in percentages)
- Disk Reads (in bytes)
- Disk Writes (in bytes)
- Disk Read Operations count
- Disk Write Operations count
- Network In (in bytes)
- Network Out (in bytes)
-
Click the Create Alarm button to create an event.
-
Select the action to be taken in the case the High CPU Utilization event triggers. For example, you may configure an auto scaling policy to add (using the Add action) one instance when the event is triggered.
-
The event may trigger early if resource consumption leaps occur after adding a new instance. To avoid this, you can set up a warm-up period in seconds using the Instances need
Xseconds to warm up parameter. No events will be triggered during this period of time.
-
-
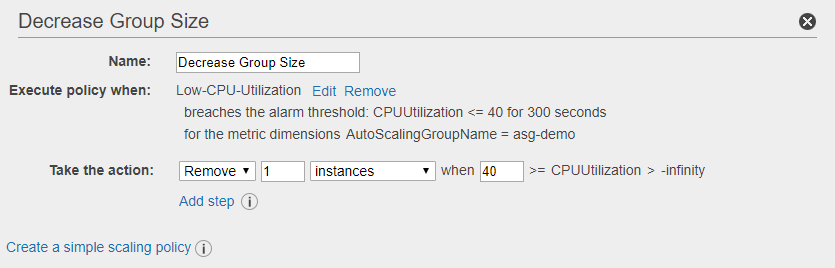
Similarly, use the Decrease Group Size parameter group to configure the group size decrease policy.
-
If necessary, configure notifications and tags for the Auto Scaling Group or proceed to the review of the changes by clicking the Review button.
-
Make sure all of the parameters are correctly specified and then launch the Auto Scaling Group creation process by clicking the Create Auto Scaling group button.
The specified number of instances will be launched automatically upon the successful Auto Scaling Group creation.
You can check that the Auto Scaling Group has been created correctly by viewing the number of launched instances in the group and comparing this data with the number of filtering nodes connected to the Wallarm Cloud.
You can do this using Wallarm Console. For example, if two instances with filtering nodes are concurrently operating, Wallarm Console will display this number for the corresponding Wallarm node in the Nodes section.

You can now proceed with the creation and configuration of a load balancer.