Step 4: Allowing Access to the Wallarm Application on the Okta Side
To authenticate through Okta, an account must be created on the Okta side and the user must have access rights to the Wallarm application. The required sequence of actions for granting access rights is described below.
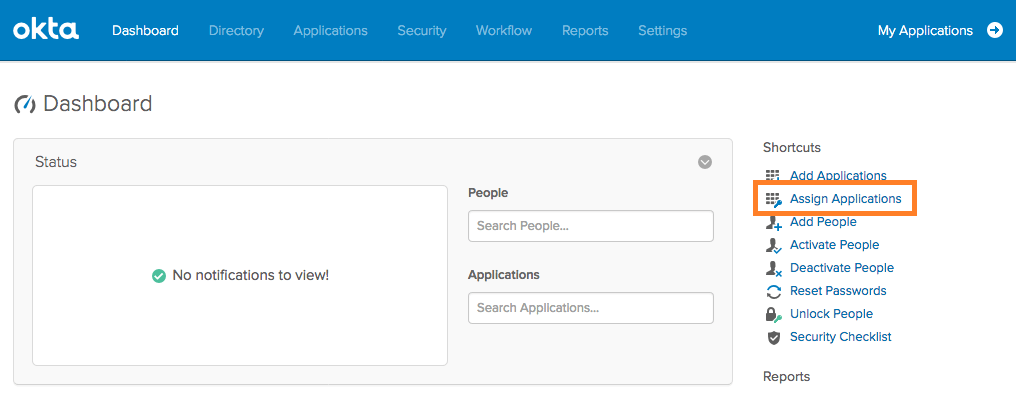
Click the Admin button at the top right of the Okta portal. In the Dashboard section, click the Assign Applications link.
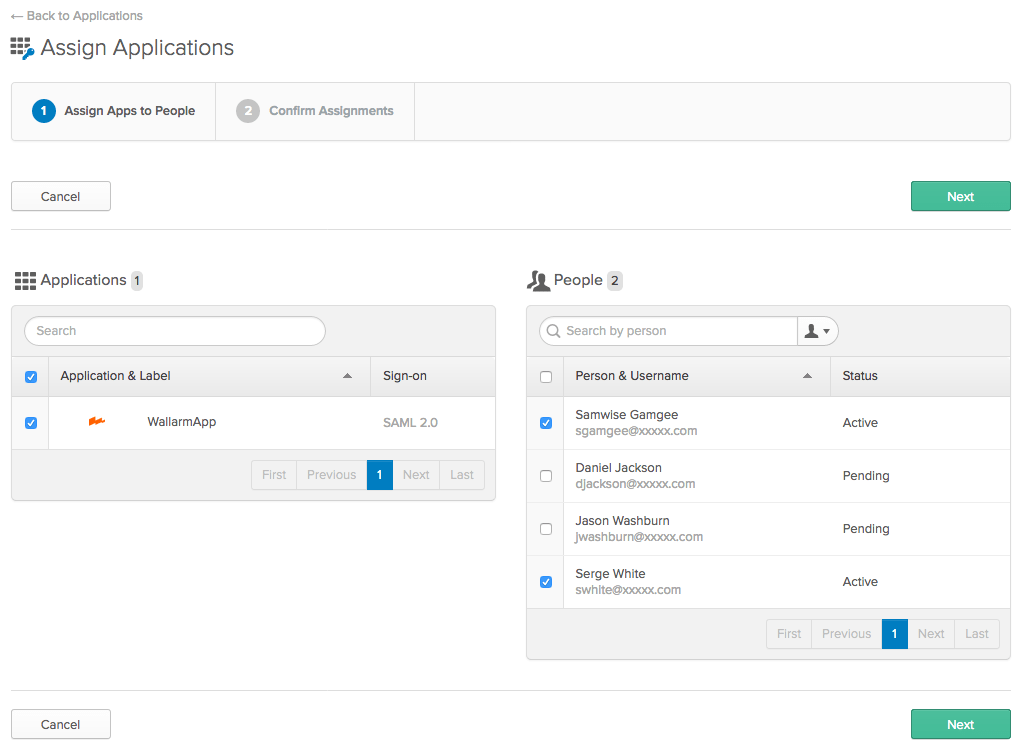
You will be prompted to assign the applications to the right users in order to give these users access to the selected applications. To do this, tick the checkboxes beside the required applications and users and click Next.
Next, you will be prompted to check and confirm the application assignments. If all is correct, confirm the assignments by clicking the Confirm Assignments button.
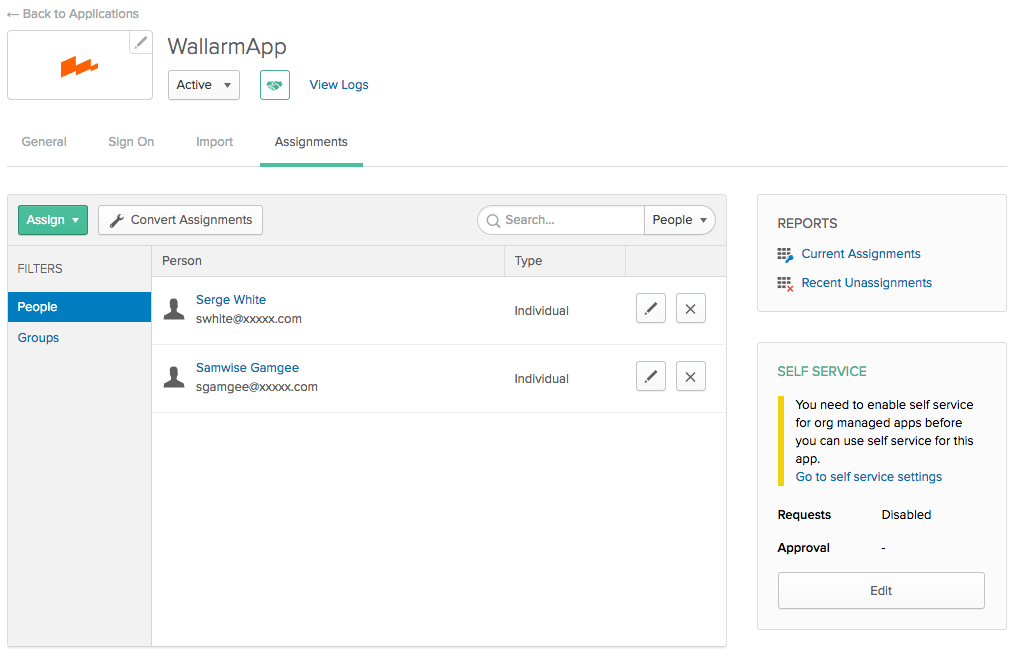
After that, you can go to the application settings page on the Assignments tab. Here you will be able to see a list of users who have access to the application for which SSO is configured.
The access rights to the Wallarm application are now set up. Now, users assigned to the application can access the application using SSO authentication through the Okta service.
Setup Complete
This completes the configuration of the Okta‑based SSO, and now you can start configuring the user specific SSO authentication on the Wallarm side.