Datadog
Datadog is a popular cloud-based monitoring and analytics platform that provides comprehensive visibility into the performance, availability, and security of modern applications. You can set up Wallarm to send notifications of detected events directly to the Datadog Logs service by creating an appropriate integration via Datadog API key in Wallarm Console.
Setting up integration
-
Open the Datadog UI → Organization Settings → API Keys and generate the API key for the integration with Wallarm.
-
Open Wallarm Console → Integrations and proceed to the Datadog integration setup.
-
Enter an integration name.
-
Paste the Datadog API key to the API key field.
-
Select the Datadog region.
-
Choose event types to trigger notifications.
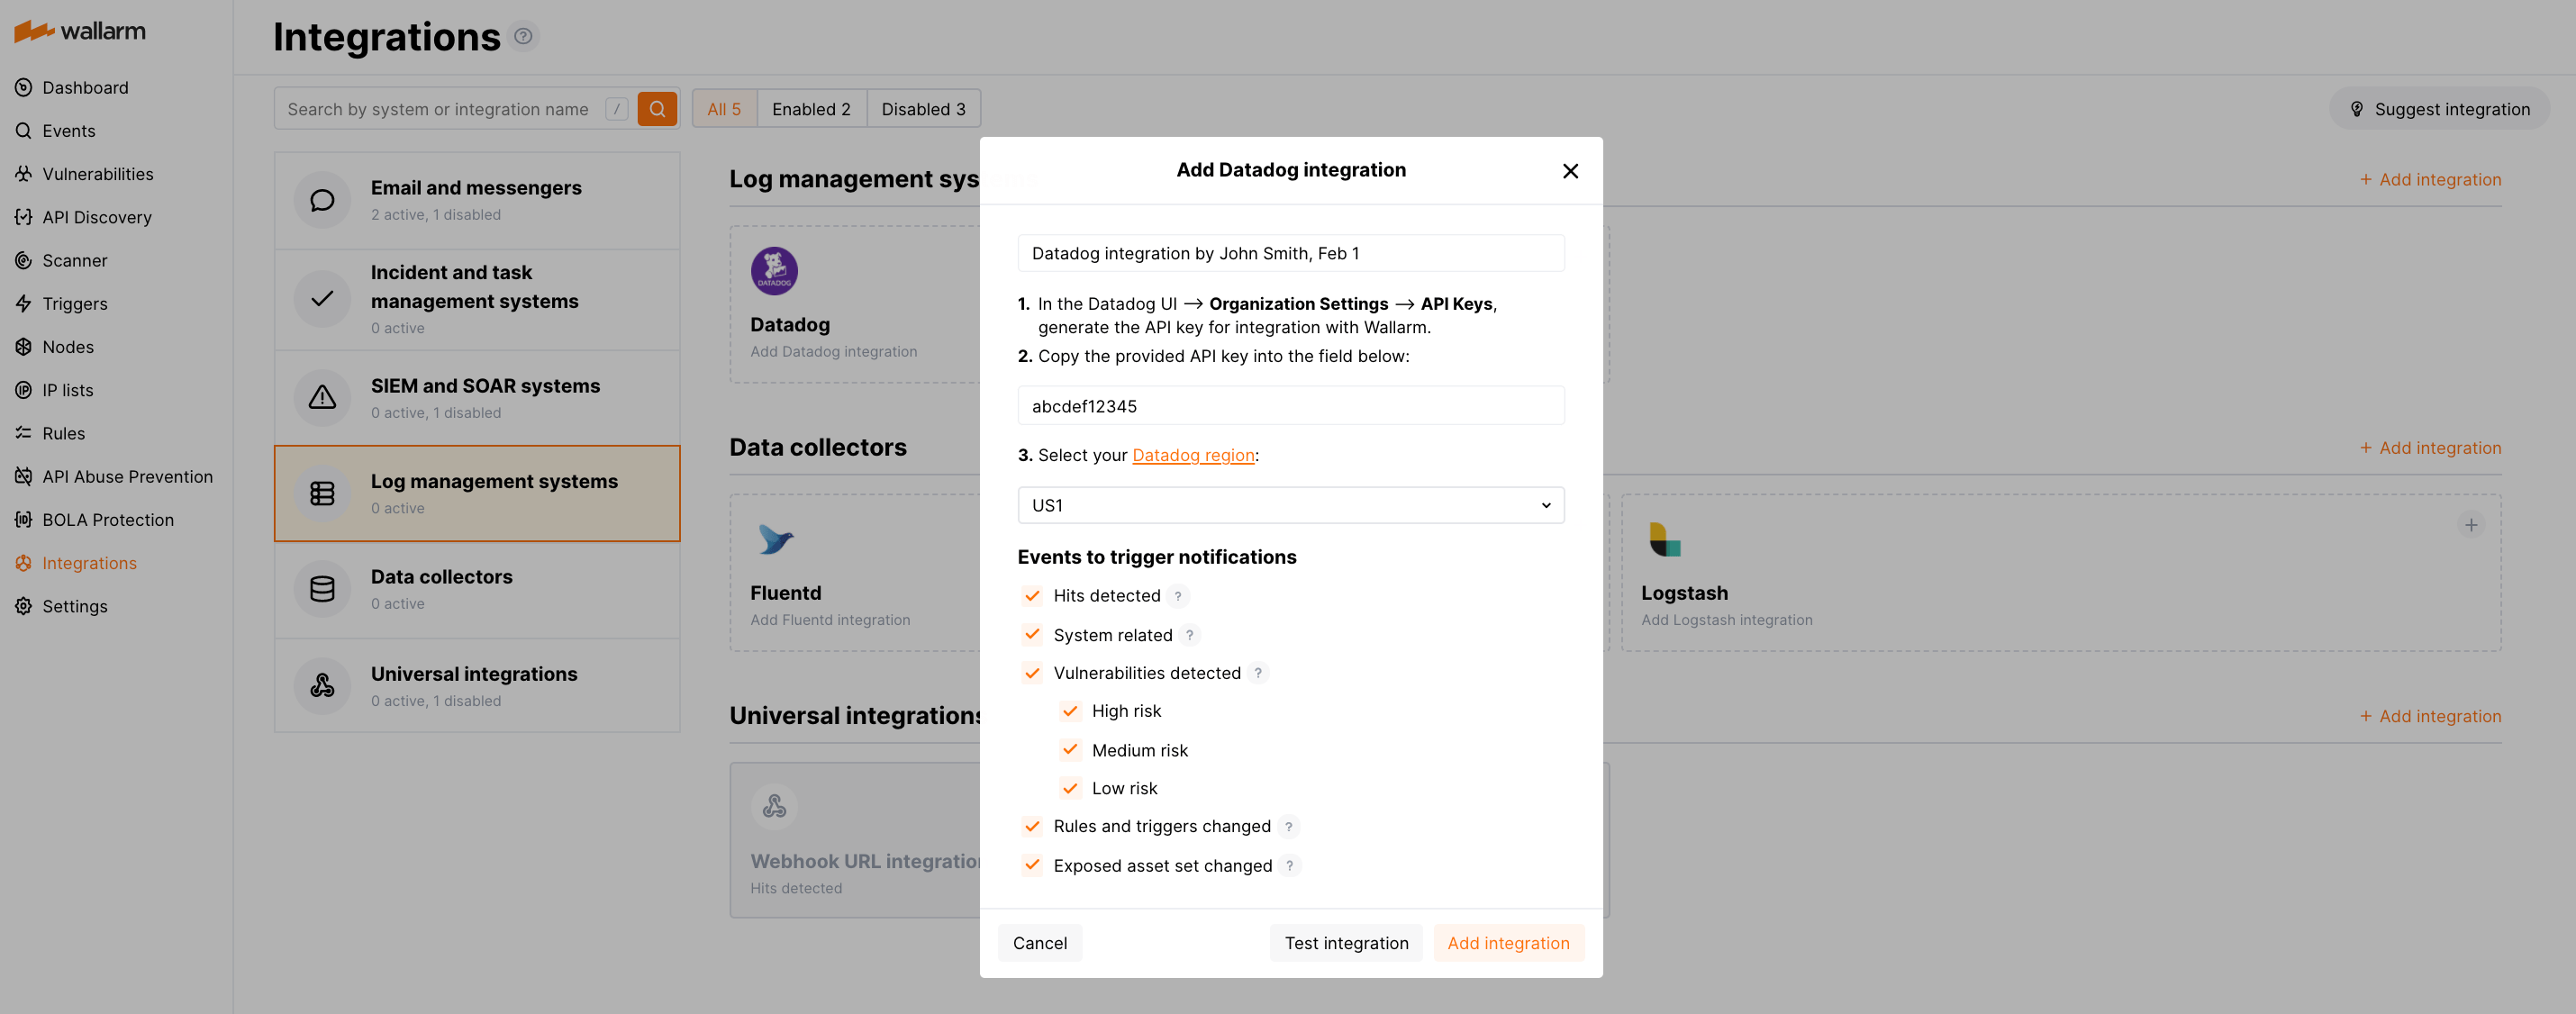
Details on available events:
-
Hits detected except for:
- Experimental hits detected based on the custom regular expression. Non-experimental hits trigger notifications.
- Hits not saved in the sample.
-
System related:
- User changes (newly created, deleted, role change)
- Integration changes (disabled, deleted)
- Application changes (newly created, deleted, name change)
- Vulnerabilities detected, all by default or only for the selected risk level(s) - high, medium or low.
- Rules and triggers changed (creating, updating, or deleting the rule or trigger)
- Scope (exposed assets) changed: updates in hosts, services, and domains
- On an hourly basis, you can get a notification with the number of requests processed during the previous hour
-
-
Click Test integration to check configuration correctness, availability of the Wallarm Cloud, and the notification format.
The test Datadog log:
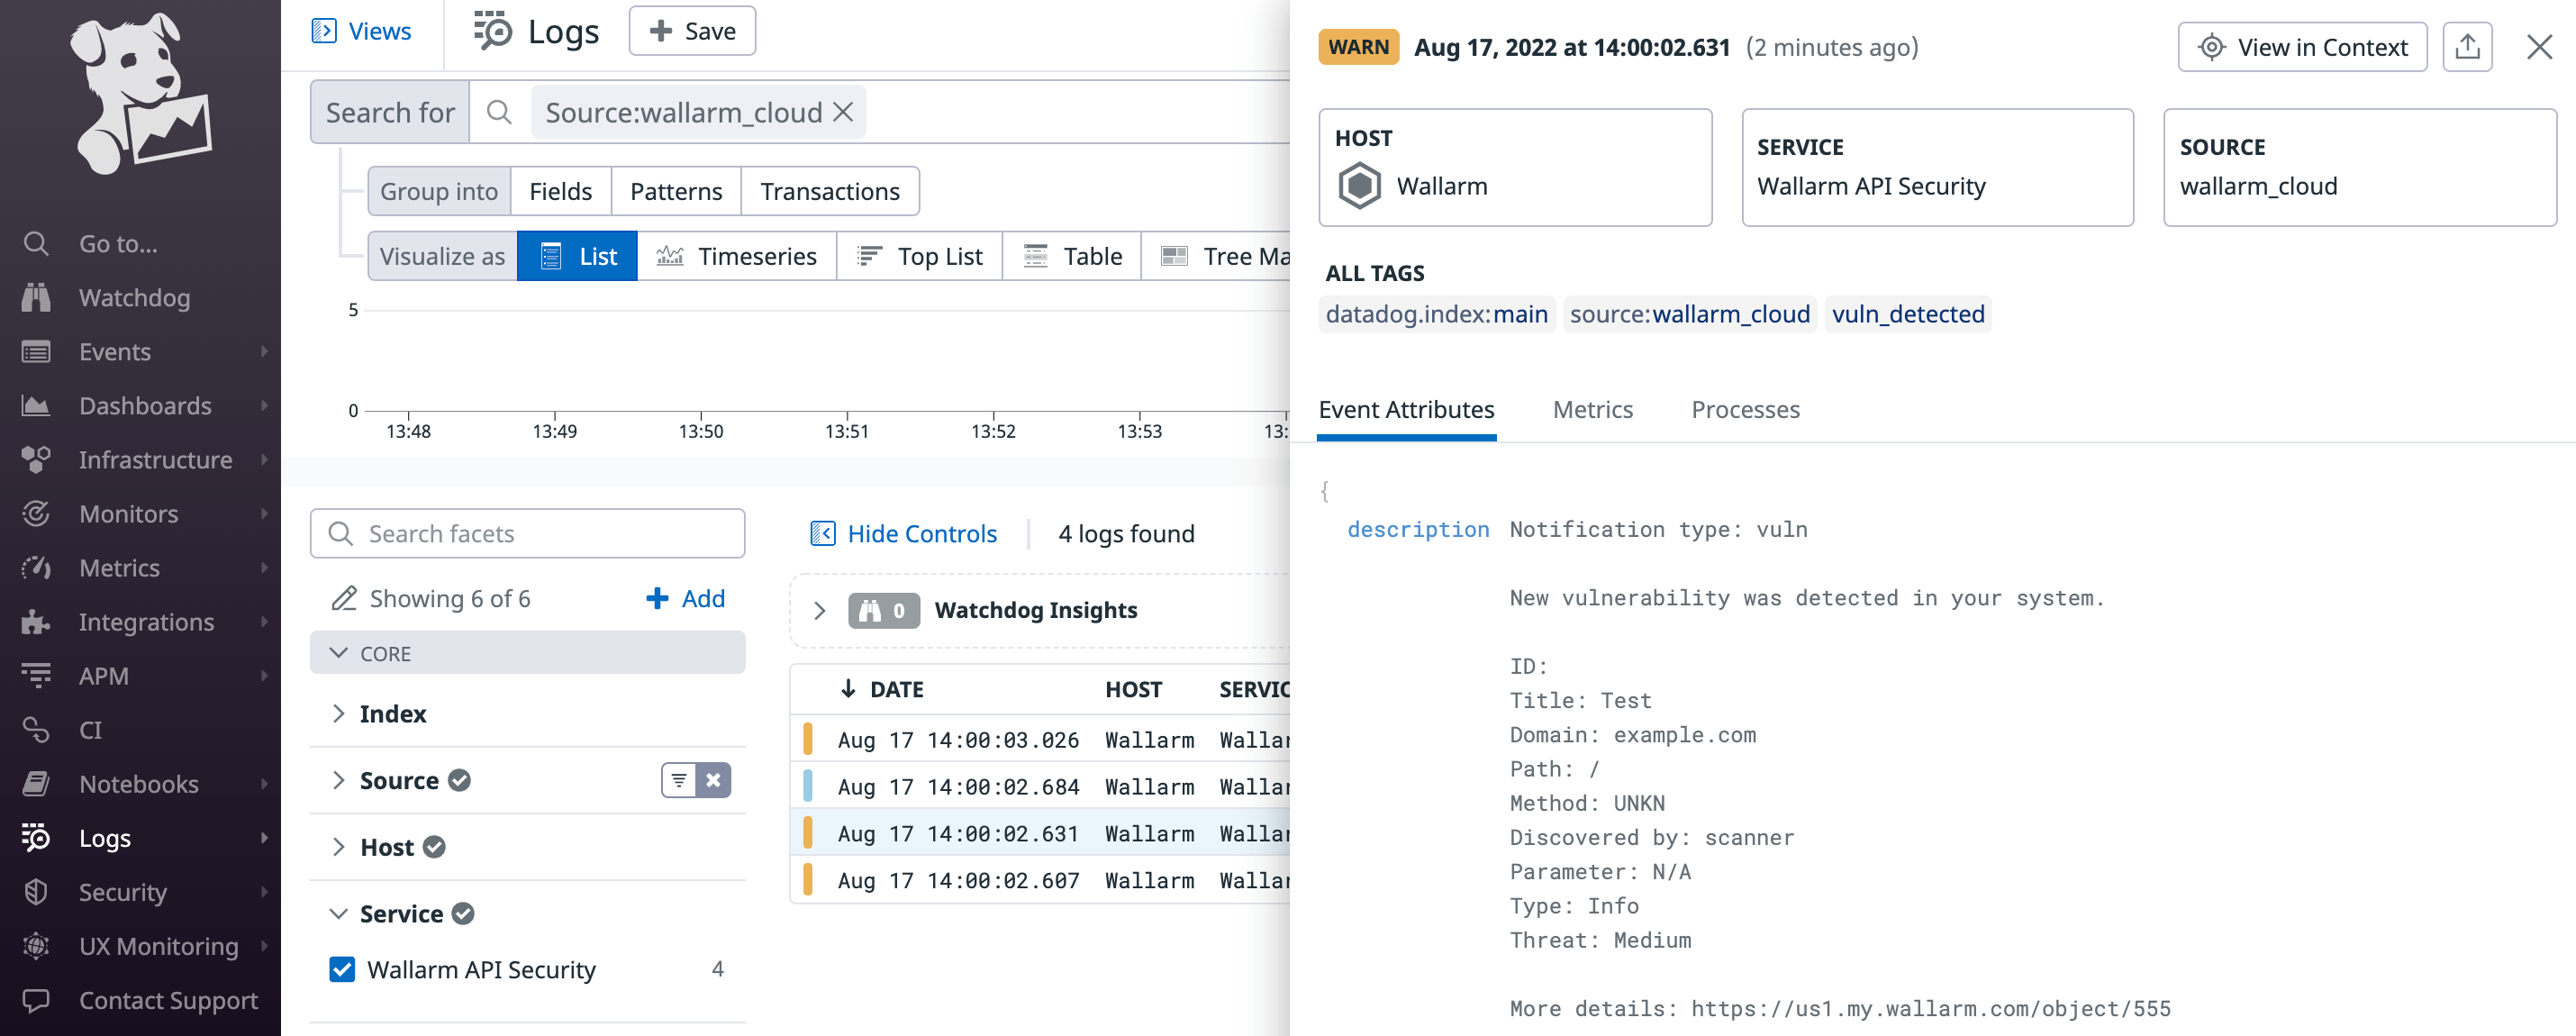
To find the Wallarm logs among other records, you can use the
source:wallarm_cloudsearch tag in the Datadog Logs service. -
Click Add integration.
Setting up additional alerts
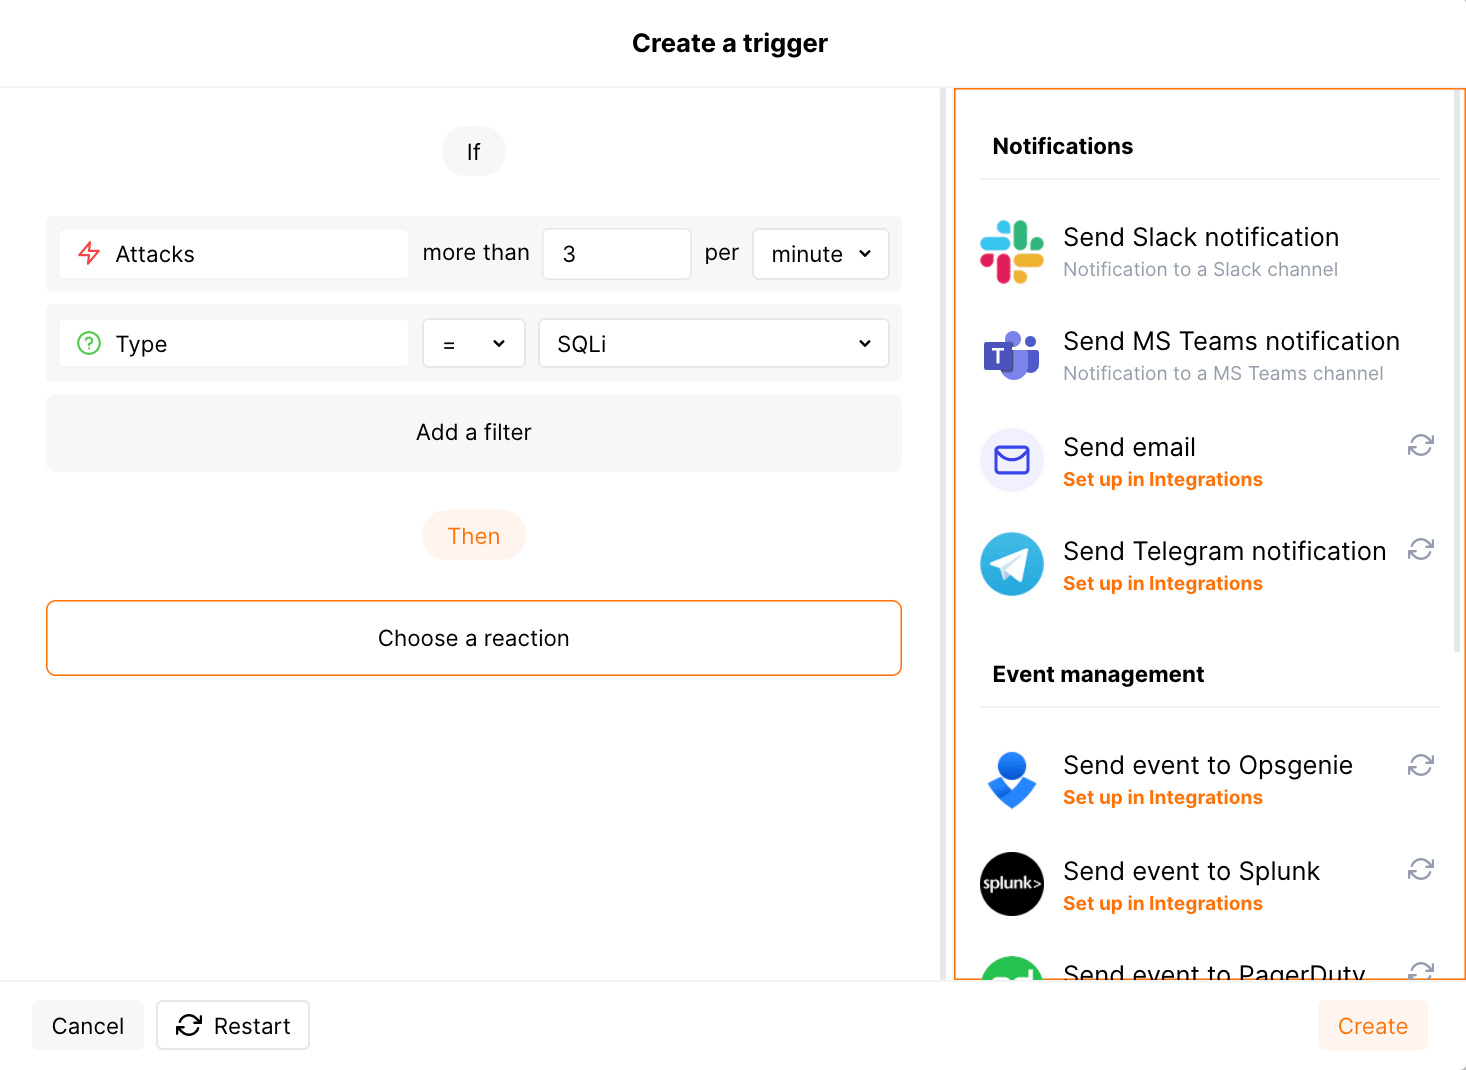
Besides the notifications you have already set up through the integration card, Wallarm triggers allow you to select additional events for notifications:
-
Number of attacks, hits or incidents per time interval (day, hour, etc.) exceeds the set number
What is not counted
- For attacks:
- The experimental attacks based on the custom regular expressions.
- For hits:
- The experimental hits based on the custom regular expressions.
- Hits not saved in the sample.
- For attacks:
-
Changes in API took place
-
IP address was denylisted
-
New rogue API (shadow, orphan, zombie) was detected
-
New user was added to the company account
For condition detailing, you can add one or more filters. As soon, as condition and filters are set, select the integration through which the selected alert should be sent. You can select several integrations simultaneously.
Disabling and deleting an integration
You can delete or temporarily disable the integration. While deleting stops sending notificatioins and completely deletes all configuration, disabling just stops sending notifications which you can at any moment re-enable with the same settings.
If for the integration the System related events are selected to trigger notifications, Wallarm will notify about both of these actions.
System unavailability and incorrect integration parameters
Notifications to the system are sent via requests. If the system is unavailable or integration parameters are configured incorrectly, the error code is returned in the response to the request.
If the system responds to Wallarm request with any code other than 2xx, Wallarm resends the request with the interval until the 2xx code is received:
-
The first cycle intervals: 1, 3, 5, 10, 10 seconds
-
The second cycle intervals: 0, 1, 3, 5, 30 seconds
-
The third cycle intervals: 1, 1, 3, 5, 10, 30 minutes
If the percentage of unsuccessful requests reaches 60% in 12 hours, the integration is automatically disabled. If you receive system notifications, you will get a message about automatically disabled integration.