Wallarm Node.js for AWS Lambda
AWS Lambda@Edge is a serverless, event-driven compute service that allows you to run code for various types of applications or backend services without the need to provision or manage servers. By incorporating Wallarm Node.js code, you can proxy incoming traffic to the Wallarm node for analysis and filtering. This article provides instructions on configuring Wallarm for traffic analysis and filtration specifically for Node.js lambdas in your AWS application.
The solution involves deploying the Wallarm node externally and injecting custom code or policies into the specific platform. This enables traffic to be directed to the external Wallarm node for analysis and protection against potential threats. Referred to as Wallarm's connectors, they serve as the essential link between platforms like Azion Edge, Akamai Edge, Mulesoft, Apigee, and AWS Lambda, and the external Wallarm node. This approach ensures seamless integration, secure traffic analysis, risk mitigation, and overall platform security.
Use cases
Among all supported Wallarm deployment options, this solution is the recommended one for the following use cases:
-
Securing applications on AWS that utilize Node.js lambdas.
-
Requiring a security solution that offers comprehensive attack observation, reporting, and instant blocking of malicious requests.
Limitations
The solution has certain limitations as it only works with incoming requests:
-
Vulnerability discovery using the passive detection method does not function properly. The solution determines if an API is vulnerable or not based on server responses to malicious requests that are typical for the vulnerabilities it tests.
-
The Wallarm API Discovery cannot explore API inventory based on your traffic, as the solution relies on response analysis.
-
The protection against forced browsing is not available since it requires response code analysis.
There are also other limitations:
-
The HTTP packet body size is limited to 40 KB when intercepted at the Viewer request level and 1MB at the Origin request level.
-
The maximum response time from the Wallarm node is limited to 5 seconds for Viewer requests and 30 seconds for Origin requests.
-
Lambda@Edge does not work within private networks (VPC).
-
The maximum number of concurrently processed requests per region is 1,000 (Default Quota), but it can be increased up to tens of thousands.
Requirements
To proceed with the deployment, ensure that you meet the following requirements:
-
Understanding of AWS Lambda technologies.
-
APIs or traffic running on AWS.
Deployment
To secure with Wallarm applications on AWS that use Node.js lambdas, follow these steps:
-
Deploy a Wallarm node on the AWS instance.
-
Obtain the Wallarm Node.js script for AWS Lambda and run it.
1. Deploy a Wallarm node
When integrating Wallarm with AWS Lambda, the traffic flow operates in-line. Therefore, choose one of the supported Wallarm node deployment artifacts for in-line deployment on AWS:
Configure the deployed node using the following template:
server {
    listen 80;

    server_name _;

    access_log off;
    wallarm_mode off;

    location / {
        proxy_set_header Host $http_x_forwarded_host;
        proxy_pass http://unix:/tmp/wallarm-nginx.sock;
    }
}

server {
    listen 443 ssl;

    server_name yourdomain-for-wallarm-node.tld;

    ### SSL configuration here

    access_log off;
    wallarm_mode off;

    location / {
        proxy_set_header Host $http_x_forwarded_host;
        proxy_pass http://unix:/tmp/wallarm-nginx.sock;
    }
}


server {
    listen unix:/tmp/wallarm-nginx.sock;

    server_name _;

    wallarm_mode monitoring;
    #wallarm_mode block;

    real_ip_header X-Lambda-Real-IP;
    set_real_ip_from unix:;

    location / {
        echo_read_request_body;
    }
}
Please ensure to pay attention to the following configurations:
-
TLS/SSL certificates for HTTPS traffic: To enable the Wallarm node to handle secure HTTPS traffic, configure the TLS/SSL certificates accordingly. The specific configuration will depend on the chosen deployment method. For example, if you are using NGINX, you can refer to its article for guidance.
-
Wallarm operation mode configuration.
2. Obtain the Wallarm Node.js script for AWS Lambda and run it
To acquire and run the Wallarm Node.js script on AWS Lambda, follow these steps:
-
Contact support@wallarm.com to obtain the Wallarm Node.js.
-
Create a new IAM policy with the following permissions:
-
In the AWS Lambda service, create a new function using Node.js 14.x as the runtime and the role created in the previous step. Choose Create a new role with basic Lambda permissions.
-
In the code source editor, paste the code received from the Wallarm support team.
-
In the pasted code, update the
WALLARM_NODE_HOSTNAMEandWALLARM_NODE_PORTvalues to point to the previously deployed Wallarm node.To send the traffic to the filtering node via 443/SSL, use the following configuration:
If you are using a self-signed certificate, make the following change to disable strict certificate enforcement:
-
Go back to the IAM section and edit the newly created role by attaching the following policies:
AWSLambda_FullAccess,AWSLambdaExecute,AWSLambdaBasicExecutionRole,AWSLambdaVPCAccessExecutionRole, andLambdaDeployPermissionscreated in the previous step. -
In Trust relationships, add the following change to Service:
-
Navigate to Lambda → Functions →
and click Add Trigger. -
In the Deploy to Lambda@Edge options, click Deploy to Lambda@Edge and select the CloudFront Distribution that needs to have the Wallarm handler added or create a new one.
During the process, choose the Viewer request for the CloudFront event and check the box for Include body.
Testing
To test the functionality of the deployed policy, follow these steps:
-
Send the request with the test Path Traversal attack to your API:
-
Open Wallarm Console → Attacks section in the US Cloud or EU Cloud and make sure the attack is displayed in the list.
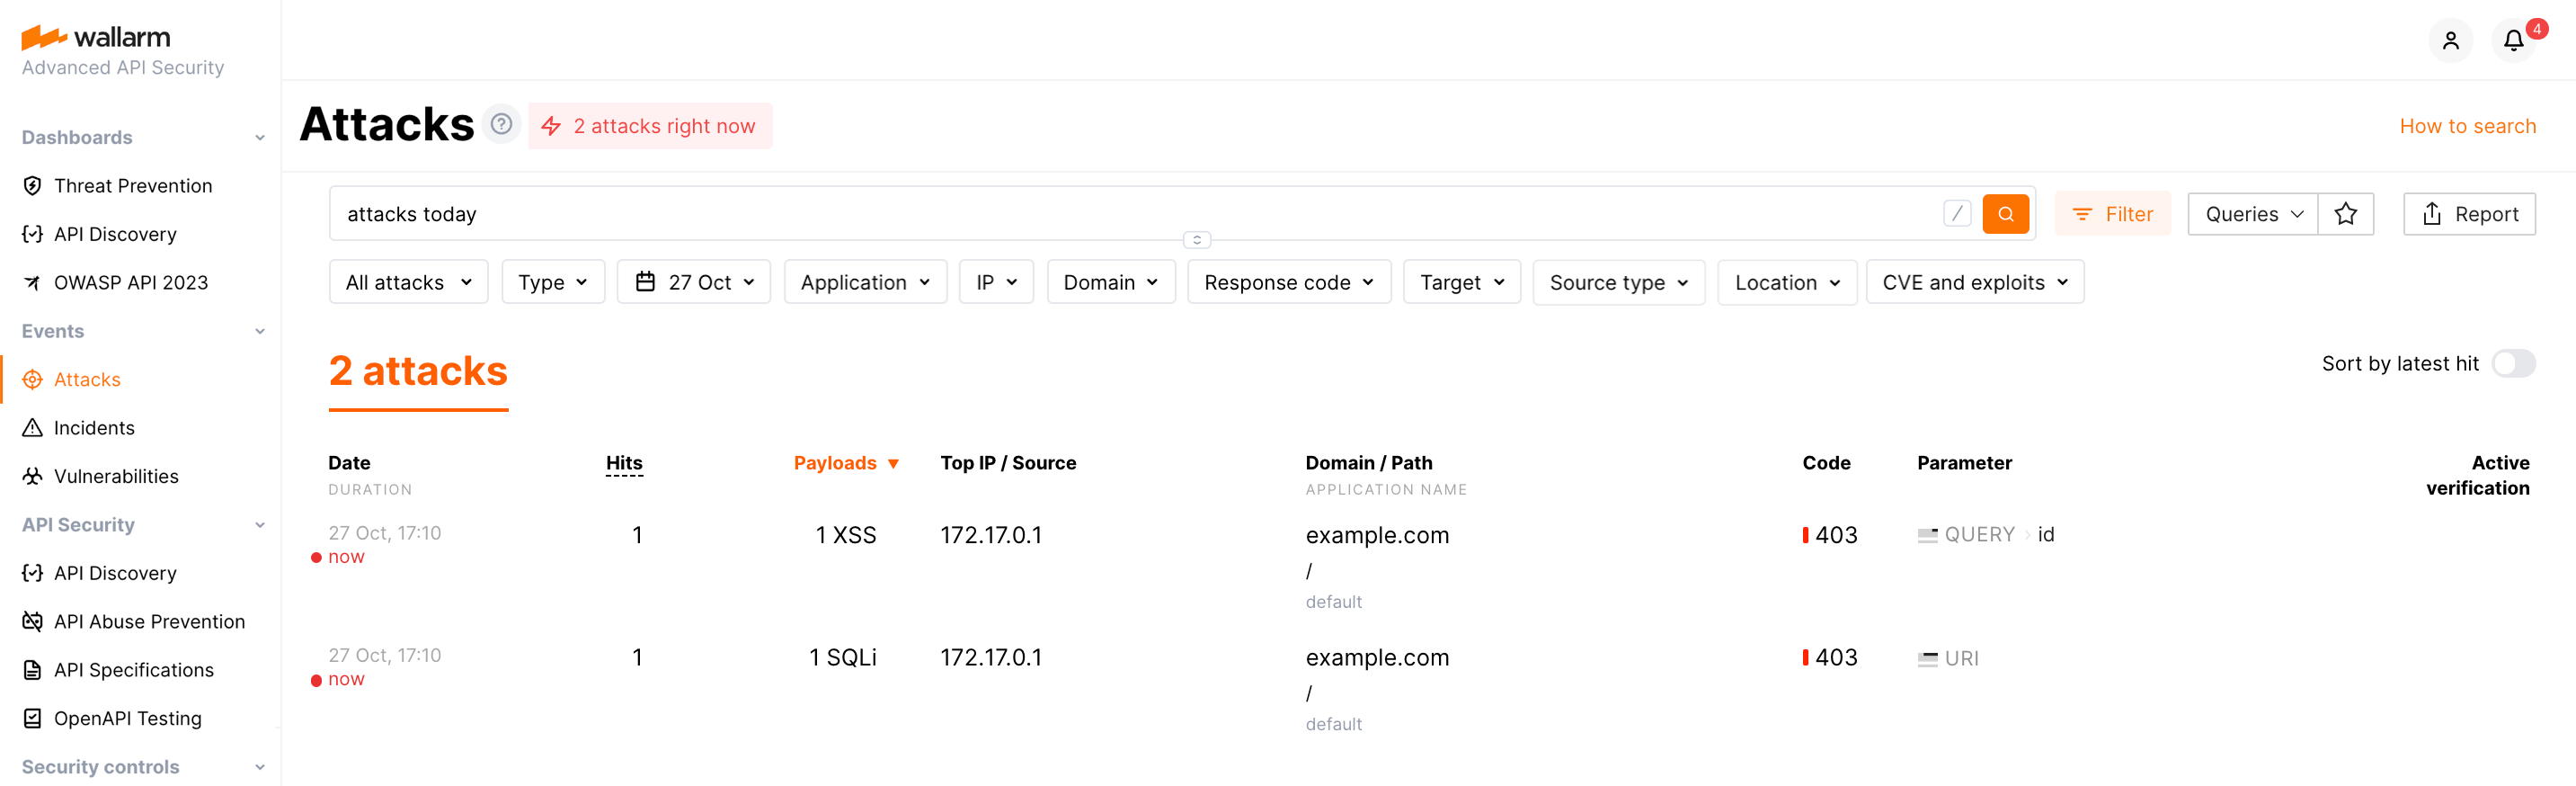
If the Wallarm node mode is set to blocking, the request will also be blocked.
Need assistance?
If you encounter any issues or require assistance with the described deployment of Wallarm in conjunction with AWS Lambda, you can reach out to the Wallarm support team. They are available to provide guidance and help resolve any problems you may face during the implementation process.