OpenAPI Security Testing on CI/CD  
OpenAPI Security Testing on CI/CD, powered by Wallarm, offers a solution to identify and address security vulnerabilities within your critical API business scenarios, including shadow and zombie APIs. This article explains how to run and use this solution.
The solution operates by generating test requests specifically designed to uncover vulnerabilities, such as Cross-Origin Resource sharing, path traversal, access control flaws, and more. It then seamlessly integrates into your CI/CD pipeline using Docker to automatically scan your APIs for these vulnerabilities.
You have the flexibility to select the endpoints you wish to subject to testing:
-
Automatic endpoint discovery: When leveraging Wallarm's API Discovery module, your API endpoints are automatically detected from real traffic data. You can then select which of these endpoints to test. This ensures security testing focuses on actively used endpoints including the shadow and zombie ones, offering an accurate assessment of your API's vulnerabilities.
-
Manual specification upload: Alternatively, you can upload your own OpenAPI specification and use the solution to test endpoints from the specification. This is useful if you have an up‑to‑date specification and want to run tests on specific endpoints outlined within it.
Issues addressed by OpenAPI security testing
-
This solution allows you to perform security testing during the regression testing of your APIs. If you make changes to the functionality of your APIs, Wallarm security testing can reveal if your changes have introduced any security issues.
-
By deploying your changes to the staging environment and running security testing on the CI/CD pipeline at this stage, you can prevent potential security vulnerabilities from reaching production and being exploited by attackers.
-
If you leverage security testing based on the data obtained from API Discovery, it also tests shadow and zombie APIs. These APIs are automatically discovered by the module as they may receive traffic, even if your team and documentation are unaware of their existence. By including zombie APIs in the security testing process, the solution addresses vulnerabilities that could otherwise go unnoticed, providing a more comprehensive security assessment.
Requirements
- An active Advanced API Security subscription plan. If you are on a different plan, please contact our sales team to transition to the required one.
Running security testing
To control and customize the OpenAPI Security Testing feature, you can utilize testing policies. Once a testing policy is created, you receive a command that allows you to integrate and run security testing within your CI/CD pipeline using Docker.
To run OpenAPI security testing, follow these steps:
-
Proceed to Wallarm Console → OpenAPI Testing by following the link for the US Cloud or EU Cloud and Create testing policy.
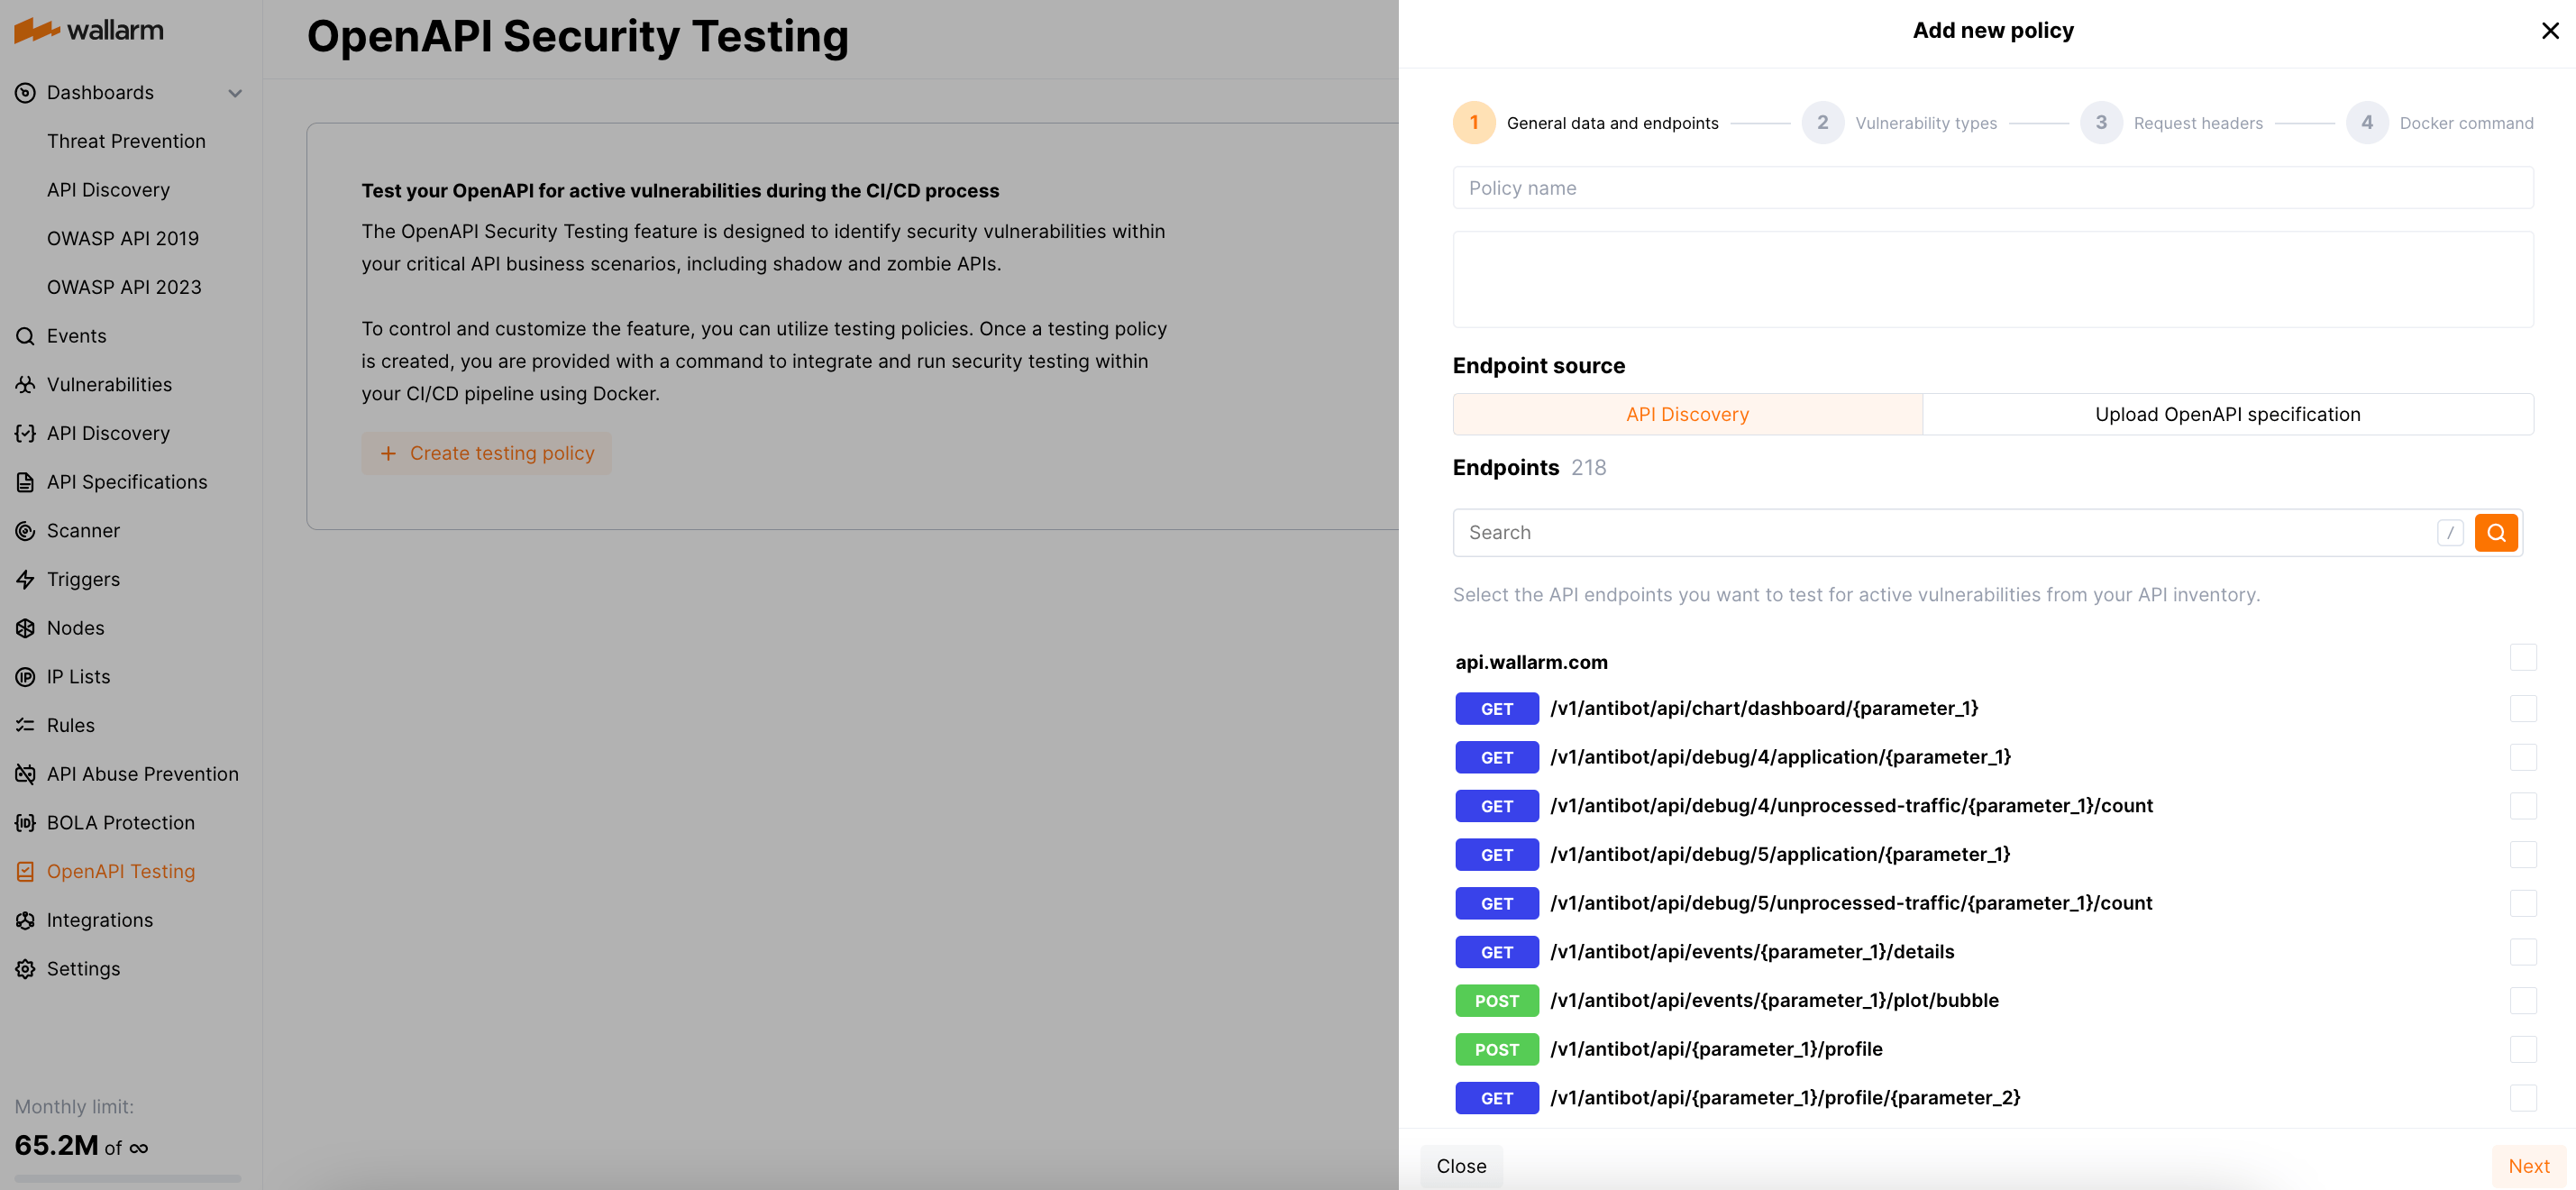
-
Select the API endpoints that you want to test either from your automatically discovered API inventory or upload an OpenAPI 3.0 specification in JSON format.
Although the API Discovery module automatically identifies new endpoints, it does not automatically include them in existing vulnerability testing policies. As a result, each newly discovered endpoint requires a separate policy.
-
Select the vulnerability types you would like to test for in your API endpoints.
-
If necessary, add custom headers for vulnerability testing, such as authentication headers or indicators for Wallarm test requests.
These headers will be used for each request to every endpoint.
-
Copy the provided Docker command and fill in the values for environment variables that were not automatically populated.
-
Integrate the command into your CI/CD pipeline for automated testing.
The Docker command example:
The list of environment variables that the Docker container accepts is provided below:
| Environment variable | Description | Required? |
|---|---|---|
WALLARM_API_HOST | Wallarm API server:
| Yes |
WALLARM_API_TOKEN | Wallarm API token with the OpenAPI testing permissions. | Yes |
WALLARM_TESTING_POLICY_ID | Wallarm testing policy ID. It is automatically generated once the policy is created. | Yes |
TARGET_URL | URL where the API endpoints you wish to test are hosted. The test requests are sent to this host, e.g., staging, or local build. | Yes |
For a more secure approach to passing variables to the container, it is recommended to save the values of container environment variables that were not automatically populated as local environment variables on your machine. You can do this by executing the following commands in your terminal:
To save the security testing results on a host machine, specify the desired host machine path in the ${WALLARM_REPORT_PATH} variable within the -v option of the Docker command.
Interpreting security testing results
When running the security tests, Wallarm generates a series of typical test requests that are specifically designed to uncover the vulnerabilities selected in your testing policy. These test requests are sent sequentially to the endpoints defined in your policy.
By analyzing the responses to the generated requests, Wallarm identifies open vulnerabilities present in your API endpoints. It then returns a 0 or 1 code via the Docker container's standard output (stdout):
-
A
0code indicates that no open vulnerabilities were detected. -
A
1code indicates the presence of open vulnerabilities.
If you receive a code 1 for certain vulnerabilities, it is important to take appropriate measures to address them.
Generating security testing report
You can obtain a security report that provides detailed information about the requests that revealed vulnerabilities. The report is generated in multiple formats, including CSV, YAML, and JSON.
To save the security testing results on a host machine, specify the desired host machine path in the ${WALLARM_REPORT_PATH} path within the -v ${WALLARM_REPORT_PATH}:/app/reports option of the Docker command.
It is important to ensure that the specified host machine path has appropriate write permissions for the Docker container to save the report files successfully.
JSON report example:
[
    {
        "type":"ptrav",
        "threat":80,
        "payload":"/../../../../../../../../../etc/passwd",
        "exploit_example":"curl -v -X GET -H 'x-test-id: 123' http://app:8000/files?path=/../../../../../../../../../etc/passwd\n\n{\"file_contents\":\"root:x:0:0:root:/root:/bin/bash\\ndaemon:x:1:1:daemon:/usr/sbin:/usr/sbin/nologin\\n",
        "name":"LFI-linux-replace",
        "path":"/files",
        "method":"get",
        "url":"http://app:8000"
    },
    {
        "type":"xss",
        "threat":60,
        "payload":"'wwra92w><wwra92w><",
        "exploit_example":"curl -v -X GET -H 'x-test-id: 123' http://app:8000/html_page?query='wwra92w><wwra92w><\n\n<html><body>'wwra92w><wwra92w><</body></html>",
        "name":"xss-html-injections",
        "path":"/html_page",
        "method":"get",
        "url":"http://app:8000"
    }
]
By default, security reports are saved inside the Docker container in the /app/reports directory. By using the -v option, you mount the contents of /app/reports into the specified host machine directory.
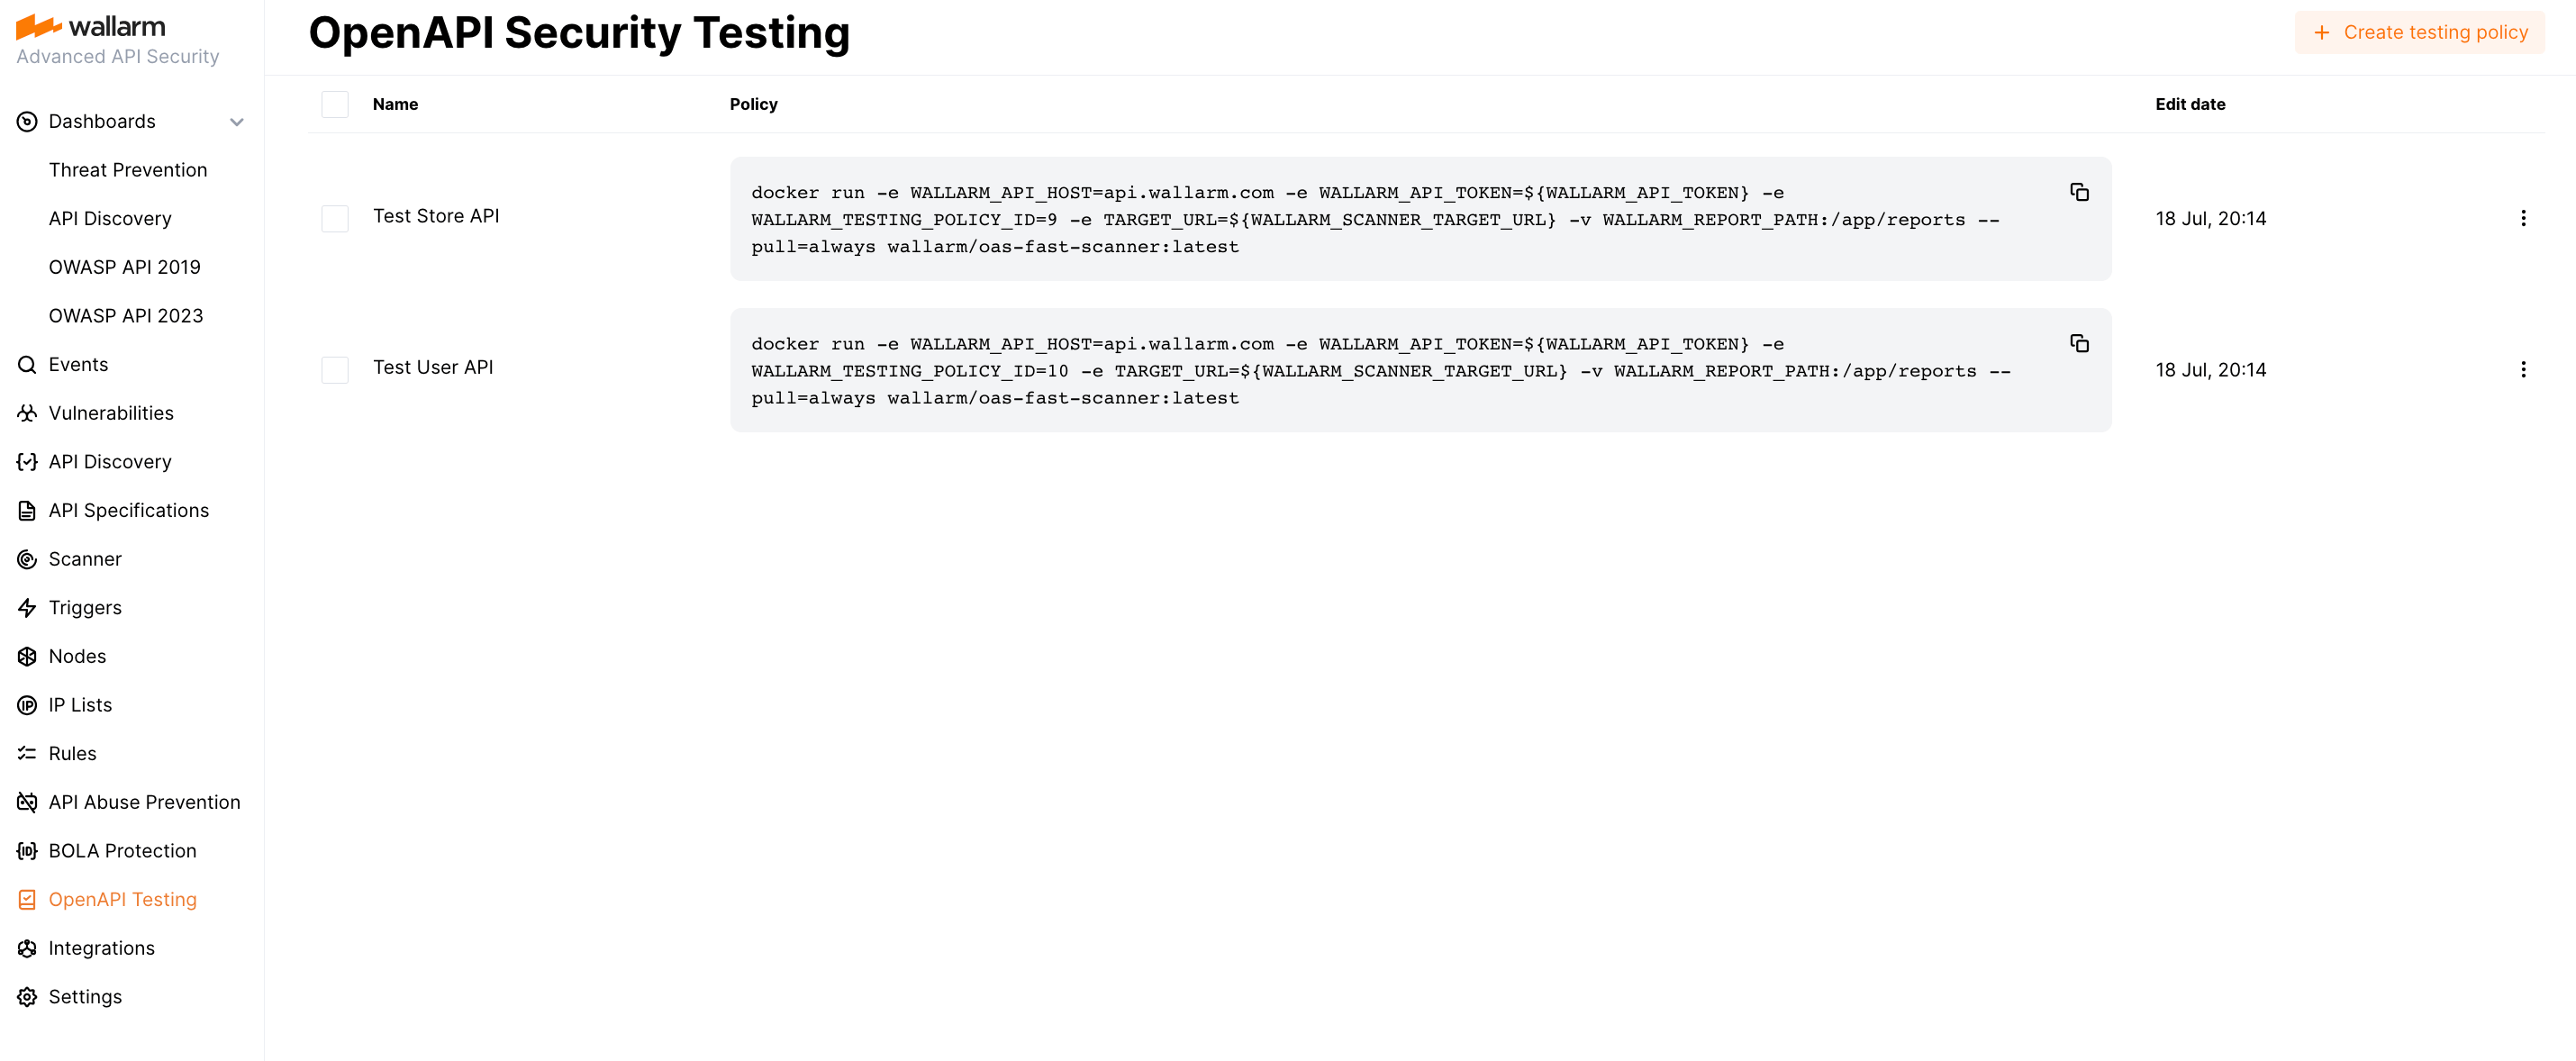
Managing security policies
In the OpenAPI Testing section of the Wallarm Console, you have the ability to manage the list of security testing policies associated with your account. Different policies can be used for different services, teams, purposes, and testing stages, such as local testing and staging.
You can edit and delete existing policies as needed to suit your requirements.